[ Start ] [ Index ] [ Parts List ]
In Which I Install A/C, P/S, and Repair Rust
At this point Covid showed up. School was a horrific amount of work, and things sat still for a couple months.

Then I was able to settle in, and get back at it.
Figuring how to mount the A/C Condenser (tacked in), and I am able to slip the transmission cooler between the Condenser and the Intercooler. Wrecked my big 1-3/8″ step drill. Well, it was wrecked to begin with, as it appears they made it out of non-carbon steel. Ended up clamping the brackets down in the mill and just using a hole saw. Did I mention I made my own dimple dies?
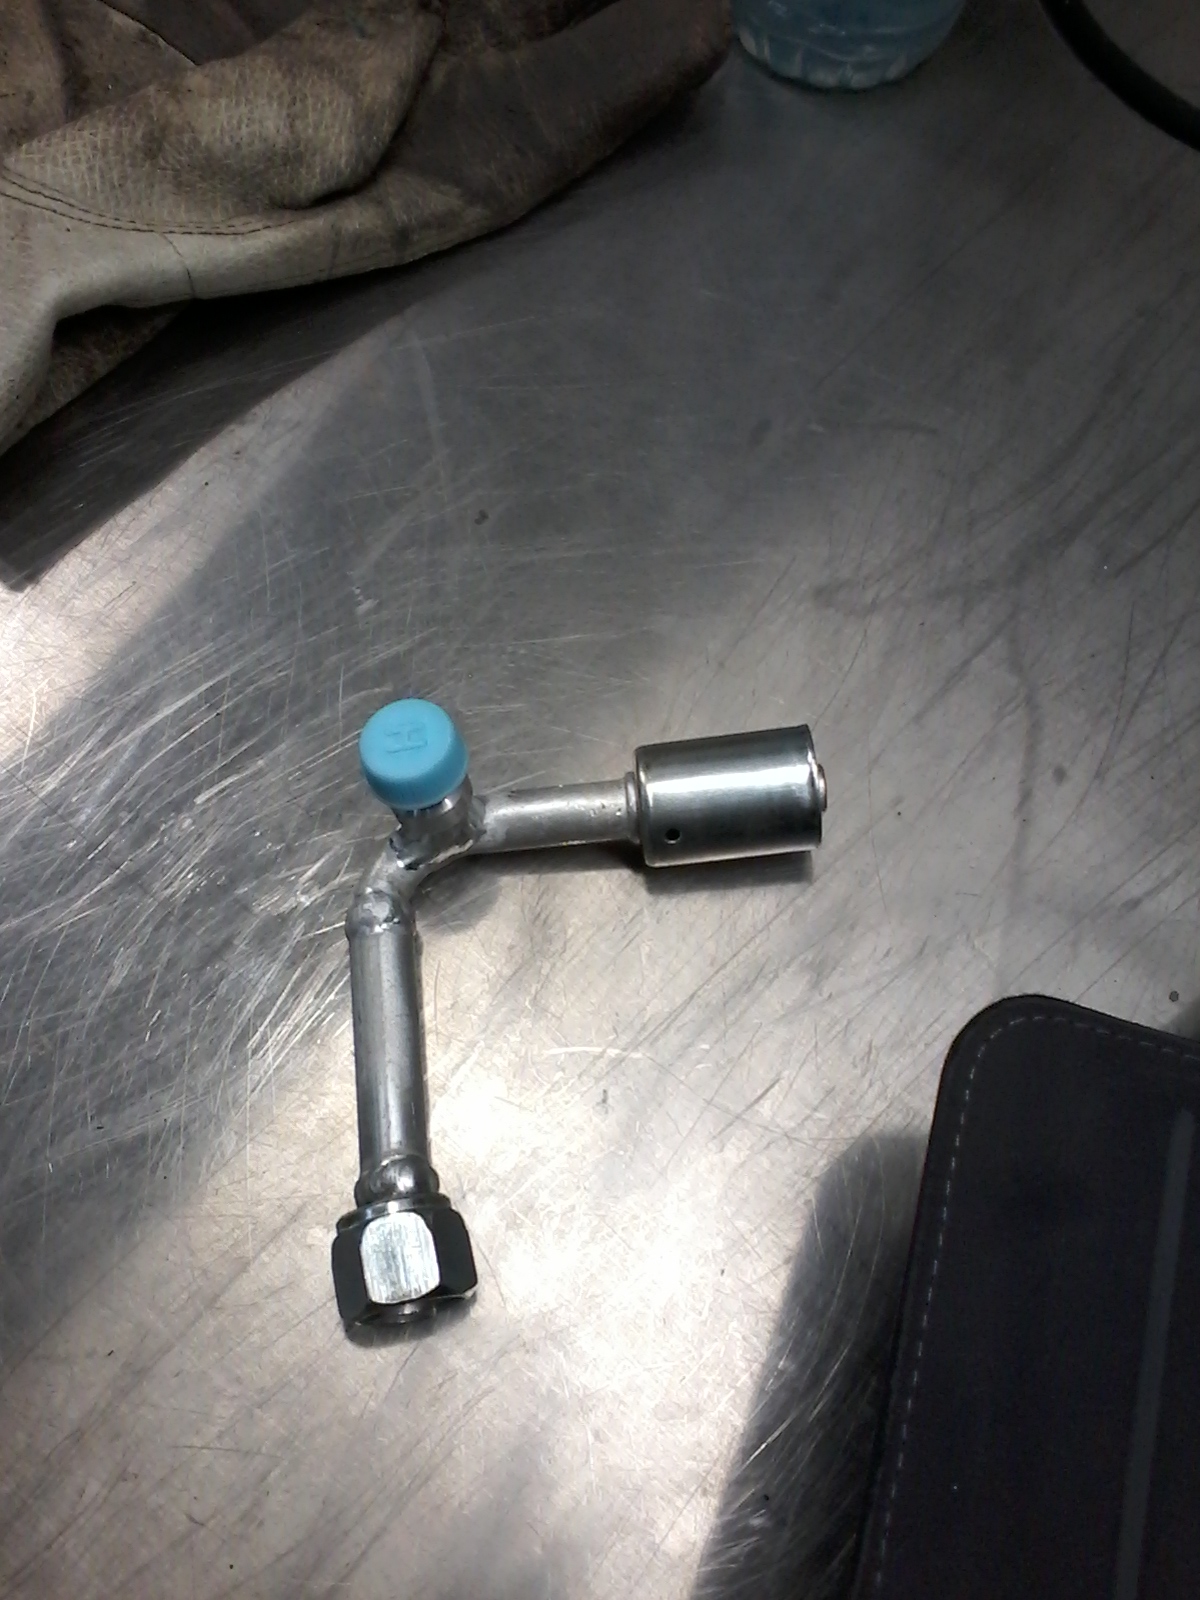
Oil cooler mounted. And modified the high pressure AC fitting to be 2″ longer, and re-located the port to make it accessible, and had to go buy the correct tap to put it back together: it’s 6mmx0.75….
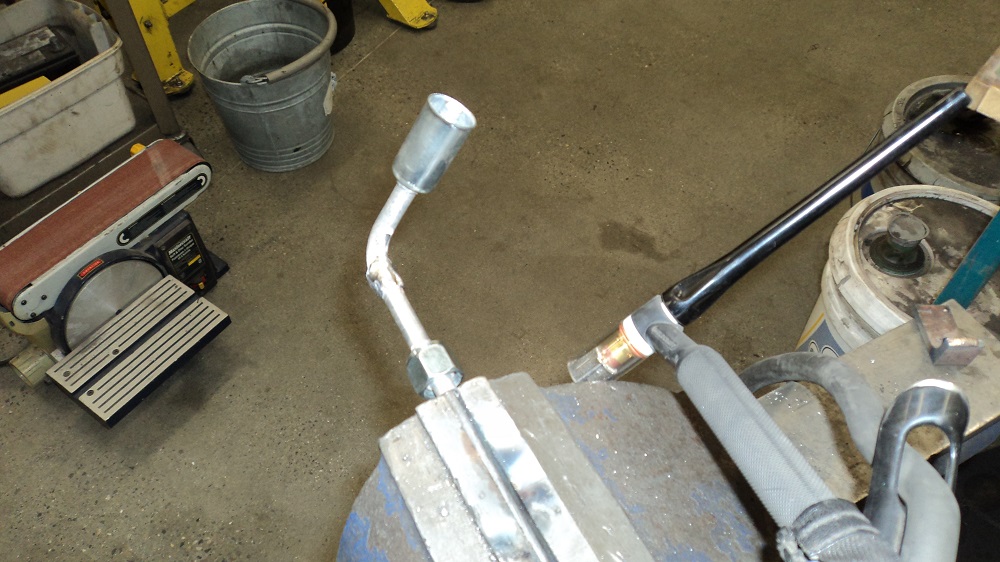
Extended 2″:
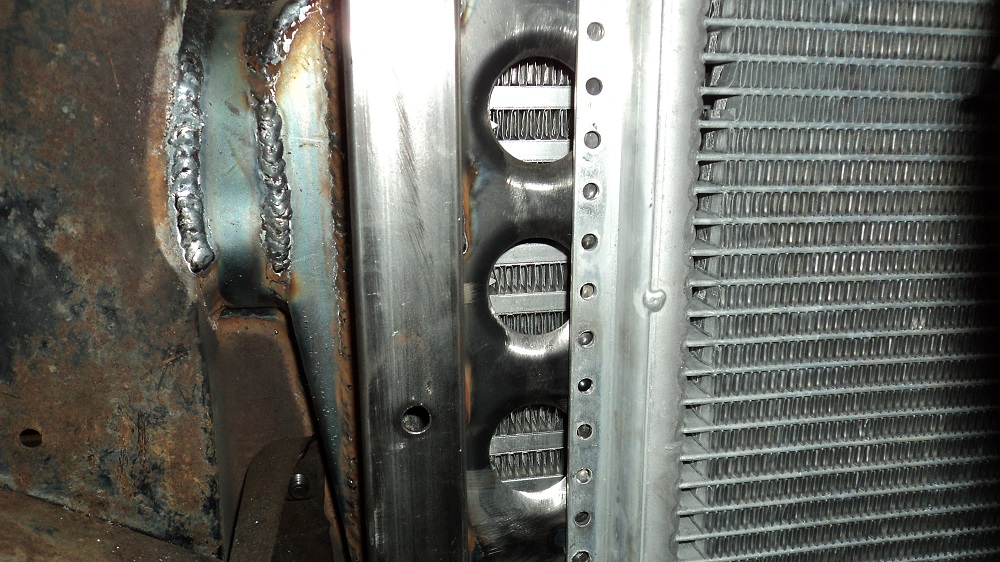
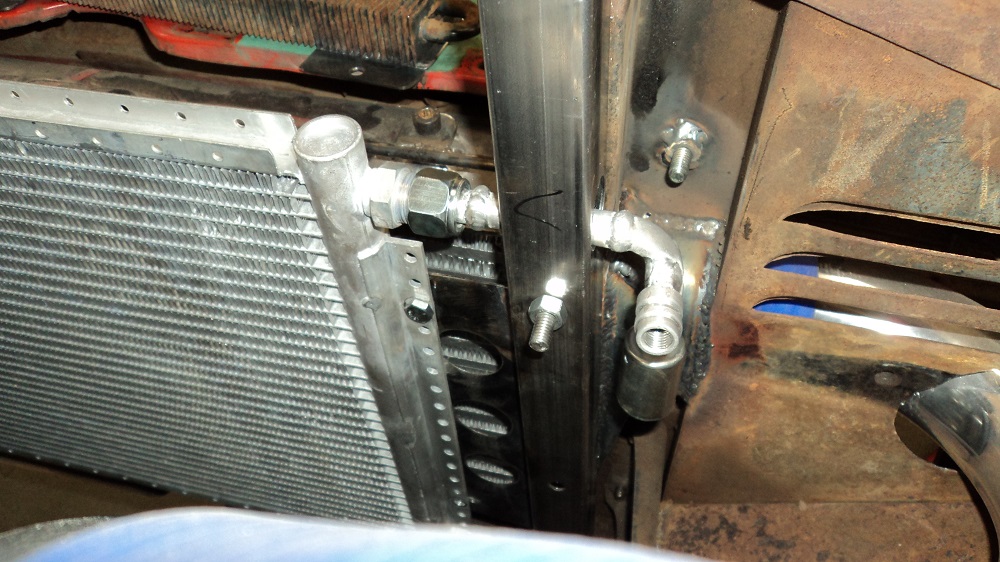
And fitted as here, squeaking through the radiator-mover-back-inator:
The Condenser outlet was lengthened 1-3/4″:
Also fabricated a bracket for the AC Drier. This will nestle neatly in the crook of the turbo compressor piping, right beside the radiator. Made out of some 2-1/2″ exhaust pipe and some 1/2″ square tube.
Hydroboost
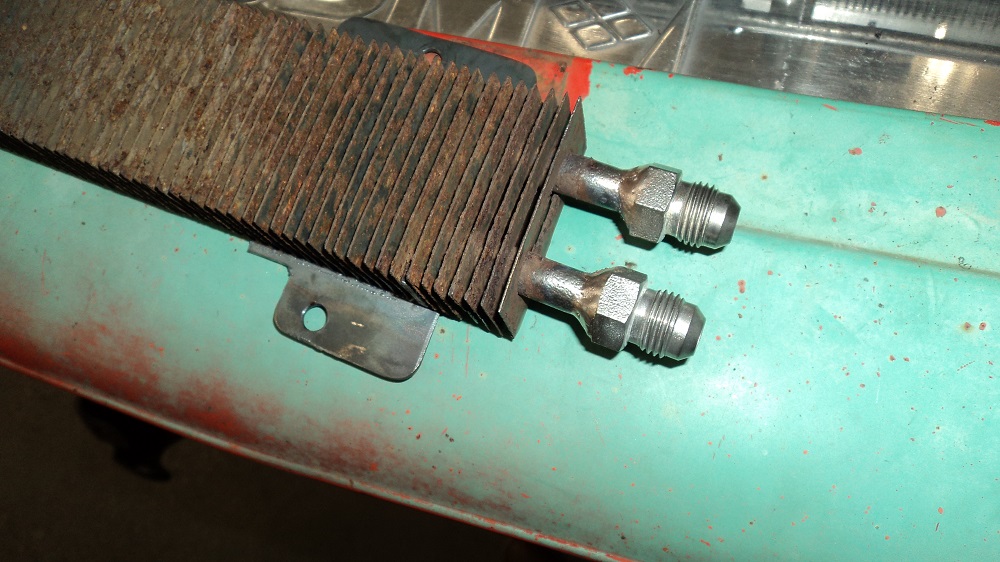
I also tried my first foray into Silicon Bronze Welding with TIG, putting -6 JIC fittings (same angle as AN) on the power steering cooler. Seemed surprisingly easy.
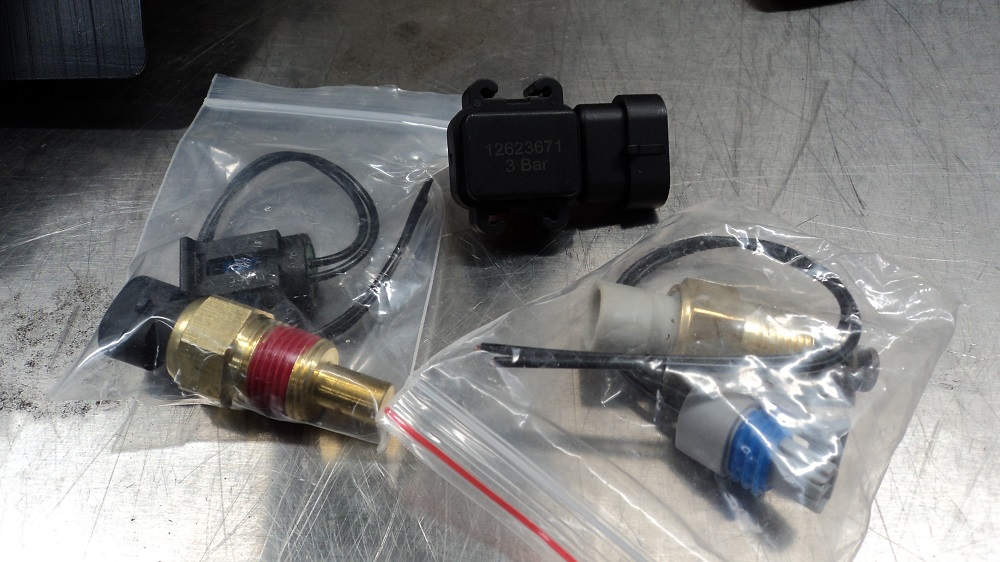
The 3-BAR “Truck” MAP sensor is part #12623671 from EFI-Source. Not sure if they had it custom made, or if it’s an OEM fitment elsewhere, but I figured I’d put the number up so I can find it again when I need it.
I cut off the end of the PS Pump line, and Silicon-Bronze-Welded -6AN to the end. Also installed the Fox-Mustang-Rack -6AN fitting adapters (Unisteer #8026070):
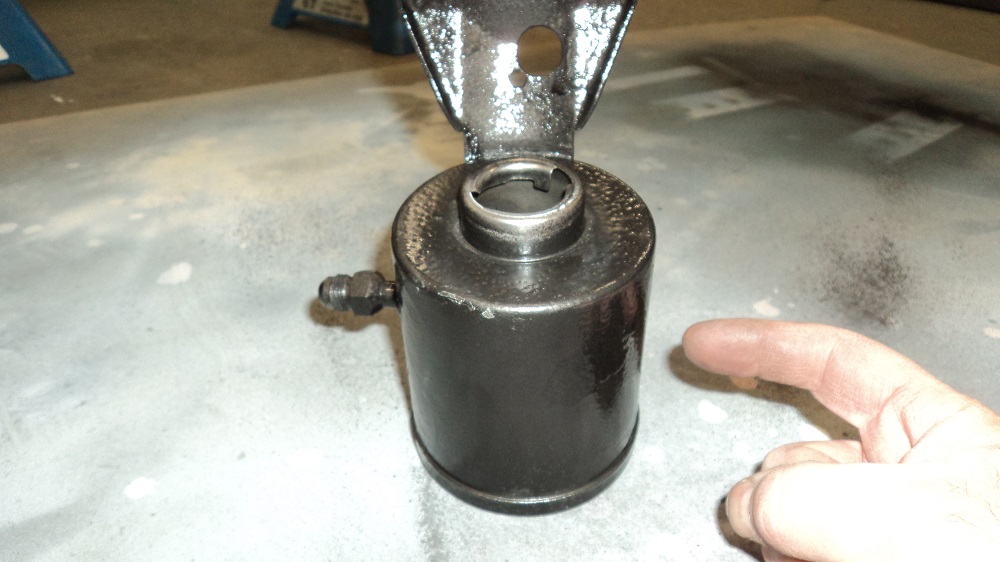
Added Hydroboost -6AN adapters (Earls #961955ERL and #961956ERL) to the Hydroboost unit:
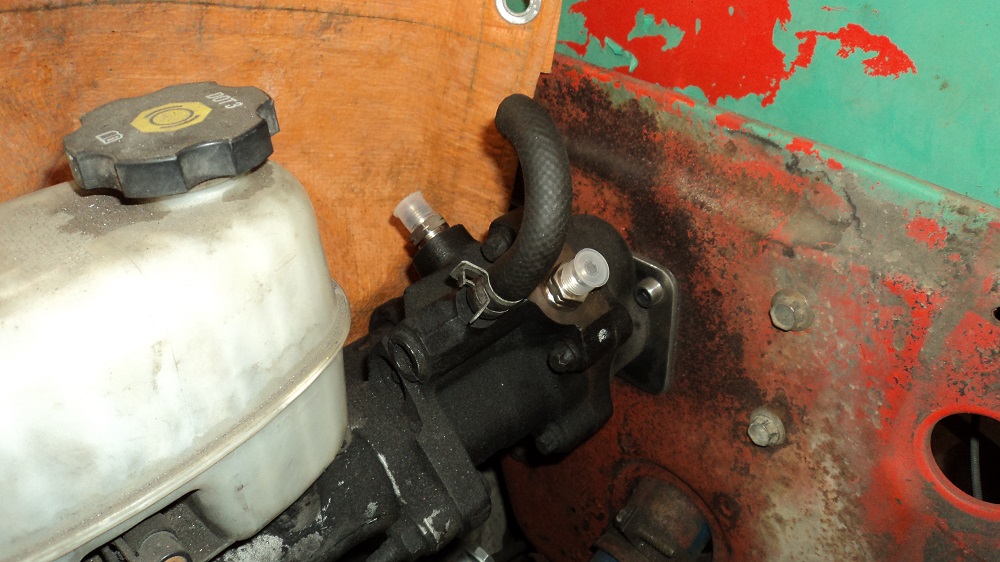
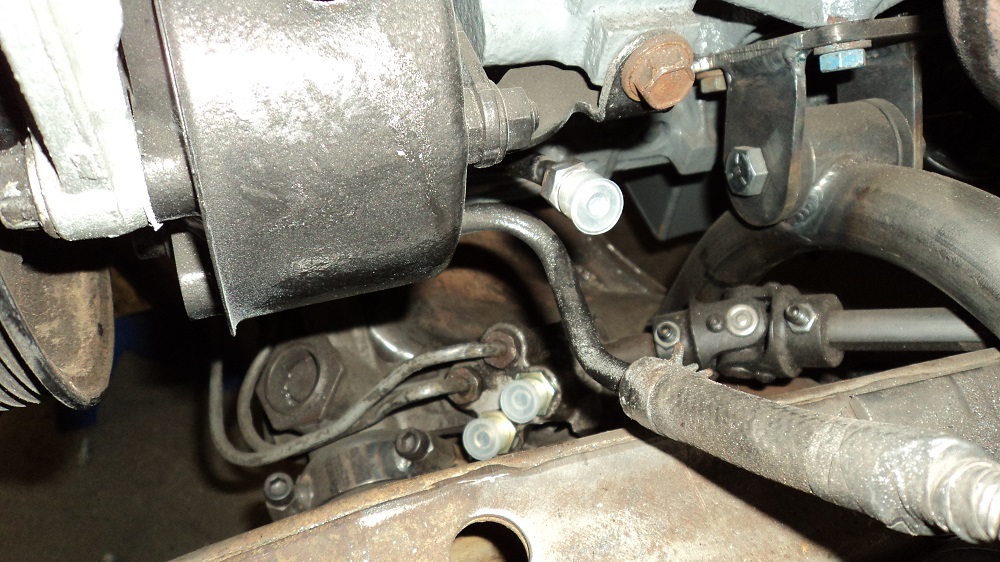
I was also a little concerned about the PS reservoir return being so close to the exhaust manifold, so I cut it out, plugged the hole (what my finger points to), and Silicon-Bronze-Welded it to the front side with another -6AN fitting (shown here completed):
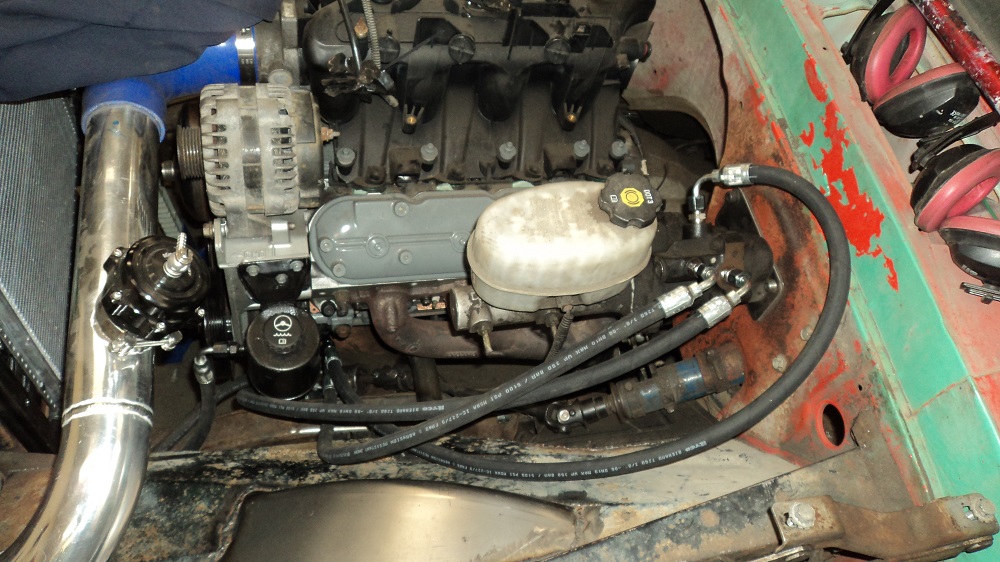
My LQ4 engine is from an Express 3500 van, but did not come with the remote reservoir, and just buying a reservoir was cheaper. I did have to do a lot of re-shaping to the bracket to make an acceptable fit. At the time, I wasn’t sure if I was going to do the turbo crossover in front of the engine or not, and the placement of the reservoir was a concern. I ended up not, and it is what it is.
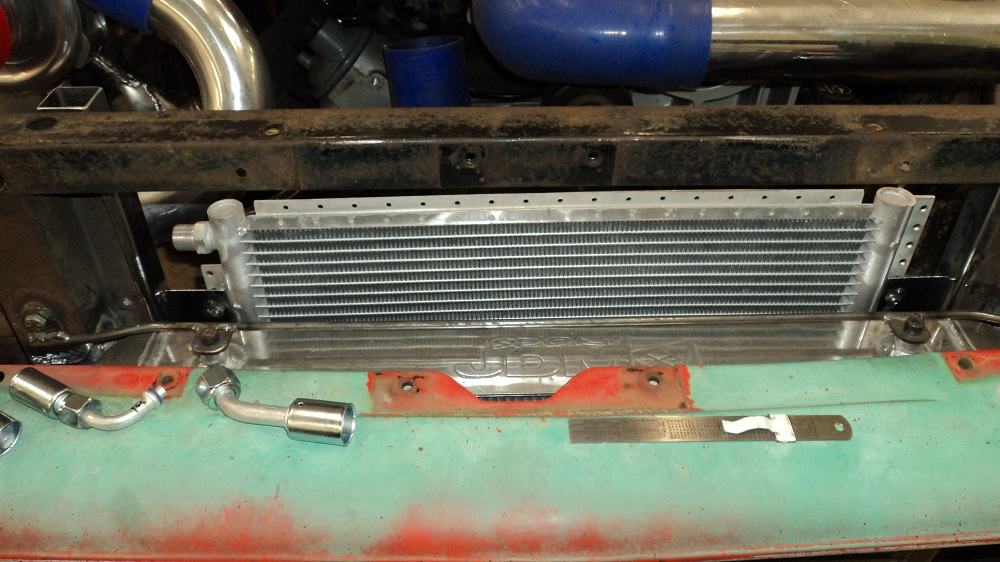
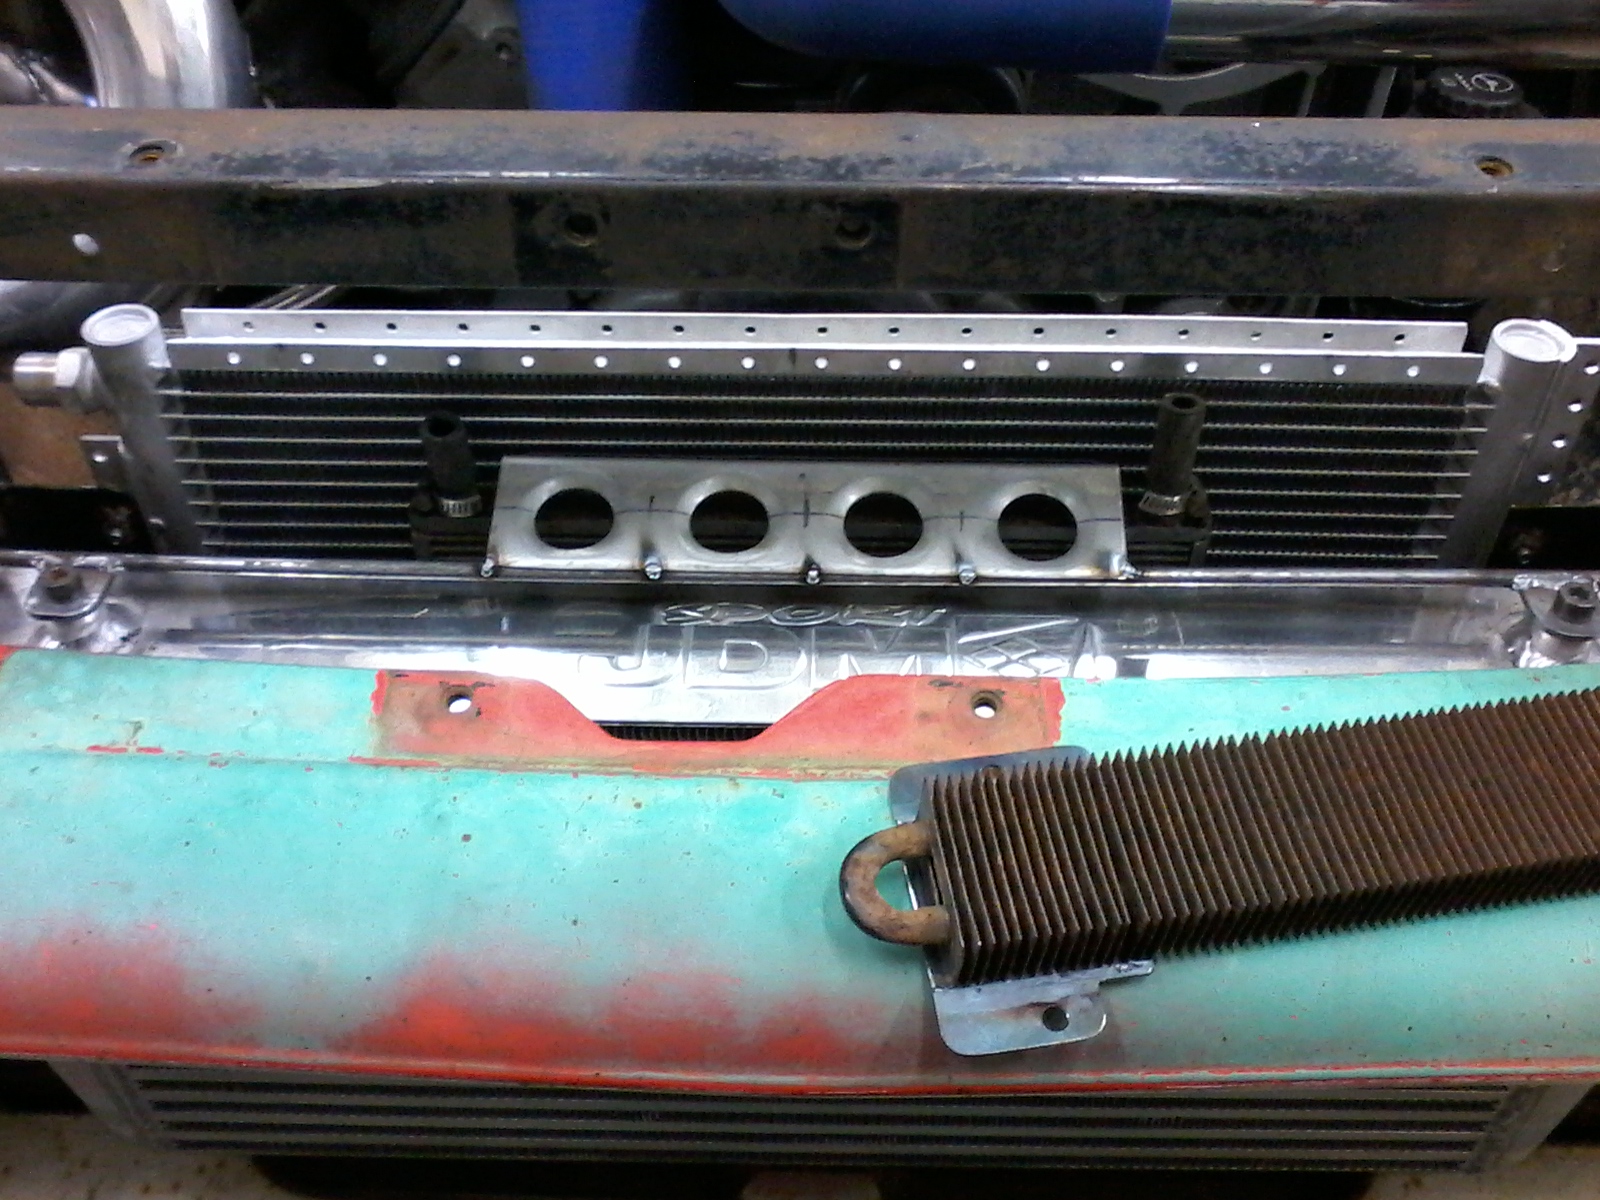
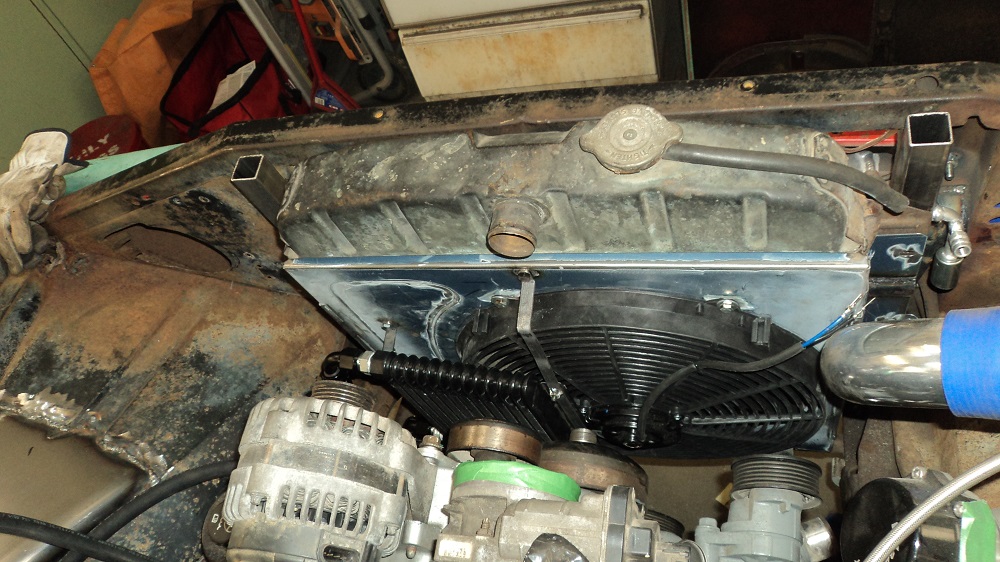
Front view, with radiator, AC condenser, trans cooler, intercooler, and (not shown) PS cooler under the AC and trans cooler:

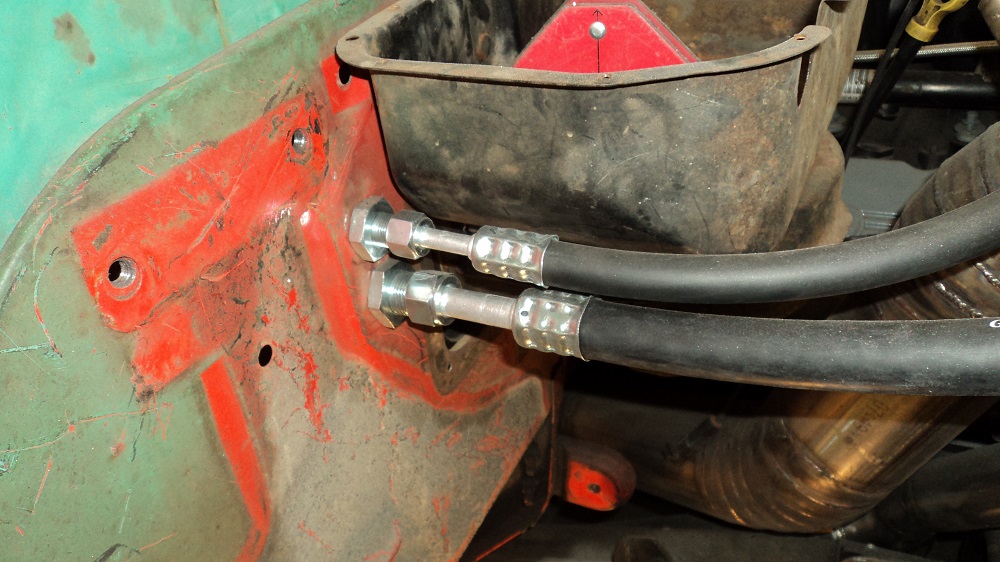
I had Princess Auto make up the hydraulic lines. Was half almost a third the price of doing it all in fancy braided line. I Bronze-Welded -6AN fittings to the return at the pump, and I Bronze-Welded a -6AN fitting to the shortened return barb at the Hydroboost so I can run hydraulic lines for return too, for a more aestheticly pleasing spaghetti-collection of hoses.
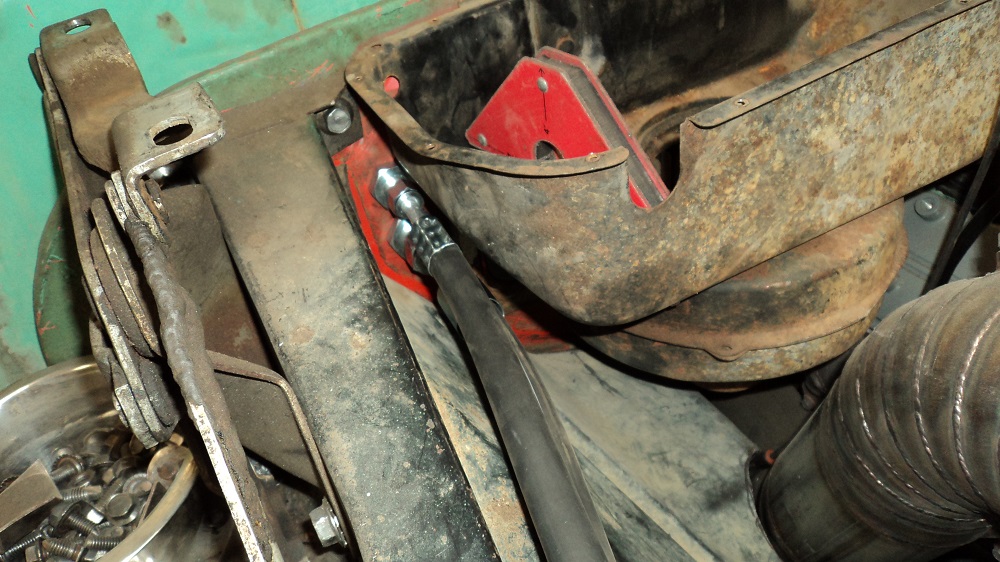
Lines to the P/S cooler under the rad:
I had one hydroboost line shortened 2″. Rearranged some of the other lines to fit better.
Oil Cooler Adapter
I dug up the factory LS thermostatic oil-cooler adapter, disassembled the unit, dug out the original hardline (sheared by the wreckers who pulled it), drilled and tapped 1/2″ NPT for -10AN (need to pick up another fitting). I’ll use the oil cooler I didn’t use on the V8 Firefly.
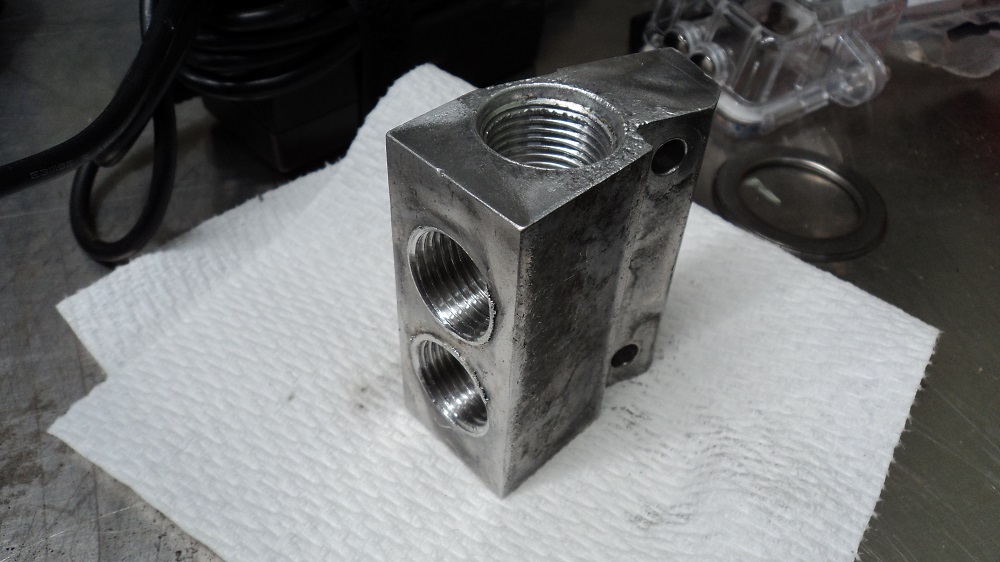
IN and OUT are on the left; threaded end up top is the plug to hold the thermostatic valve
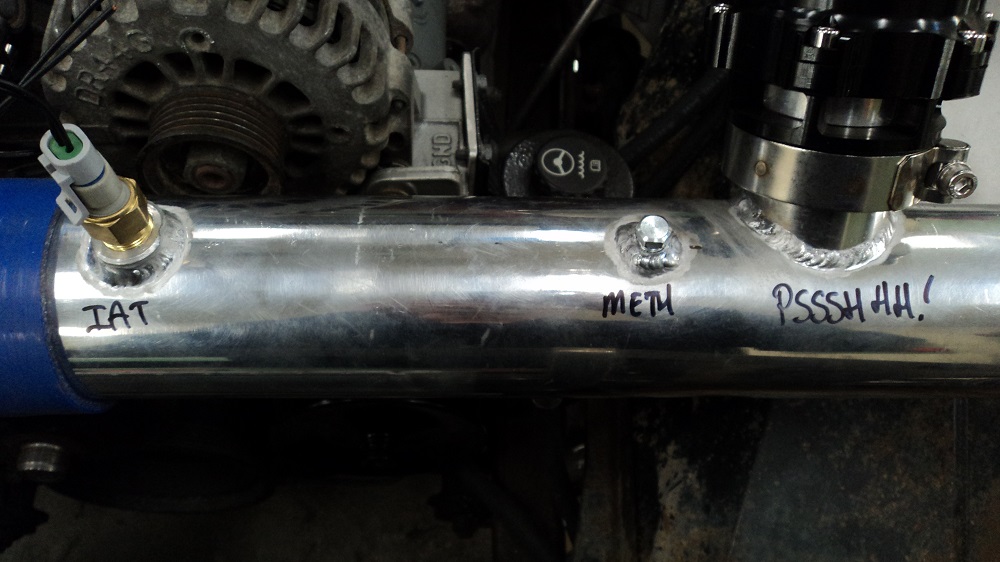
Also added an IAT bung as well as a Methanol Injection bung.
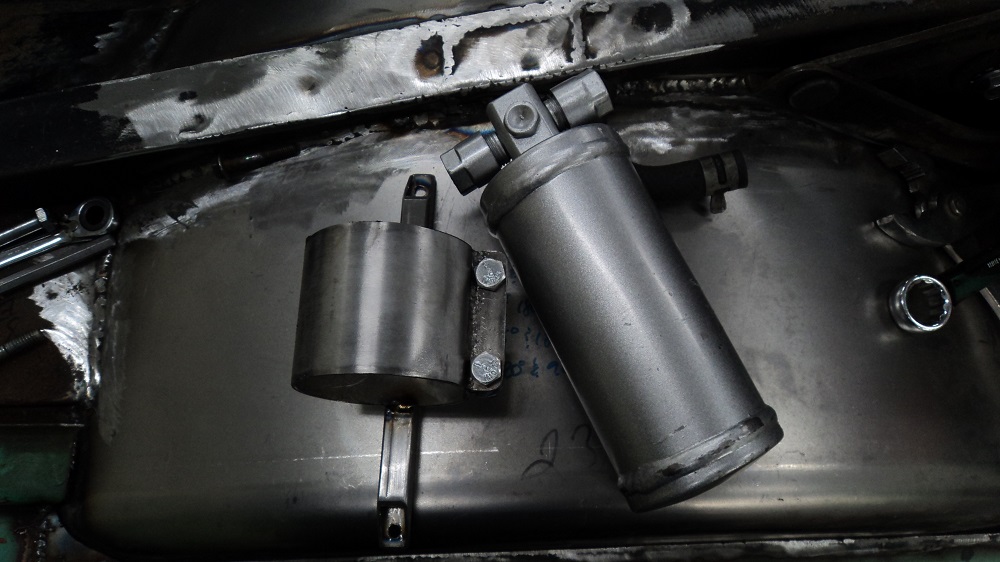
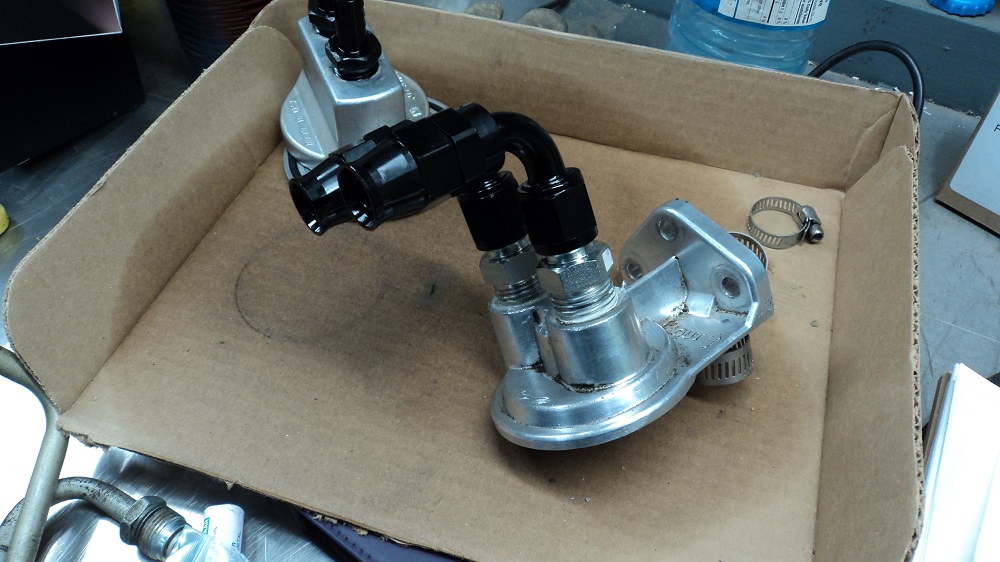
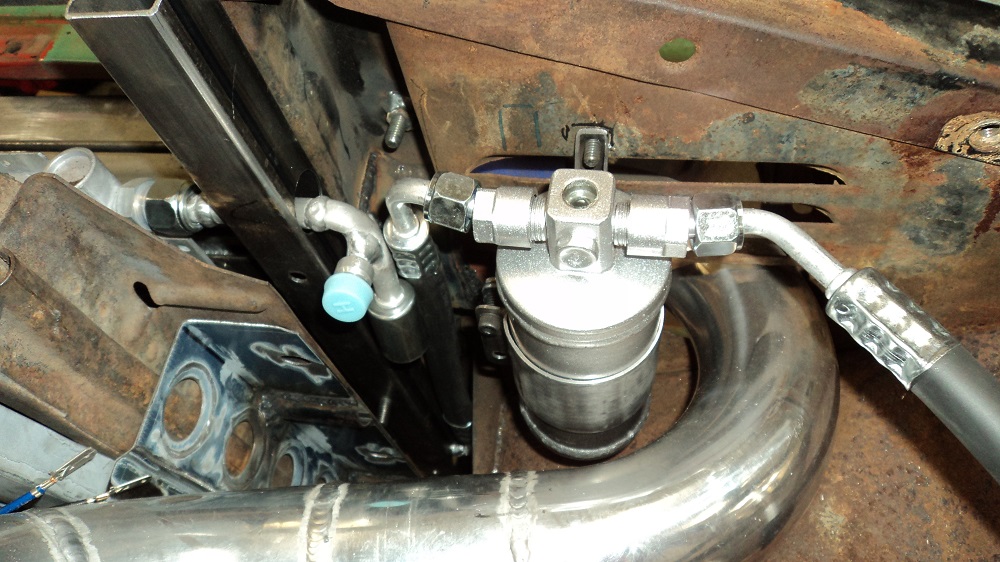
Also, since I am running -8AN fuel line to the fuel rail, I am going to use the remote oil filter mount from the V8 Firefly oil cooler kit as a fuel filter holder, with a WIX 33382.
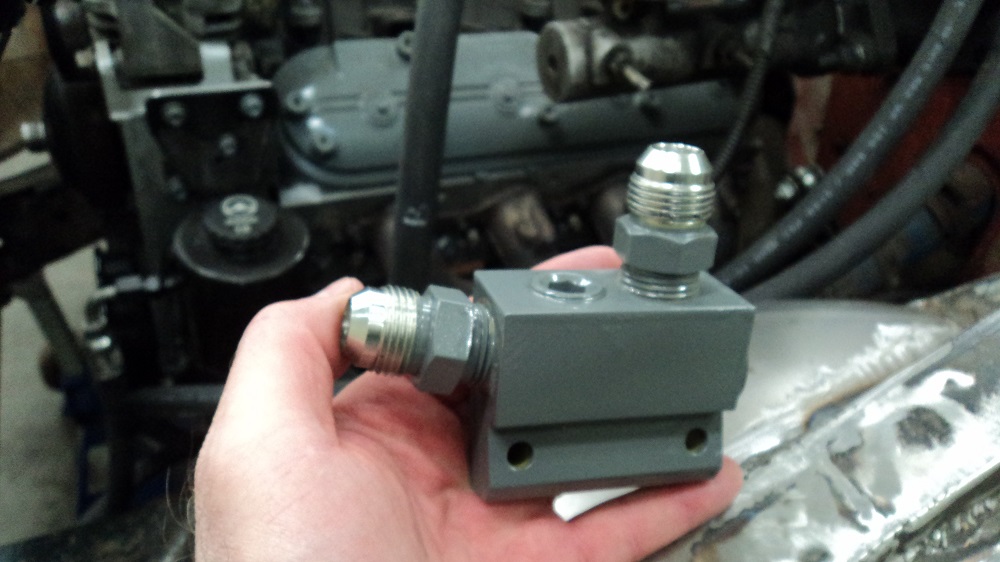
Ran into a snag – because I started drilling and threading for 3/8″NPT fittings and then changed my mind and went 1/2″NPT so I could run -10AN hose for the oil cooler, the fittings were now too close together to assemble. This would not do.
So I ran a plug in through one, and drilled (at an angle) and tapped the end of the oil cooler block to relocate the fitting.
Also ported the mother-loving mess inside to make it flow decent.
Future me interrupting: I did not use this adapter
Turbo Oil Feed
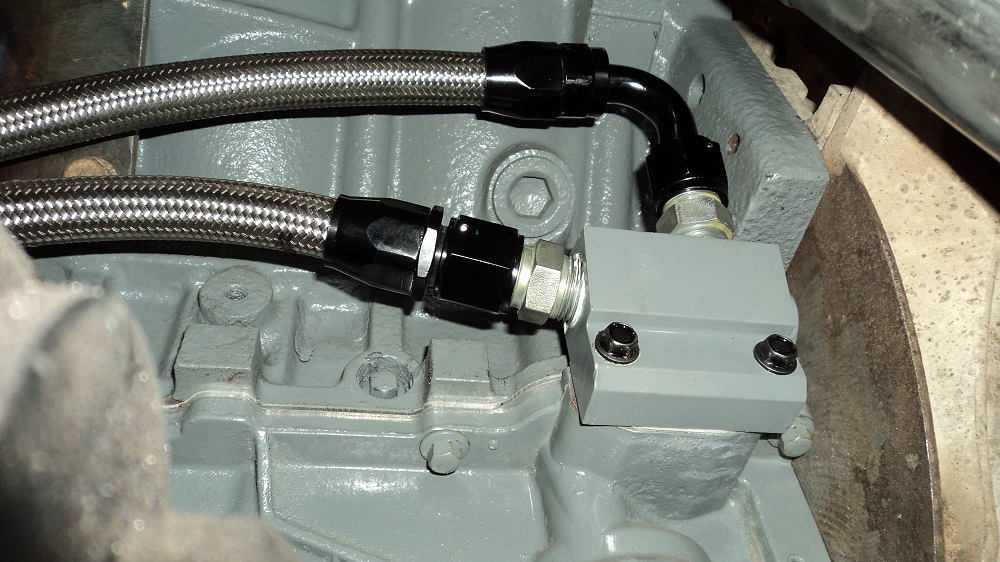
Fabricated an oil sender adapter so I could feed the turbo.
The LS uses a 16mm x 1.5 thread and a sealing washer. I turned half of some 1″ steel down to 5/8″ and threaded it, then bored the other end and threaded it as well, then drilled and tapped 1/8″NPT at an angle such that I can easily thread the adapter and sensor into the block, then thread an 1/8″NPT 45° in there to better reach the turbo feed.
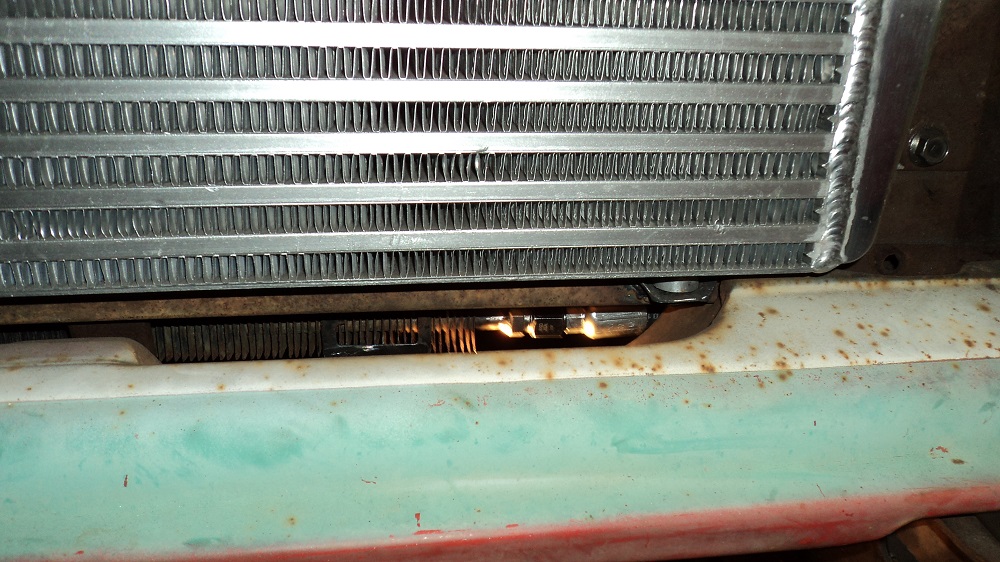
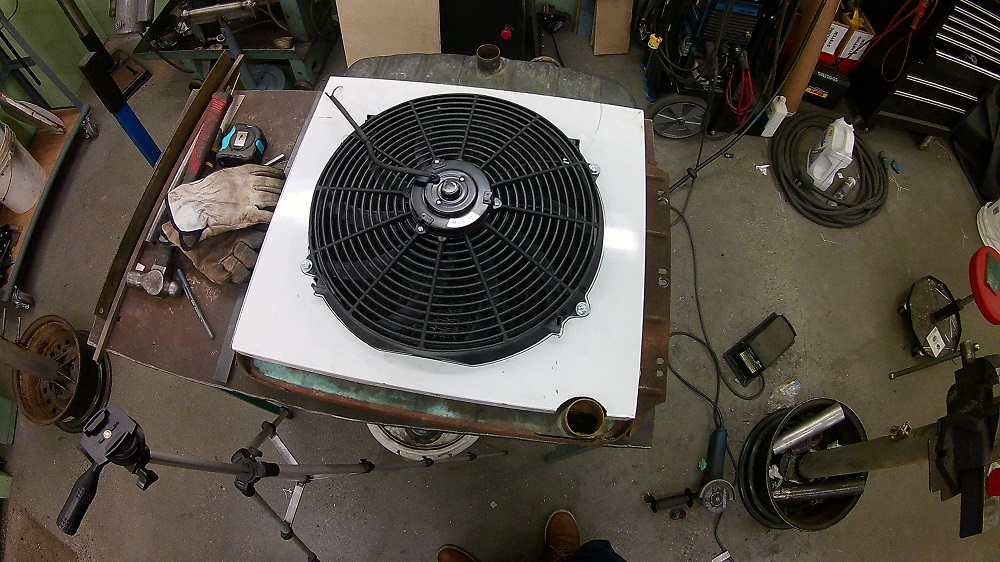
Also put the rad in to measure fan clearance. I have just under 4″ to the stub of where the fan clutch was, so I’m going to need a thin electric. But, if I can find one, I should be able to squeeze the engine oil cooler behind that.
If I can’t find one I like, I could probably relocate the trans cooler, run a thinner rad-spacer-back-inator and gain maybe another 1/2″ of fan room.
Added a -8AN fitting to the fuel line. Due to the proximity to the alternator, I can’t see a super effective way to convert to return style. Though I suppose I could return out the back of the fuel rails now that I think about it….

And I started fabricating a shroud for the cooling fan. Made out of oven.
Which sucked. I mis-measured, and cut the hole in a spot that interferes with the water pump.
So I made another one. Made from Corolla roof.
Also made up some AN hoses to connect the oil cooler to the motor.
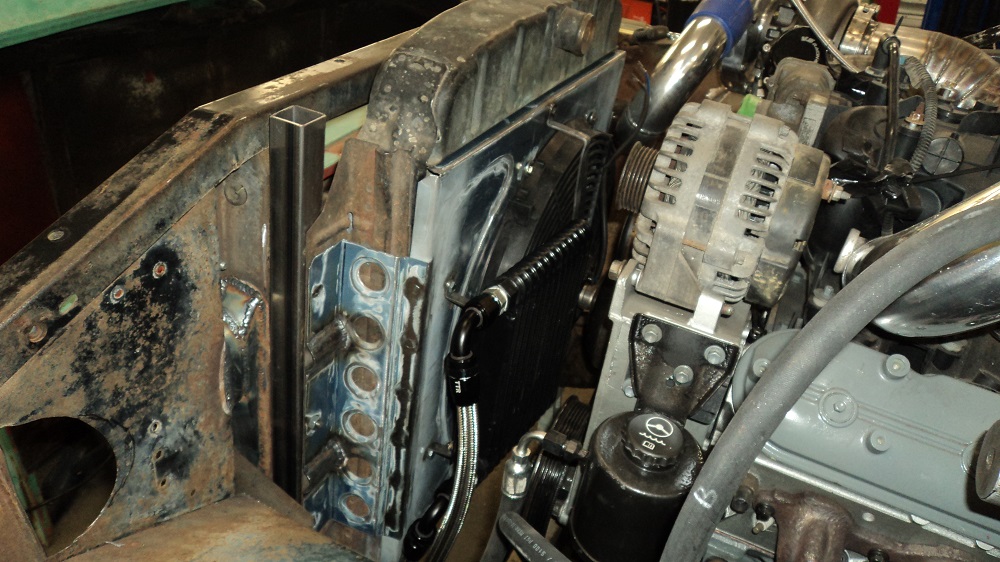
That completed mounting the Intercooler, Trans cooler, A/C condenser, P/S cooler, Radiator, and engine oil cooler, all where only the radiator sat alone.
Next I need to finish the A/C hoses, and then the cab will come off. Still waiting on rust panels though.
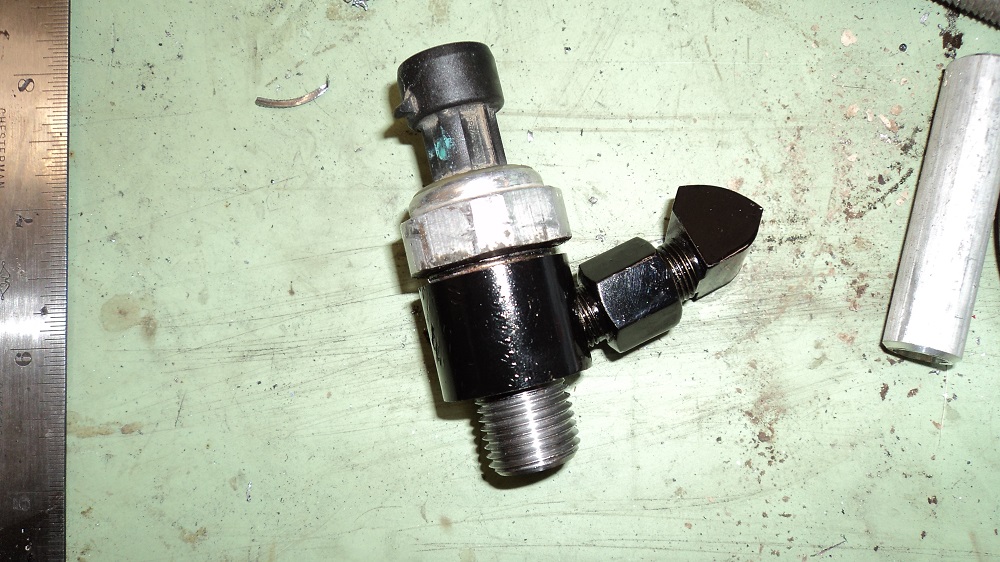
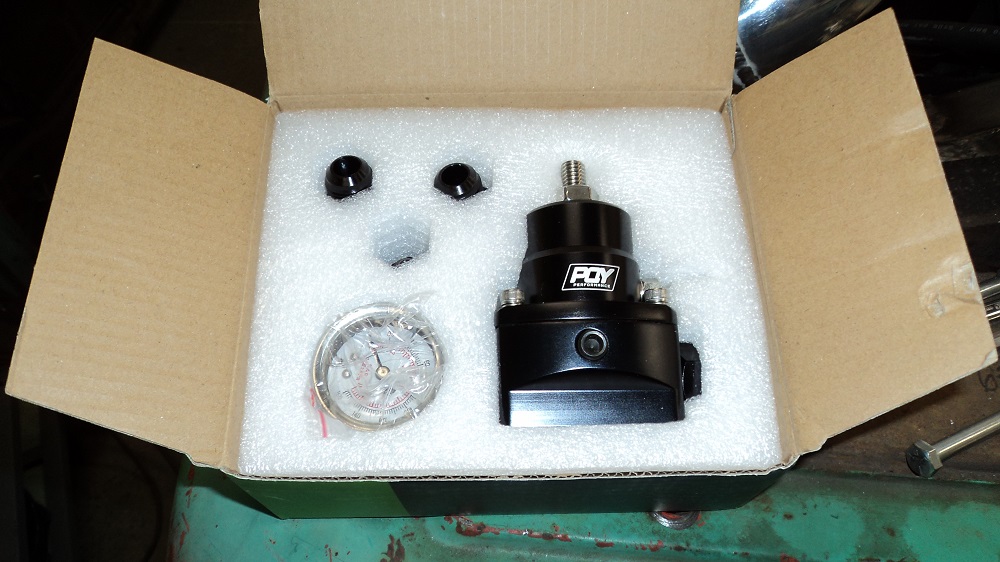
Also gazed upon the beauty of the PQY fuel pressure regulator, a favourite of the Sloppy Mechanics folks.
Feeling a bit overwhelmed with the magnitude of this project, too. I’m thinking I’ve bitten off more than I can chew.
Took a breather for most of the summer, and did a wack of house renovations that have been nagging me for years. Also did some home ethernet networking and such, relocating the router, adding a switch, connecting my shop, and ‘net to the tv and game console. Yay!
When I finally got back into the shop, I did a bunch of tidying and organizing just to be around the ’61 and remember where I left off, and wrap my head around where I was months ago.
AC Components
I crimped together the AC hoses from the condenser to the drier, and from the drier to the bulkhead fitting, and from the bulkhead fitting to the under-dash unit. Then crimped the hoses from the under-dash unit to the bulkhead fitting, but I am going to need a longer hose to connect to the compressor. I will likely need to modify the fittings at the compressor, but to fit the compressor, I need to cut a notch out of the frame. Good times.
Drier is not connected until final assembly and filling.
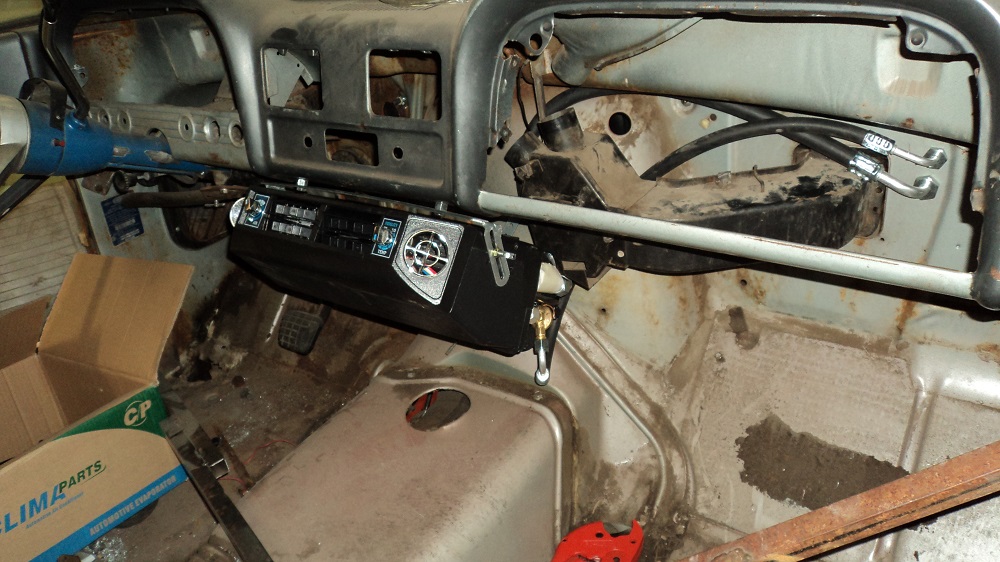
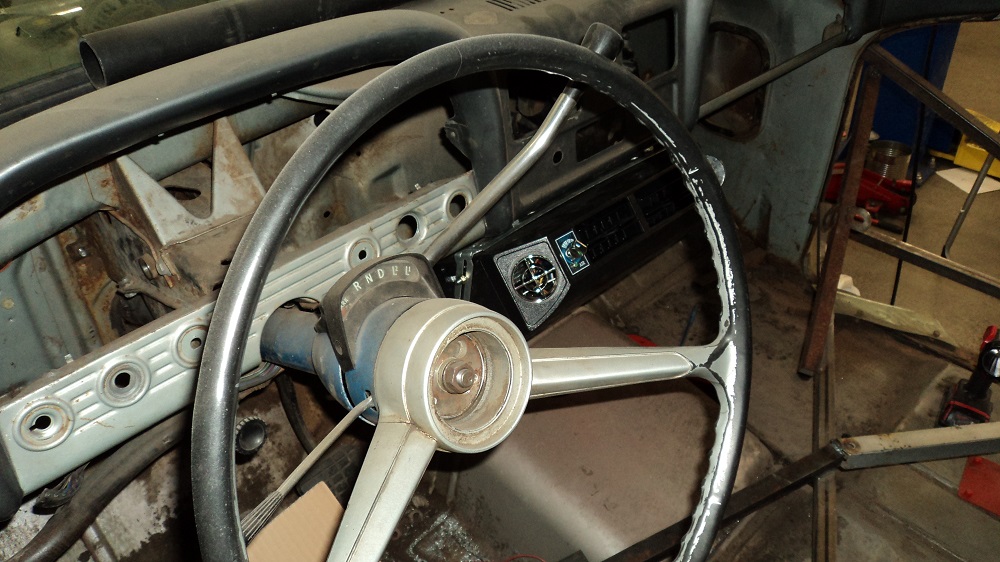
I am very pleased that the factory heater is very compact. Or at least – in the engine bay.
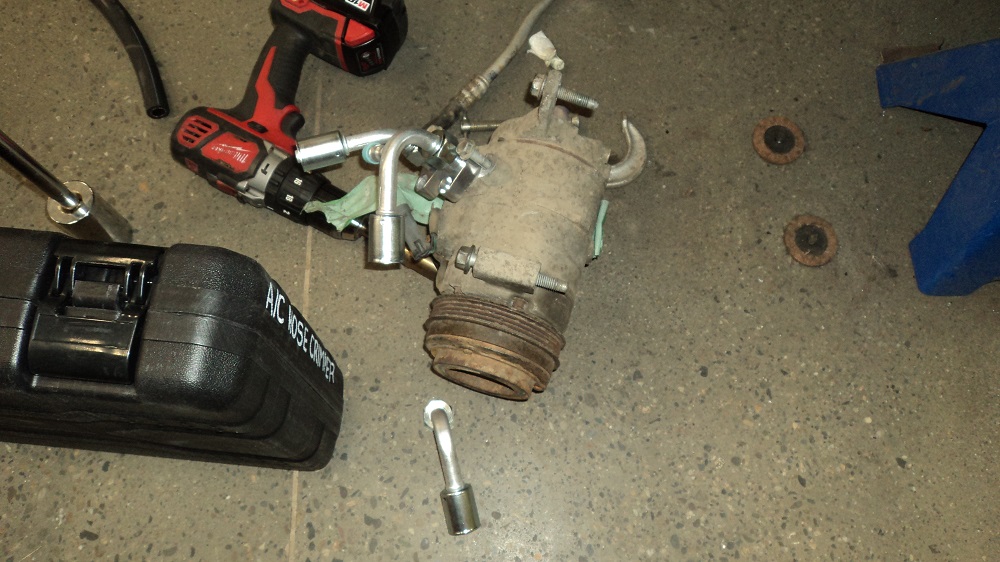
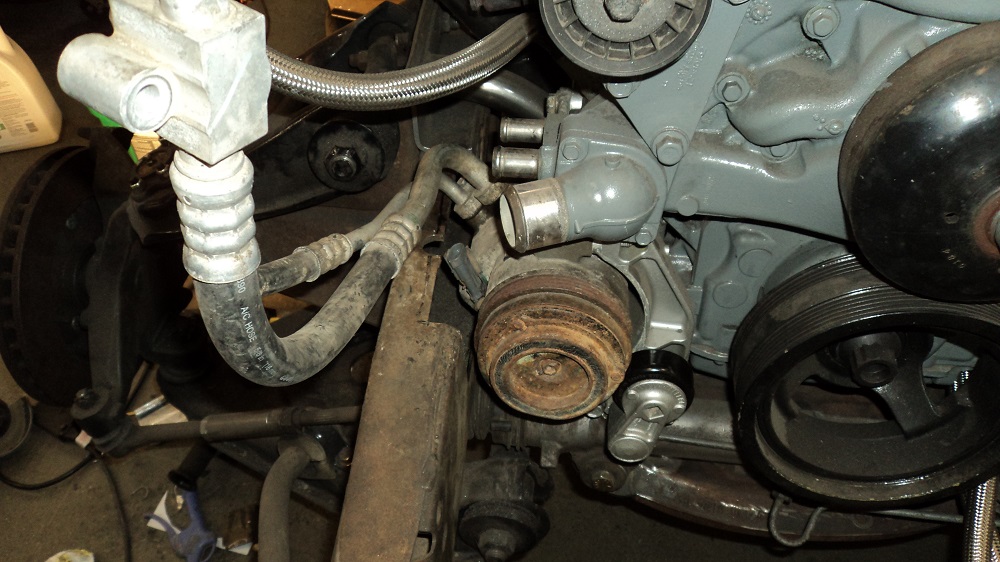
Compressor fittings are really designed for a top-mount compressor. They will be modified.
AC bulkhead fittings:
More Metalwork
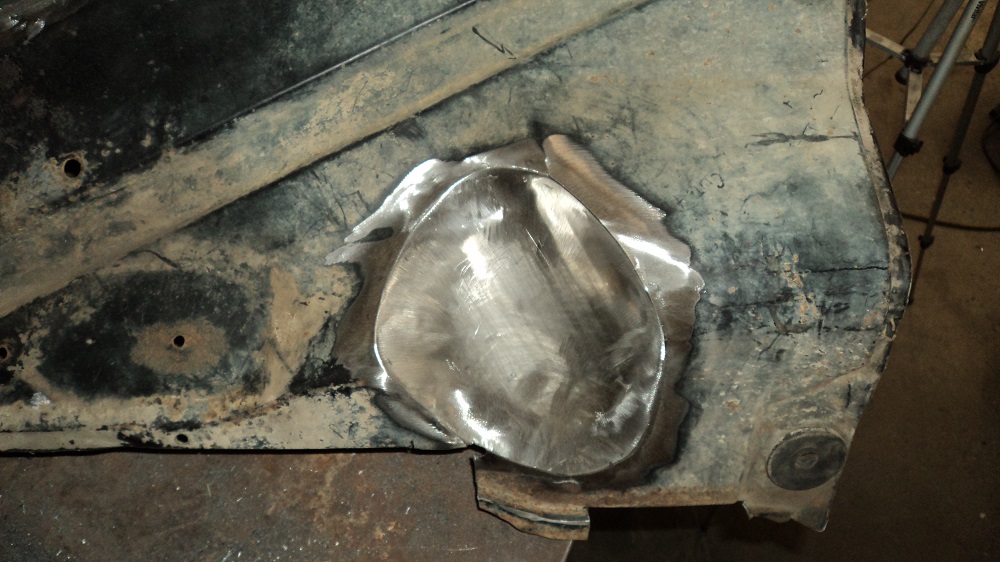
Fabricated a slightly domed patch to cover where I cut the inner fender to clear 4″ exhaust:
Patched the leading edge of the passenger inner fender and part of battery mount:
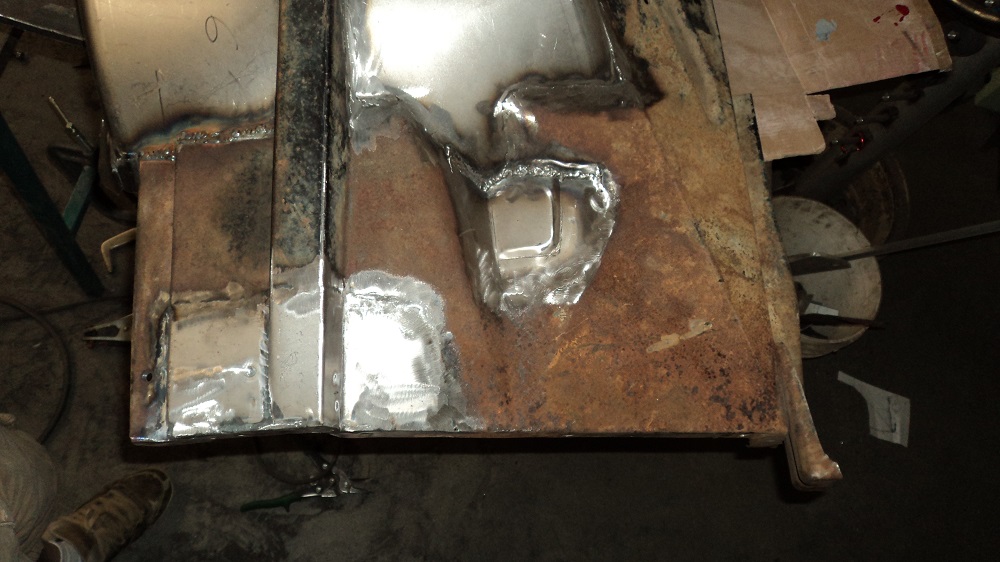
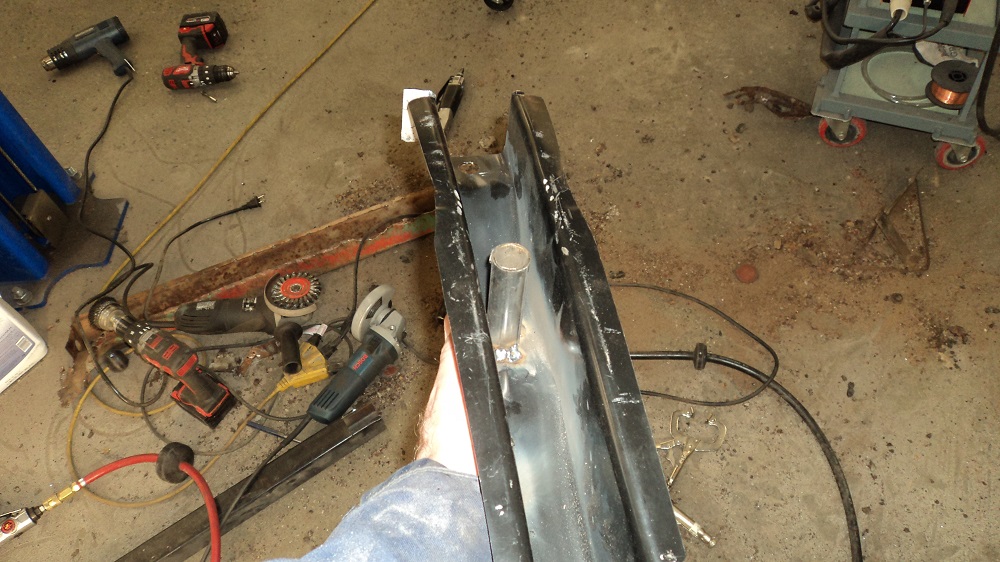
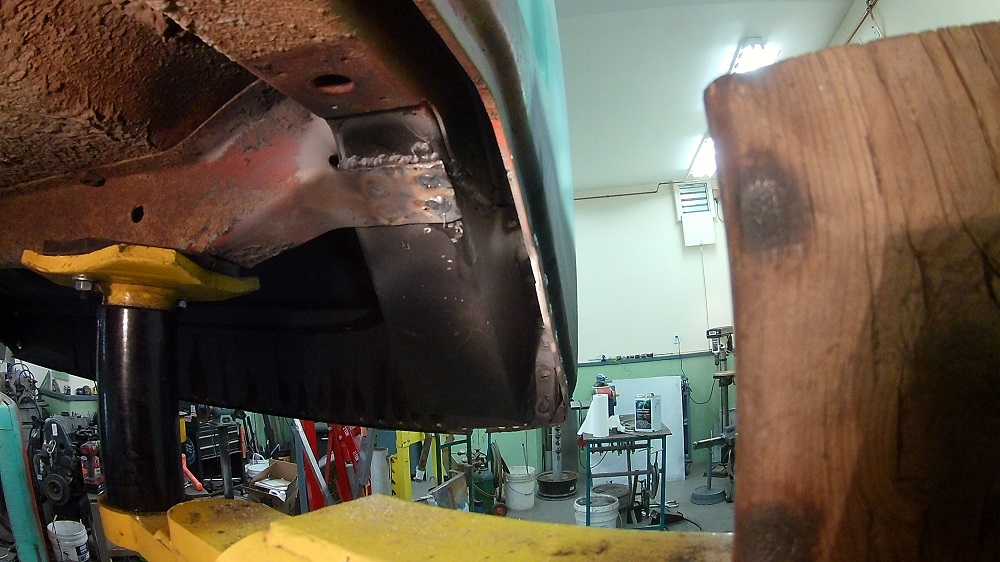
Sliced the frame to clear the AC compressor (will box the hole once the engine is out):
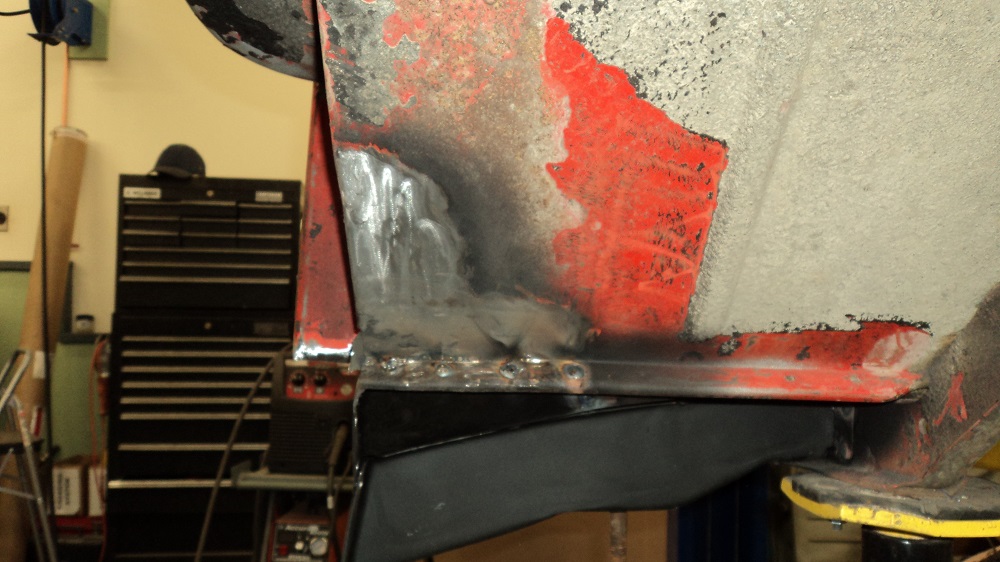
Rust Repair
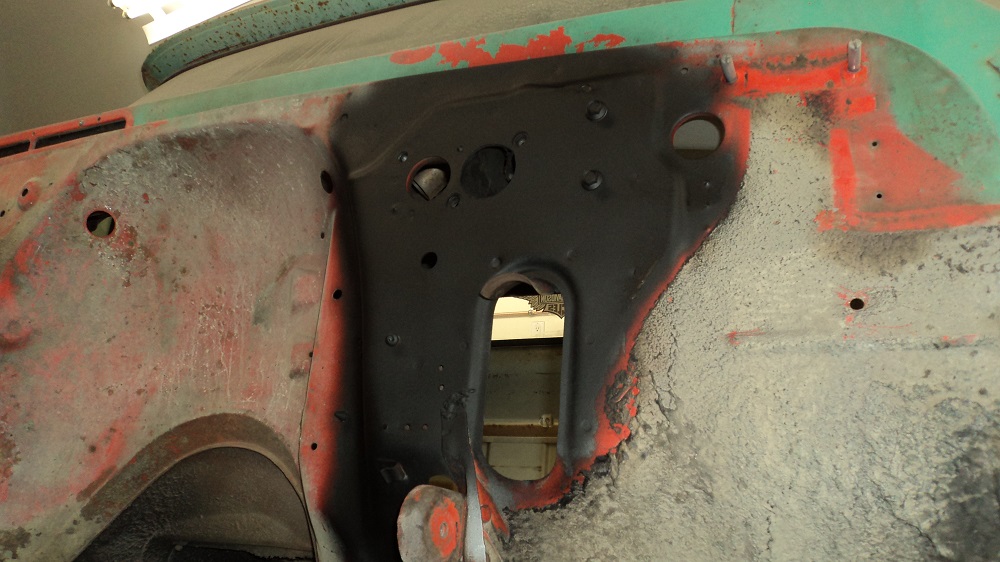
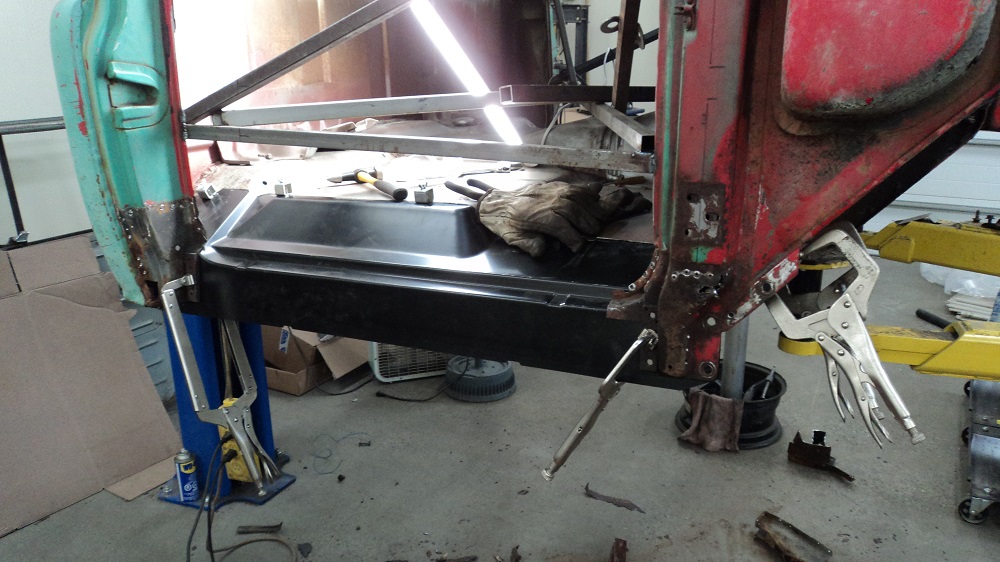
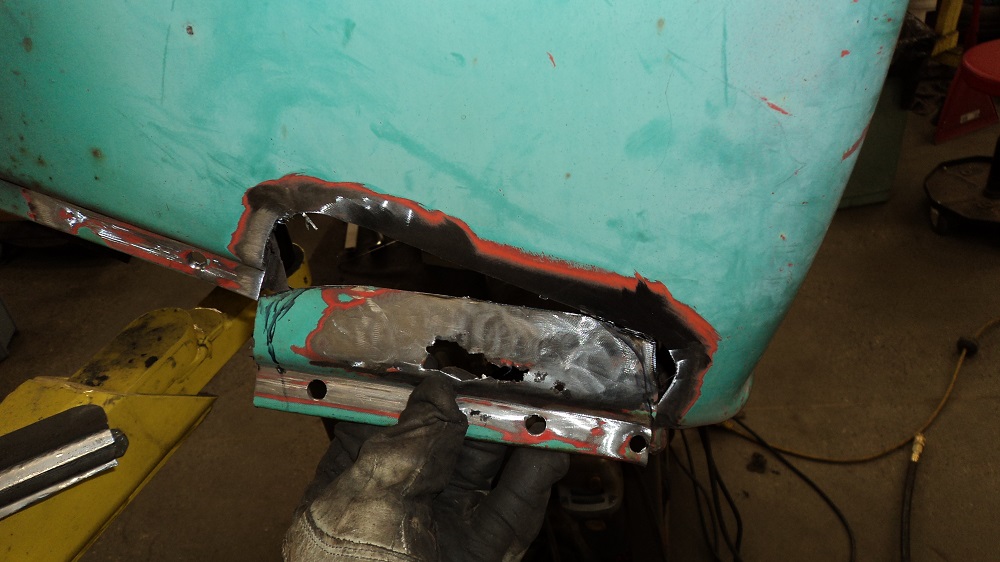
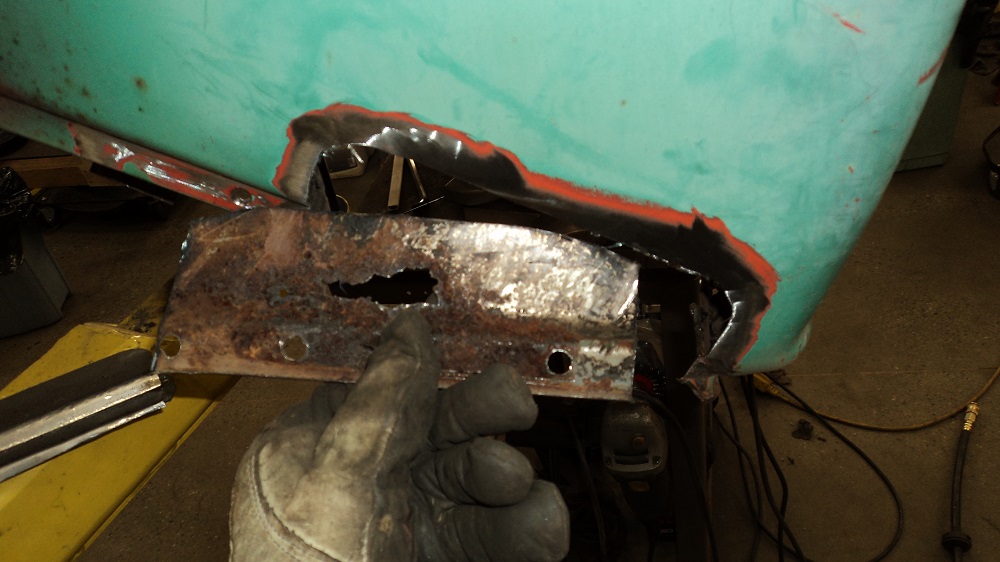
And now, really digging into the nasty:
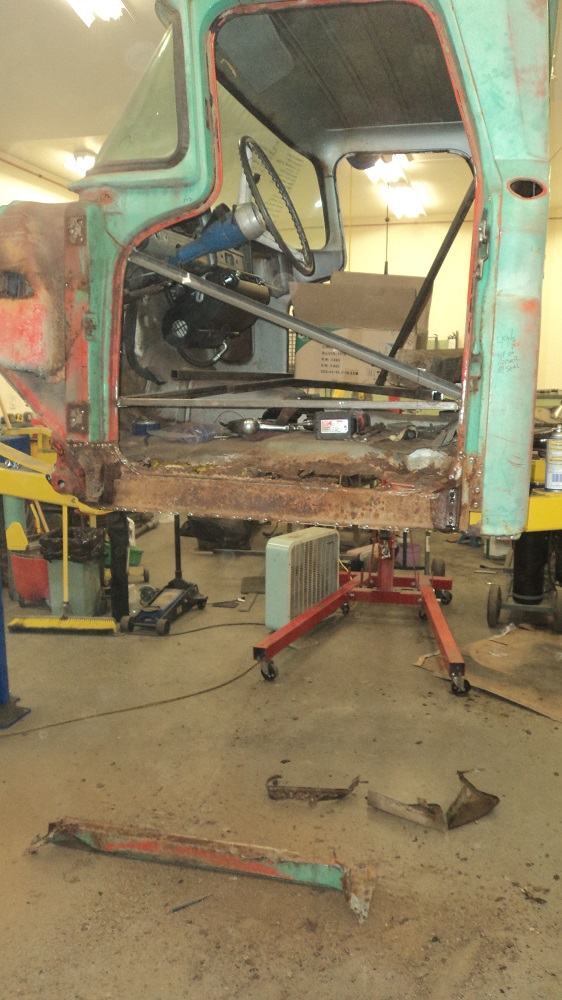
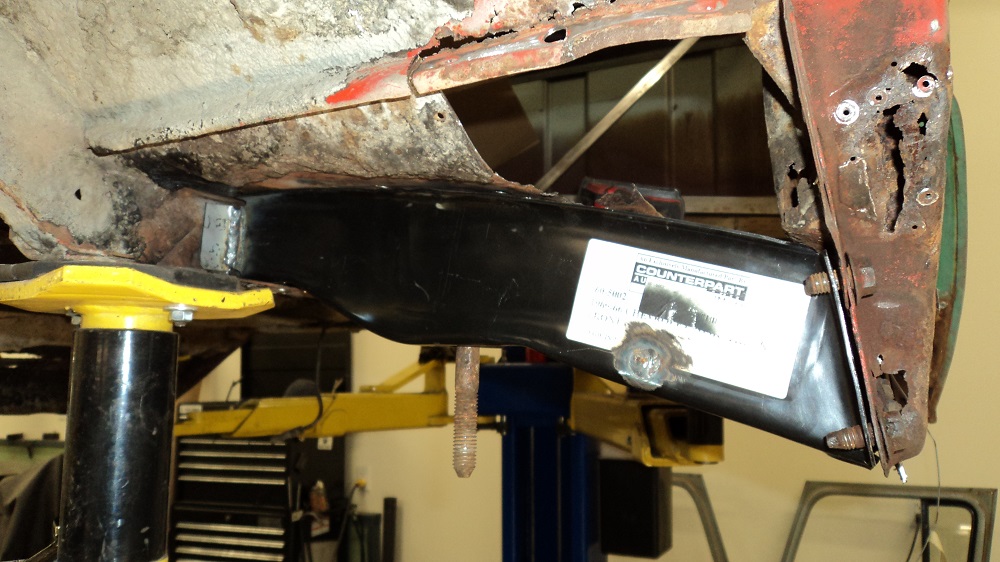
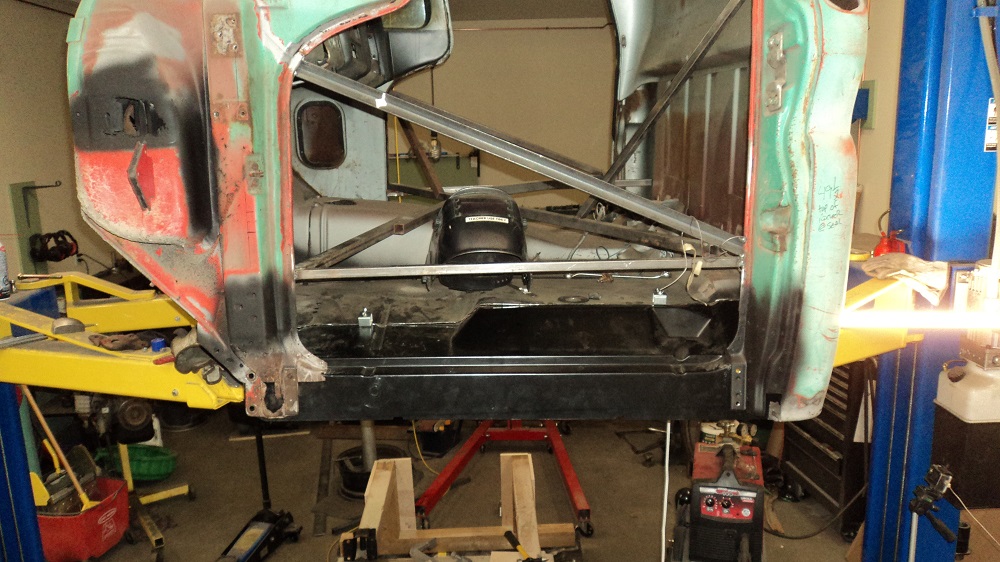
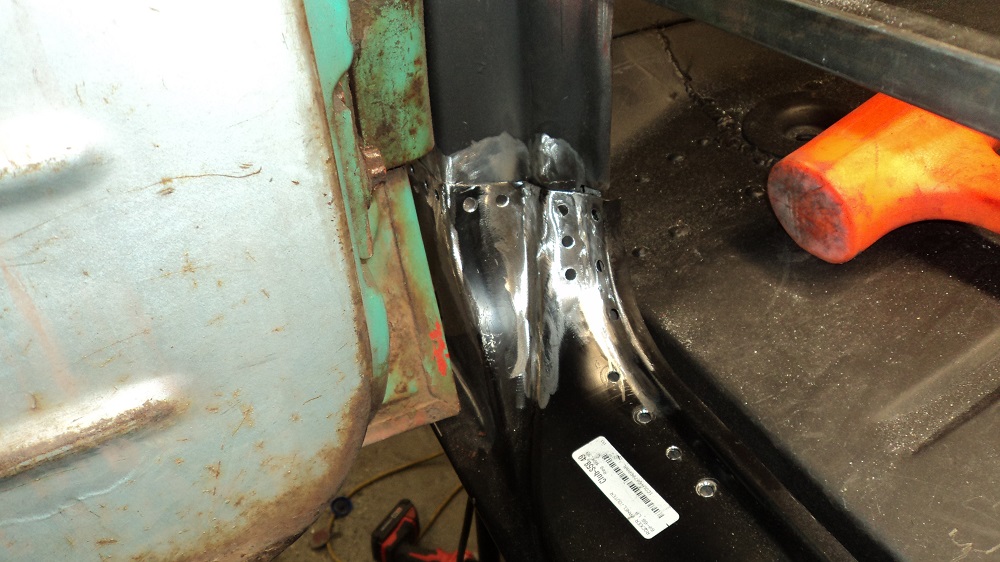
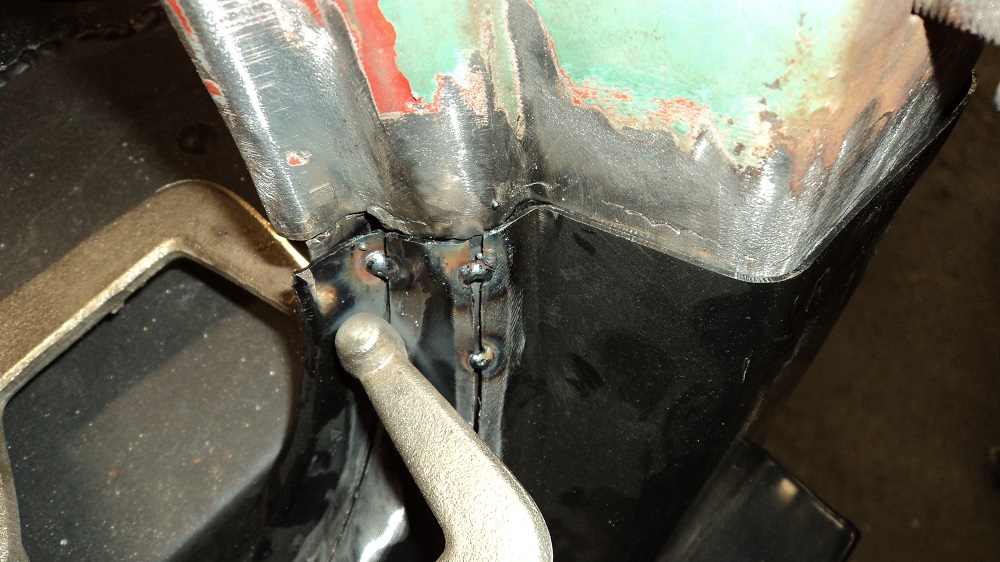
Cab mount fitted, but not welded yet. Years of collected muck rusted out the cab floor support. Also added a crush tube for the cab mount, as you’re -supposed- to do that when you run a bolt through tubing.
At this point, I significantly less inclined to strip it all down and do a thorough paint job. I’m not enjoying this as much as I thought I would. There is something to be said about just keeping it “good enough.”
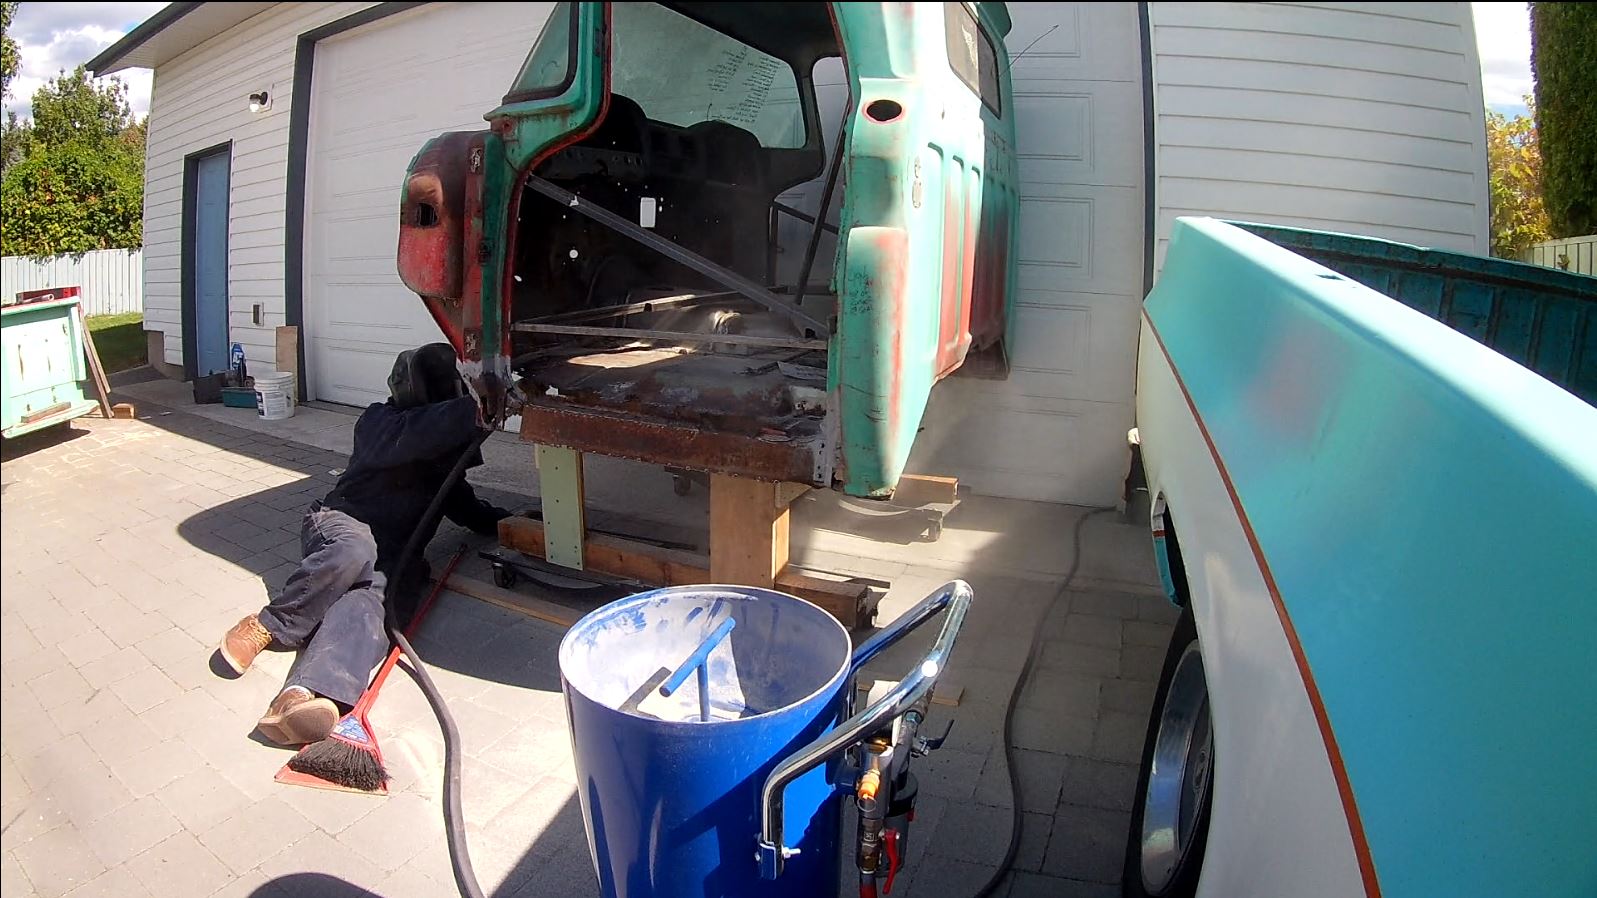
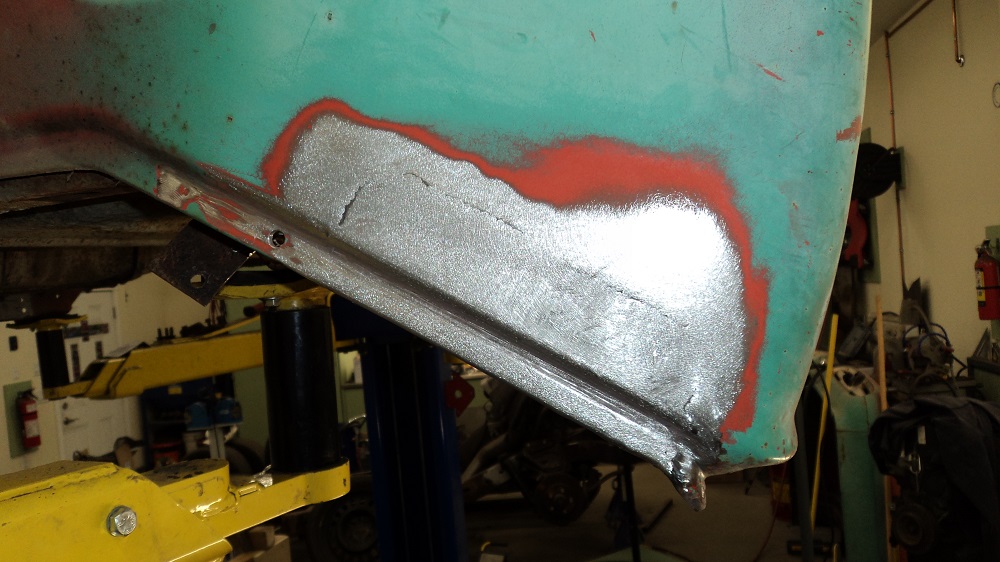
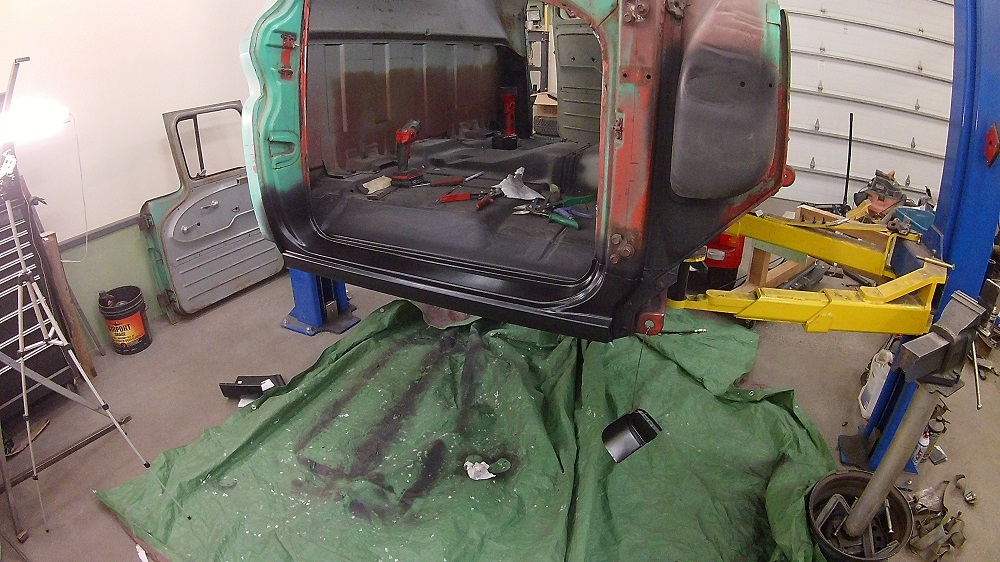
I take it all back. I thoroughly enjoyed blasting the cab today.
For the best repair, the inside should be epoxy primed. For the best application of primer, that meant blasting.
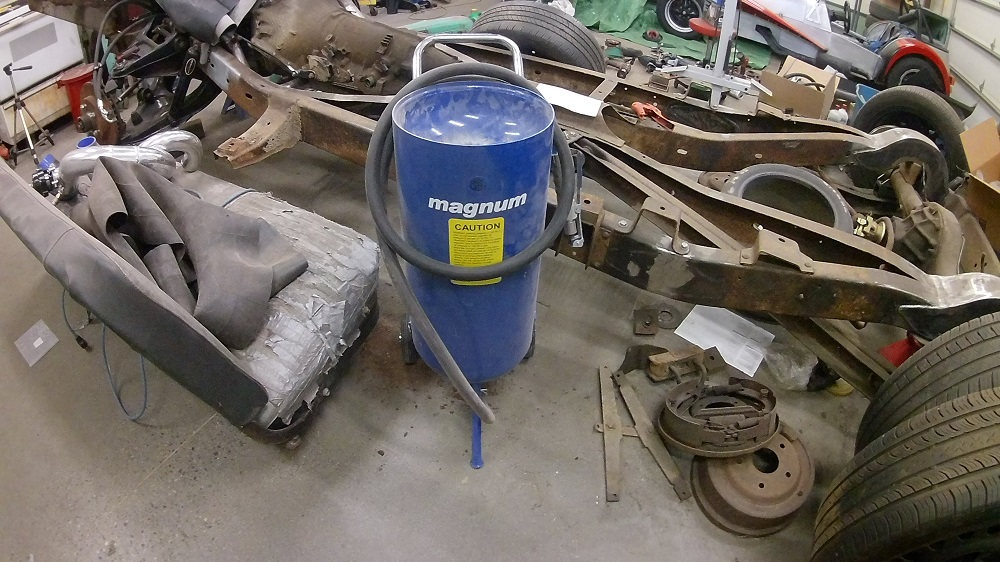
Since I -bought- a pressure-pot sand blaster, I figured I would blast and prime in convenient piece-meal portions. Today I dealt with the area I am dealing with. Once the front cab support is in, I’ll likely drag it outside again to blast the rear cab support area, then put the floor in. I’m dealing with each cab support individually to (in my mind) minimize any movement of the cab as metal is cut out.
Why not farm out the blasting? I was quoted $1000 to $1800 to blast everything in the truck. And I’d still need to get parts blasted again as I open them up. My labour is free.
Pictures in no particular order:
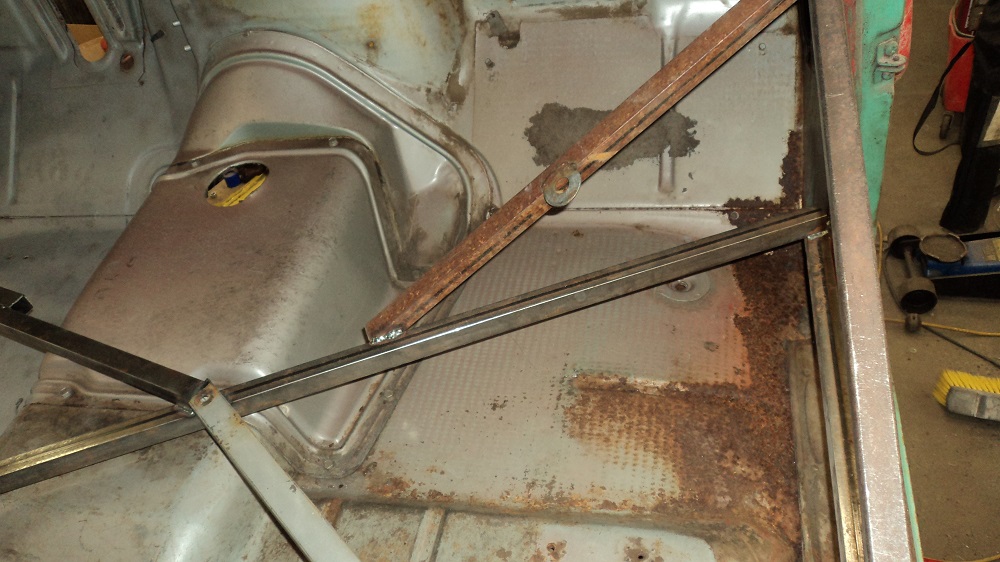

Or, maybe I’ll just cut out the rear cab support, fit the floor, and then finish the blasting and primering in one go, and reassemble.
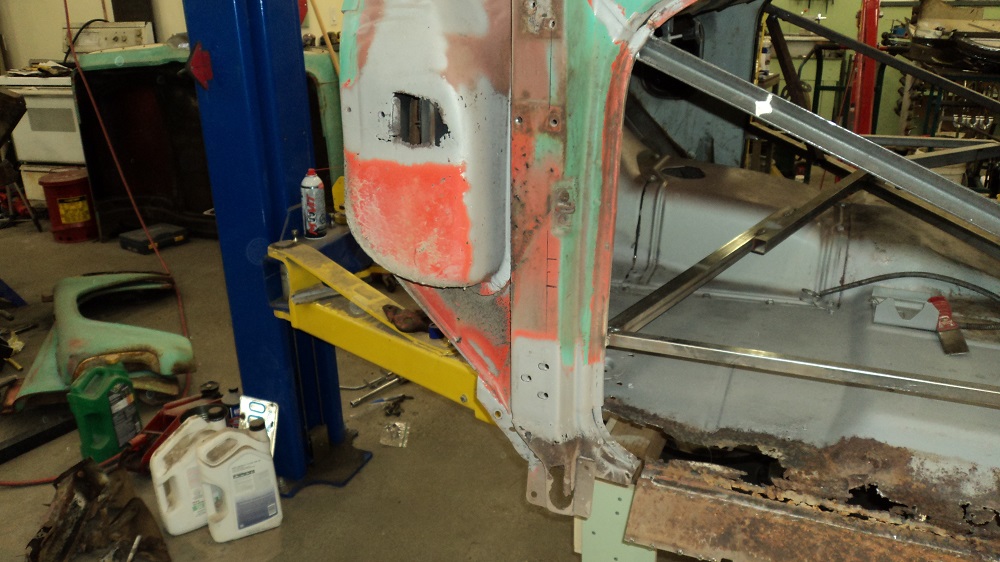
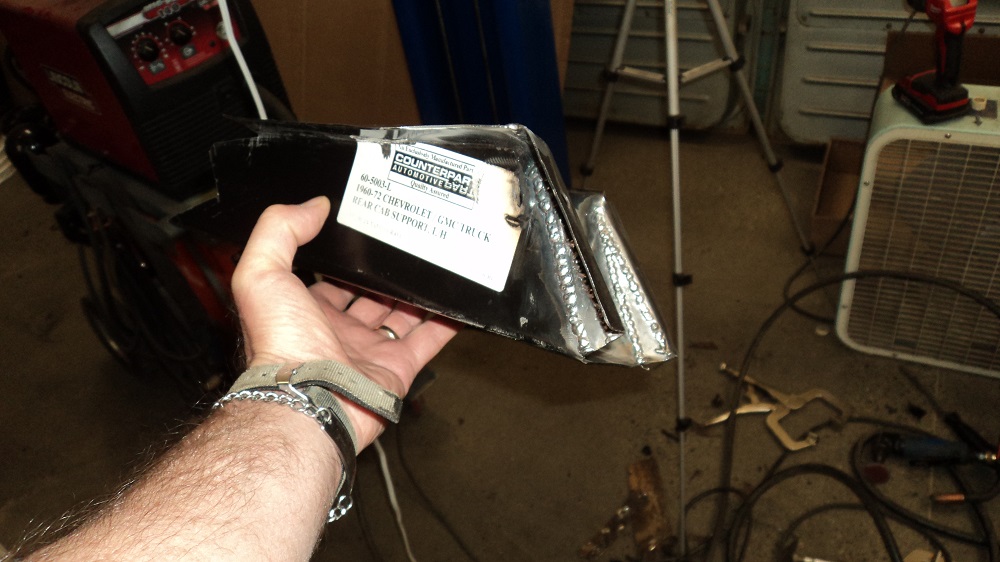
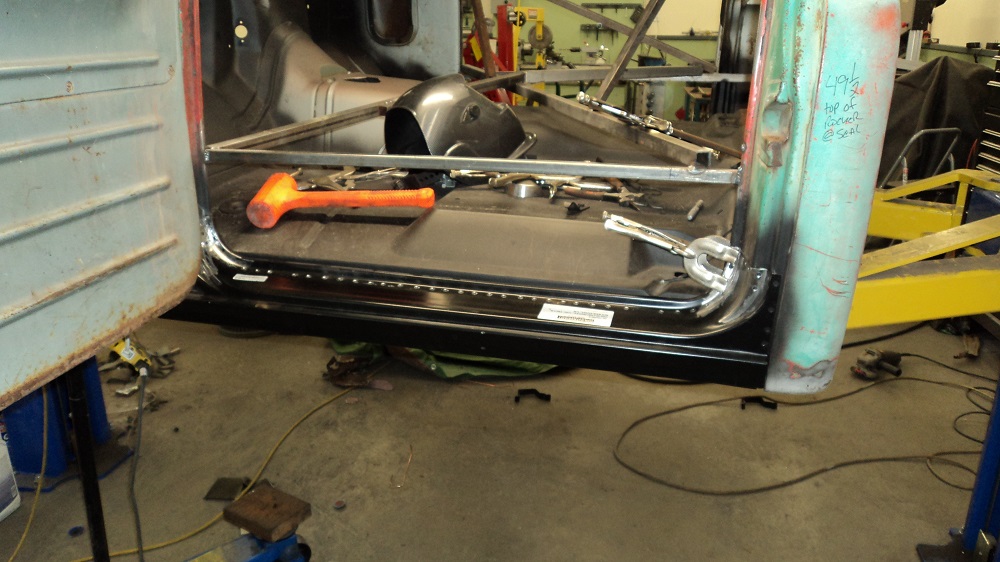
Today: trial fit floor, and shaping rear cab support:
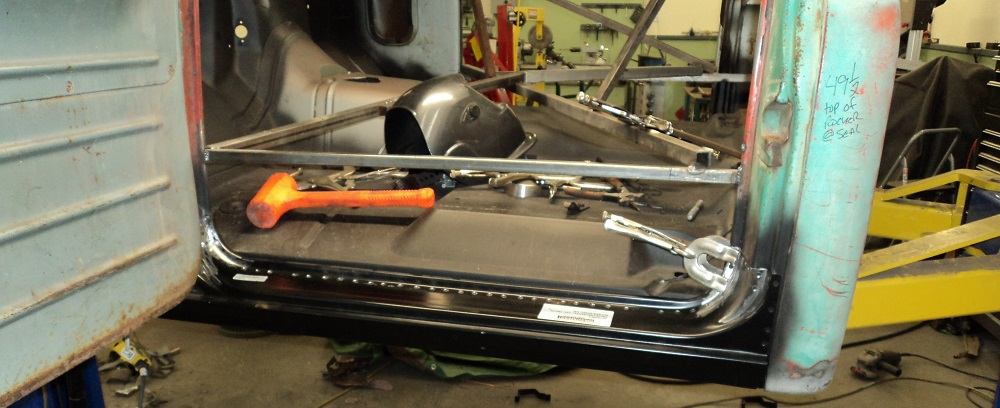
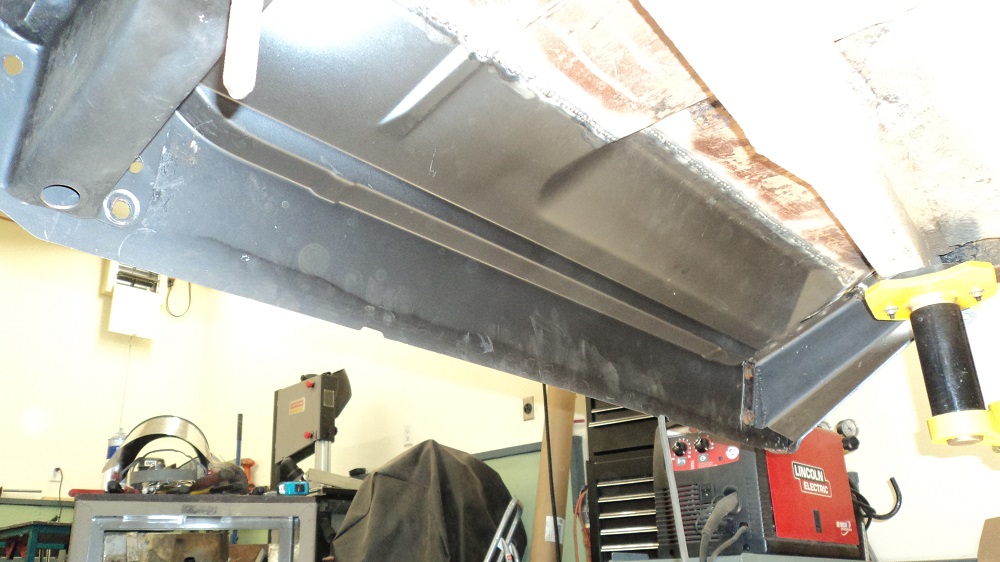
Inner Rockers
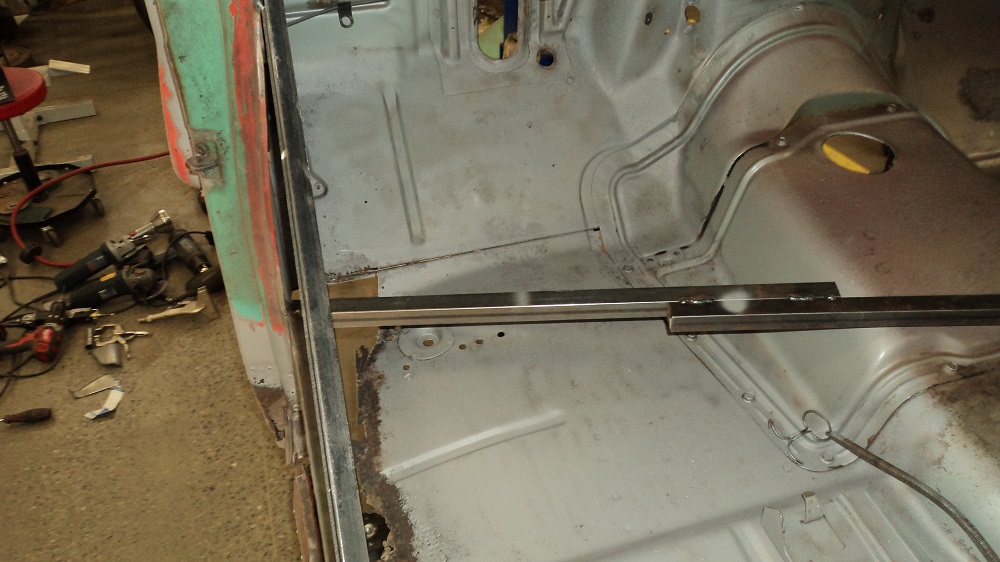
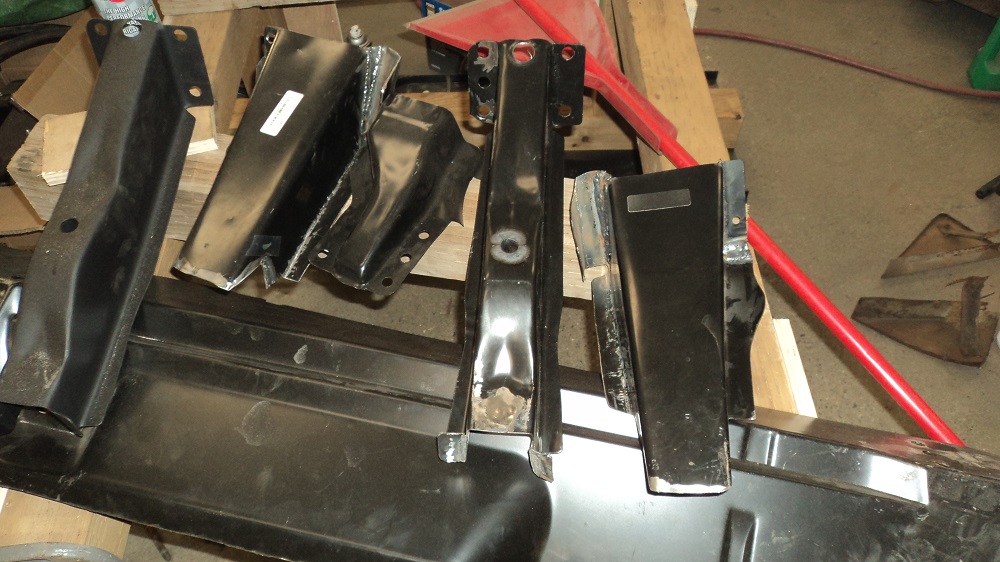
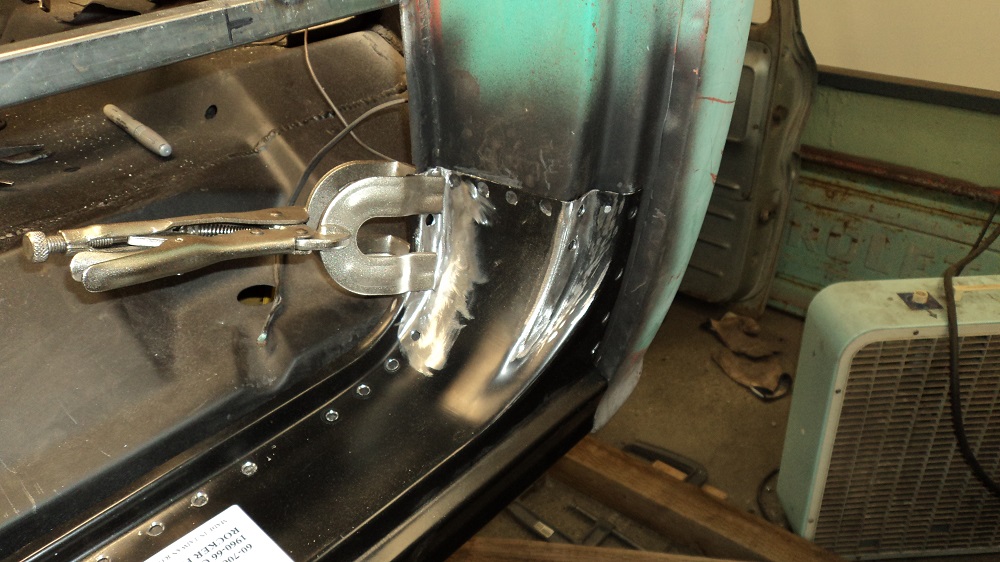
Fitted the passenger side inner-rocker/floor-section, also fitted the front and rear cab supports.
The panels needed the toe part cut and re-welded to fit the truck, as well as behind the seat to line up with the existing floor. The cab support holes needed to be moved as well. You need to just accept that the panels don’t fit “out of the box,” but it’s still easier than fabricating your own from scratch. At least, that’s what I keep telling myself.
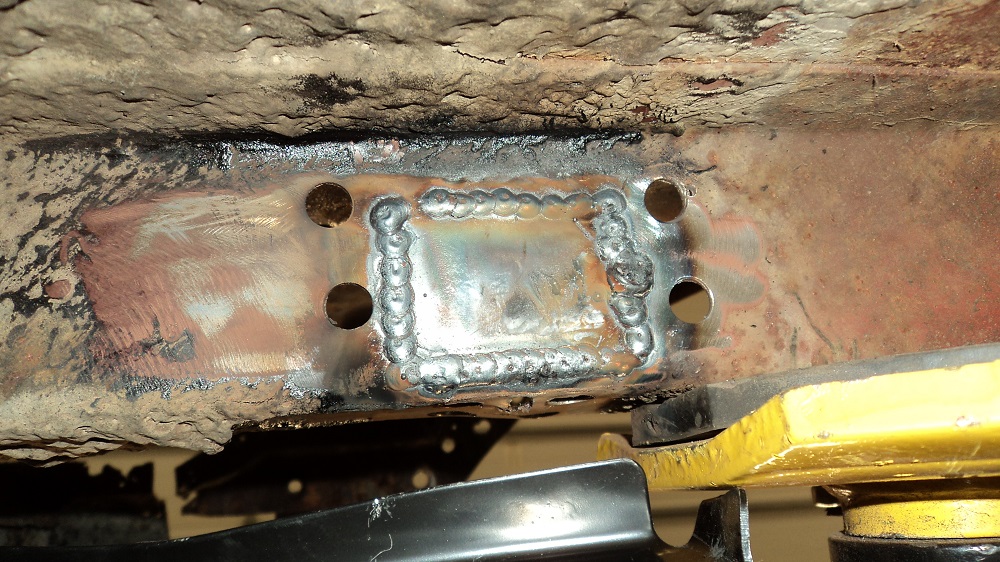
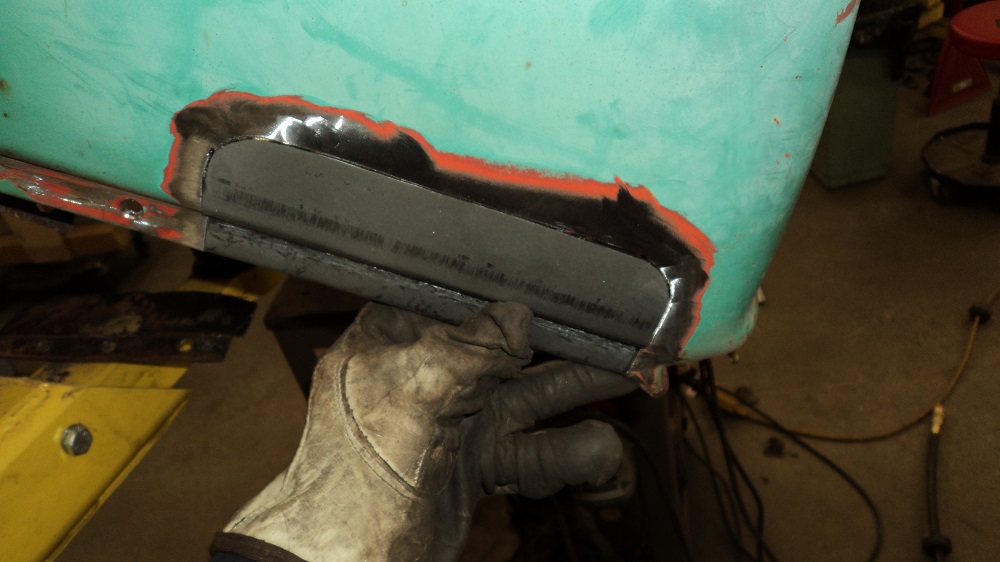
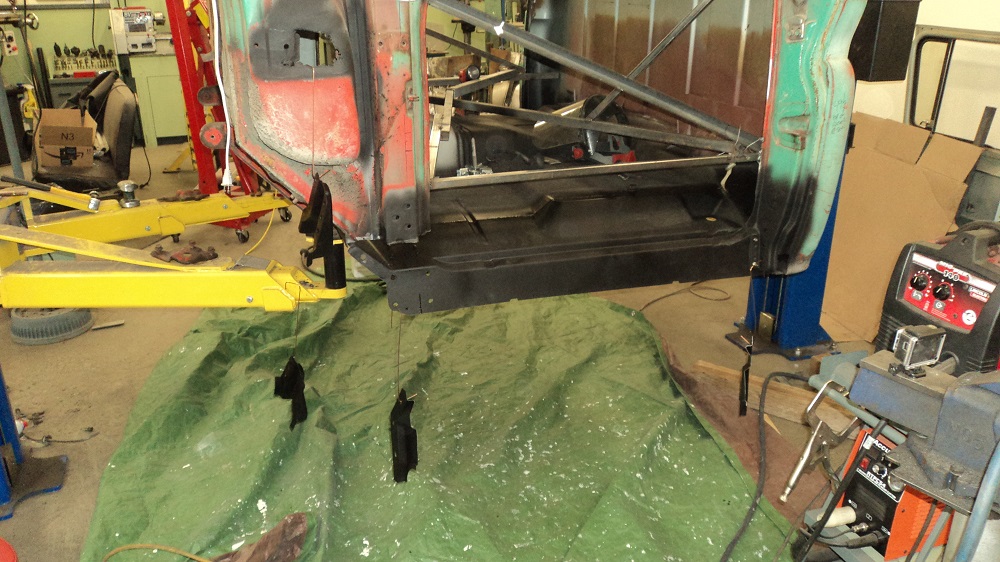
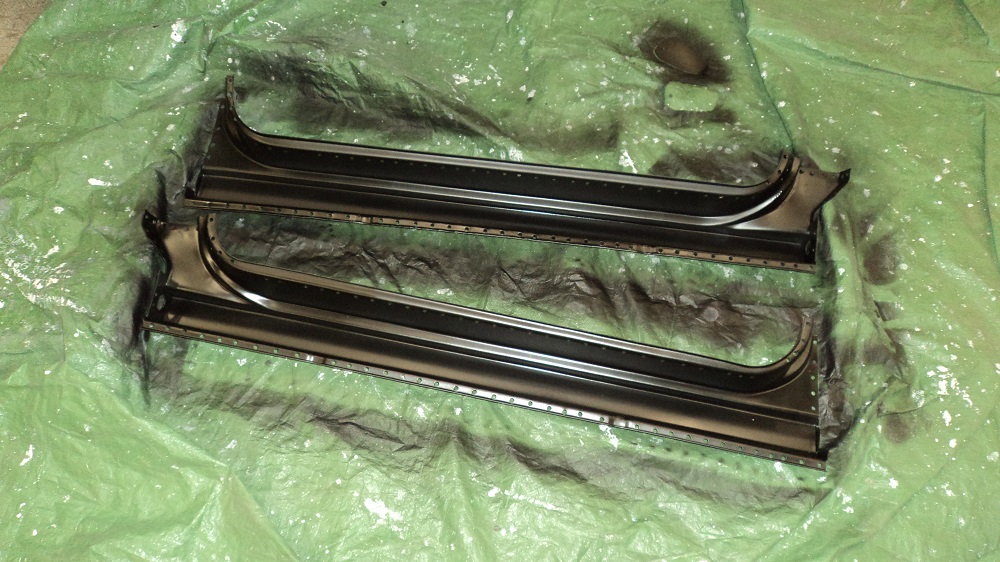
Tomorrow, if it doesn’t rain, I’ll blast all the exposed metal so I can reassemble everything. If it does rain, I’ll just epoxy prime the mounts and parts get get hidden in assembly. You can see the one I painted the other day – on it I also welded up the 63+ cab mounting hole, and added a bigger drain at the small end. I added a sleeve to the cab mount bolt hole, so it doesn’t crush.
Ok, so I forgot another patch. But I did get blasted what I wanted to get blasted. Epoxy primer tomorrow. I learned watching “Bitchin’ Boot Camp” that it’s a good idea to have rounded corners on patches, so I thought I’d do that.
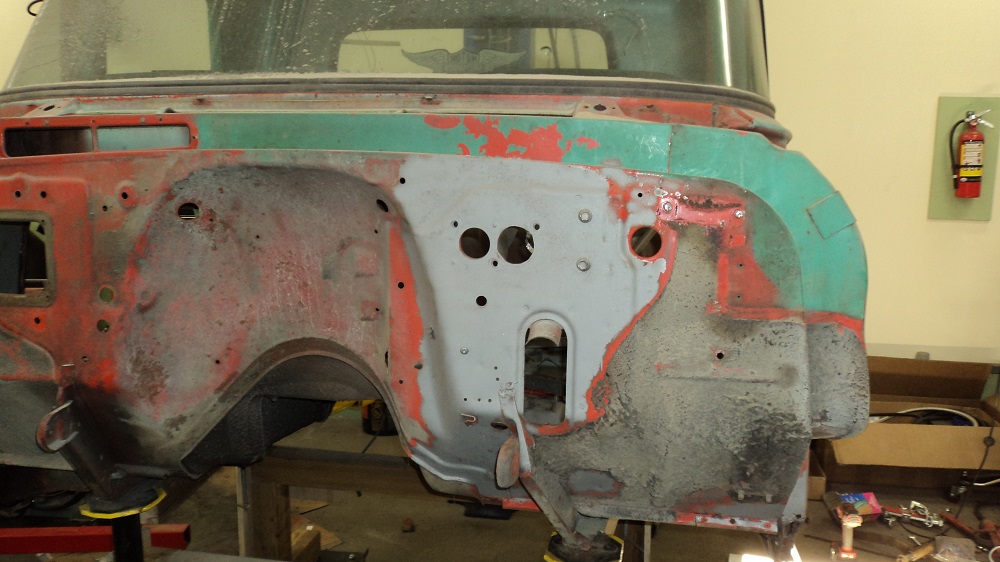
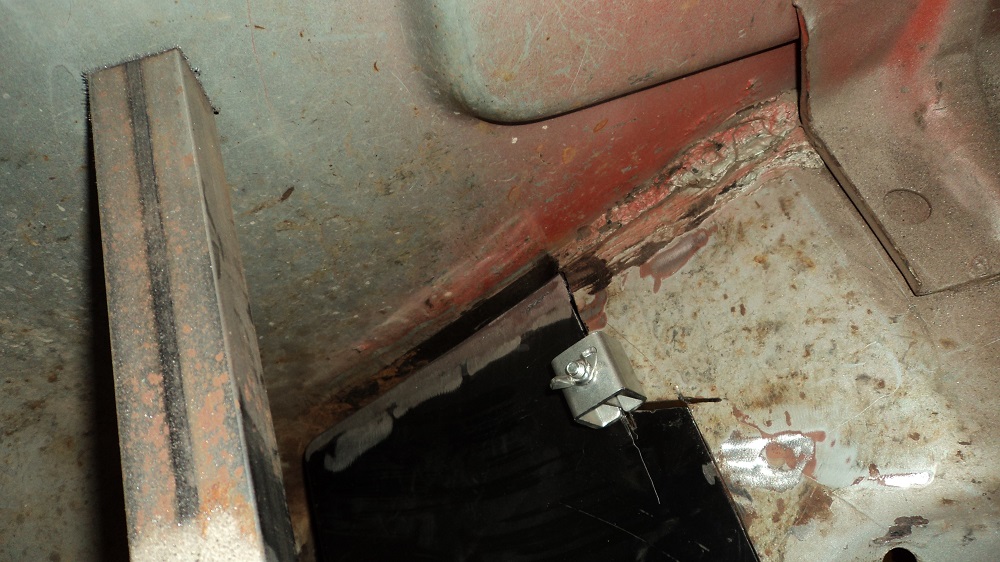
I patched a section of the Toe board, as it was far more pitted than i wanted. The passenger side inner rocker and cab supports got installed, and now that all that structure is back in and located, the A pillar bottom and kick is being replaced. I was a horrible judge of how long this would take. OMG.

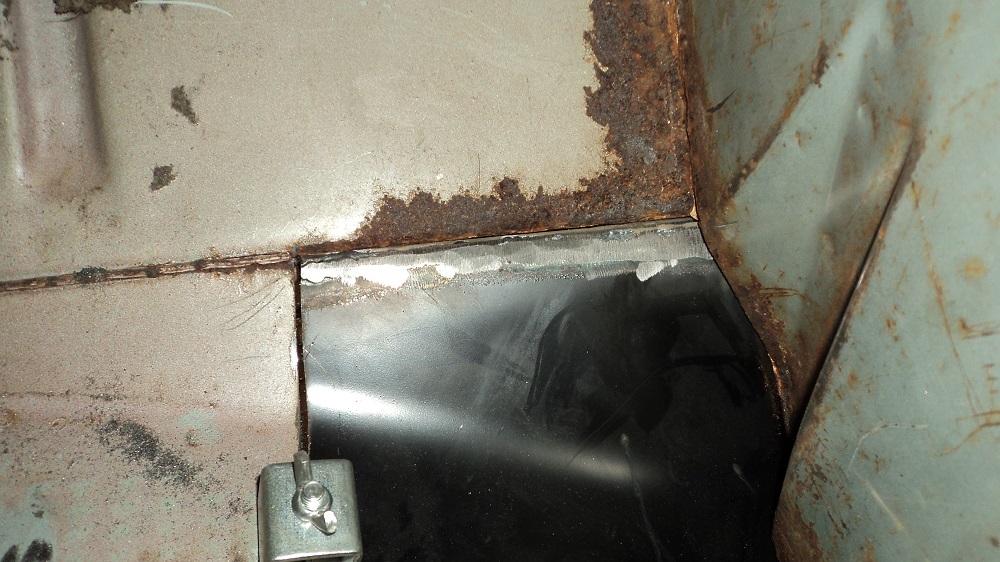
Handy tip 1 – use sheet metal screws to suck the cab supports up to the floor for welding, then just plug weld the holes.
Handy tip 2 – use the appropriate sized end mill in a hand drill (lightly) to clean out your epoxy primer or weld-through primer prior to plug welding.
Driver’s side rocker and floor done, and A-pillar bottoms are epoxy primered and drying, ready for welding tomorrow.
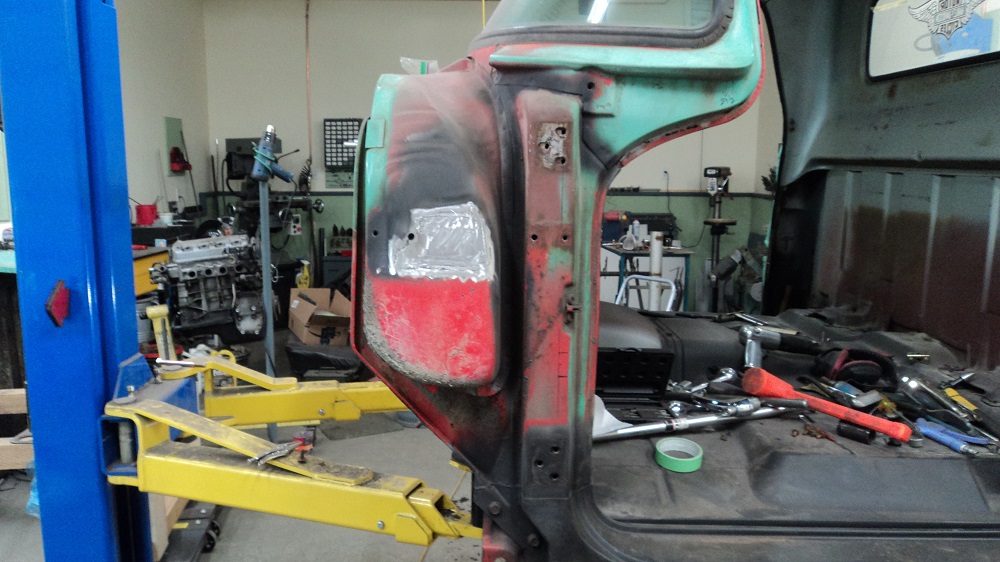
Outer Rockers
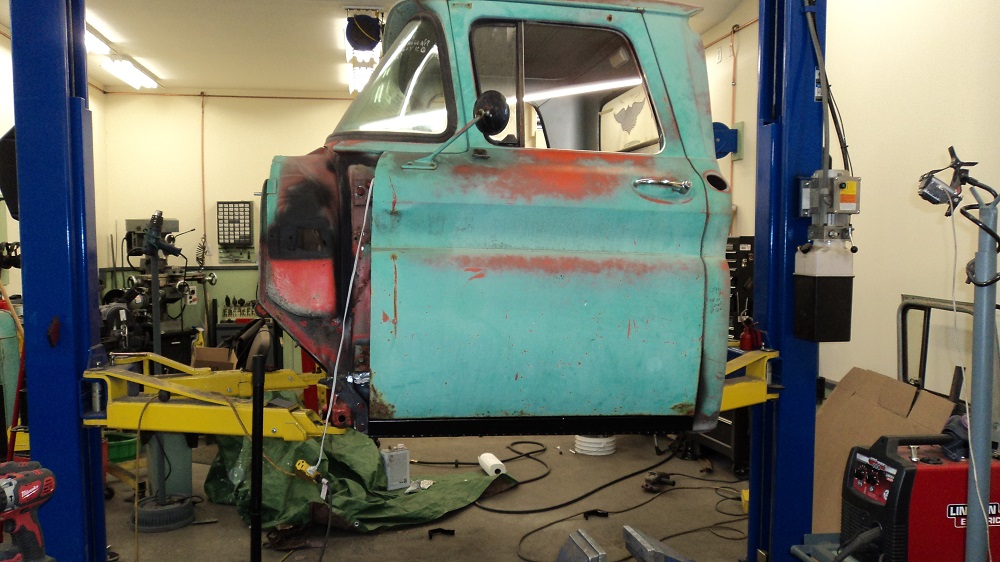
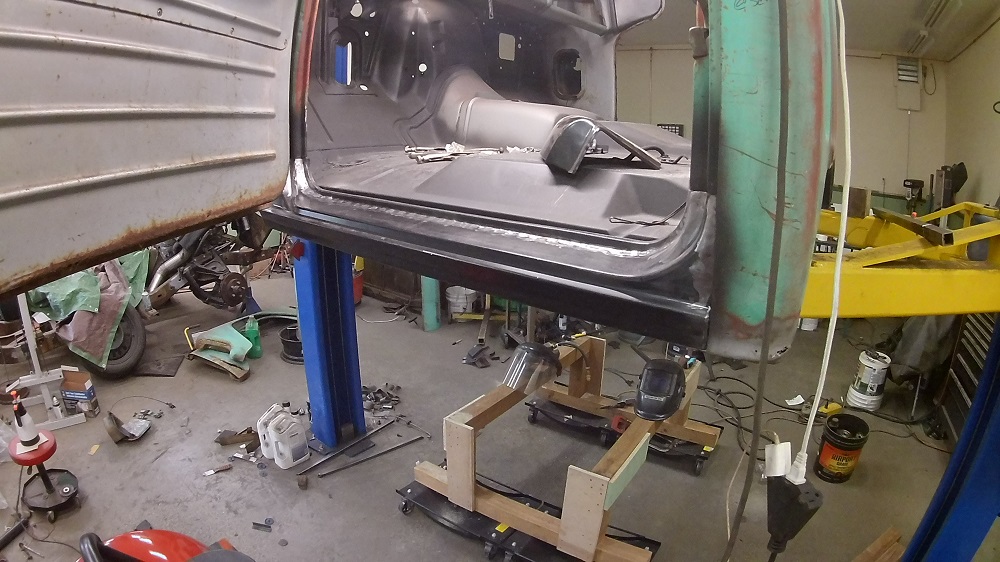
I hung the door to fit the outer rocker, which (after some significant adjustment) fit with gargantuan door gaps. The door already had the hinges as high as they would go, and the guide on the door also adjusted as high as it could go, and the gaps are freaking drunk. The build quality of these trucks betrays the golden age of no seatbelts, and bottle openers on the dashboard.
Since it appears that the door bottoms in and out should be replaced, I may “adjust” the gap at that time. Or ignore it completely.
I won’t be making my self-imposed schedule, so I slowed the hell down and just focused on the one side. Even if I had gotten just one rocker finished and sprayed in epoxy to dry over night, that would leave Monday to fit the cab corners and epoxy, and I’m back to work Tuesday. So, I backed off.
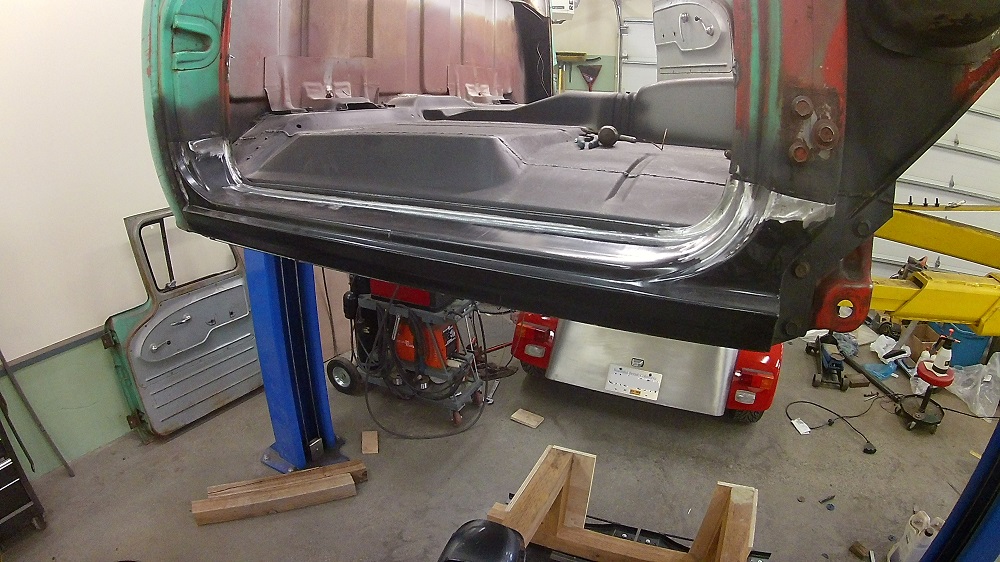
Oh My Gosh – the body panel gods must be smiling. The back of this rocker panel fit perfectly, the front only needed two slits.
And two coats of epoxy primer, and that’s it for my summer. Back to work tomorrow. My projects usually stall for close to two months at the start of the school year because work sucks all my energy away.
Rockers are welded in, and I welded a “tab” I bent back for the rear cab supports.
Hopefully, cab corners tomorrow.
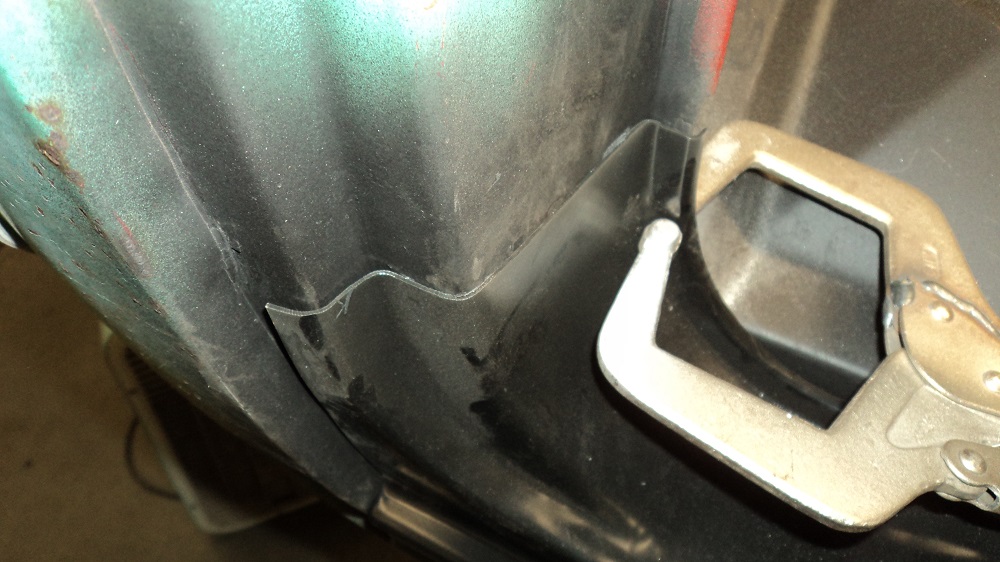
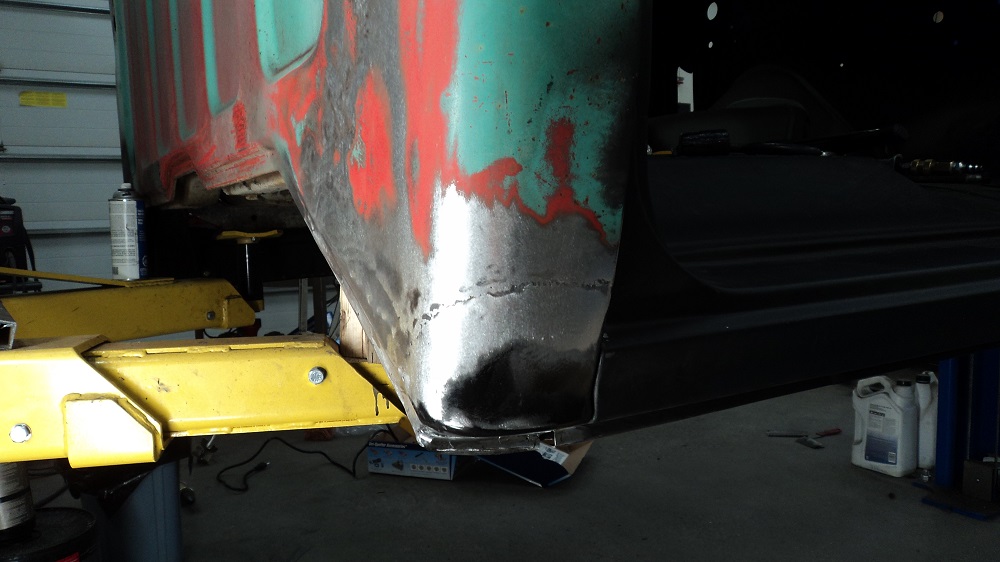
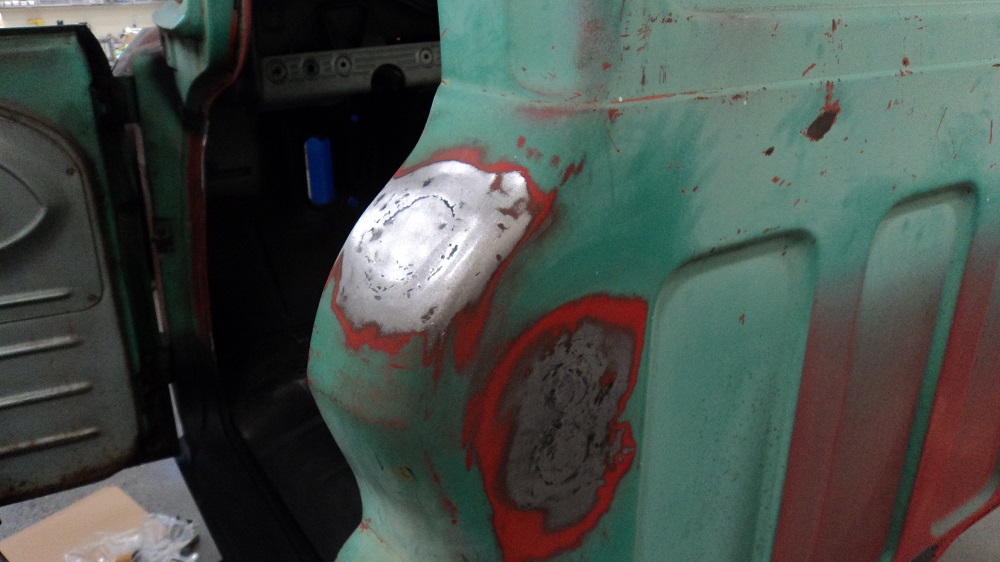
Cab Corners
Both cab corners are fitted. They both needed tweaking as the curve didn’t match, and the beading at the bottom didn’t match. Good think I have hammers.
The passenger cab corner was actually very solid. But I cut as little of it as I figured I could get away with, just to make sure that ALL the rust in the nooks and crannies are gone. I want to do my best to make this repair last as long as possible.
Sprayed epoxy over the rockers, and in and on the cab corners in preparation for welding whenever I get to them.
Oh, also filled the hole in the cowl.
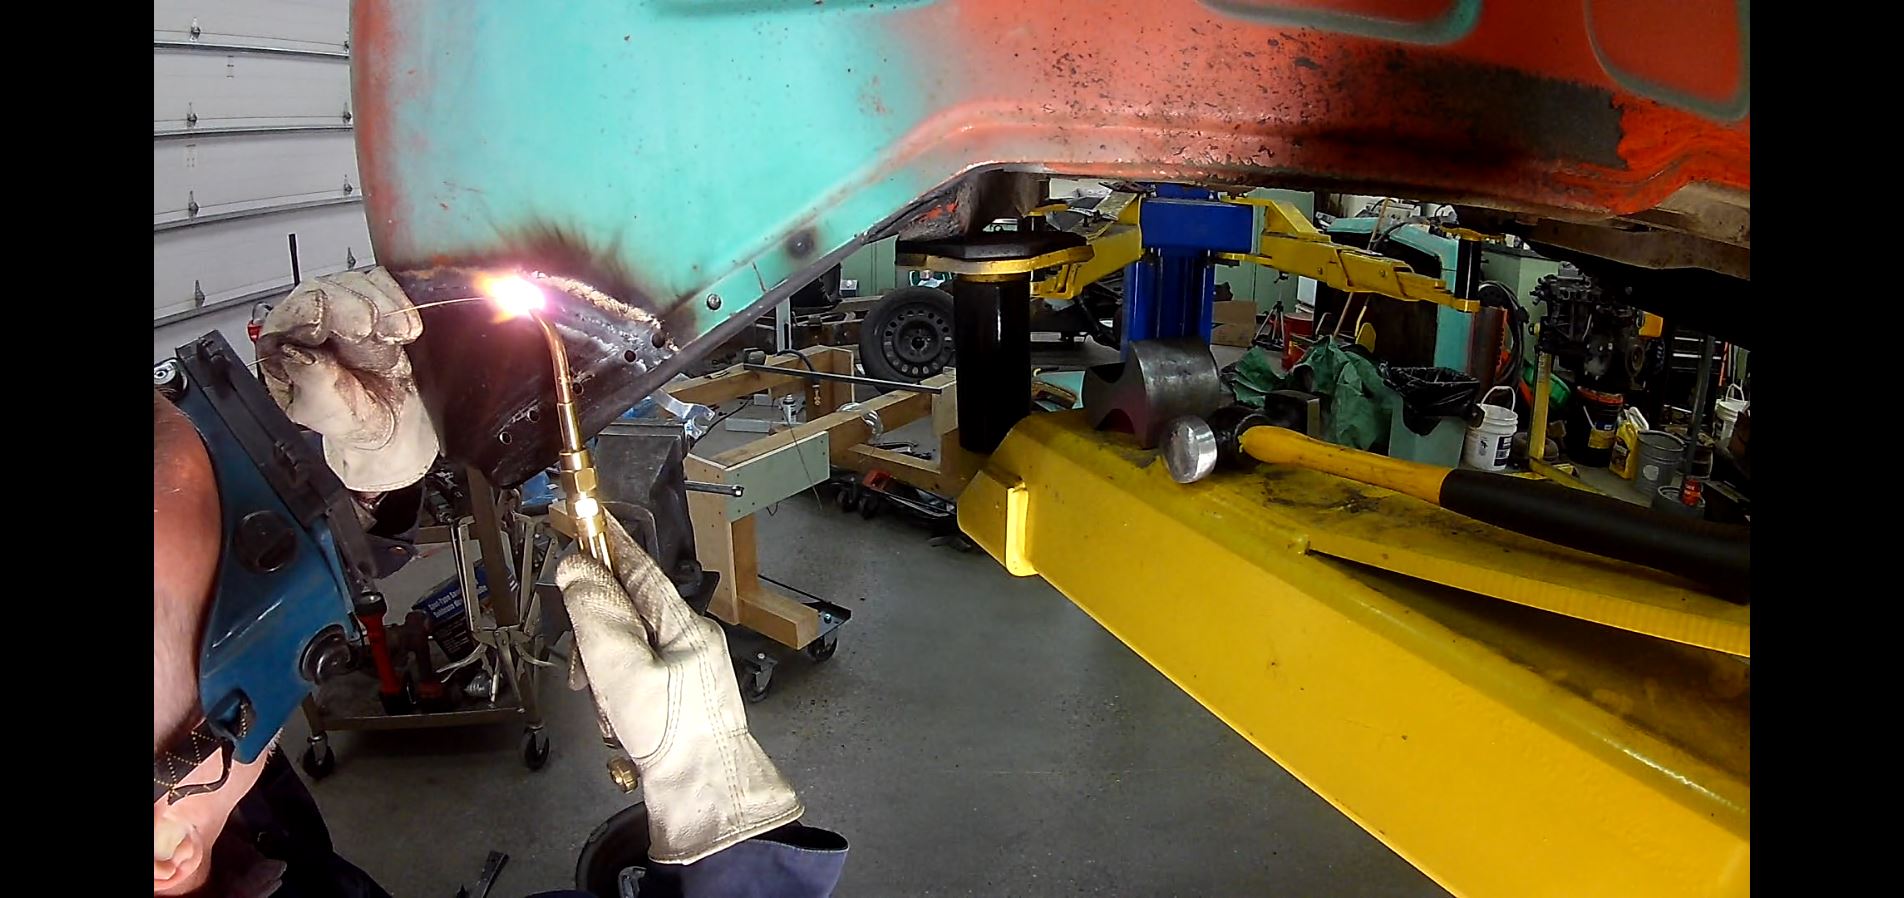
Cab corners are welded.
Like an idiot, I decided that I should oxy-acetylene weld these in. My reasoning, is that gas welding leaves the most malleable weld, (theoretically) distorts less as you heat the metal up more gradually, and cool it down more gradually. In theory, it is quicker, as you do not need to stack a bunch of beads together, but you can give’er in one pass (once tacked, of course), and you don’t have to grind the welds down, and there’s a whole lot less shrinkage since there’s a whole lot less bead to contract.
At least that’s the theory.
The reality was really more of a slow-paced but-whuppin.
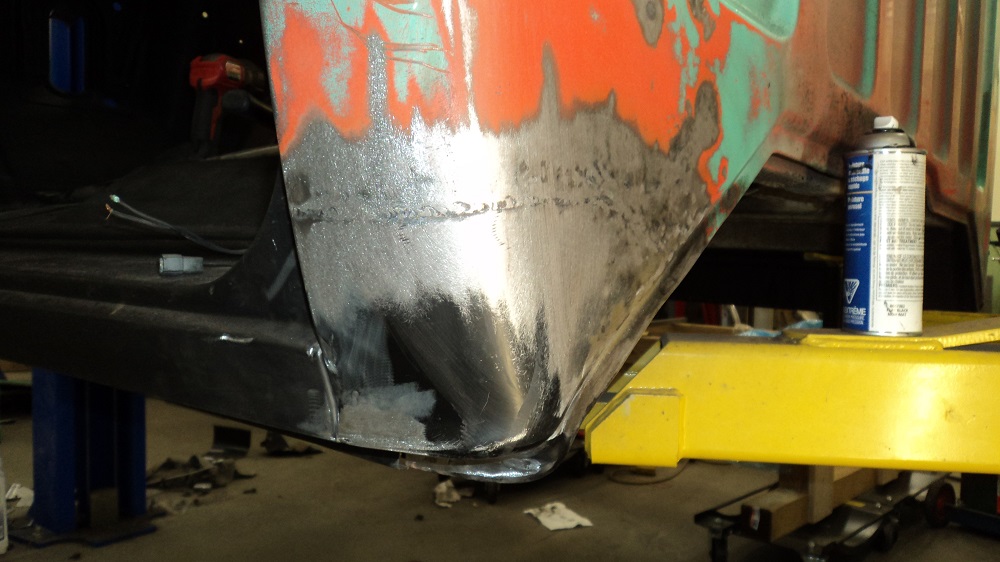
They ain’t gorgeous, but they are solid, and they actually ended up fitting relatively well. And yes – there was less shrinkage/distortion.
MIG is so much easier, and while it may be more work, MIG feels more productive.
It also took quite some time to stretch/shrink parts of the cab wall. That was un-fun.
Also filled two antenna holes (shortwave? two way? CB?) that had been caulked and plated many moons ago.
And filled the fuel filler hole. I bent the flange into the opening and planished it flat, then cut a patch from some e-coated offcuts, and gas welded that in. The gas welding certainly is WAY more malleable than MIG.
Filled the last rust repair on the cab. Thus endeth cab rust repair.
These’ll be good enough for a skim of filler. It ain’t gonna be master metal craftsmanship. Not yet, anyway.
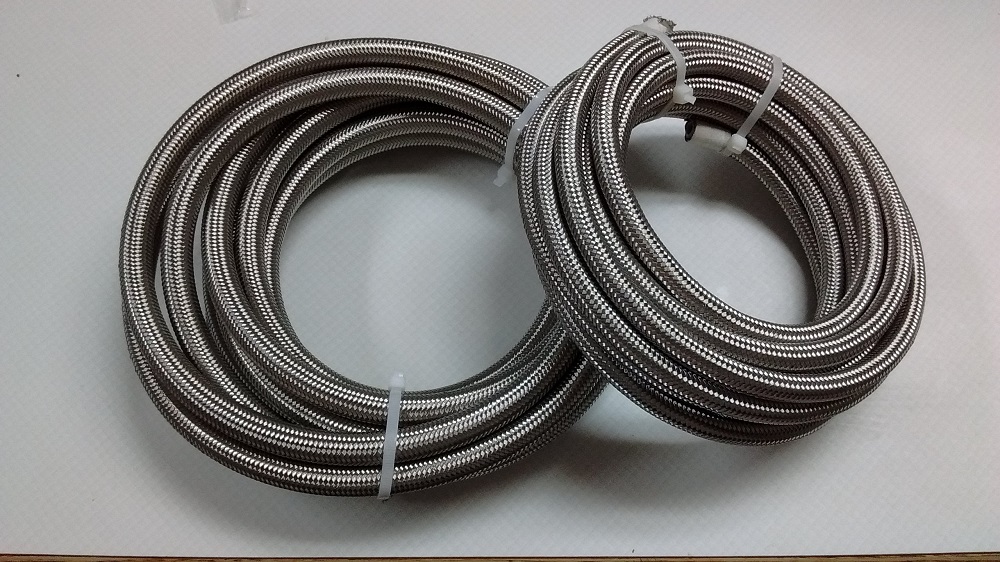
Fuel Lines
Oh, and fuel lines showed up. -8 for fuel feed (yes, that’s half-inch fuel line!), and -6 for return. PTFE to last longer, stink less, and be E85 friendly.