[ Start ] [ A/C ] [ Bodywork ] [ Bushings ] [ C-Notching ] [ De-Arced Leafs] [ Driveshaft] [ Drivetrain] [ Exhaust ] [ Lowered ] [ Quirks ] [ Wipers ]
Replacing the Carrier Bearing
One of the things that seems to rapidly wear out when you lower the Hardbody is the Driveshaft Carrier Bearing.
While I think mine was on its way out (vibration cruising at 55km/h in 3rd only), I replaced it. Turns out it may have been just insufficient pinion angle and not the bearing. Though the bearing did have a bit of play in it…. Nevertheless, here is how to replace it:
Replacing the carrier bearing was easier to do than I expected. Book time is 1.2hrs, I did it in 1.3 and was not hoofing it to do so.

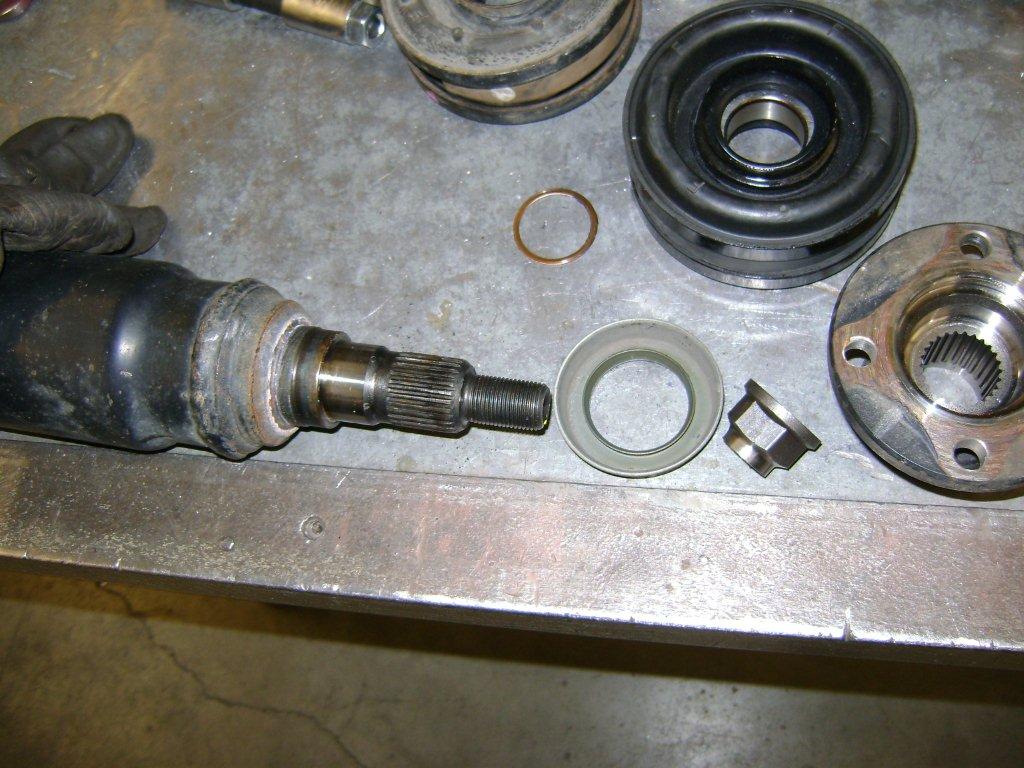
Here’s the beauty just itching to be replaced. Mark how all the pieces are attached so they go back together the same way.

Disconnect the four attaching bolts, and just let the rear half hang, or tie it up to the frame so you don’t bash your brains in with it.

Remove the two pieces of the OEM carrier bearing bracket.

Pull the driveshaft out of the transmission (fluid shouldn’t leak out, but be prepared for it if it does) and put it on the bench. Center punch the flange and the shaft so they can be re-assembled the way they came apart.

Use a 2 or 3-jaw puller to pull the flange off shaft. I forgot to take a picture of this part.

Use a bearing splitter and a hydraulic press to pop the bearing off the shaft. It shouldn’t be super tight.

Thin coat of lithium grease on the shaft and install the new parts with the provided new copper washer and nut. Check your alignment marks that you made. The bearing should have marks to indicate “front” – mine had “F” on one side.