[ Start ] [ A/C ] [ Bodywork ] [ Bushings ] [ C-Notching ] [ De-Arced Leafs] [ Driveshaft] [ Drivetrain] [ Exhaust ] [ Lowered ] [ Quirks ] [ Wipers ]
Trademark Nissan Mush Be Gone!
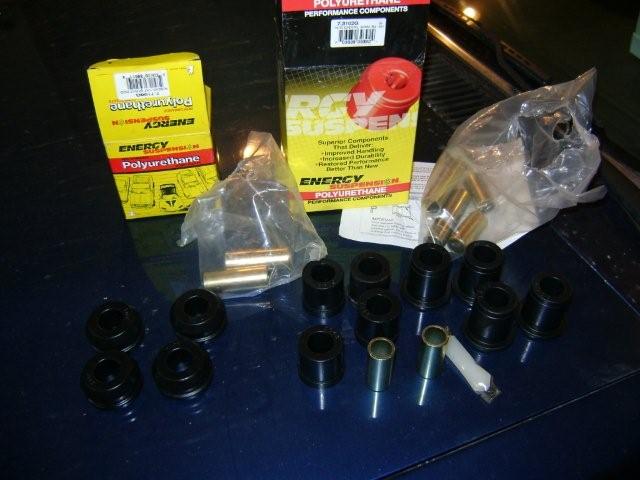
At 265,000km’s, the truck was worn. It felt tired. And Nissan’s soft bushings were once again to blame. There is no “Master Kit” for a Hardbody pickup. Instead, you buy the rear leaf spring shackle bushings (7.2103), the front control arm bushings (7.3102) and the front strut rod bushings (7.7106). The sway bar bushing kit (7.5108) was unavailable through my supplier at the time of the writing.
Leaf Spring Bushings
The rear leaf bushings are very straight forward. So much so that I have no real pictures. The leaf spring bushings took about an hour to change with no unusual tools. This should be a common repair, as the worn shackle bushings cause a weird snap in the back that you can feel through the entire truck when making a turn.

Worn out front bushings are easy to change.

As are the rear shackle bushings
Upper Control Arm Bushings
I changed the front bushings at the same time as I switched to BellTech spindles. The entire job took about twelve hours, but this included swapping the spindles and re-indexing the torsion bars.

See everything there?

Remove it.
The upper control arm is relatively easy. If your truck is fairly rusty, you will want a torch to help loosen the seized sleeves. The bushings come out and install quite easily.

Clamp the control arm in a vice and remove the nuts, lockwashers, and flat washers (save them).

Drill the bushing material out using a 1/4″ bit in as many places as you can.

Slide the control arm off the shaft

I ground one section flat until I broke through the sleeve, then pried the sleeve off with a pair of Vice Grips.

I Never-Siezed the old washers and new sleeves, and greased the bushing. Slip the control arm back onto the shaft.

Assembled!
Lower Control Arm Bushings
I wanted to see if these, too, could be removed without a torch.
Yeah, right. I am that masochistic.
I drilled them as much as possible, I used X-Acto knives, I used a rasp bit on a drill, I used files, I used a Burnz-O-Matic propane torch. These were not fun.
The best way to remove bushings is always a torch. Except the Hardbody bushings are IN the crossmember. This means that the resulting smouldering-rubber flame will burn whatever is above it (your engine), and soot everything up. Or I could just calm down and use less torch flame. The Oxy-Acetylene torch at work was out of Oxygen, and my truck was up on blocks. I scoffed the wee Acetylene Rosebud torch and cranked up the heat. Torch, baby. Don’t mess around.

Drill the bushing material out, twist and remove the inner sleeve, then burn what’s left keeping an eye on everything else that catches fire – this part is nasty.

Press in the new bushing and sleeve – this part is fun.
Radius Rod Bushings
This is a no-brainer. You have to remove the rods anyways to get the control arms off. These were no problem at all. I Never-Seized the works.

Disappointingly easy
Conclusion
A marginal improvement. The truck is a bit tighter, but nothing to write home about. Left front squeaks.