[ Start ] [ A/C ] [ Bodywork ] [ Bushings ] [ C-Notching ] [ De-Arced Leafs] [ Driveshaft] [ Drivetrain] [ Exhaust ] [ Lowered ] [ Quirks ] [ Wipers ]
Lower!

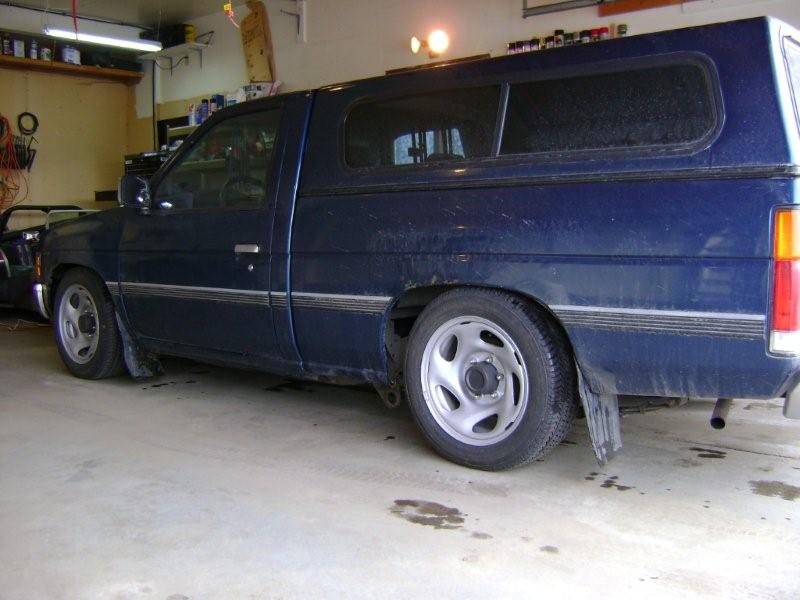
Because I’m an idiot, I bought this truck to lower it. I had to get right to it.
While there are a number of different ways to get your Hardbody lower, I explored some of the more common methods.
I did a wack of research to see what people have done, and which way to go (having learned my lesson doing it wrong with the Sinister Sentra) I’m going to explore lowering in a few stages, to see what works and what doesn’t, and hopefully wade through much of the garbage perpetuated by the non-analytical monkey-see-monkey-do masses.
No offense intended. At least not much….
Here’s what I did:
Lowering Blocks
I started lowering my truck in stages. The first way I went was with cheap and simple lowering blocks and unwinding the torsion bars.
I purchased a set of BellTech 3″ blocks, which came with all the hardware. The U-bolts were just long enough to engage the nylon in the Nylock nuts provided.

American viewers will notice one extra leaf spring in this truck – Canadian Hardbodies have a different spring pack than the states, adding another longer helper spring.
The installation was straight forward:
Installation
- Support the frame on jackstands
- Disconnect shock absorber bottom (not required, but makes it easier)
- Unbolt the existing u-bolts
- Raise the axle with a jack
- Insert blocks, making sure the locating pins are seated
- Install longer u-bolts
- Adjust load-sensing proportioning valve
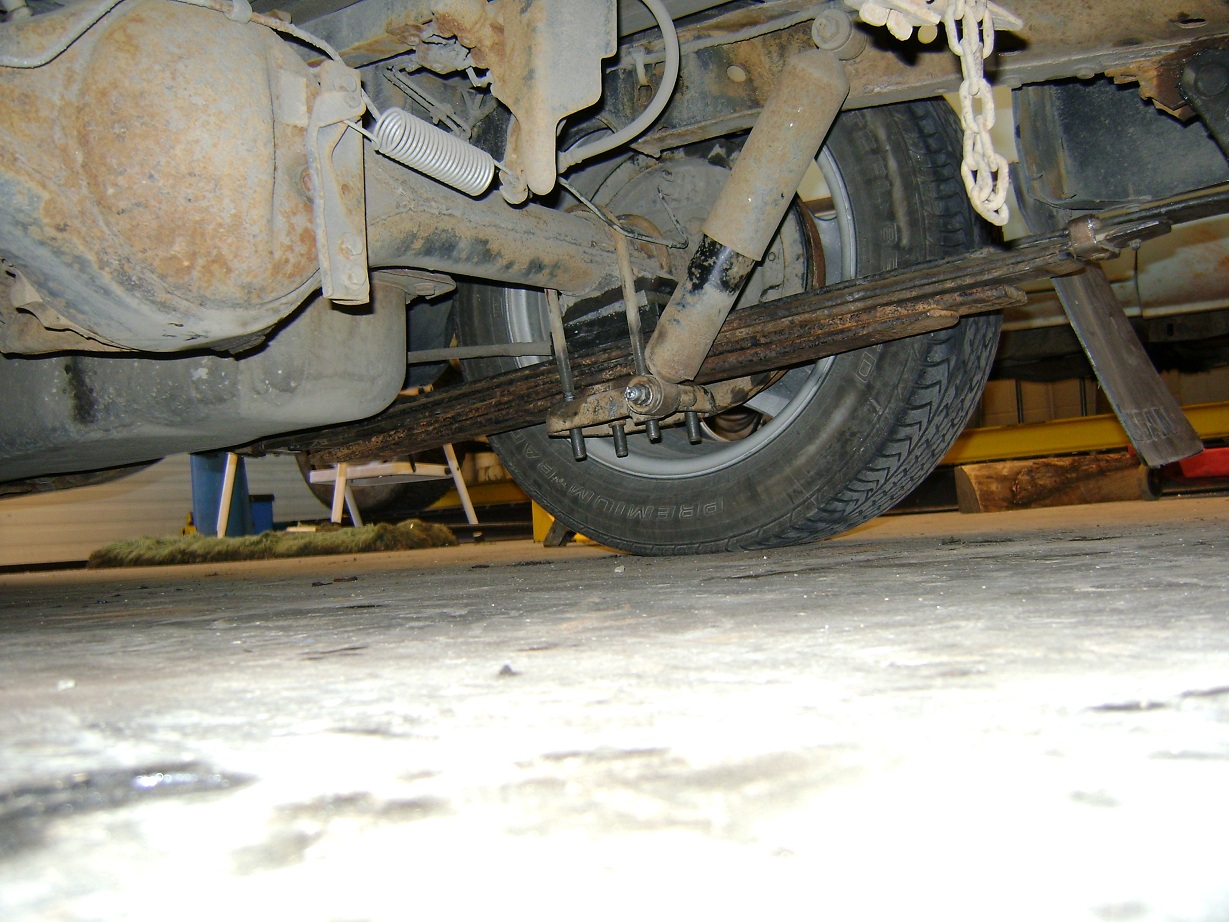
This made the rear of the truck significantly lower. There was also a slight vibration when taking off in 1st gear only, a result of excessive universal joint angularity at the reduced ride height. Common recommendation is to use 2° tapered blocks. I don’t think tapered blocks is the solution, because now the front and rear universal joints are operating at different (non-complimentary) angles. Instead, I machined 1″ spacers to raise the carrier bearing which completely eliminated the vibration. Then again, perhaps the increased spring-wrap because of the blocks is made up by the added pinion angle….
There was also not enough adjustment in the load-sensing-proportioning valve to account for the 3″ drop. I fabricated a bracket out of angle iron that re-located the axle-mount-end 3″ lower and it works perfectly (shown below with an additional 1-3/4″ added due to a later re-drill).

The Factory Service Manual says that proper ride height has the front fender edge 1″ lower than the rear fender edge. The front must be lowered to match!

Nissan is not particularly generous with suspension travel at the best of times. The Hardbody was no exception. In anticipation, I purchased Energy Suspension ultra-low profile bumpstops (#9.9132, 3/8″ thick). These required the mounting hole to be enlarged to 3/8″. I used a tapered drill bit and a 1/4″ socket on my air-ratchet just to save disassembling everything for a simple hole drilling.
I unwound the front torsion bars until the truck sat with a slight rake, leaving about 1-1/16″ gap between the lower control arm and the bump stop. This looked good. I jumped on the bumper to see how much travel I had. Instead of feeling lots of movement and the dull thud of the stop, I felt about 1/2″ movement and the metallic clank of the shock bottoming out. Nuts.

Short Shocks
The Hardbody forum I was frequenting at the time had numerous people recommending the use of Ford Pinto shocks. These shocks are 8.375″ compressed, versus the Hardbody’s 8.875″. Shorter, but is it enough?
I measured the travel I had at the bump stop and using the motion ratios determined that I needed a shock at least 1-1/2″ shorter than stock. The Pinto isn’t enough.
The 4WD Hardbody shock is 8.125″ compressed. Better, but still not enough.
Chrysler used a very short shock in many of their boats from the mid 70’s to mid 80’s. Monro-Matic #31176 is the shortest shock Monroe makes, at 7.125″. Perfect. It uses a stud on both ends, so the lower mount in the control arm needs to be modified.

- Drill the hole below the OEM shock mount in the control arm to at least 1/2″ (probably 9/16″ or 5/8″ would be better)
- Splay the sides of the OEM mount apart to fit the stud-mount bushing and washer (I used a large crescent wrench – I like my modifications reversible) OR remove OEM mount from control arm (angle grinder or cut-off wheel)
The #31176 shock is significantly shorter than stock, and will not let the front wheels droop as much as before. This shouldn’t be a problem, since you’re sitting lower than before. You will need to raise the lower control arm with a jack to complete the shock installation.

After installing, I drove around a bit to see what it was like. Large violent bumps would still bottom the truck (as before), but it seems (so far) that it bottoms less than with the original bumpstops at original ride height (well, front fender edge 1″ lower than rear fender edge as per FSM). The significantly lower roll centers (especially in the front) make the truck feel MUCH more confidence inspiring on the street. At factory ride height, it was somewhat scary with lots of body roll and high roll center (induces “jacking”). It feels so much better now.

Incidentally, torsioned down this far does not place the lower control arm angle too badly – I’ve driven far worse (strut cars – eww).
Dropped Spindles
Six months after I initially lowered the truck, I installed a set of BellTech dropped spindles. My rationale was so that the front-end geometry could be maintained as stock (reducing he truck’s tendency to oversteer because of a lower front roll center), my tires would not have to deal with excessive negative camber, and I could use larger, softer bumpstops to reduce the abruptness of bottoming.
At the same time as the spindles, I changed all the bushings to polyurethane.
When I disassembled everything for this job, I found that one of the Cordoba shocks was bent, while the other was blown. That was quick. I re-installed the factory bumpstop (for now), as well as the hardbody shocks (these were changed later – see Shocks II).

BellTech spindles provide a 2″ drop with no change in ride or load-carrying capability.

The tie rod ends must be shortened about 1/4″ to properly align the truck.

The brake calipers did not clear the spindle properly – I had to grind a large casting line back.

Some guys running 16″ GM Z71 wheels have clearance issues with the radius rod – not me! Tundra wheels to the rescue!
The truck wasn’t dramatically different with the spindles versus the torsion drop. There was something different, it felt slightly more “correct,” but the handling wasn’t significantly different. Not $270 worth of different.
The ride was more firm because I would hit the stock bumpstops earlier, but full bottoming was easier because of the large bumpstop. I got over this pretty quickly. Full bump is not as low – I don’t scrape the tires on the inner fender shields like I did torsioned.
Shocks Take II
About six months after installing the spindles, and unwinding the torsion bars a bit to get the rake I wanted, I got tired of the rough ride the truck had resting on the bumpstops. The bumpstops were compressed about 1/4″ at the ride height I wanted.
So I tried the Pinto shock absorber. It is not as short as the Cordoba, but shorter than stock and comes with its own bumpstop.

The factory bumpstop must be removed, and the bottom shock eye needs to be either trimmed and re-drilled to 31/64″ or pressed out and the Nissan shock eye sleeve pressed in.
A jack is still needed to raise the control arm for assembly – the shock has much less droop travel than stock.

Left-to-right: Cordoba – Pinto – Hardbody
The ride quality is almost significantly improved with the Pinto shocks – except the tires now hit the inner fenders
Dropped spindles and a set of Ford Pinto shocks will lower your truck more than the tires can move. Pinto shocks or 4WD Hardbody shocks might be a good move for a static drop without spindles, but they won’t be as low as the Cordoba shocks.
Shocks Take III
After one month one of the Pinto shocks was blown, and the tires hitting the inner fenders was unsafe. I pulled them and installed a set of 4WD hardbody shocks and the factory bumpstops.


I drilled four 3/8″ holes through the factory bumpstop to make them a bit softer.
Cross-drilling the full-length bumpstop allows the suspension to bottom out, but do so gradually. This makes bottoming much less abrupt, and yet still keep the tires from scraping the inner fender shield.

Top-to-bottom: Cordoba – Pinto – 4WD Hardbody – 2WD Hardbody
The nice thing of using the 4WD shock is the damping is much better, and the shock is a “truck” shock.
As of this writing, the truck is sitting 25-1/8″ from the ground to the 4WD fenderedge, the tires are 215/55R16 on Tundra steelies.
Re-Drilled Hangers
Redrilling the front spring hanger involves drilling a new 3/4″ hole higher up and slightly rearward in the spring hanger. The rearward relocation is to reduce any driveshaft loading on the rear transmission seal (or housing, if bad enough).
Common recommendation is to measure 2″ up. I measured 2″ up from the center of the original leaf spring mount and felt it was not high enough – there was room to be had and, by golly, like an idiot I was going to use it. I measured from the top of the hole (which, incidentally, is 2″ in diameter) and there wasn’t enough room to fit the spring eye. I settled on 2-1/2″ from the center of the original hole, and 1/2″ back (forums seem undecided between 1/2″ and 1″ back).
This required the removal of the original hardware, the disconnection of the shock absorbers (to allow the axle to droop enough to change my worn rubber bushing for polyurethane), the accurate measurement of the outside hole, drilling (I used a cool “stepped” drill that went from 1/4″ all the way to 3/4″ – you just keep drilling bigger and bigger), and the accurate measurement of the inside hole, and more drilling.


I had to use a large C-clamp to pull the spring eye forward enough to put the first bolt in (both eyes were disconnected at the time).
Be careful when drilling the inside hole on the passenger side, so that you don’t drill into the gas tank. That would be dumb.
While the process should be relatively simple, during the procedure I was also able to experience my 1/2″ hammer drill jamming into “hammer-only” mode, the shearing off of one e-brake cable bracket bolt, and the shearing off of my 1/4-3/4 stepped drill bit at 9:30pm rendering the procedure done for the day.
A 3/4 x 4-1/2″ UNF Grade 8 fastener with washers and lock washers was used. This fastener does not have the positive “stop” that the factory 12mm shouldered (or permanently corroded sleeve) fastener has, so you have to snug the spring eye up and hope it’s tight enough to hold without coming undone.

A more “OEM” method of doing this could be a 12mm fastener with a new sleeve (as supplied with the ES bushing kit) used as a stop, but frankly, I’m a bit nervous of using only a 12mm fastener for a front spring eye bolt. More thought is required here….
Relocating the front eye 2-1/2″ higher lowered the truck 1-3/4″. I had to unwind the torsion bars another 1/2″ to try and get the truck sitting level (dropped spindles were not installed at this time), which made the truck bottom virtually everywhere.

The significantly lower rear end bottom hard and frequently (bump stops had been removed), and made carrying any sort of load a ridiculous adventure. Sure I could C-notch the frame, but I would not be able to get the front any lower even with spindles to match the rear’s height. Furthermore, there was a horrid groaning/grinding from under the truck under coasting only (not accel/decel) which must mean I did not drill far enough back.
I was very, very, very unimpressed, and I returned it back to the way I had it the next day. The only way to solve all this is to weld the holes up and re-drill at 2″ up and 1″ back. And frankly, I don’t think I’ll bother. I prefer how drivable it is with a 3/3″ drop.
Yeah….. That lasted about six months. I had to try it again. I’m that stupid.
Re-Drill Take II Because I’m Stupid
I wanted to know for sure if the driveshaft was, in fact, bottoming in the tranny.
It wasn’t.
At ride height there was about 3/8″ free travel. After the re-drill there was over 1/2″ free travel (this happens because now the pinion is higher than the carrier bearing, so as the suspension compresses the driveshaft is pulled out of the transmission). At full droop, however, the driveshaft is fully bottomed in the tranny (this is bad, but not the problem I had).
I tried moving the carrier bearing slightly, thinking that it was the carrier bearing that was causing the noises. Placed as far back as I could (slotting the mounting holes) and installing at ride height, the noises went away for a day but came back. I tried moving the carrier as far forward as I could and installing at full droop. This was generally quieter, but the noise was still there. It could be that the carrier bearing needs tension, or that it’s just 265,000km of worn out and needs to be replaced. I’ll just turn up the stereo.
The other thing I noticed was some pretty awful vibration and stuttering on take-off. This was largely due to the bad pinion angle – I replaced the 3″ straight blocks with some 3″ angled blocks (2° angle) and the bizarre pinion issues was reduced, but not eliminated. I then took the angled blocks out, and machined a 5° taper on them and the problem went away.

The relocated front spring eyes had two other issues:
- The springs would wrap much more easier, and it is a annoying. Inspiration to replace the blocks with de-arced leaves.
- The rear is more responsive due to the geometry change (roll-steer) – the front spring eye is supposed to be lower than the rear eye so that in roll, the distance between the eye and the axle “shortens,” causing the axle to point into the turn which aids stability. Relocating the front eye causes less angle in the leaf, which induces less stability. NEVER have the front spring eye higher than the rear (spinning death). With the 2-1/2″ higher re-drill, the truck is very sporty feeling – it definitely wants to “turn in.”
So yeah, I’m ok with the re-drill now. But you MUST use angled blocks, and drill 1″ back.
And it doesn’t bottom really, with no canopy, which probably makes a big difference. I installed some air shocks this summer so I can raise the back whenever I’m carrying dixie cups and feathers and empty boxes.
I later c-notched the frame for more clearance….
UPDATE
The next thing I did was de-arc the leaf springs in an effort to get rid of the lowering blocks. This had its own extensive set of problems, which you can read about.