[DESIGN] [ISOMETRIC] [ORTHOGRAPHIC] [DIMENSIONING] [SAFETY] [SAFETY-BOOKLET] [TOOL-BOX] [MEASUREMENT] [TIME-MANAGEMENT] [BASIC LATHE-OPERATIONS] [PRECISION-MEASUREMENT] [THREAD-CUTTING] [FABRICATION-TIPS]EXPECTATIONSBefore we get into this, I want to be very clear on some expectations: RESPECT
ATTEND
TRY
PRODUCE
FOLLOW INSTRUCTION
MAKE YOURSELF EMPLOYABLE
I’m hoping this isn’t new to you (but I’ll know pretty quick if it is).
GET STARTED!Let’s establish some foundation skills. You all want to build something, I get that. But without some foundation skills, once I unleash you onto the tools and materials, you’re likely just going to turn good material into garbage, and possibly damage the machinery in the process. Wasted material costs will go through the roof, and I start to question my career choice. (my materials costs have also quadrupled since I started teaching, while my budget has been cut in half). I also totally do this stuff for a hobby; this stuff works. Note to self: CLICK HERE for “Introduction Pages” of shop booklet
|
||||||||||||||||
DESIGN |
||||||||||||||||
SKETCHING |
||||||||||||||||
|
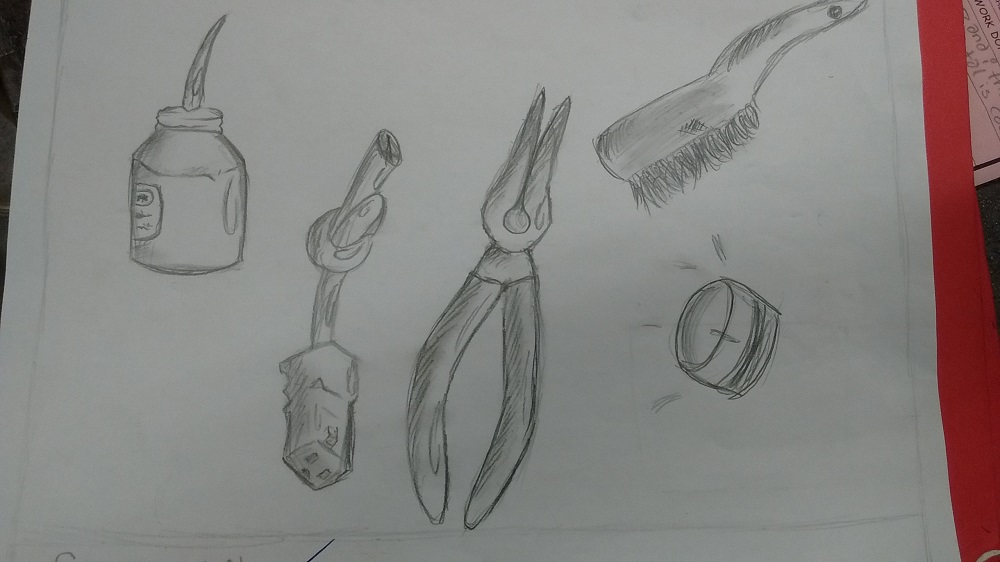
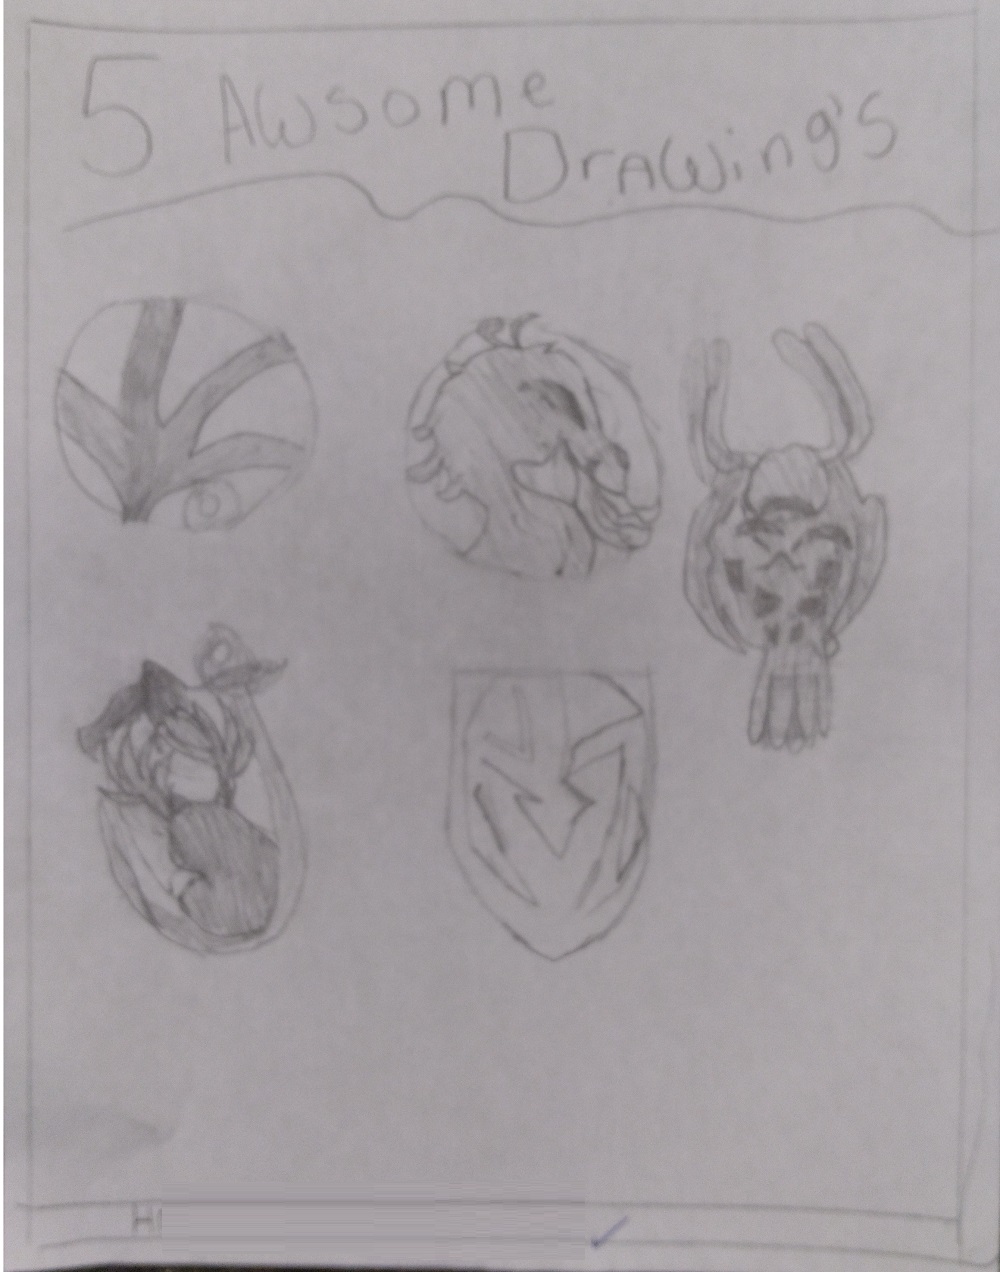
All designs use drawings. Some people are very good at drawing, some less so. But sketching is still an important part of conveying the information you need to get across. DEMONSTRATION (NOT ASSIGNMENT)
ASSIGNMENT #1
|
||||||||||||||||
ISOMETRIC SKETCHING |
||||||||||||||||
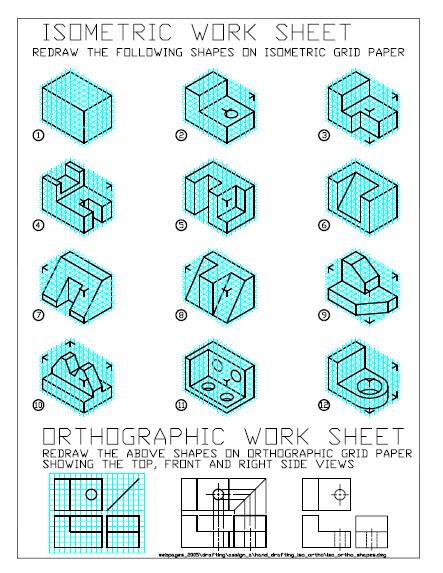
LESSONThis style of drawing is best used to show what the completed object LOOKS LIKE. It sucks to WORK FROM. Some people cannot visualize things – this drawing style is best for those people to SEE what you’re going to build. Both the left and right sides come off at a 30° angle to give it a more realistic appearance (but it will look slightly distorted – no “perspective”). This is the hardest to draw.
You want to show the VIEW with the MOST DETAIL. You want no details “hidden.” Notice the arrangement of each view on the sheet below. These views show the MOST information of the object. If you were to look at the object from any other angle, you would NOT be showing useful information.
DEMONSTRATION (NOT ASSIGNMENT)ASSIGNMENT #2THIS IS NOT TRACING – Kindergarten is over, move on. AT NO TIME will I EVER accept TRACED drawings. THIS IS NOT TRACING. Accept it.
|
||||||||||||||||
ORTHOGRAPHIC SKETCHING |
||||||||||||||||
LESSONThese drawings are ALWAYS used in plans and designs and blueprints. These are THE BEST for FABRICATION. You need to be able to read these. They are, however, are harder for some people to visualize the finished product.
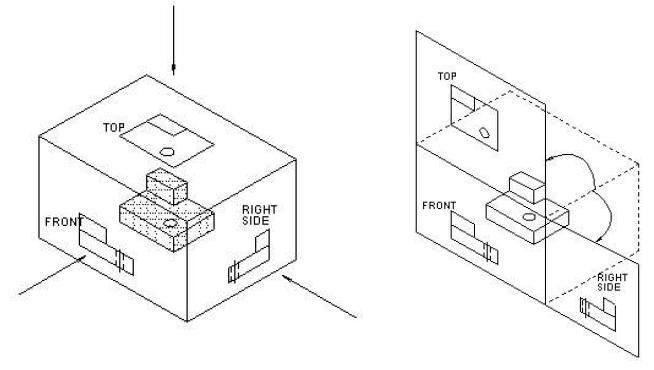
The object is drawn with three separate views (Top, Side, End) that are “projected” off of each other. “Projected” means that the TOP VIEW IS DIRECTLY ABOVE THE SIDE VIEW, and that the END VIEW IS DIRECTLY BESIDE THE SIDE VIEW.
Kind of like drawing on a box, and then unfolding the box. This is the hardest to type of drawing to understand.
DEMONSTRATION (NOT ASSIGNMENT)You arrange the object sides to show the MOST DETAIL. Kind of like how a photograph shows the FRONT of your head, not the BACK. The front is useful information. UNIQUE TO ORTHOGRAPHIC DRAWINGS: Hidden details (like holes and edges on the opposite side or inside) are show as a DASHED LINE. IE: Stuff that IS THERE, but you CANNOT SEE, are drawn in a dashed (hidden) line.
TWO OF THESE ARE DRUNK:
THE VIEWS MUST LINE UP!THE SIZE BETWEEN VIEWS MUST BE CONSISTENT
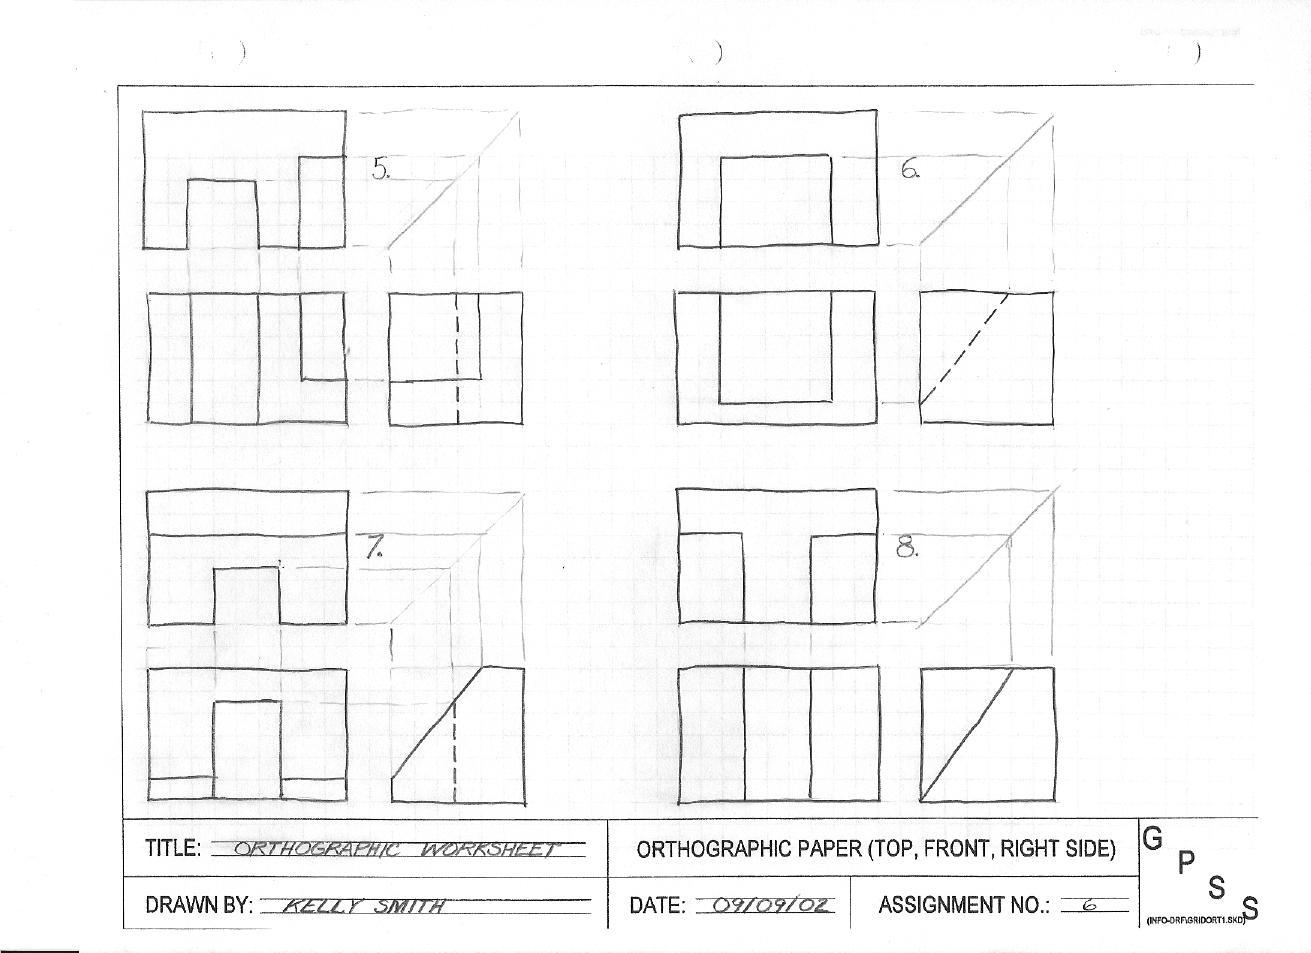
ASSIGNMENT #3THIS IS NOT TRACING – Kindergarten is over, move on. AT NO TIME will I EVER accept TRACED drawings. THIS IS NOT TRACING. Accept it.
|
||||||||||||||||
DIMENSIONING |
||||||||||||||||
LESSONAll Manufacturing and Fabrication Industries depend on Drawings. Without Drawings, nothing can be manufactured. We’ve looked at Drawings. Now we need to look further. The “drawings” that companies use to “Work” from are called “Working Drawings.” A Working Drawing must have enough information that someone could build the object as specified. A Working Drawing must:
ASK YOURSELF: “Can this object be built without further instructions?” The more things you build, the more you will be able to know what needs to be listed. You will know what you need to know, bro. There are rules; there is a way Dimensions are given:
Example:
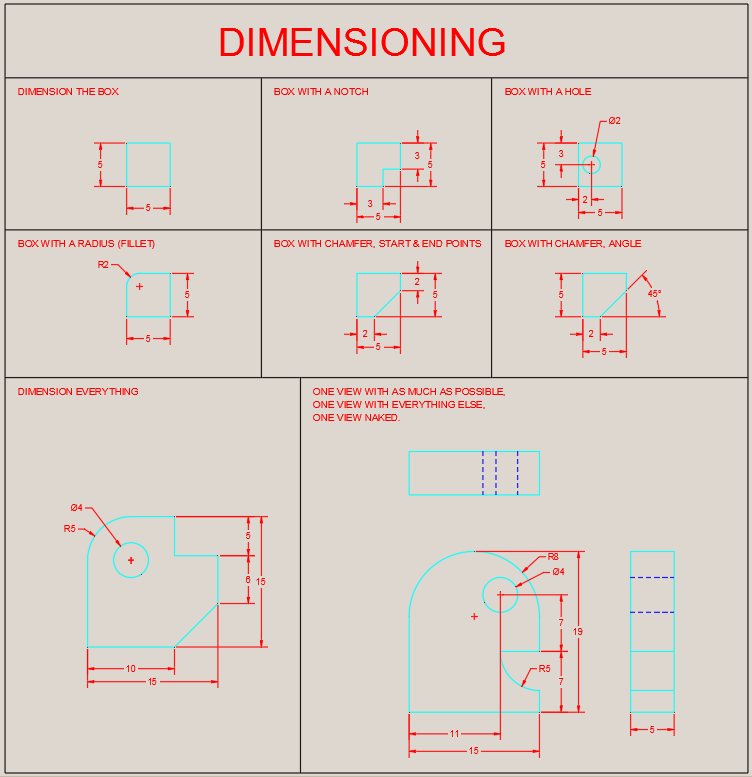
WORKSHEETIn class, I usually lead you through the filling out of this worksheet: CLICK HERE to print the Dimensioning Notes Worksheet, and make each shape look like the one below:
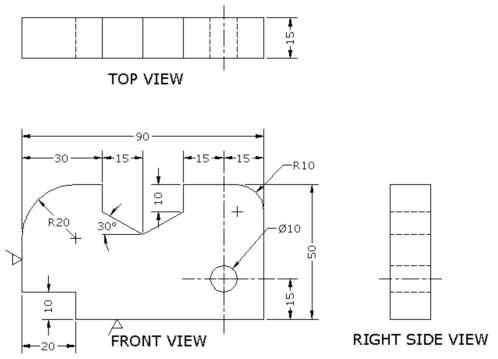
ASSIGNMENTCLICK HERE to print the Dimensioning Assignment Worksheet, and FOLLOW THE NOTES ABOVE to dimension the shape.
MARKS : “Competency” – You will receive full marks when this is dimensioned adequately.
Is it kicking your butt? DO IT yourself first, then if you have to…. watch this Video Solution (it doesn’t have to be exactly as shown, but you should show enough information).
|
||||||||||||||||
SAFETY, TOOLS, MACHINES |
||||||||||||||||
|
Level 0 WORKSHEET to go with Level 0 POWERPOINTLevel 1-3 WORKSHEET to go with Level 1-3 POWERPOINTYou must pass a SAFETY QUIZ with AT LEAST 80%The Quiz is on THESE NOTES and MACHINE DEMOS
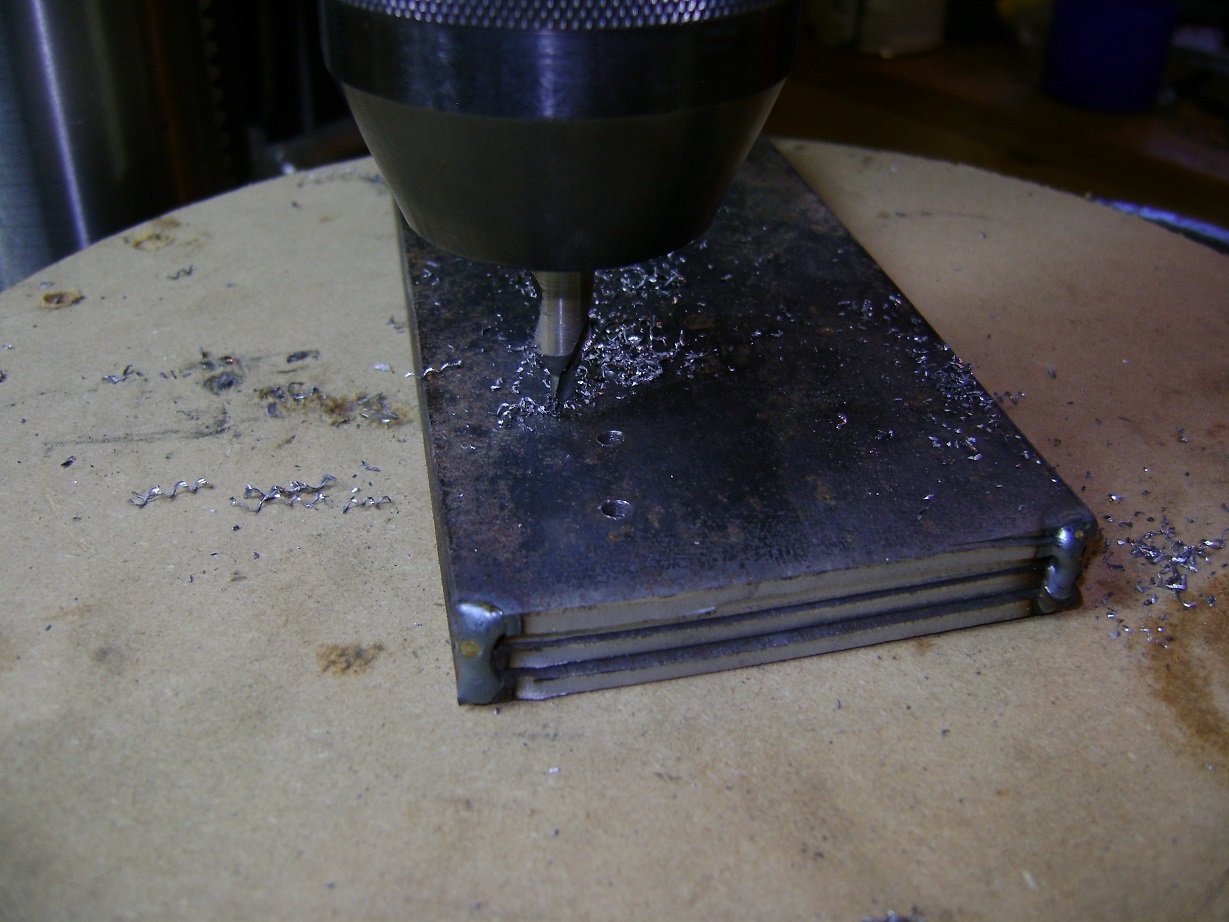
By the way, consider using cutting oil when drilling:
|
||||||||||||||||
ASSIGNMENT – Safety Booklet |
||||||||||||||||
The Purpose….In this activity you will be producing a word processed handout on the safety of a machine. This should be review, however it’s been a long summer, and most of our brains have turned into mush, so we may need a refresher. The Procedure…You will work in groups set up by your Instructor. Each group will be randomly given a topic for which they must present an exactly 2 (two) page handout. The handout will describe each safe operation of the machine such that anyone in the class will be able to understand. Use Google to find your information. The handout must contain the following:
To make it easier, follow these easy steps (You will find this course MUCH easier if you will take the time to read the instructions!): Research the topic – gather as much information as you can Select the Need to Know basic safety Outline the steps needed to operate the machine safely, or to perform the task Organize the information into a presentable format (POINT FORM is best) Show your Instructor your progress and ask for suggestions Word process the handout, check for misteaks and hand in! ConclusionYou are done when you have completed and handed in a high quality, professional handout on your machine/process/future-technology. ReflectionWhat did you learn about communication? How did you enjoy working with your partner? What difficulties did you encounter? What was the most effective method to convey your information?
There will be a SAFETY QUIZ following these units, on which you much achieve at least 80% to pass. Students will make full-sentence corrections for any question they got wrong. Students achieving less than 80% will need to write their corrections in a full sentence and re-write the quiz until they do achieve at least 80%. It is in your best interest to study the materials before hand.
|
||||||||||||||||
ASSIGNMENT – TOOL BOX |
||||||||||||||||
|
In this activity you have $1000 fictitious dollars to spend on tools for your basic kit of metalworking tools. You must determine what tools your kit will consist of, and how much you wish to spend on each tool. Level 1: Hand tools only (do not include consumables, like oil or rags) Level 2: Power tools only (do not include consumables, or drill bits or impact sockets) Level 3: Precision Measurement tools Level 4: Lathe (D1-4 chuck) and/or Milling Machine (R8 Collet) tooling (assuming you have a basic, complete, machine)
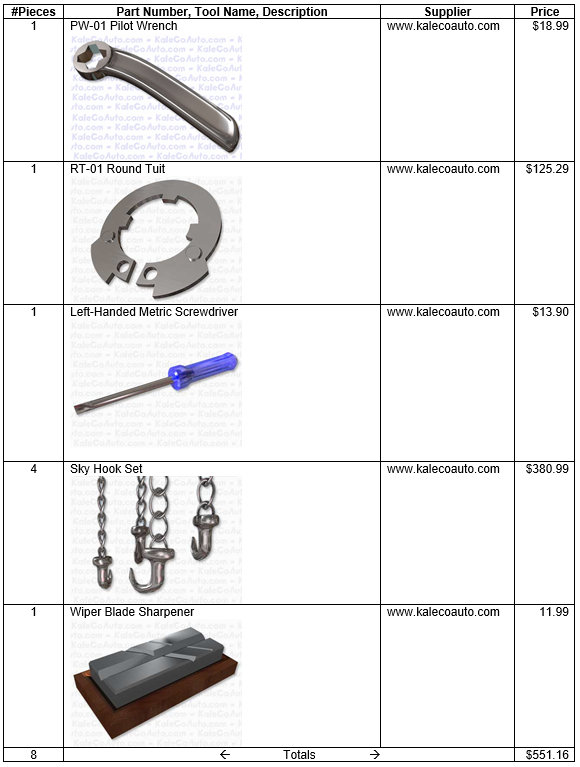
WHAT I’M LOOKING FOR:You may not be OVER $1000 You may not be less than $995 You may use Canadian or American dollars only. Do NOT include taxes or shipping. You must source a REAL store, with NEW tools, not Castanet or eBay or the like. You will create a TABLE using Microsoft WORD, set up with FOUR columns, like this:
In MS Word, you can TOTAL the #Pieces and Price columns easy: Click in an empty cell at the bottom of the column. Go to [TABLE TOOLS] -> [LAYOUT] -> “=SUM(ABOVE)” Watch the person beside you use their calculator, and start laughing loudly at them. Point out that this is in both BOLD, ITALICS, and COLOUR
|
||||||||||||||||
MEASUREMENT |
||||||||||||||||
Woodworker Level: Fractions |
||||||||||||||||
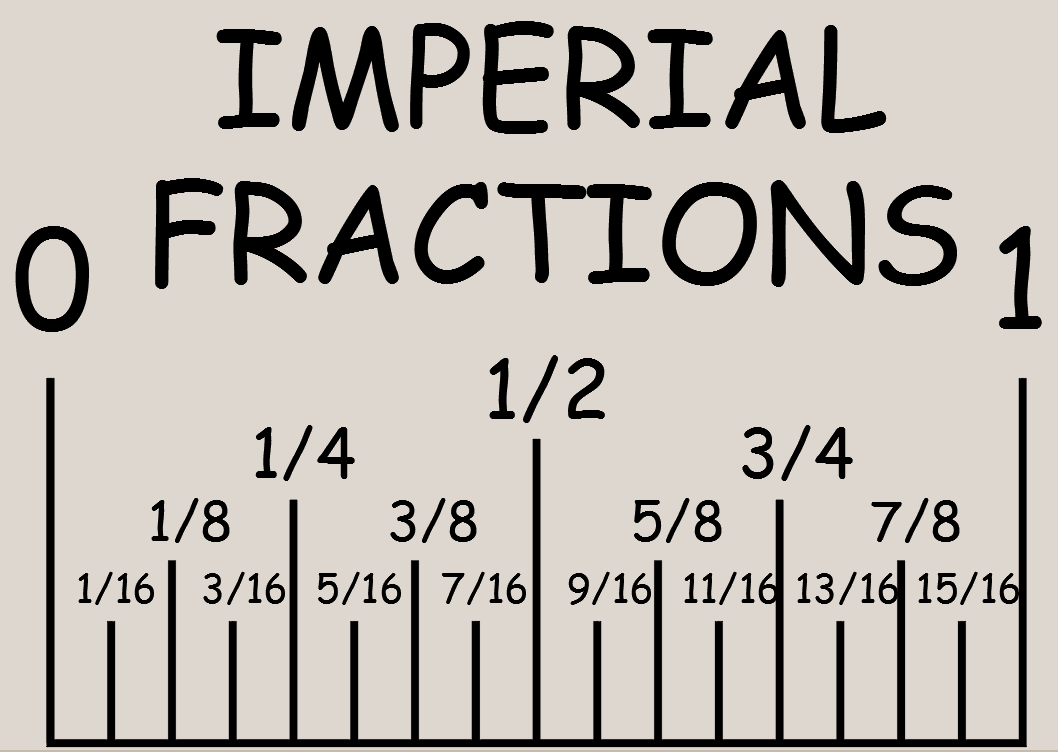
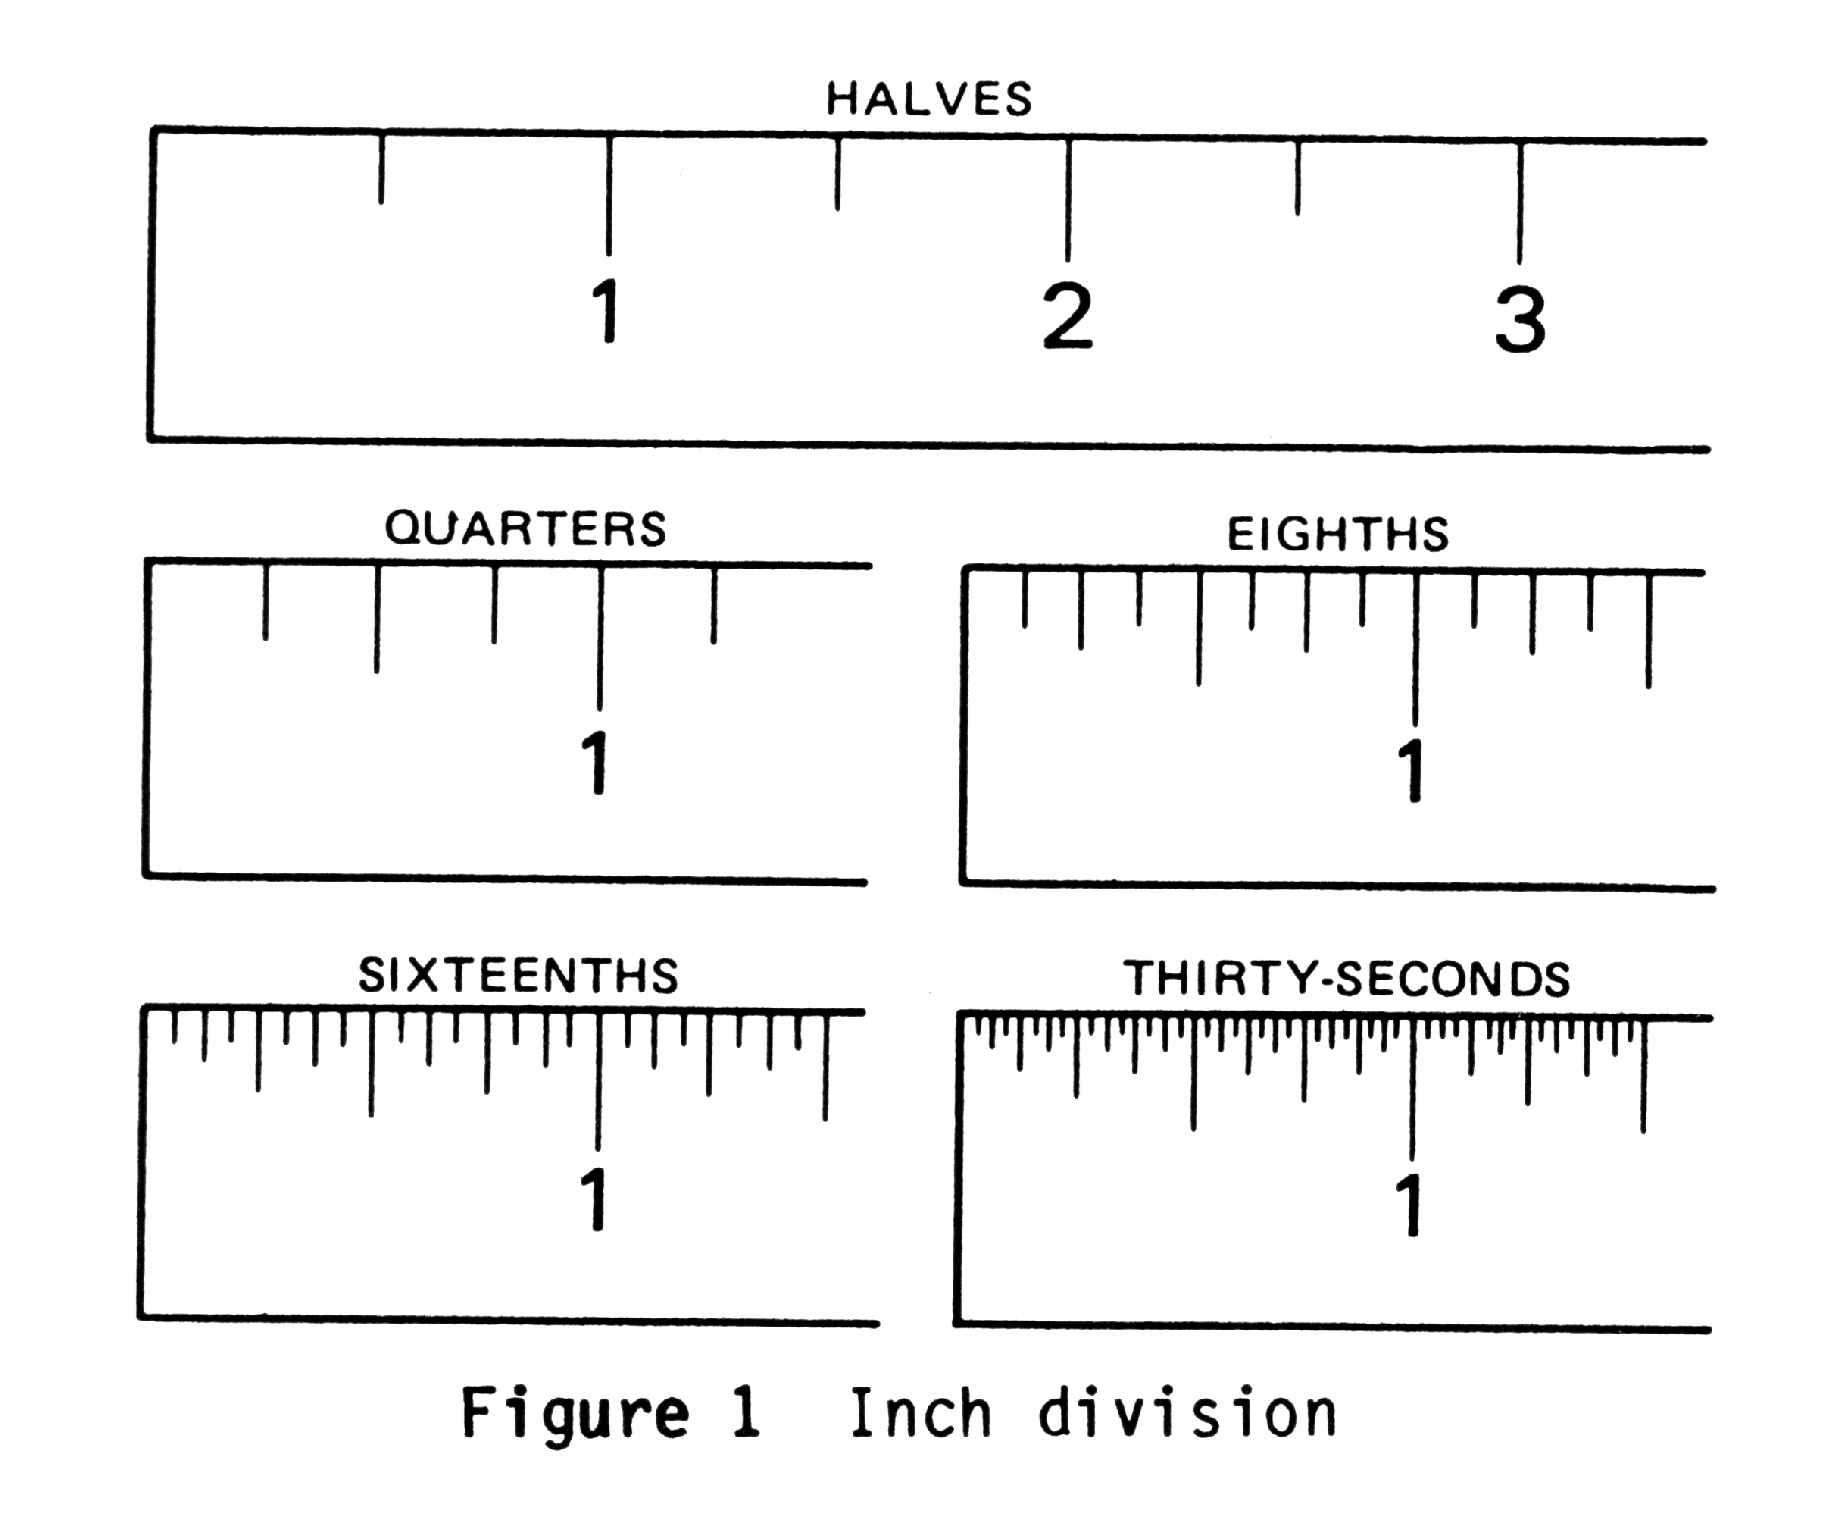
LESSONThe basic measurement you will need to work with can be done with simple a ruler or a tape measure. For many projects, whether wood or metal, this is fine. While you may have learned to measure in Metric, once the US get with the freaking program of the entire freaking Globe, we’re still stuck with measuring in Imperial (feet and inches, and lovely fractions). We’ll try to make it easier for you:
If I bake a blueberry pie, and cut it into two pieces and gave you one piece, you will have received 1 of 2 pieces. 1 out of 2. If you scored 1 out of 2 on a quiz, it would look like: 1/2. A smart cookie would also know that scoring 1 out of 2 on a quiz is only 50%. Half a dollar is 50 cents, or 0.50 of a dollar. You know all that stuff they taught you in math? Yeah – this is where you use it. Hope you were paying attention.
ASSIGNMENTUsing the lesson images above as a reference, CLICK HERE to print the worksheet for Imperial Fractional Measurement. I don’t usually go much smaller than sixteenths when using a ruler. If I need to be more precise, I use something better, something easier – Precision Measurement! (Coming up)
|
||||||||||||||||
TIME MANAGEMENT |
||||||||||||||||
|
The dream: I want to help each and every one of you learn lots and do your best. The reality:
I provide LOTS of Project Booklets and Setup Posters and Hand Outs to help you succeed. USE THEM. It’s like another “me” in the room to help you (only less annoying). I DO NOT HAVE ENOUGH TIME IN THE CLASS TO DEMONSTRATE EVERY STEP OF EVERY PROJECT TO EVERY STUDENT INDIVIDUALLY.LEARN TO LEARN
Don’t be afraid to ask for help – but do YOUR part to help yourself too!
GIVE ME YOUR EFFORT
|
||||||||||||||||
BASIC LATHE OPERATIONS |
||||||||||||||||
WORKSHEET (Updated 2024)to go with POWERPOINT
|
||||||||||||||||
PRECISION MEASUREMENT |
||||||||||||||||
Metalworker Level: Thousandths |
||||||||||||||||
|
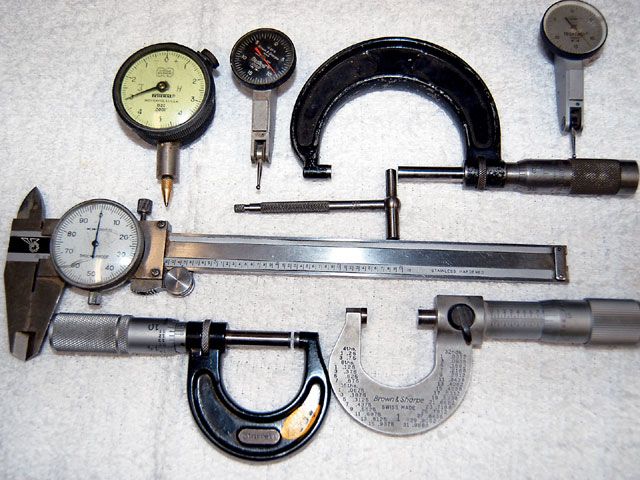
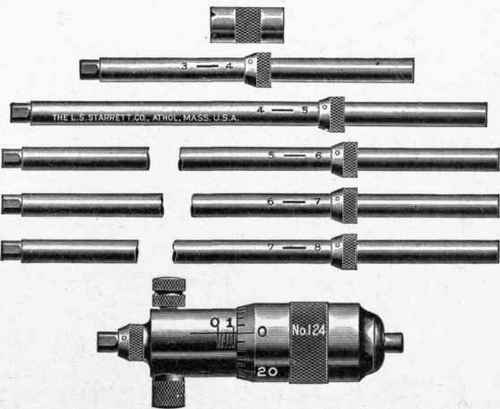
Precisely fitting parts must be precisely made. The difference between “not fitting,” “fitting” and “way too lose,” can be as little as the thickness of your hair! You cannot measure this wear with a ruler, you must use more precise tools such as a Micrometer, and a Vernier Caliper, or Dial Caliper.
For Teaching: VIRTUAL MICROMETER
For Teaching: VIRTUAL DIAL CALIPER
ASSIGNMENTS
|
||||||||||||||||
THREAD CUTTING |
||||||||||||||||
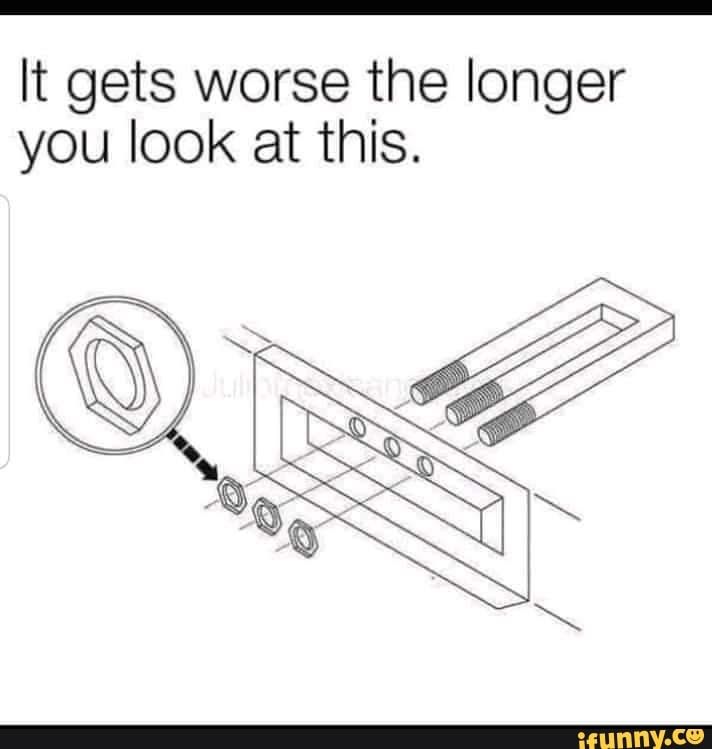
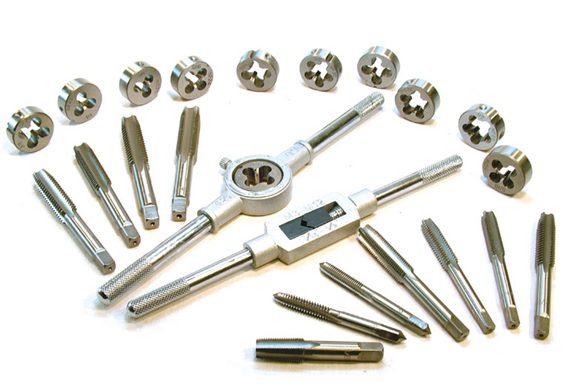
LESSONYou will likely build a project that is assembled with threaded fasteners. While anything could be assembled with nuts and bolts, sometimes it is super handy to have bolts that thread into the part itself. Like when you can’t actually get to the back side of the assembly, for instance. The tool we need is a Tap & Die Set. These are commonly available in Metric and in Imperial (SAE). Threads cut inside a hole are done with a TAP, whilst threads cut on the outside of round stock are done with a DIE.
INTERNAL THREADS In order for the TAP to work, the CORRECT SIZE hole must be drilled. If the hole is too big, the threads will be really loose; if the hole is too small, the tap may not cut, or it may jam and break off. Then you are screwed. To make sure you drill the right size (and they are SPECIFIC), you need to have a TAP-DRILL CHART (<<< Click to print a copy) Handy Tips:
EXTERNAL THREADS In order for the DIE to work, the metal diameter must be EXACT. If it is too large, the die may not cut at all; if the diameter is too small, the threads will be really loose. The material diameter MUST be that of the fastener diameter. A 3/8″ thread can be cut in 3/8″ diameter metal. The same handy tips apply for dies.
A NOTE ABOUT THREADS: If you don’t have the RIGHT thread, you have the WRONG thread. Any thread other than THE RIGHT THREAD, is THE WRONG THREAD.
IMPERIAL (SAE) THREADS
METRIC THREADS
THREAD LAW:
ASSIGNMENT:POWER POINT for WORKSHEET.You want the FIRST COLUMN of drill sizes (the second column is for -rolled- threads, we want -cut- threads).
|
||||||||||||||||
FABRICATION TIPS |
||||||||||||||||
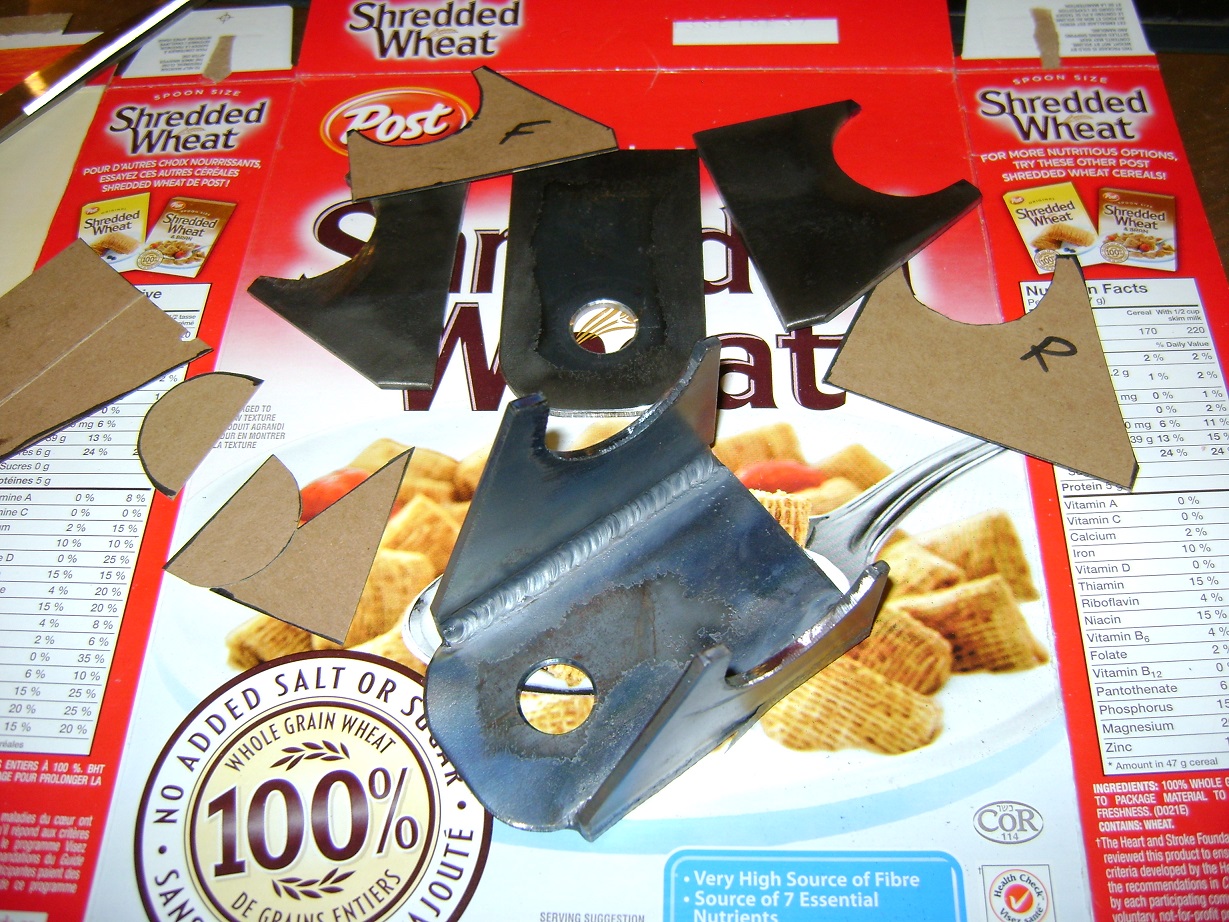
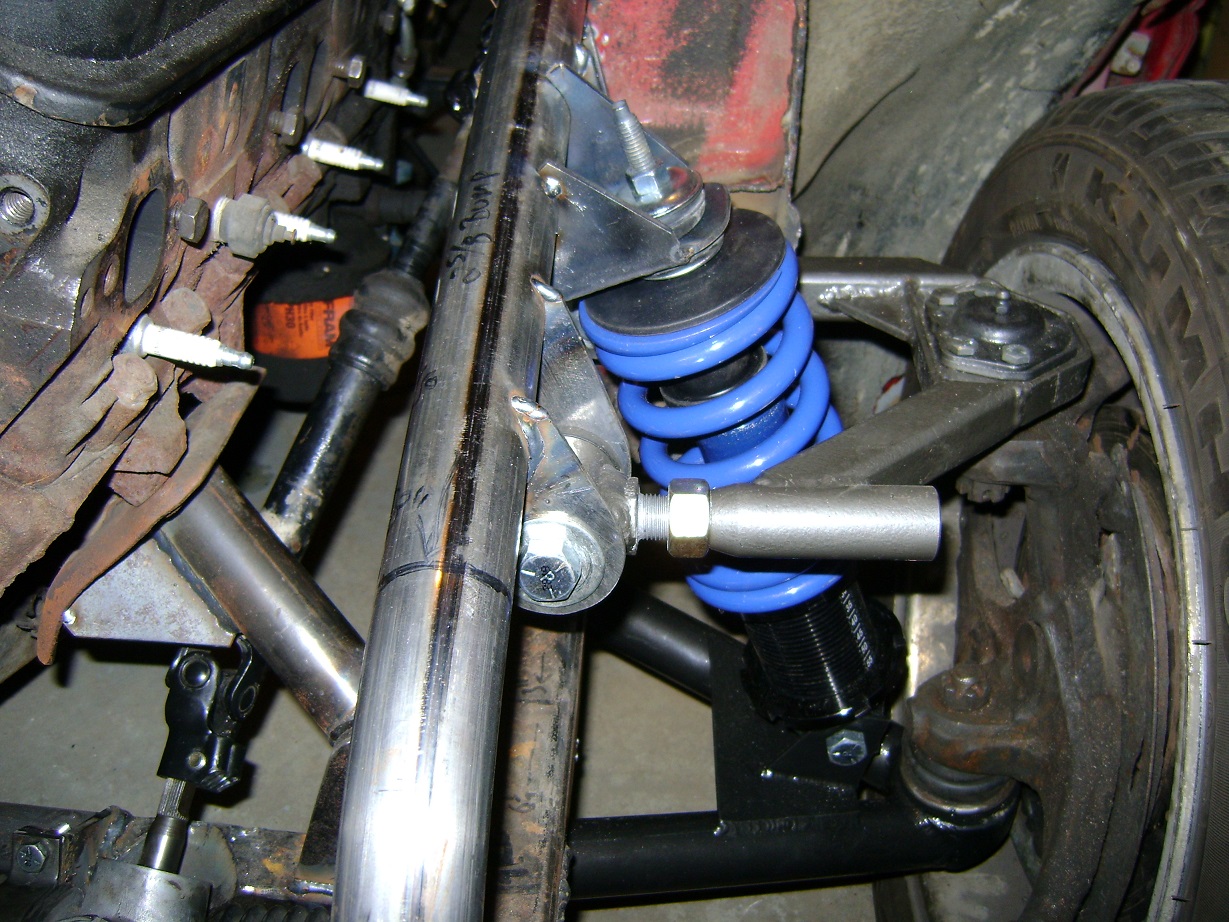
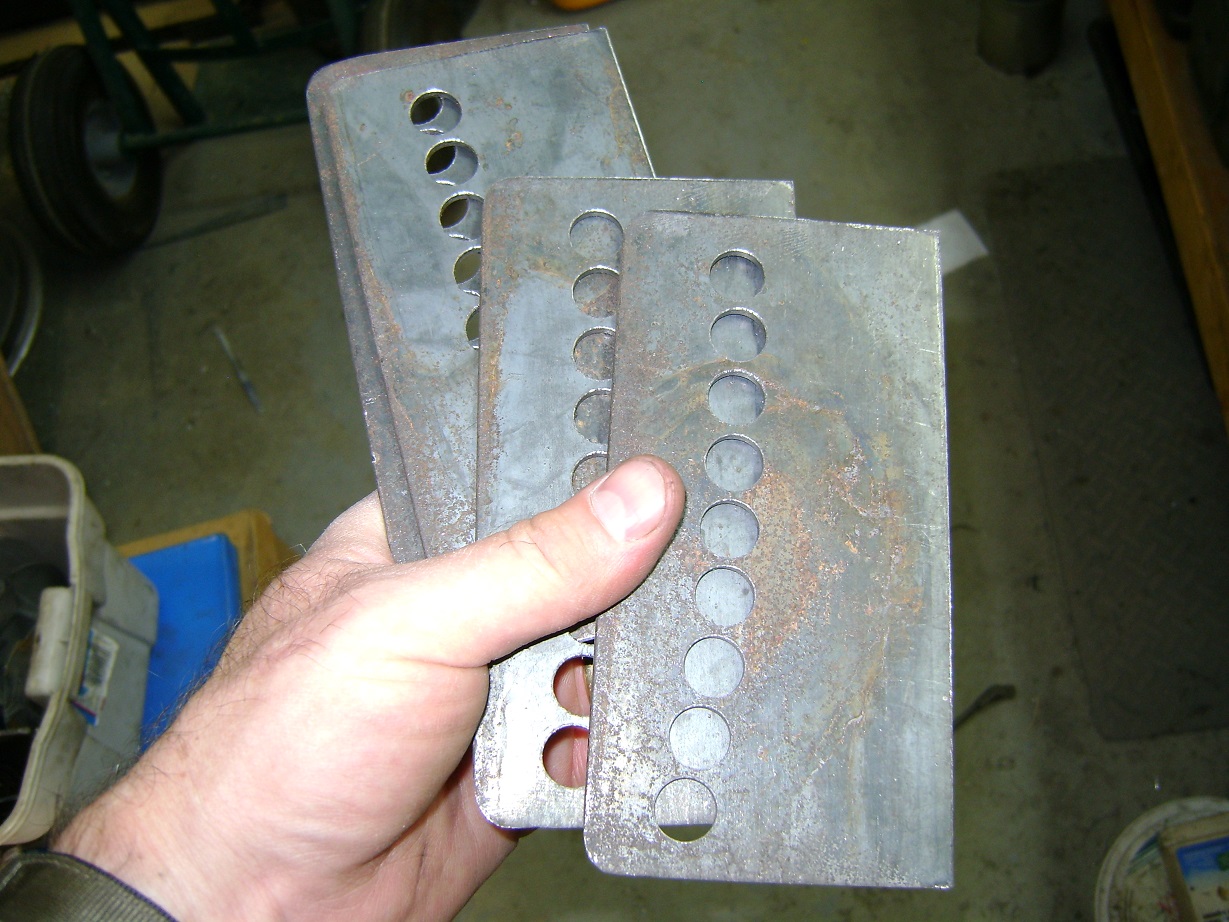
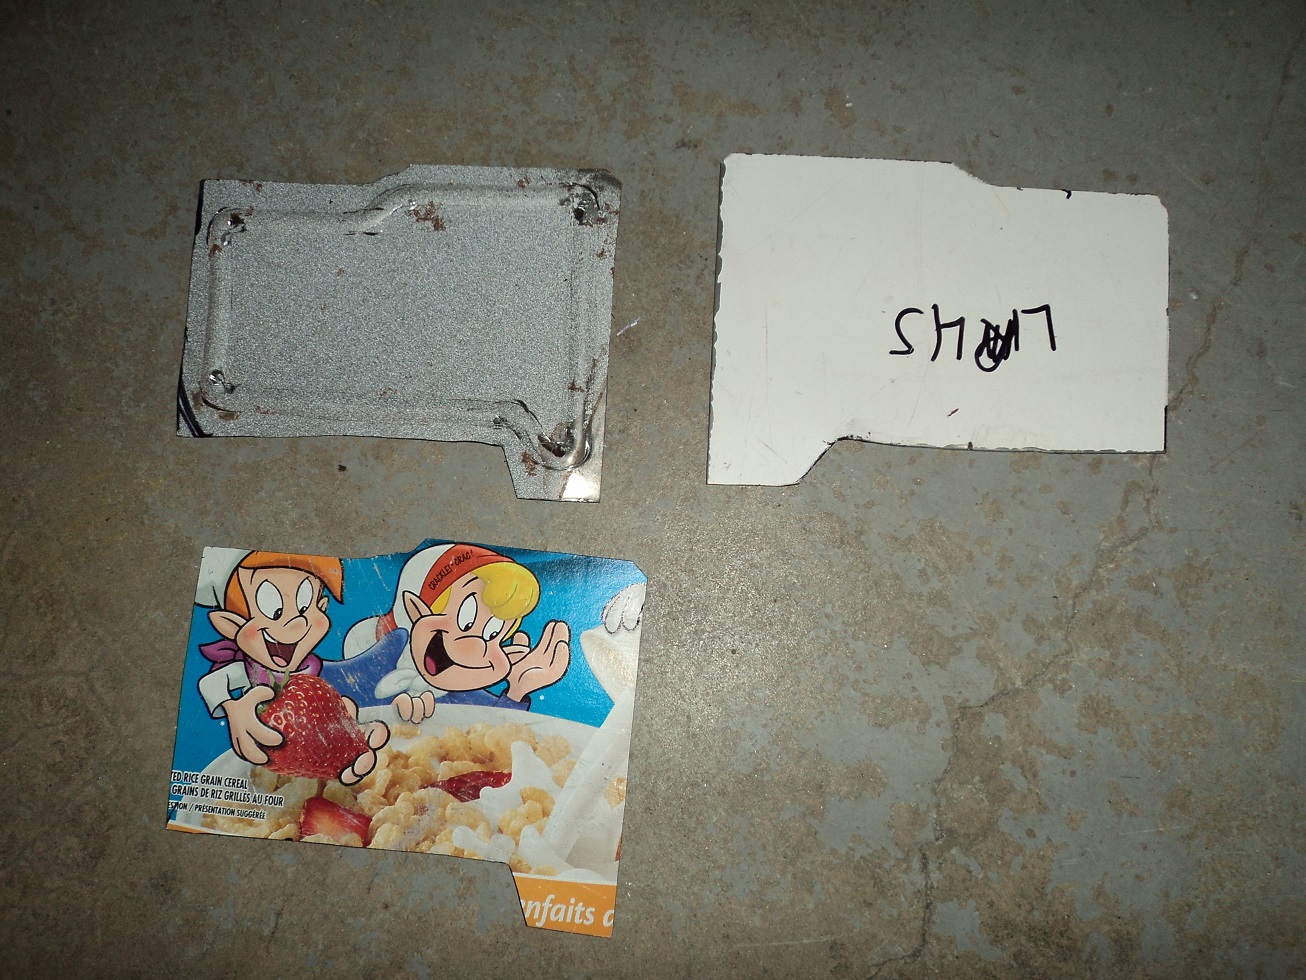
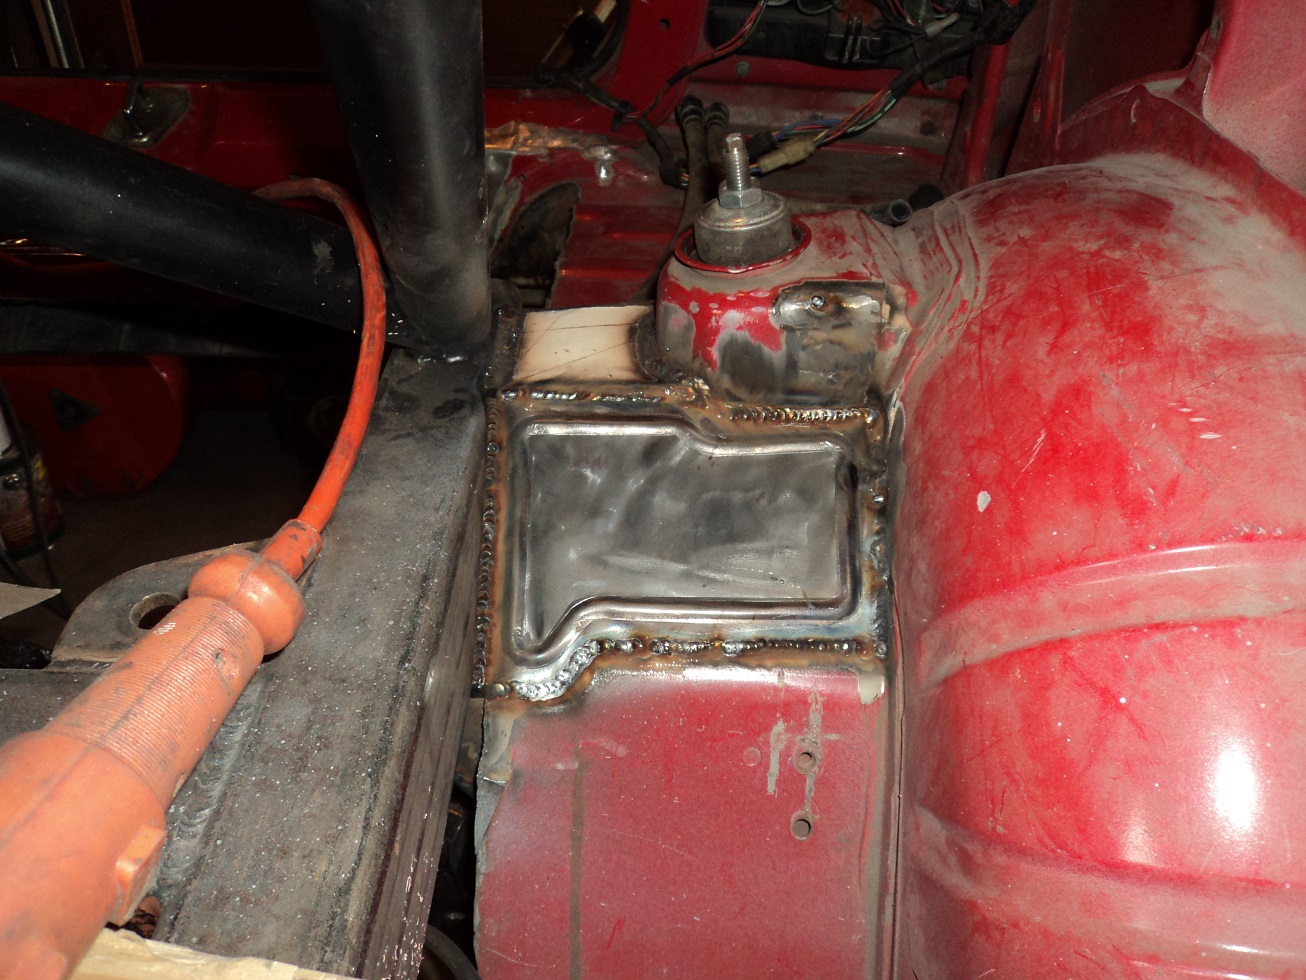
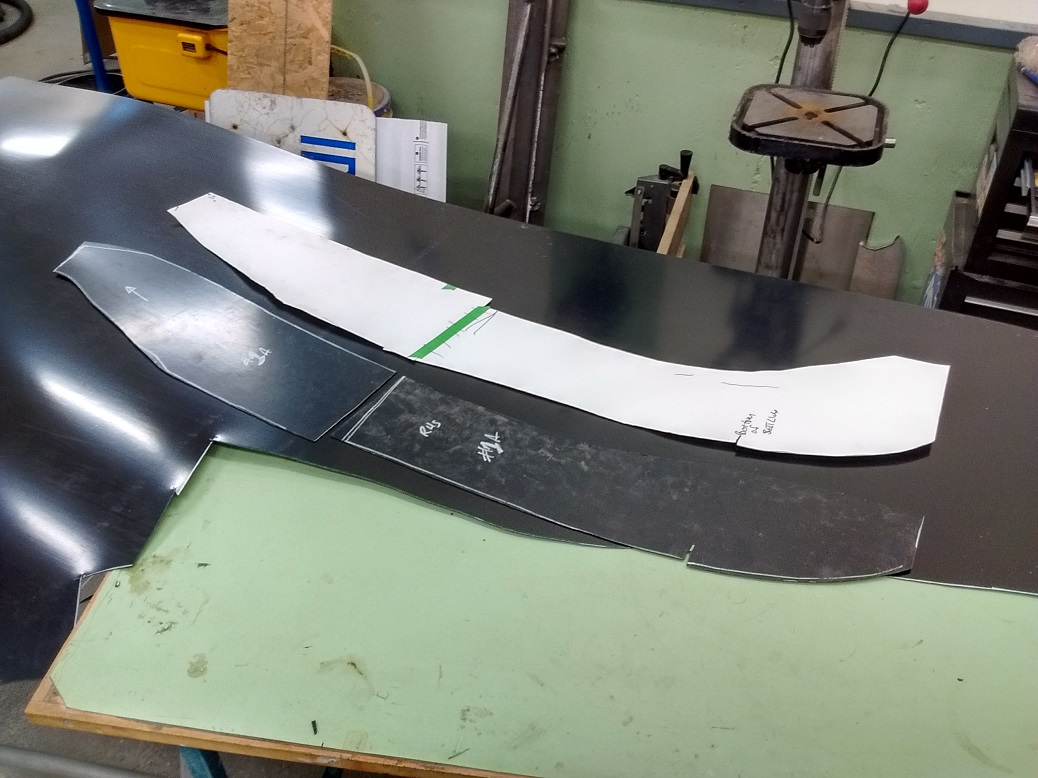
Cardboard PatternsCardboard is WAY cheaper, and WAY faster to mock something up to see that it fits, than going straight to metal. Once you KNOW the cardboard shape will work, THEN you have a pattern to work it out of metal. Flip the pattern over for a mirrored part! If you can’t make it out of cardboard, you won’t be able to make it out of metal. Shock mounts for a project car I built (cardboard, steel, and welded):
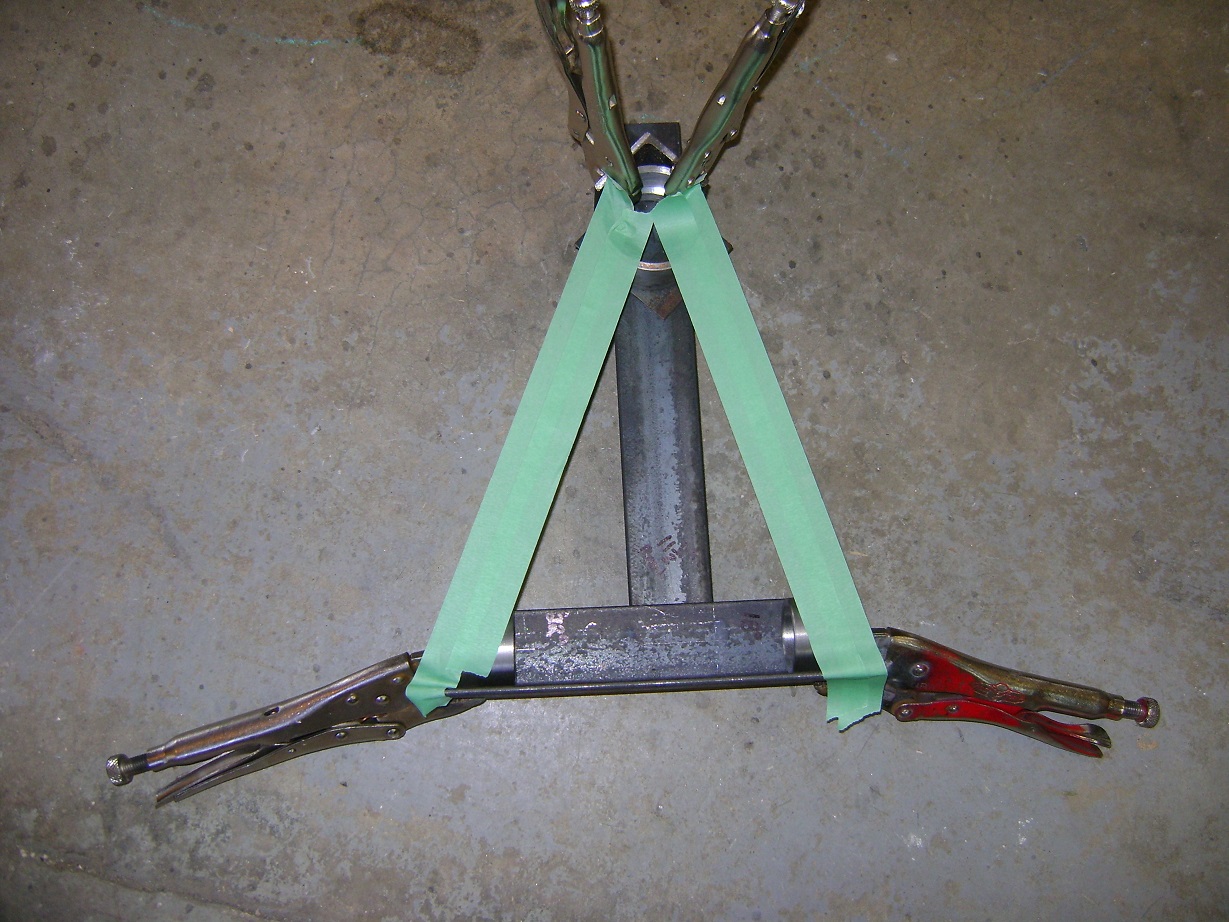
Suspension Arm tube lengths and angles:
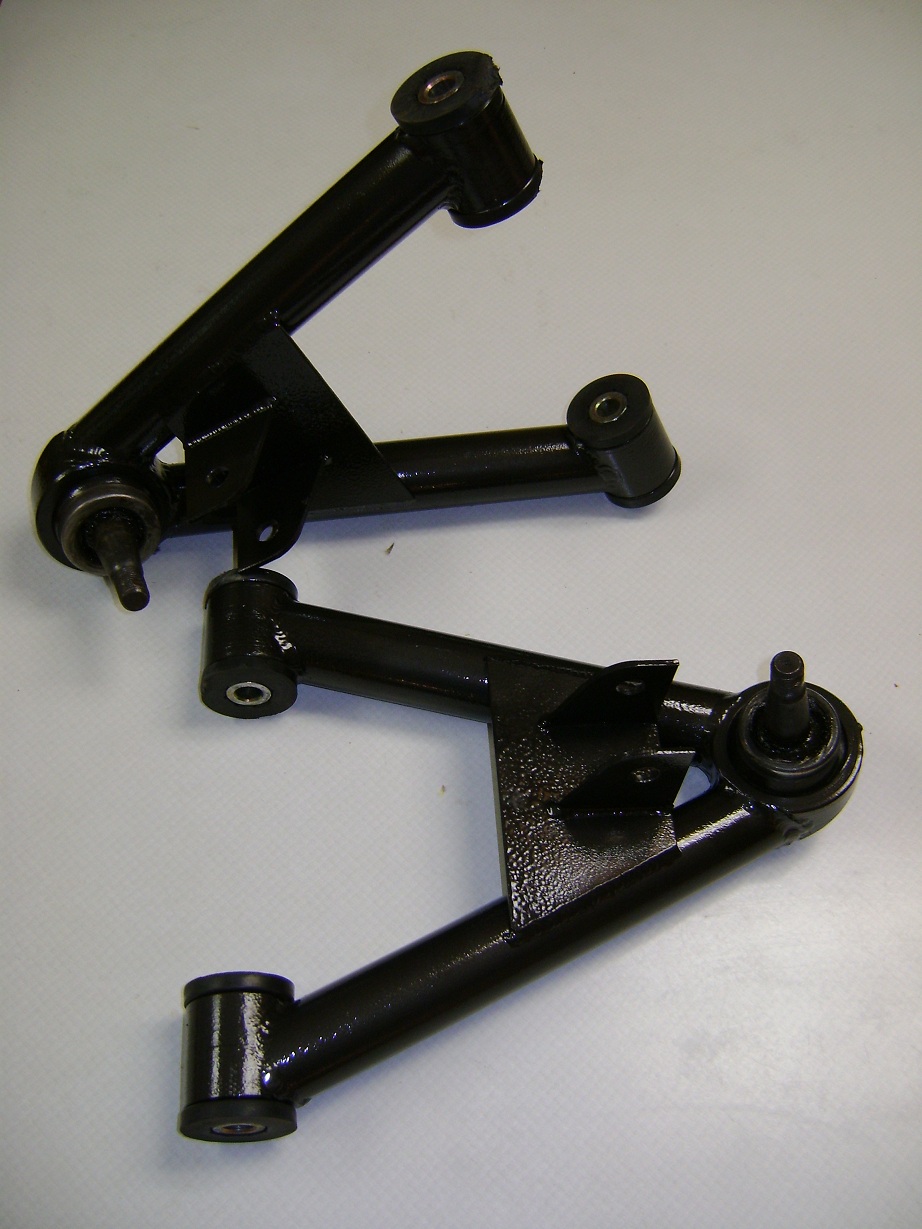
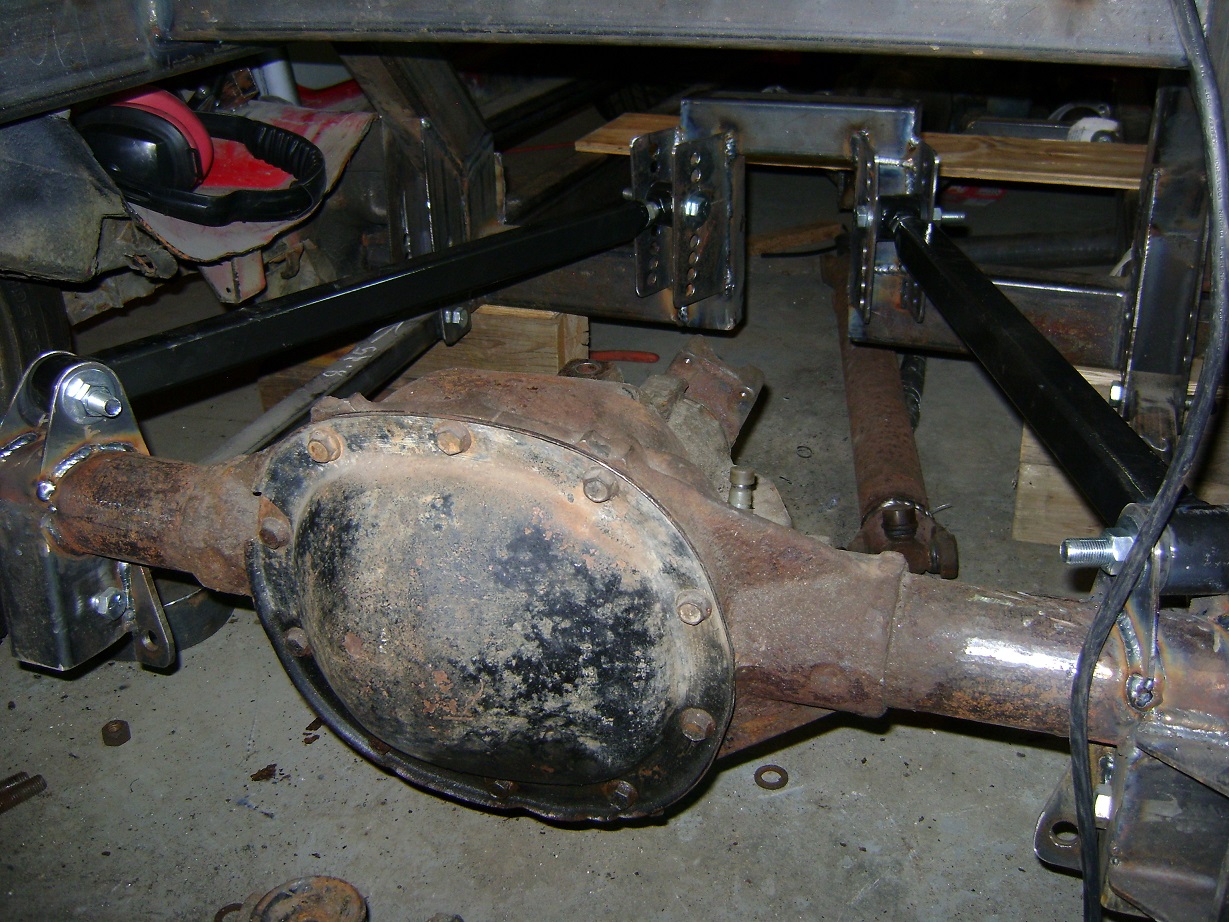
Suspension 4-link bar mounts:
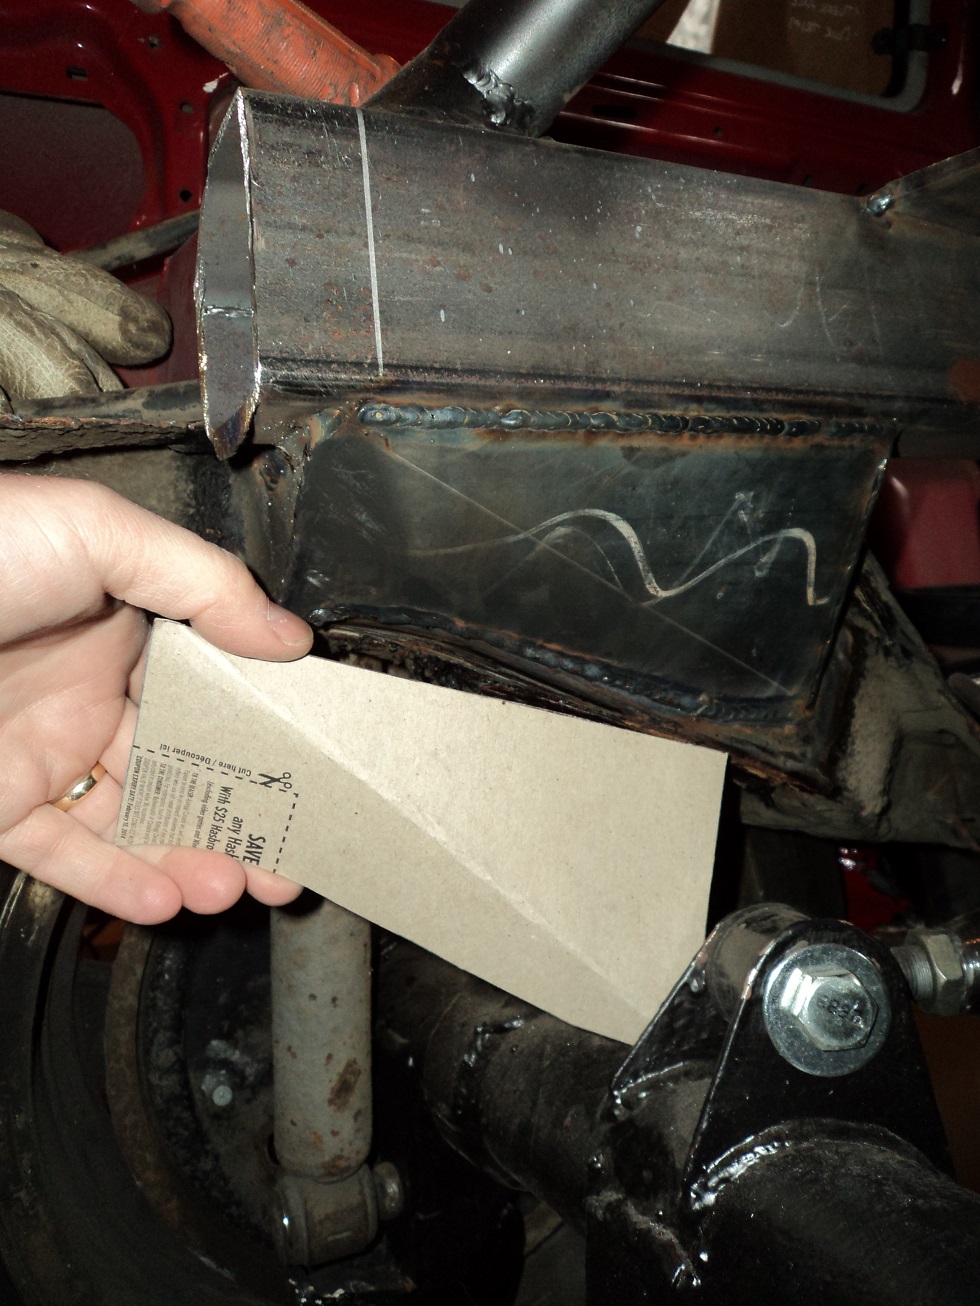
Frame-to-Unibody Connectors:
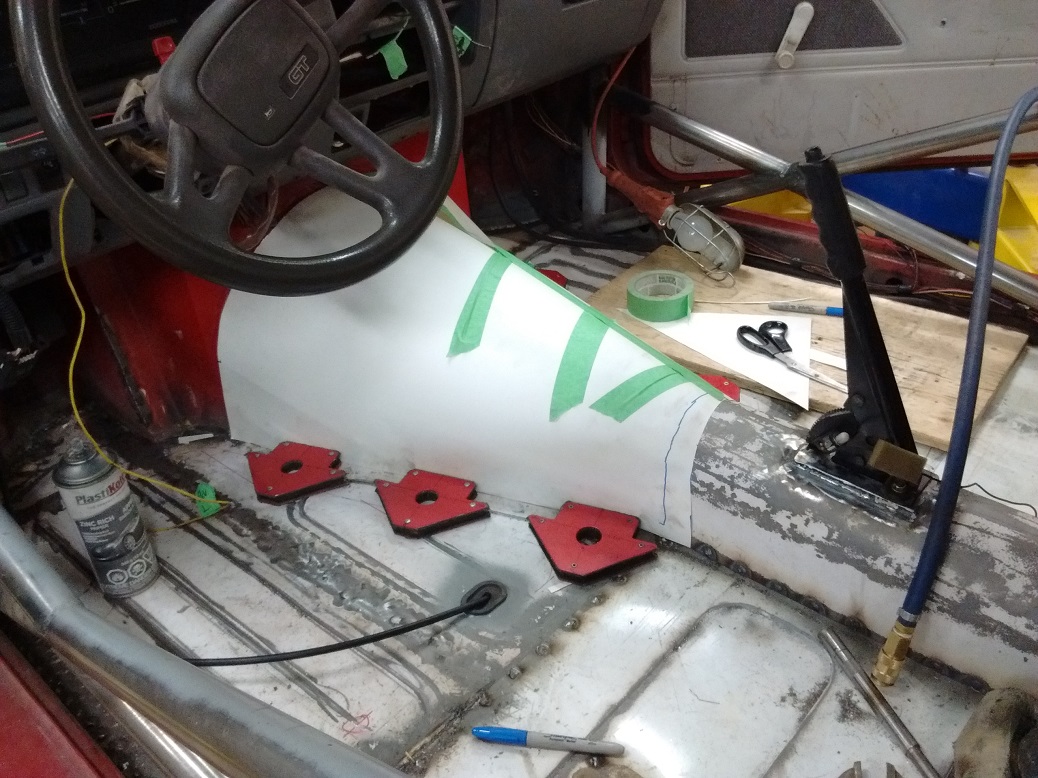
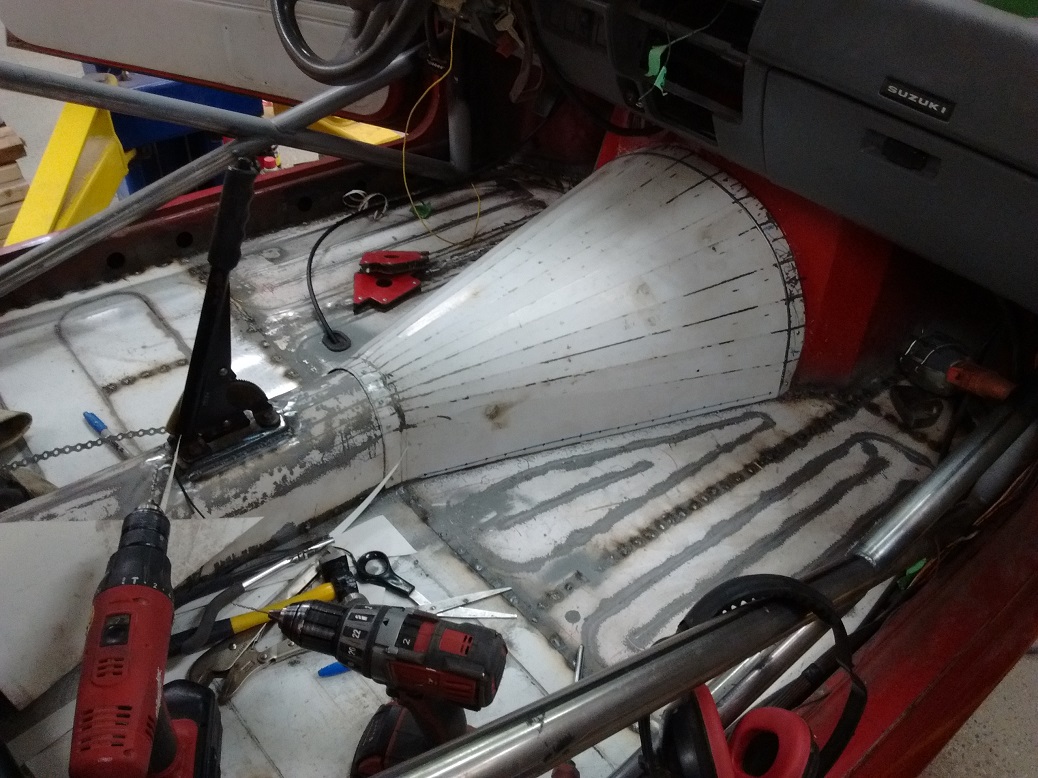
Transmission Tunnel:
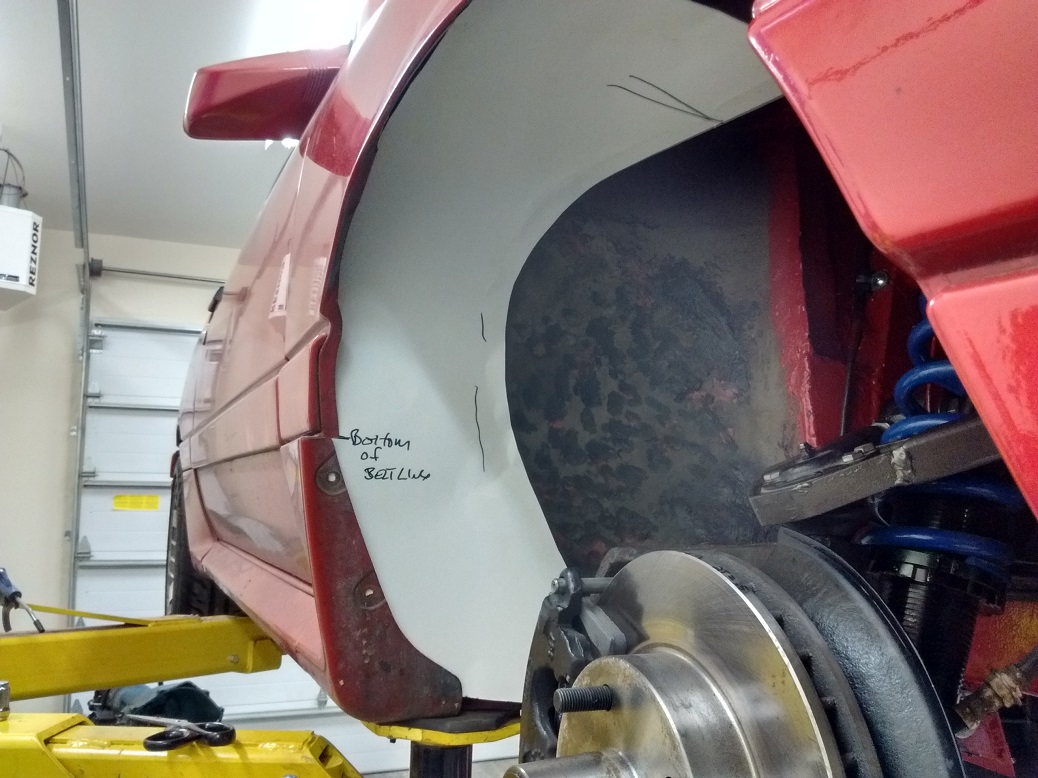
Inner Fenders:
|
||||||||||||||||