[Drivetrain] [Brakes] [Suspension] [Steering] [Electrical] [Emissions]
QUESTIONS – Steering |
We are going to look at:
As always – if something seems unclear, it probably is – so ask me for clarification (then I can make it more clear for others) |
HISTORY |
|
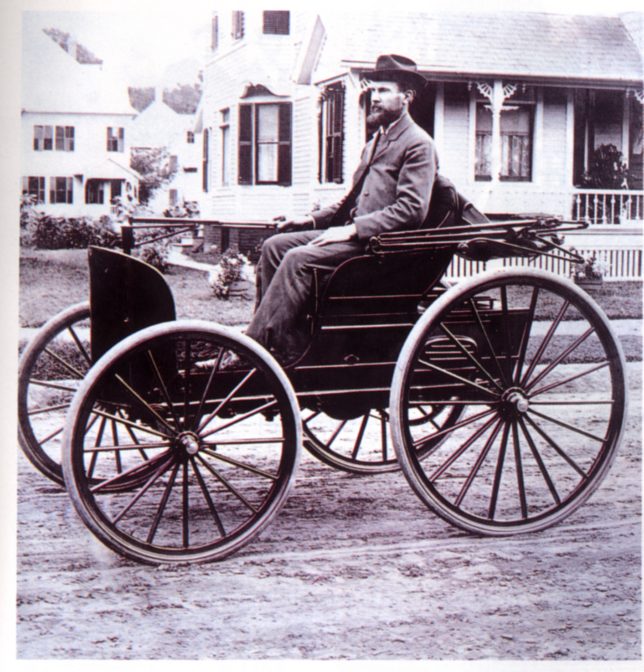
Back in the earliest days of automobile development, when most of the car’s weight (including the engine) was on the rear axle, steering was a simple matter of turning a tiller that pivoted the entire front axle. When the engine was moved to the front of the car, our puny little chicken arms couldn’t move the tiller, and complex steering systems had to evolve. If we made the tiller arm longer to reduce our steering effort, we end up with a tiller handle that moves more than we can actually reach. Using a steering gearbox of some sort can give us some mechanical advantage (easier to steer, but have to move the tiller farther), but we can’t work it with a tiller. Cadillac allegedly produced the first American car to use a steering wheel instead of a tiller. “Power Steering” was developed using hydraulic pressure to assist the driver in steering a big heavy car easily. It had become normal equipment for almost everything today.
|
STEERING SYSTEMS |
|
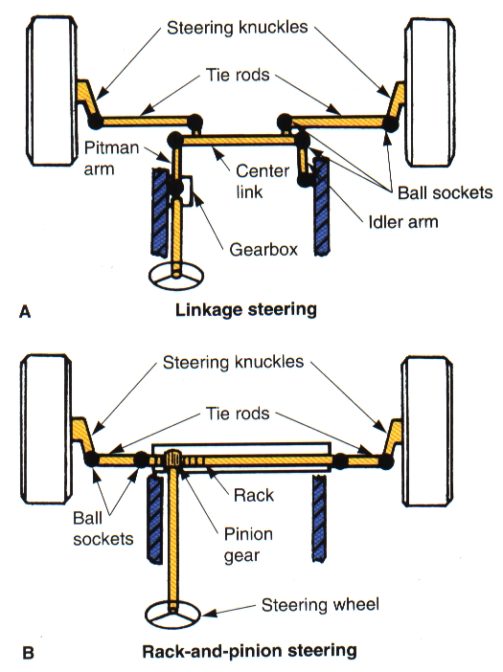
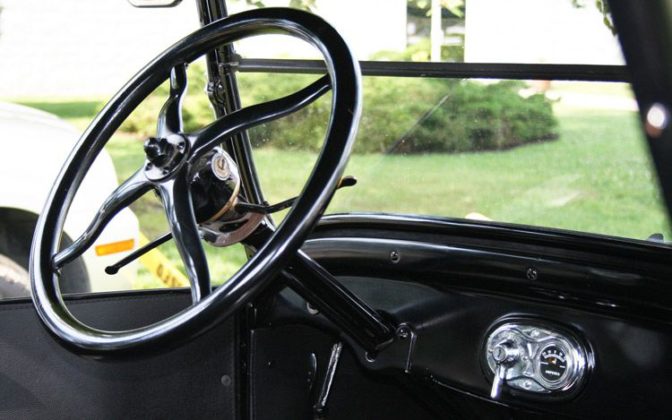
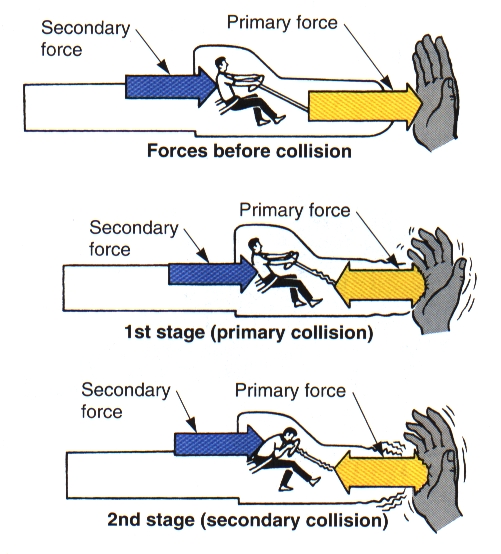
Every steering system incorporates: Steering wheel and column A steering box Linkages, spindles (also called knuckles) and ball joints There are two basic types of steering systems: Parallelogram (also called “Linkage” or “Pitman Arm” systems) Rack and Pinion All steering systems need to convert the rotating motion of the steering wheel into a linear motion to turn the spindles and wheels. The easiest way to do this is a set of gears. Both systems use a steering box with a set of gears inside. How the gears are arranged is what is different. Steering Wheel and ColumnAll cars have a steering wheel and column. In the bad old days, the steering wheel was simple, the steering column was simple. And when you got into a front-end collision, the steering wheel bashed your face in, or put a hole through your chest. Today, steering columns are designed to “collapse” in a collision, steering wheels are padded and can bend, seat belts are required, chassis have “crumple zones” to absorb most of the impact, and almost all cars now have air-bags that inflate to protect you from the steering wheel. All these safety features add weight to the vehicle which cuts into performance and fuel economy, but I guess safety should be more important, eh? Dodge Power-Wagon vs. B-Train Semi On a One-Way BridgeWhen I was a kid, my pops used to work for the Ministry of Transportation and Highways up in Stewart BC, on the border of Alaska. The highway into Stewart was very narrow and twisty and at the time largely gravel. One time he was on the highway and was going over a Bailey bridge (one-lane bridge) on a blind corner at the same time that a loaded B-Train Semi (a rig pulling two trailers) came from the other side. Pops slammed on the brakes, and was frantically trying to get the 4X4 Dodge Crew Cab Powerwagon into reverse when they hit head-on. He had bruises on his chest from his seat belt, and bruises on his face from his hands still hanging onto the steering wheel. The Dodge was ruined – the military front bumper and winch was folded under the truck, the front half of the frame was ruined. They turned the truck into a trailer, because that was the only part salvageable.
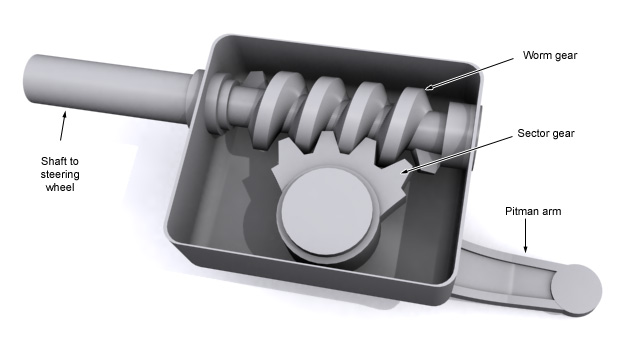
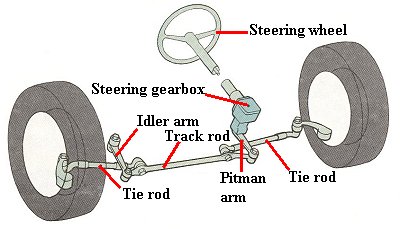
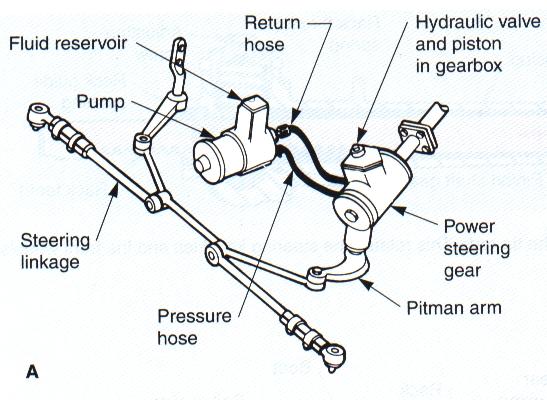
Parallelogram Steering BoxThe Parallelogram system’s steering box uses Worm and Sector gears – the steering wheel shaft turns an attached worm gear inside the steering box. As the worm gear turns, it causes the output gear (called the Sector gear, meshed with the worm gear) to turn. The Sector Shaft is attached to a steering lever called the Pitman Arm, and the Pitman Arm moves the rest of the steering linkage. If you’ve ever played with Technical Lego, you’ve played with Worm and Sector gears.
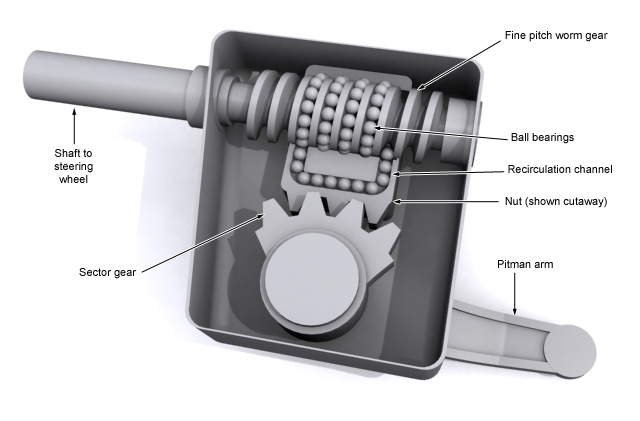
Worm gears were originally used in steering boxes, but the friction inside was very high and caused them to wear out quickly. Modern steering boxes are designed with a bunch of ball bearings inside tubes to make the “gear” connection, greatly reducing friction and wear. This type is called a “Recirculating Ball and Nut” steering box.
The Parallelogram type of steering tends to be very “vague” in feel, and you will never see it in a modern sports car. Because it has many joints in the linkage system, it also tends to be somewhat sloppy, especially if everything is just a little bit worn (all that wear adds up).
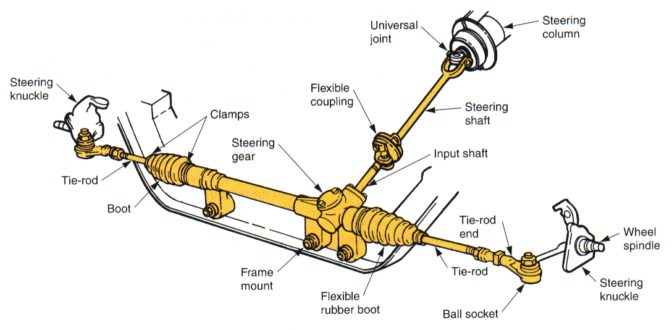
Rack and Pinion Steering BoxThis type of steering is much more precise than the Parallelogram steering. It has much fewer parts in the linkages, which reduces any slop you might feel. Because the gears are more direct-acting, the driver can “feel” the road better through the steering. Grandma might not want to feel the road at all in her Cadillac, but some of us do – a car’s feed-back gives you better control because you know what the car is doing.
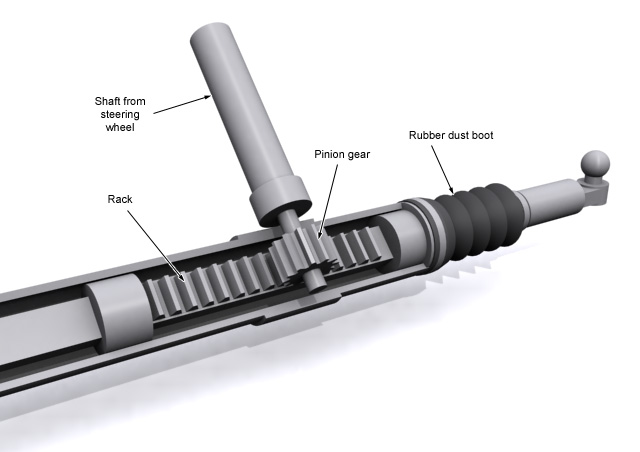
The Rack and Pinion steering box has a simple Rack (basically a gear on a line), driven by a Pinion gear attached to the steering shaft. Again, if you’ve played with Technical Lego or RC cars, you’ve already played with this.
|
Linkages, Spindles and Ball Joints |
|
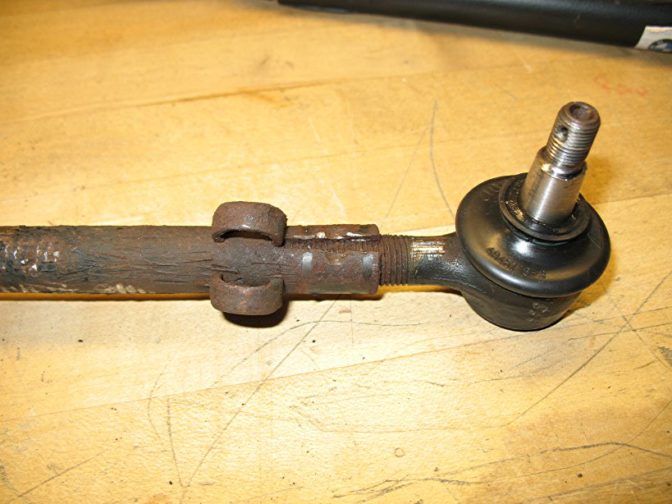
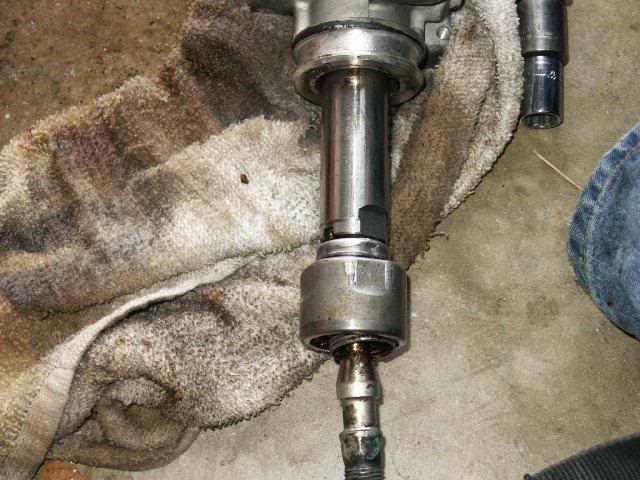
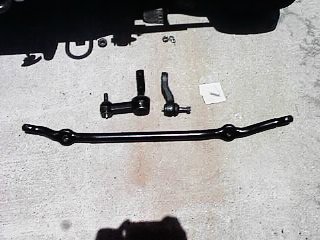
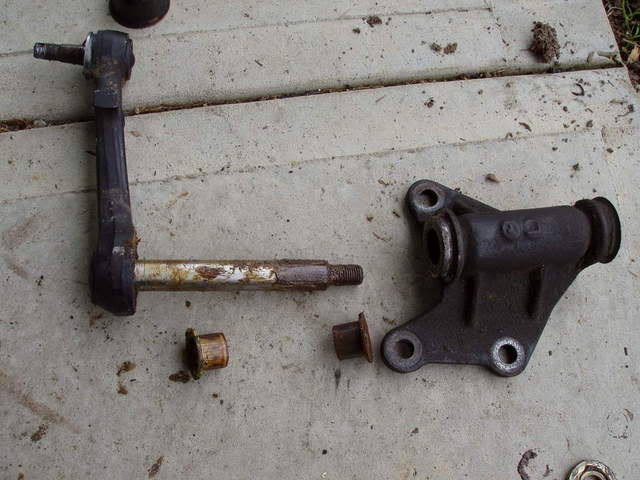
Regardless which type of steering the vehicle has, many of the common parts are inspected and replaced in the same way. All steering systems have the following components that must be inspected: Steering Box: They can wear out over time, but often can have their “freeplay” adjusted – FOLLOW THE MANUFACTURER’S INSTRUCTIONS when doing this or you will ruin your steering box. Most steering boxes can be rebuilt with new seals if yours is leaking, however if any of the shafts show pitting from corrosion or grooves from wear, new seals likely will not stop the leakage. Steering racks should have the rubber bellows inspected for rips or tears – any dirt getting in will ruin it. Tie Rod Ends: Tie Rods Ends are a type of ball joint – they act like a ball-in-socket much like your shoulder or hip works. Squeeze and wiggle by hand them to see if there is any play – any play indicates the part is worn out. Any ripped or missing rubber Tie Rod End Boots should be replaced – any dirt or water getting in will ruin it. The best tie rod ends have grease fittings so you can keep them well lubed. Most factory joints are not greaseable at all and are replaced when they die. Tie Rods themselves should be inspected for bends, usually due to collisions. Rack and Pinion steering has an Inner Tie Rod End that is inside the rubber bellows on the rack itself. These are inspected by pulling the tie rod in and out of the rack and feeling for play. Spindles: Also called Knuckles, also inspect the spindle for any bends or cracks. Usually hitting curbs will bend the steering arm on the spindle, which requires the entire spindle to be replaced (you cannot bend them back – it is forged steel and heating it will weaken it and it WILL break). Some manufacturers have bolt-on steering arms where you only have to replace the arm itself, not the whole spindle. Ball Joints: They have a ball joint or two to allow the spindle to turn and the suspension to move. A strut car will only have a lower ball joint, while a double wishbone car will have both top and bottom ball joints. Worn ball joints allow the spindle to move, which will make the driver think there is a steering problem. When you hit a bump and hear a clunk and the car wants to change lanes on you – it’s usually ball joints. Any ripped or missing rubber Ball Joint Boots should be replaced – any dirt or water getting in will ruin it. Parallelogram steering have these additional components to check: Track Rod: Also called the Center Link – Inspect to make sure it is not bent. This can be difficult to see, since they are often not usually straight to begin with – they need to clear various components under the car. The only way to really see if they are bent is to compare to a new one. These links are usually hardened steel – heating them with a torch to straighten them weakens the metal and it WILL break. Then you’re really hooped. Idler Arm: The idler arm is usually greaseable at the pivot that bolts to the frame. Aggressively wiggle it – any movement at the joint and it should be replaced. Pitman Arm: Doesn’t usually wear out, but can bend in a collision and will need to be replaced.
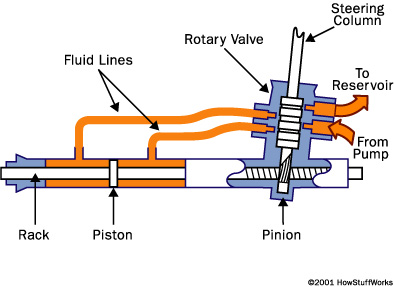
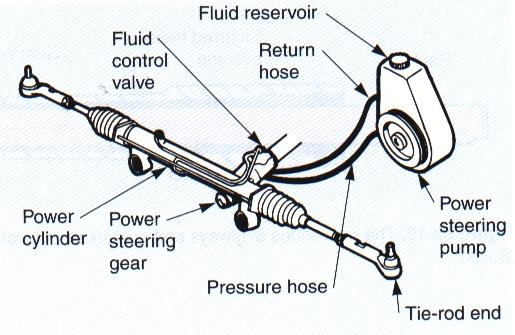
POWER STEERINGWhile the early, lightweight cars came with a simple manual steering box, as cars got bigger, and engines got bigger and tires got wider, and everything got heavier, our wee chicken arms had a harder and harder time steering our cars. While we could change the gearing in the steering box to increase our mechanical advantage, we would lose speed – meaning to turn a corner would require many, many turns of the steering wheel just to make the corner. Kind of like your bicycle – pick a gear to pull a hill, and you have to pedal LOTS. We started adapting a hydraulic assist in the steering box to give us more force to turn the car – this means we can have a fast steering speed, and still have power to do it. The easiest way to see how this works is to look at a Rack and Pinion steering box: A control valve is mounted where the steering column comes into the box. When the steering wheel is turned with force, the valve opens to allow hydraulic pressure through a hose to push on one side of a piston mounted to the rack itself. This hydraulic pressure greatly increases the force to steer the car. If you turn the wheel gently, the valve doesn’t open much (if at all) and you get essentially no assist. The hydraulic pressure needs to come from somewhere, and usually it is from a pump driven by the engine. This is why it is very hard to steer the car when the engine is not on. It is, however, possible to still steer the car if there is a hydraulic failure – it’s just not easy. Like everything, nothing lasts forever. here are some common problems you may find with power steering: Squealing at full lock: Full lock means you’ve turned the wheel ALL the way. This is usually normal, as the control valve thinks you’re trying to steer like a mad man, and tries to give you so much hydraulic assist that the engine cannot turn the power steering pump enough and the belt slips. Growling: Usually a faulty pump. Bearing noise or something defective Groaning: Usually low fluid or air in the system Leaking: Usually caused by leaks. Hahahahahaha. Find ’em and fix ’em.
|
WHEEL ALIGNMENT |
|
I used to do wheel alignments on the side; I love how subtle changes totally TRANSFORM the handling of the vehicle. MR. WELLWOOD’S CLASSROOM LESSON:
It would make sense that we want our tires to point in the direction we want to go, but if you’ve ever rolled down a hill in a little red wagon, you know there is more to handling than just having the wheels pointing straight ahead. We’d like our ’63 Corvette to be more stable than a red wagon. We want our vehicles to: Drive straight Turn properly Handle predictably Operate intuitively Be stable at speed Grip the road Make the tires last All the geometry needed to do this is designed and engineered for the vehicle – there is very specific science and engineering behind it. It would be great if manufacturers would build it right, and everything would stay that way forever. But that is not reality. Most manufacturers make things adjustable so you can “correct” any manufacturing flaws or tolerances in the vehicle. In most vehicles, there are three wheel alignment angles we can adjust:
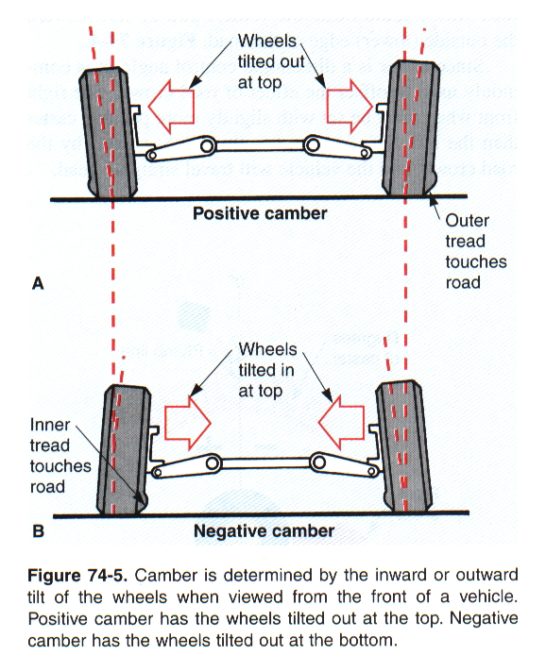
CAMBERCamber is the angle of the wheel, measured in degrees, when viewed from the front of the vehicle. The top of the wheel leaning out from the center of the car is positive camber, and the top of the tire leaning in, is negative camber. Early cars usually came with positive camber (to counteract a geometry issue that is beyond the scope of this unit – ask me about it some time), while modern cars usually come with negative camber (to improve handling). If the camber is out of adjustment, it will cause tire wear on one side of the tire’s tread. If the camber is too far negative, for instance, then the tire will wear on the inside of the tread. Camber is usually more negative on the passenger side – this cause the car to pull slightly to the left, however – “road crown” – would make the car pull slightly to the right (same as the “fall line” in snowboarding) On many cars camber is not adjustable. If it is out of spec, it usually means something is bent from a collision. Clues: A vehicle with excessive positive camber will not grip at all well in corners, and may feel “slippery.” A vehicle with excessive negative camber will grip well in corners, and have a more solid steering feel. Excessive in either direction will hurt traction in braking and acceleration since not all the tread is on the ground. Uneven camber will cause the vehicle to pull (want to turn in a certain direction all the time even when you are trying to go straight). The vehicle will pull towards the side with the most positive camber (imagine trying to roll a cone across the floor)
Mac Struts Are Not Performance – Poor Camber Control
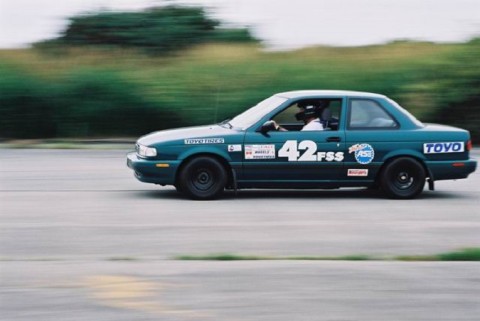
I did a few “questionably legal” things to get as much negative camber as I could (smaller fasteners, prying the chassis attachment points to take advantage of any slop) – I ended up with -3.5° camber, which worked great on the track. On the street, this camber obliterated my tires. I would run my street tires until the inside edges of the tires were completely bald. Then I would flip the tires around on the rims and wear out the other side. By then it was the end of the season and I would set the alignment back to normal, and then over-inflate the tire to wear off the inside tread. This car made it to second place at the Canadian National Autoslalom Championship, missing first place by 2/10ths of a second. ….. to a double wishbone Honda Civic with a much better driver.
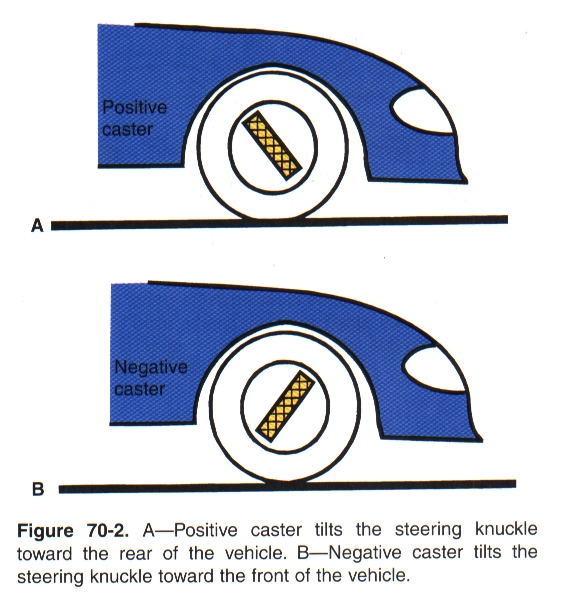
CASTERCaster is the angle of the steering axis Zero caster is very easy to turn, because the wheel pivots easily. But it won’t be very stable – it will want to steer TOO easily. In a shopping cart, the caster wheels ALWAYS trail the steering axis. You WANT the tires to trail the steering axis. If you pull the shopping cart backwards, the caster wheels flip around, so the wheel still trails the steering axis. Have you ever driven your car really quickly in reverse? The twitchy steering is your tires trying to flip around to trail the steering axis. Caster is the angle of the Steering Axis, measured in degrees, when viewed from the side of the vehicle. The top of the pivot leaning toward the rear of the car is positive caster. Leaning toward the front, is negative caster. NO CASTER? If the caster is close to zero, the steering will be light and the vehicle will wander and be difficult to keep in a straight line. TOO POSITIVE? If the caster is excessively positive, the steering will be heavy, the vehicle will be very stable at speed. Caster has essentially does not affect tire wear. TOO NEGATIVE? A vehicle with ANY negative caster will be nearly impossible to drive. The steering will feel like being in reverse, always trying to kick around out of your hands. CASTER SPREAD? If the caster is different from side to side, the vehicle will pull to the side with the less positive caster (some technicians use caster to compensate for road crown, some use a combination of camber and caster together). This is especially noticeable when you are braking. If Caster is out of spec and not adjustable, it means something is bent. Oh – this will bake your noodle: Since caster is the steering angle, the inside wheel on a turn actually increases pressure onto the ground, while the outside wheel reduces pressure. You can see this as you turn the steering wheel from lock-to-lock while parked – you will actually see the inside rise, and the outside drop. This makes weight transfer to the outside front wheel, and OFF the inside rear wheel, increasing steering response. The pressing of the inside wheels against the ground also cause the wheels to self-center after a turn.
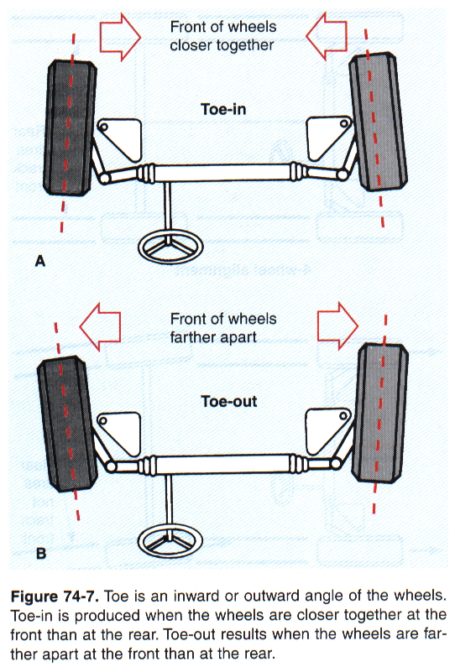
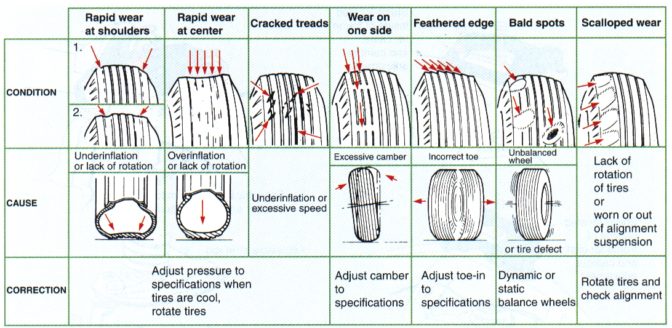
TOEThe toe measurement is the difference in the distance between the front of the tires and the back of the tires. It is usually measured in fractions of an inch and is usually set close to zero which means that the wheels are parallel with each other. Toe-in means that the fronts of the tires are closer to each other than the rears (pigeon-toed). Toe-out is just the opposite. An incorrect toe-in will cause RAPID tire wear to both tires equally. This type of tire wear is called a saw-tooth wear pattern as shown in this illustration. Just drag your hand across the tread and feel which way the wear is going. If the sharp edges of the tread sections are pointing to the center of the car, then there is too much toe-in. If they are pointed to the outside of the car then there is too much toe-out. Toe is always adjustable on the front wheels and on some cars is adjustable for the rear wheels. Clues: TOE IN? A vehicle with excessive toe in will feel “numb” and “unresponsive.” TOE OUT? A vehicle with excessive toe out will feel “twitchy” and “darty.” REAR TOE OUT? A vehicle with ANY toe out on the rear is lethal – the back will want to spin out; very hard to control. DIFFERENT SIDE-TO-SIDE? Uneven toe will cause the steering wheel to be off-center, however the car will continue to drive straight and will not pull to one side.
Why You Don’t Drive a Race Car on the StreetToe can make a phenomenal difference in the way the car handles. Front wheel drive cars like a bit of toe out, because the engine pulls it to zero when you’re driving. Rear wheel drive cars like a bit of toe in, because road friction pushes them to zero. I like to race with a very twitchy car – a car that wants to turn very quickly. When I ran a FWD, I used to run about 1/4″ front toe out, and I’d set the rear at 0″ or 1/8″ toe out. Setting the rear up this way made the car so twitchy, if you went into a corner quickly and lifted off the throttle the back would start coming around on you – the only way to stay ahead of the back was to stay on the throttle. This would result in either a wickedly fast run, or spinning wildly out of control. On the street, this setup was freaking dangerous. I started changing the alignment at the events, and then changing it back for the drive home.
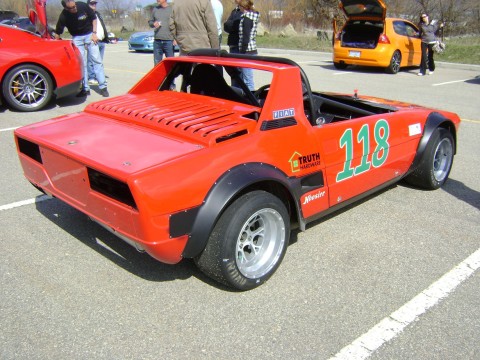
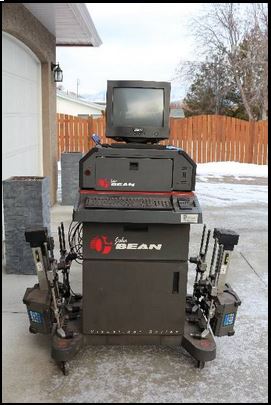
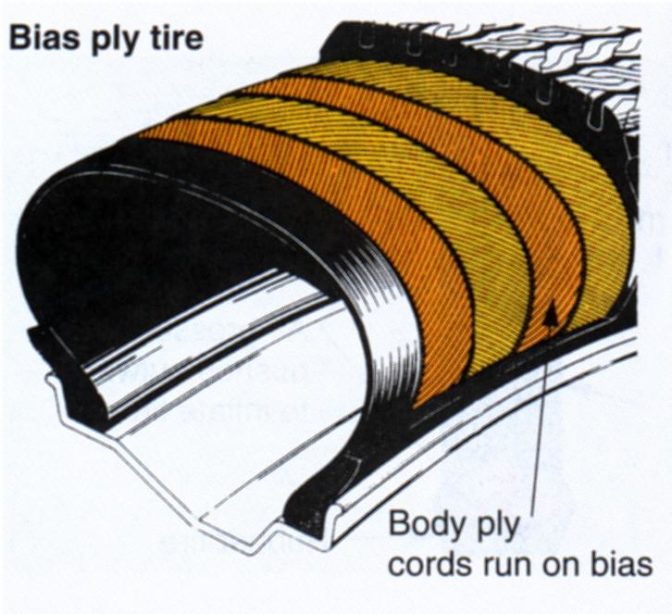
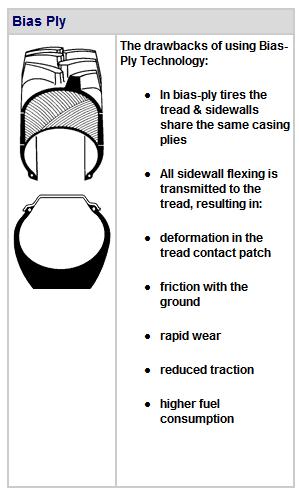
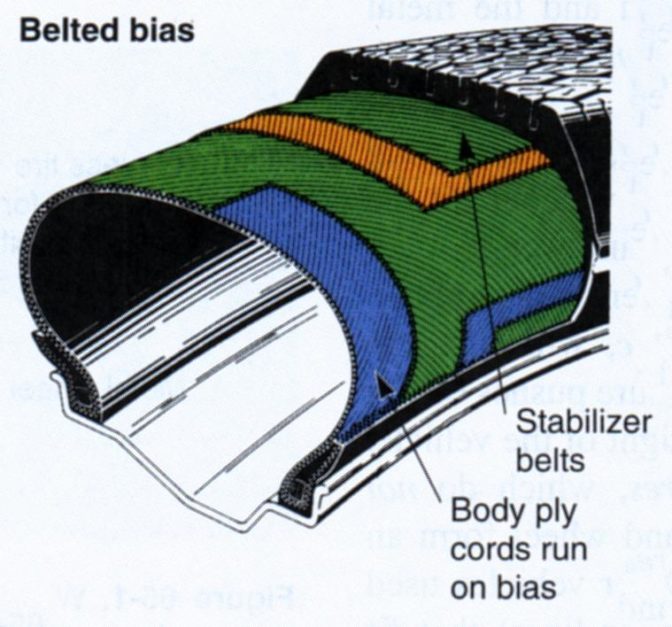
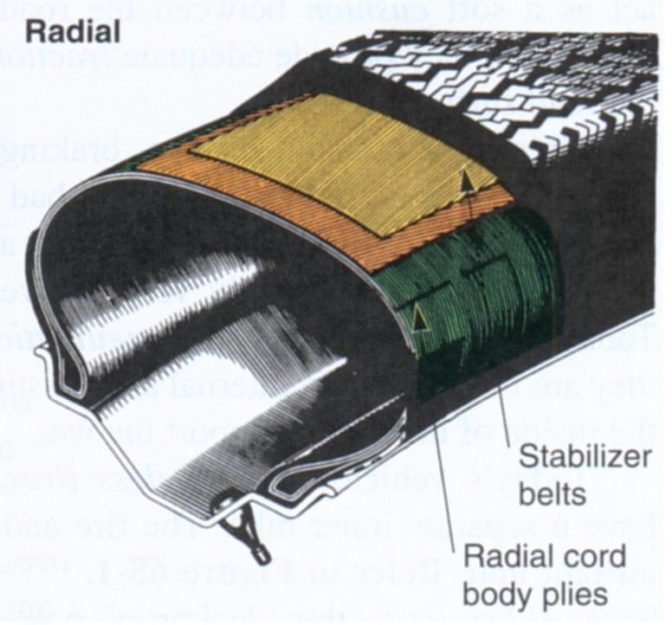
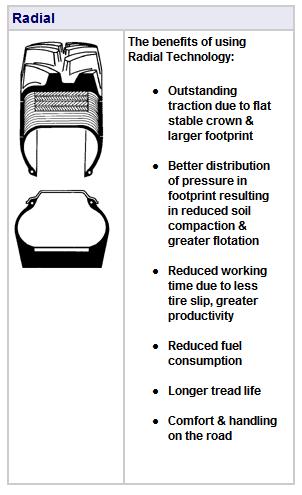
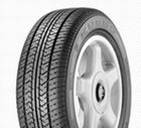
The Hatchet-Murdering FiatI used to do wheel alignments on race cars. The owner of this Fiat X1/9 got me to align it. He said everything was just fine, but every time he got on the gas, it was as if it wanted to hatchet murder him. I suspected a rear toe issue. Initial measurements showed the rear toe was at 1 1/2″ (38mm) !!! I usually set rear toe to 1/16″ (1.6mm) for a street car, or zero for trailered-only race car. Wow. Dialed that back down, and the beast was happy. Advanced DIY AlignmentsA while back I had bought this older alignment machine. I have done alignments using old-school methods, but this machine was pretty cool. My routine when doing alignments is this: Inspect for any worn components, as they will throw off the alignment Check and adjust tire pressures, as they will throw off alignment Simulate the weight of the driver in the driver’s seat. A lacky, or some sandbags work. Set rear toe to be parallel with the chassis (amazing how often this is out) Set rear camber Set toe (setting camber changes toe; everything is related) Set front caster Set front camber Set front toe Test drive. TIRESIf you think about it, ALL of your steering, handling, and braking depend on how well you stick to the pavement – your tires! If your tires are the only thing keeping you in control, why no buy the best you can afford?? Bias Ply (OG)The original tire construction. Nylon or polyester plies mounted at angles to each other around the carcass of the tire. Bias tires have a difficult time keeping the tread flat on the ground in a corner – the inside edge tends to lift as it rolls with the sidewall Bias Belted (still old school)Same construction as Bias Ply, but with stabilizing belts in the tread to improve tread contact and traction by keeping the tread as flat as possible. Radial Ply (the now now)sidewall plies run 90° to the tread (radially, rather than axially). Stabilizing belts in the tread running at a shallow bias keep the tread flat on the pavement, despite what the sidewall is doing. No tire can handle every road condition and driving style perfectly. Positive attributes are always offset by negative factors, as the following list of tire types shows: All-Season Tires – The Jack-of-all-trades of the tire world, and, as a result, they’re the most compromised. They provide only adequate traction and handling, but they have long tread life and a smooth, quiet ride. They’re also relatively affordable.
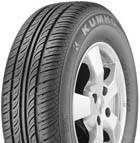
Touring All-Season Tires – These tires combine good handling with a civilized ride. Their performance oriented construction means that they’re somewhat noisier and harsher than regular all-season tires. They’re also more expensive than regular all-season radials, but last just as long. Some manufacturer’s arbitrarily add “touring” to a tire’s name as a selling point.
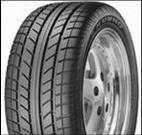
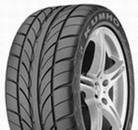
Performance Tires – Wider tread and lower profiles combine good looks with good grip for precise, high-speed driving. Performance tires tend to have a harsh, noisy ride, relatively poor wet traction, bad snow traction, and they wear out faster than all-season radials. They’re also much more expensive.
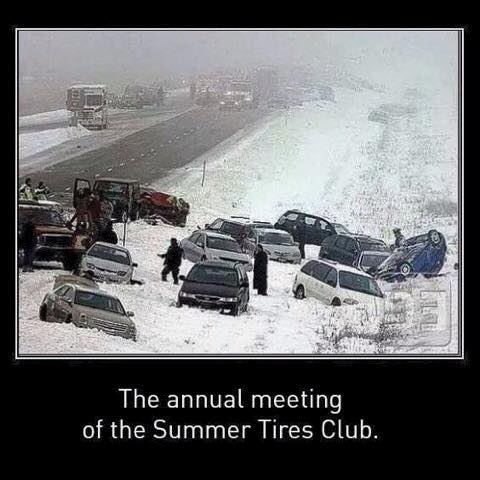
Ultra High Performance Tires – Even wider tread and even lower profiles look great and grip awesome – as long as it’s warm (and usually dry). Has a harsh, noisy ride, relatively poor wet traction, forget snow traction, and they wear out very fast (expect no more than 20,000km’s). The price of ultra-high performance tires can cause your jaw to drop.
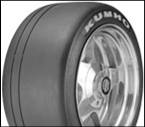
Competition Tires – Barely street legal. Forget winter, forget rain. These can be damaged if it drops below freezing. They will dry out and harden within a year, whether they are used or not. Locking up the brakes and skidding could instantly shred a tire right down to the cords. But dry grip is unbelievable, if not short lived.
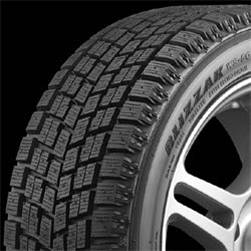
Conventional Snow Tires – Have chunky, aggressive treads that dig down to pavement covered by snow and ice. They’re noisy and handle poorly on dry roads. They’re more expensive than all-season radials. They should last a long time, especially since they’re only on the car for one season each year. Studded snow tires have tiny metal studs embedded in the tread for even better traction. (These days snow tire use is less common than in past decades. If you live in a place where it snows, and you drive a rear-wheel drive car, invest in a set of snow tires.)
“High-Tech” Snow Tires – Have precision engineered tread patterns and state-of-the-art multi-cell compounds which lend to good ice/snow traction and stopping ability. They can be used all year, but they’re noisy and somewhat clumsy on dry pavement. They’re expensive and wear out quickly.
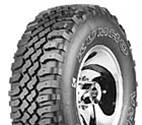
Light Truck Tires – Specifically designed for trucks and sport-utility vehicles, yet they are as diverse as passenger car tires. “Highway ribbed,” on-road tires emphasize civilized ride and handling, while aggressive “off-road” or “mudder” tires have a loud, harsh ride and sloppy handling on pavement. Light truck tires are more expensive than passenger car tires due to their larger sizes, higher load ratings and heavy-duty construction. Deep treads mean that they’ll last a relatively long time.
There are also a variety of specialty tires: Rain Tires – Have a drainage channel in the tread that directs water away from the tire’s surface more efficiently than conventional drainage grooves. High Flotation Tires – Big, wide tires that people put on 4×4 trucks and sport-utilities so they can drive on sand without sinking. These tires have poor traction in the ice and snow, so put those skinny, un-cool tires back on the truck for the winter. Directional Tires – Have a “one-way” tread pattern optimized for the direction the tires rotate on the car. Asymmetrical Tires – Combine multiple tread patterns in order to make a more well-rounded performance tire. Self-Sealing Tires – Have a flexible inner-lining that seals around an object if punctured, stopping air loss. “Twin” Tires – This setup employs two thin, “half-width” tires which are mounted on a special wheel. If one tire goes flat, the other “half” can still support the car. “Run-flat” Tires – Use special rubber compounds and reinforced sidewalls that can support the car even when deflated — allowing limited travel. “Lifetime” Tires – Last for many years, as the name suggests. These tires wear out very slowly while delivering marginally adequate traction.
READING TIRESTires come with a multitude of markings: Tire Manufacturer and Model Tire Construction Tire Type Width (in millimeters, sidewall-to-sidewall) Aspect Ratio (sidewall height as a percentage of width) Rim Diameter Speed Rating (but not always) Load Capacity Maximum Pressure Manufacturing Date (tires should be replaced every six years) Treadwear, Temperature and Traction rating
|
TIRE BALANCE |
|
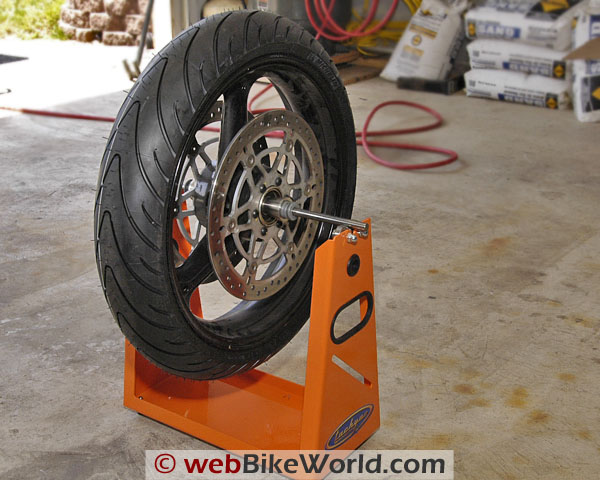
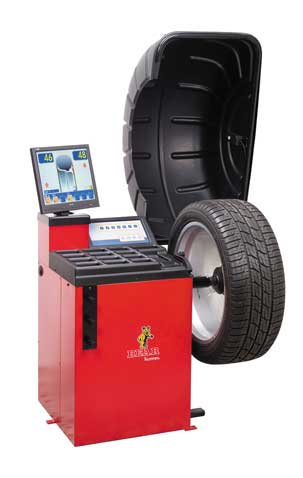
No tire or wheel is perfect from the factory. All tires should be balanced when installed on their rims. Balancing involves spinning the wheel and finding out where the heavy spots are, and adding weight opposite them. Imbalance not only damages the suspension and steering of the car, it also damages the tread of the tire. There are two methods of balancing: Static Balancing: This method merely balances the wheel so that there are no heavy spots when the wheel is at rest. If you placed the wheel on a car, the wheel should not slowly rotate to the same heavy spot at the bottom every time. A statically unbalanced tire will “tramp” up and down at speed. This will ruin the shock absorbers and fatigue the springs Dynamic Balancing: This method looks for a heavy spot on one side of the wheel only. When a dynamically imbalanced wheel spins, the heavy spot will always seek the center of the rim. This will cause “shimmy” which you can feel through the steering wheel. This will ruin tie rod ends in the steering system. Steel wheels use a clip-on weights. Steel wheel weights have a curved back that fits the curved lip of of the wheel Aluminum wheels use either special clip-on weights with a flat back to fit the wheel, or stick-on weights that are taped to the inside of the wheel so they are not visible on a mag wheel As tires wear, heavy spots and light spots in the tread are worn away. The tires should be re-balanced every year
|
NERD OUT! |

