[ Start ] [ Wheels & Tires ] [Bushings ] [ Springs & Struts ] [ Sway Bars ] [ Alignment ] [ Drivetrain ] [ Miscellaneous ] [ Racing ]

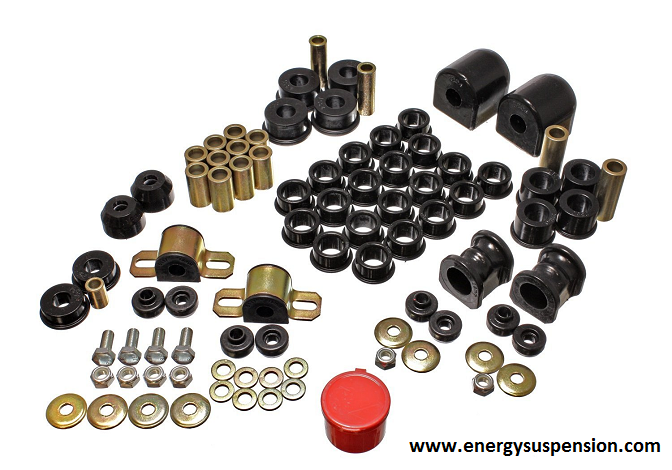
Energy Suspension master bushing kit #7.18104G.
The suspension bushings in the vehicle are rubber. They are either press-fit or molded into each suspension component, and hold a metal sleeve through which attachment bolts fit. The bushings act as both a vibration insulator and a pivot for movement. The rubber is elastic, and can provide an additional amount of “spring” to the suspension, albeit not much.
The factory Sentra suspension is a reasonable compromise between handling and comfort. Nissan, like all manufacturers, use rubber bushings to insulate the road noise and movement of the suspension from the passenger compartment. In a performance application, you may not want this compliance, reducing both alignment accuracy and consistency, as well as “road feel” and responsiveness.
Replacing these bushings with something significantly stiffer like polyurethane can change the feel of the vehicle.
One criticism people have of polyurethane bushings is that they “squeak”. The reason they do this is because polyurethane bushings act as a true bushing/bearing surface on a metal sleeve, as opposed to the factory unit which is one piece and can “flex” with the suspension (this flex in rubber bushings is why it is so important to final-tighten all suspension bolts once the vehicle is on the ground, otherwise you can pre-load your bushings – this is especially important to you “lowriders” out there).
Most polyurethane kits come with a small tub of special grease for assembly. This grease can be purchased in a tube for your grease-gun through Super Lube, the product details I have placed HERE. It is translucent, thick and very sticky. As the suspension is used, this grease may be squeezed out over time, resulting in polyurethane rubbing on the steel sleeve – squeak! The bushings are especially prone to squeak as the temperature dips down around 0°C.
To counter this, I drilled, tapped and installed grease fittings to all suspension joints so I can add more grease over time. I bought a tube of the Super Lube from a local fabrication shop, and loaded my grease gun so I can grease the bushings every oil change.
| Tools Required | |
|
|
Front Control Arms
The front suspension was fairly easy to do. Split the ball joint by removing the cotterpin and undoing the nut, then use the prybar to pry downward on the suspension (applying tension to the balljont) and wack the steering knuckle at the tapered sleeve for the ball joint with the hammer to pop the ball joint out. Everything else should come out easy. The sway bar must be dropped to get the control arms out, but since you’ll be changing the sway bar bushings anyway, it’s no loss.
The front bushing on each control arm uses a steel sleeve. Torch the rubber out of the joint (you’ll probably want to do this outdoors), then if you’re good with a torch, skin the steel sleeve out of the control arm – be careful not to torch the control arm. If you’re nervous, hacksaw through the sleeve and use an air chisel to peel the sleeve out.
Installation is super easy – slip in the new bushings by pressing with a bench vise or c-clamp, lube, and press in the sleeve.
| Whiteline Offset Caster Bushings
In 2004 I replaced the large rear bushing of the lower control arm with the “Nissan Caster Kit” from Whiteline (Part# KCA303). The kit consists of two bushings and a packet of grease. The picture here shows the Whiteline bushings (yellow) beside the Energy Suspension bushings (one, black) they replaced. Notice the greatly offset hole. This moves the rear of the control arm outward, which in turn moves the lower ball joint forward, which increases caster.
Increased caster provides increased high-speed stability at the expense of low-speed steering effort. Additionally, it improves dynamic camber, that is, as the wheel is turned into a corner increased caster causes the camber to become more negative as it is turned. This then would require less static camber for the same cornering ability. The additional caster can also increase steering “feel”, and a good “feeling” car can be easier to drive fast than a poor feeling car. The quality of the Whiteline product appears to be much better than the Energy Suspension product, with a greater attention to detail and fit and finish. The Polyurethane also appears to be of a higher durometer. |


Rear Control Arms
The rear suspension was a pain in the butt. Nissan went weird and used a trailing arm/dual control arm suspension with bolts that never come undone. What worked best for me was to remove the suspension as a unit so it was easier to work with. You will be removing the assembled spindle, complete with front and rear control arms and trailing arm from the car.
First, remove the rear brake drum and hub to that you can remove the backing plates from the spindle. This saves you from having to crack the brake lines and e-brake cable.
The forward control arm must be removed from the frame first, or you won’t be able to get the rearward control arm bolt out. Everything else, including the trailing arm, comes apart easily as a unit – you’re just undoing the frame mounts. You will notice there is a through bolt holding the control arms to the spindle. It is likely that this bolt will not budge.
Torch the rear control arm bushing to remove the control arm. As each bushing melts, sometimes the inner sleeve is spat out (fun to watch). Burn off the remaining rubber on the sleeve from the rearward control arm, then heat the snot out of the sleeve (I think it’s aluminum, or something non-ferrous). You can get it hot enough to melt without hurting the bolt if you want. Let it cool, then clamp the sleeve in a vise and beat on the knuckle to pull the bolt out of the sleeve (the bolt is still attached to the knuckle and front control arm).
Heat the snot out of the knuckle only where the through bolt passes through. You’ll need to get it quite hot to break the bond. Let it cool, then you should be able to tap the bolt out of spindle. Torch the forward control arm bushing, and heat the sleeve as you did for the rearward one and remove with a vise and a hammer again.
Any remaining bushings need to be torched out. It’s smokey, environmentally unfriendly, and butchery, but it is the fastest, cleanest way of getting the old ones out.
Press in the new bushings with the vise or c-clamp, lube, and press in the sleeves.
Reassemble on the car, but leave the rearward control arm to the spindle for last. Remember that the rear control arm must be installed to the frame first, or the front bolt will not fit in. Hooking up the rearward control arm to the spindle is a horrid affair. The arms do not line up parallel when assembled, so it is going to take some brute force and profanity to get it lined up. I tried one side by prying the spindle into submission, and beating on the through bolt with a hammer. I tried the other side by saving the trailing arm for last (don’t do this – SO much work). Note: If you are installing Suspension Techniques sway bars, install the rear bar end link brackets at this time!
It took me 8 hours to do the job, and I did not replace the tie rod boots (I think that’s silly).
Conclusion
In the Sentra, the steering became more precise and responsive, less vague and mushy. The ride is much more firm, like I had 10 psi more air in the tires than I should have. Bouncing the end of the car up and down showed that the suspension was significantly stiffer – a lot less “bounce.”
The grease fittings, it seems, were a waste of time. The assembled bushings leave no room for the grease to go, so no grease ever got into the bushings. After 10,000km I had to disassemble the front control arms to re-grease the bushings. It helps to have a grease gun full of the Super Lube so you can be very liberal with it when assembling – the wee tubs you get with the kit just don’t look like enough.
The reduced compliance also reduces the forgiveness of the car. When you make a mistake in your steering inputs, the car lets you know how big that mistake was. There is no masking your mistakes here.
On the whole I am quite happy with the results, but it is a tad on the stiff side. I do think this is effort well spent.
An excellent writeup on installing bushings on a B13 Sentra can be found at SE-R.net ES Bushing