[ Start ] [ Index ] [ Sold 2019 ]
In which I join the wiring harnesses together, finish some cooling system, and get lights.
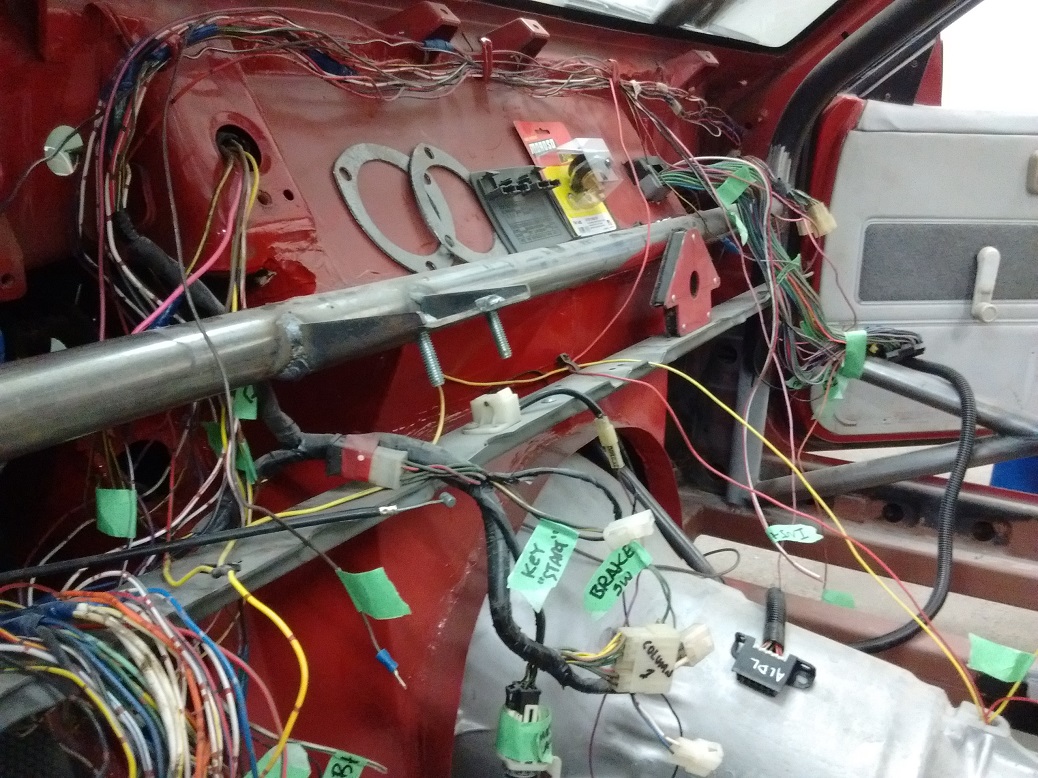
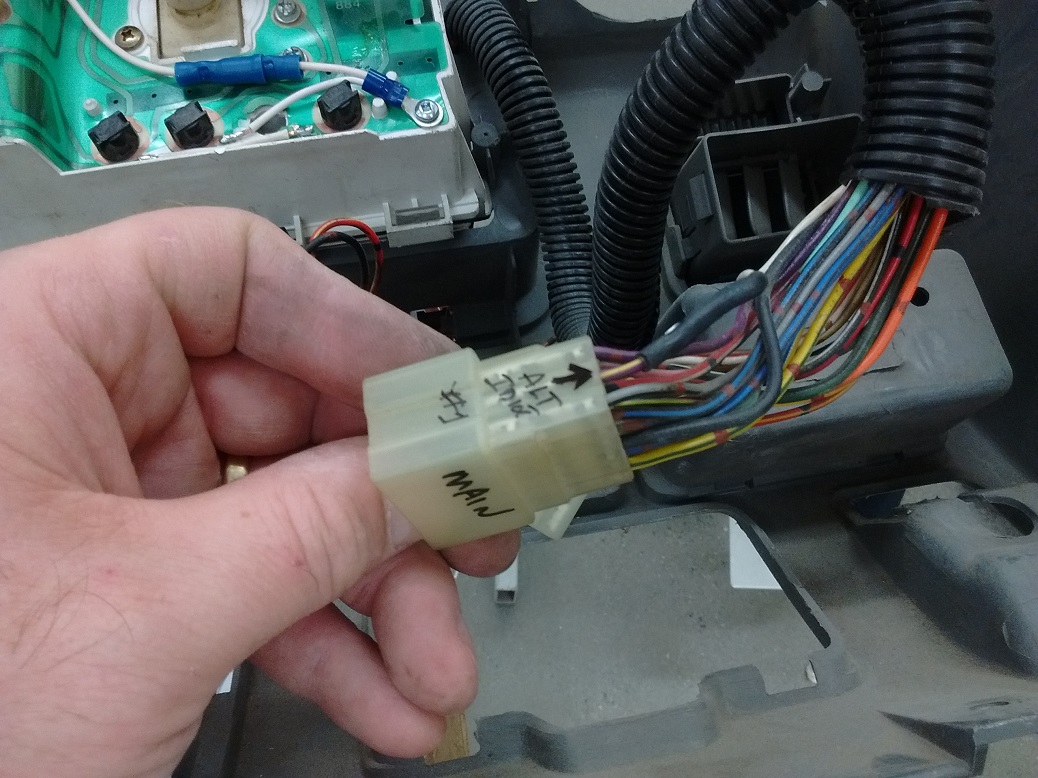
Still tying the two wiring harnesses together. Suzuki didn’t seem to worry about fuses (one 20A fed the entire fuel injection), while Pontiac had fuses for everything.
Once the engine is all hooked up (one more wire), I will connect all the lights again. I seem to have cut off all the wires through the cabin, so that will take some time to do.
(March 2017)
Wiring sure doesn’t show progress like paintwork or engine assembly. I like wiring, but it’s not impressive to show off.
Challenge Advantage: I have a LOT of wiring harness to scavenge!
I did not wire in the VSS buffer. It ~seems~ that all the buffer does is allow the VSS signal feed the ECM, the Speedo (not using electric), and the Cruise Control (not equipped). I just plugged the Firefly VSS from the speedo into the ECM. We’ll see what happens.
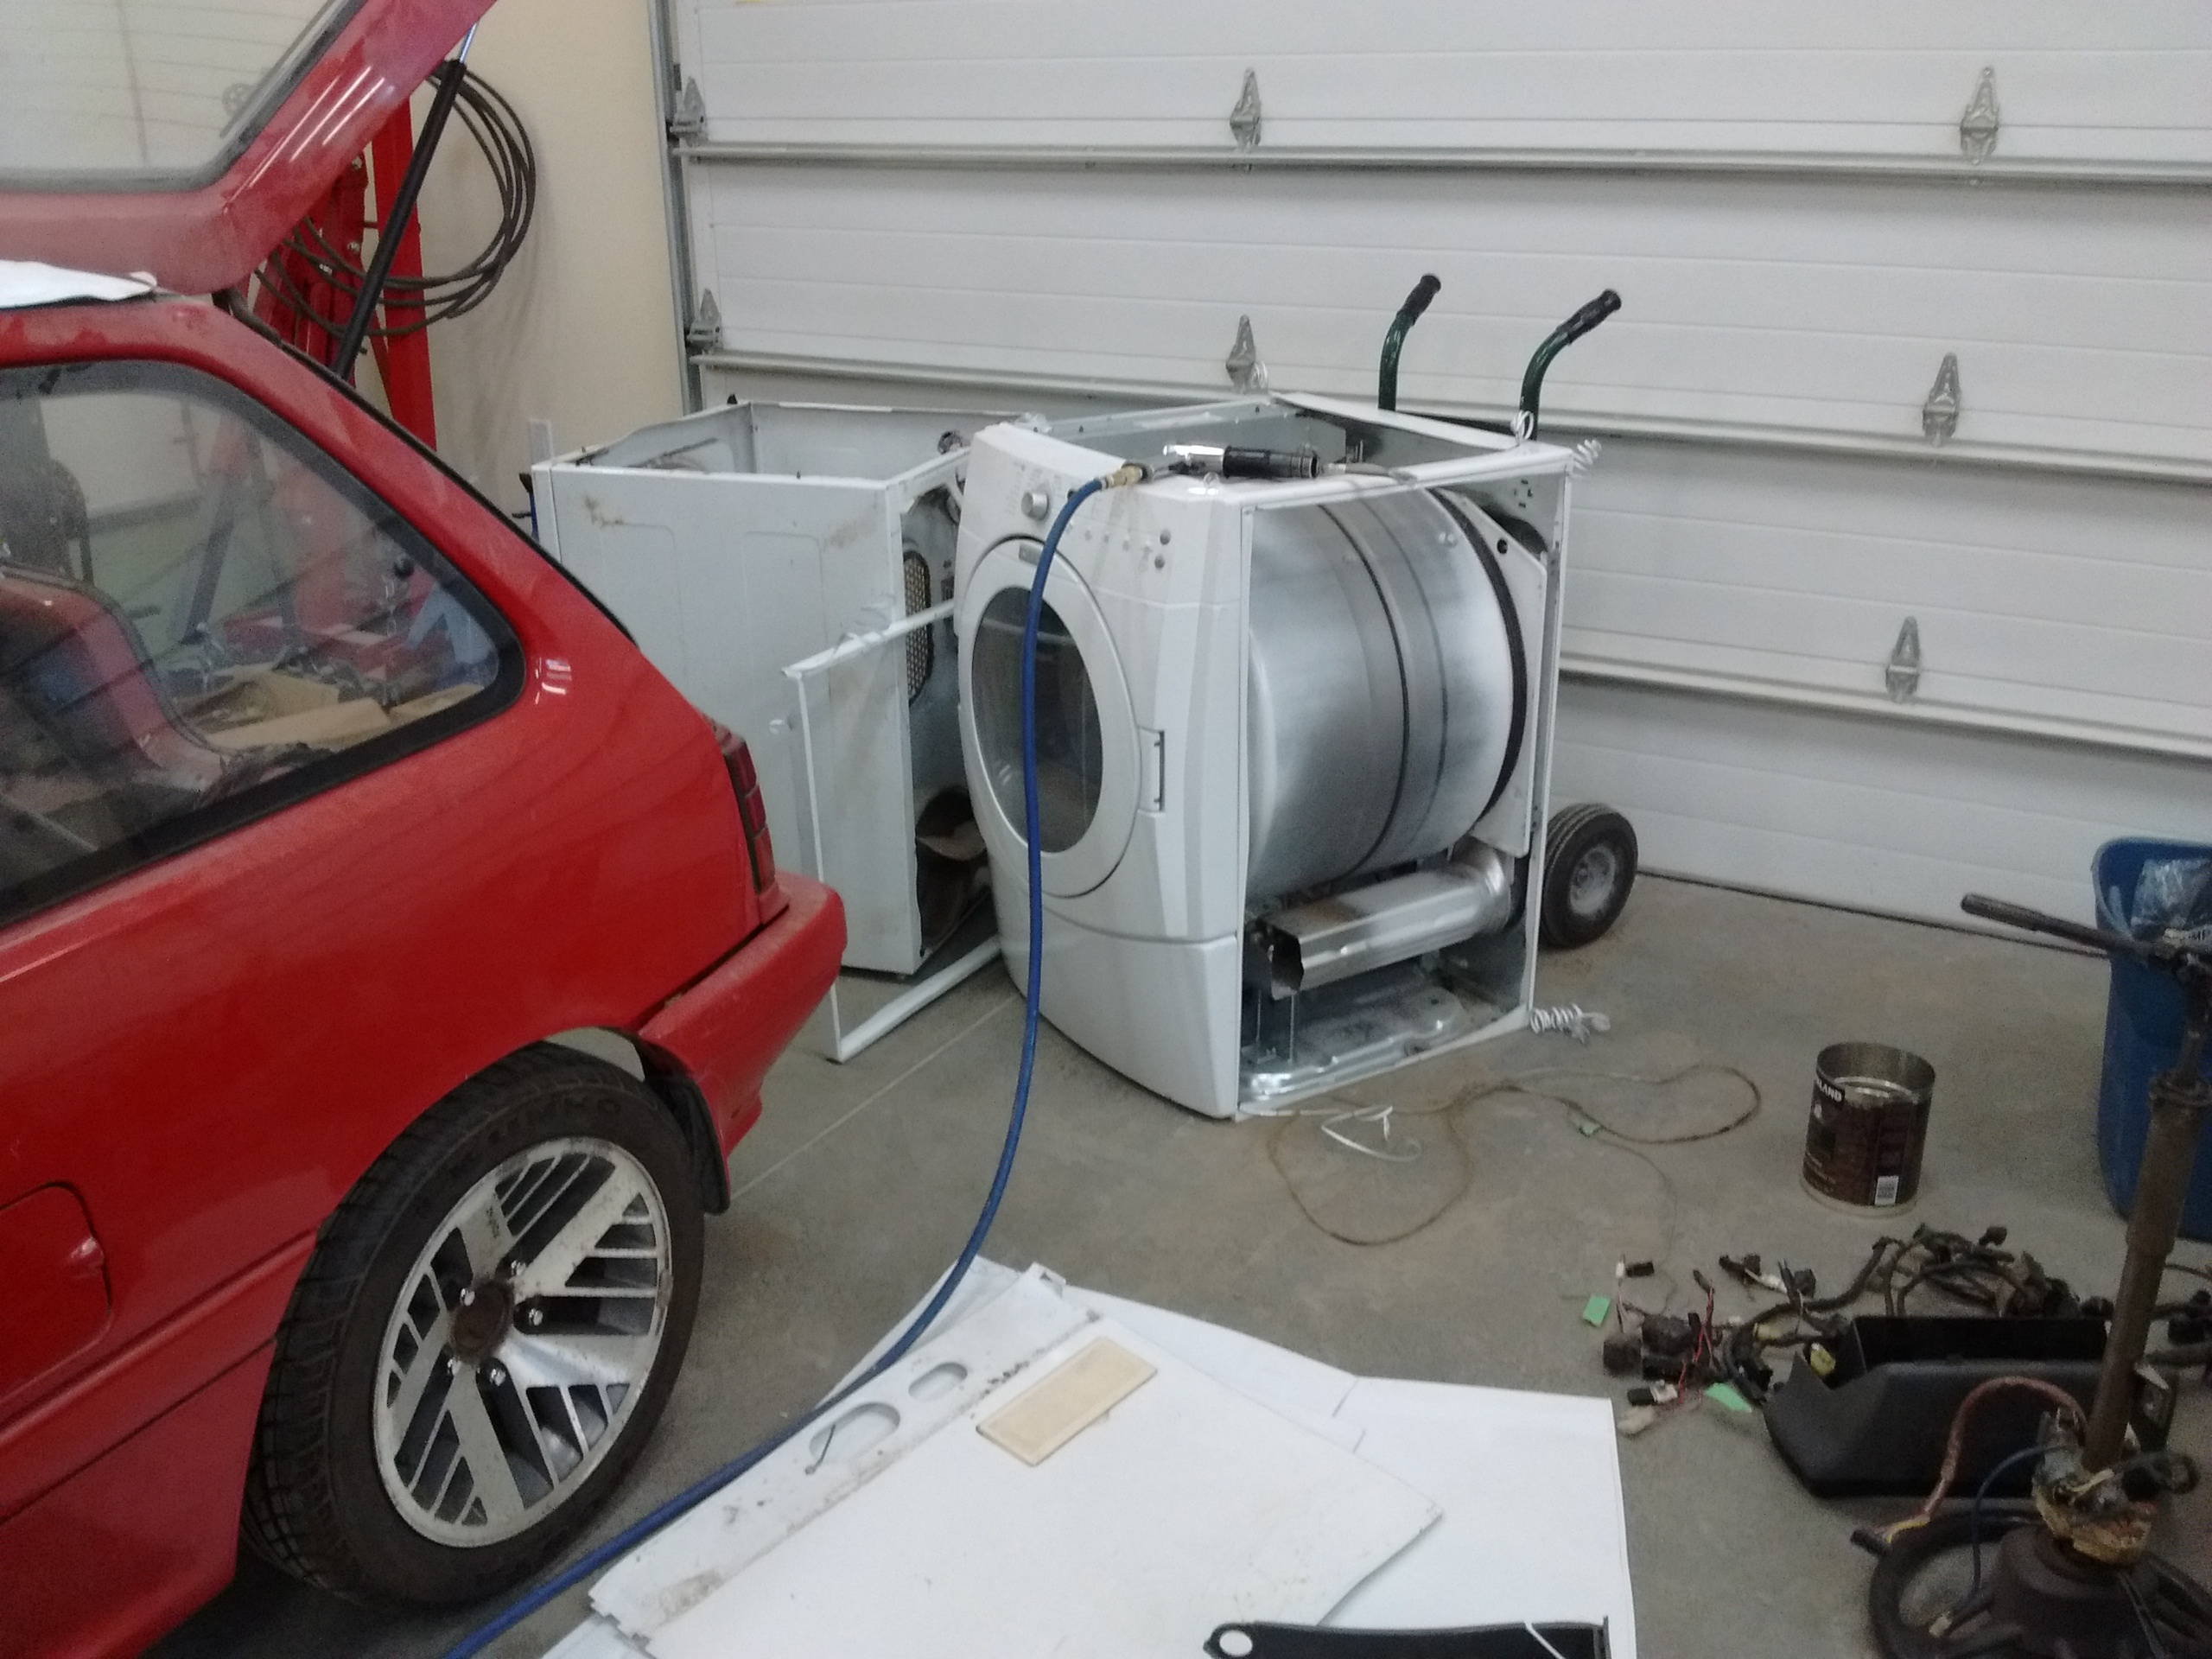
Cutting up some more dead appliances for sheet metal.
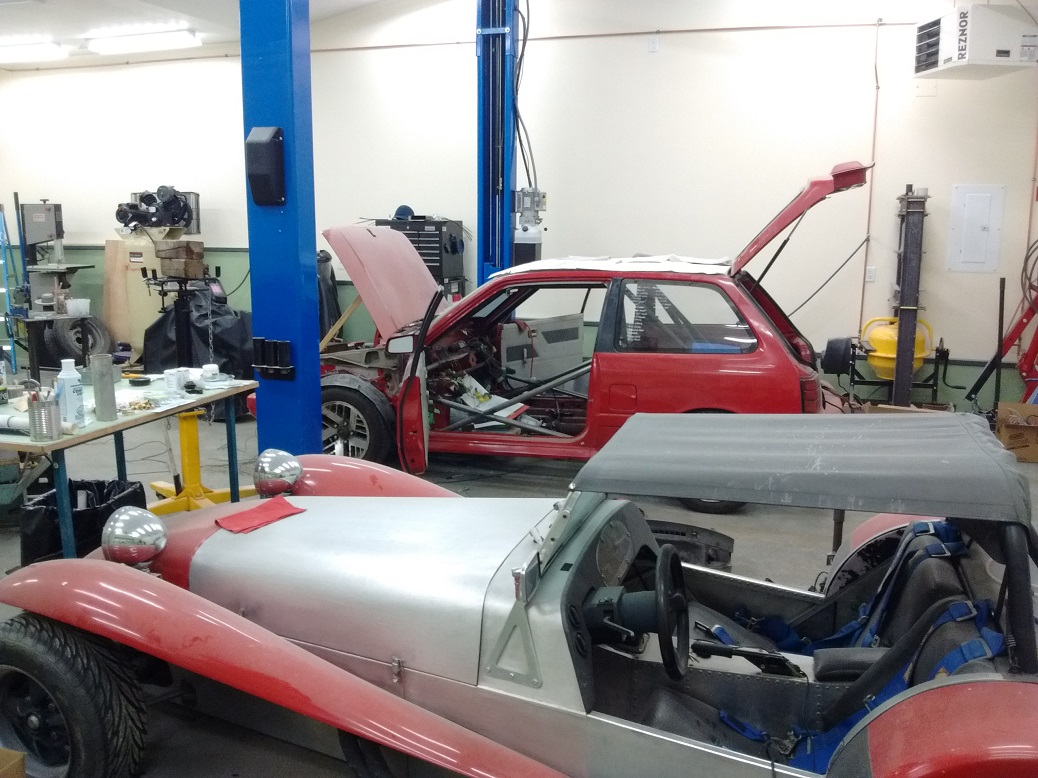
I finished off more of The Workshop, so I had to figure out where I left off months ago.
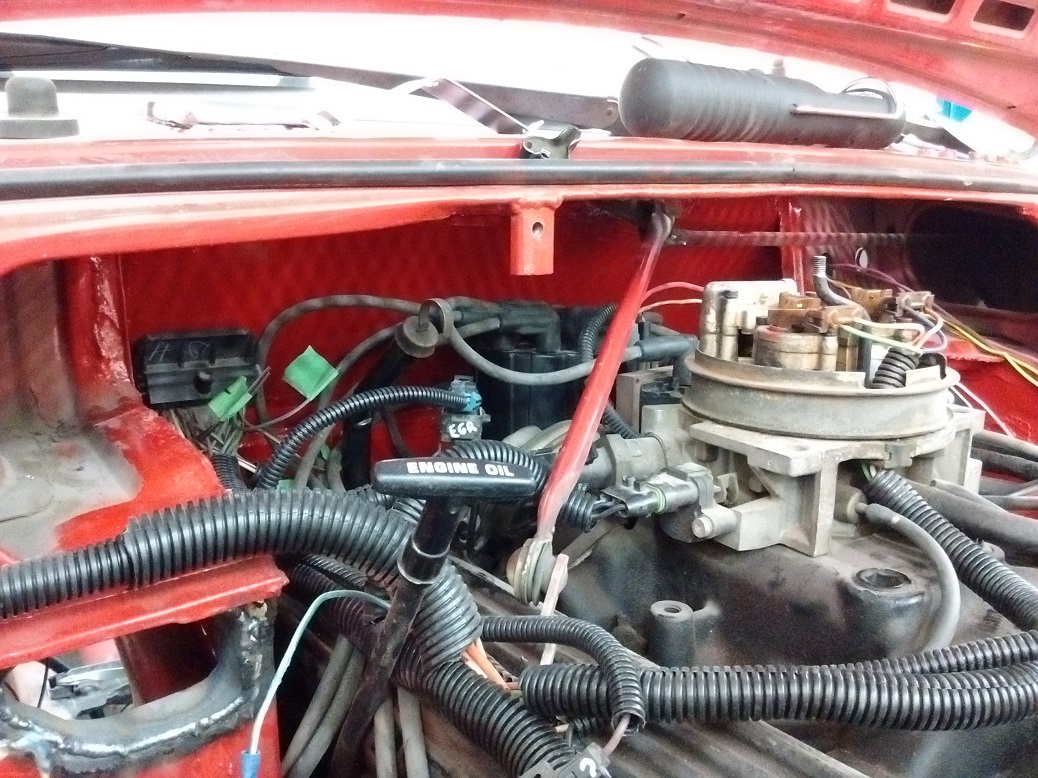
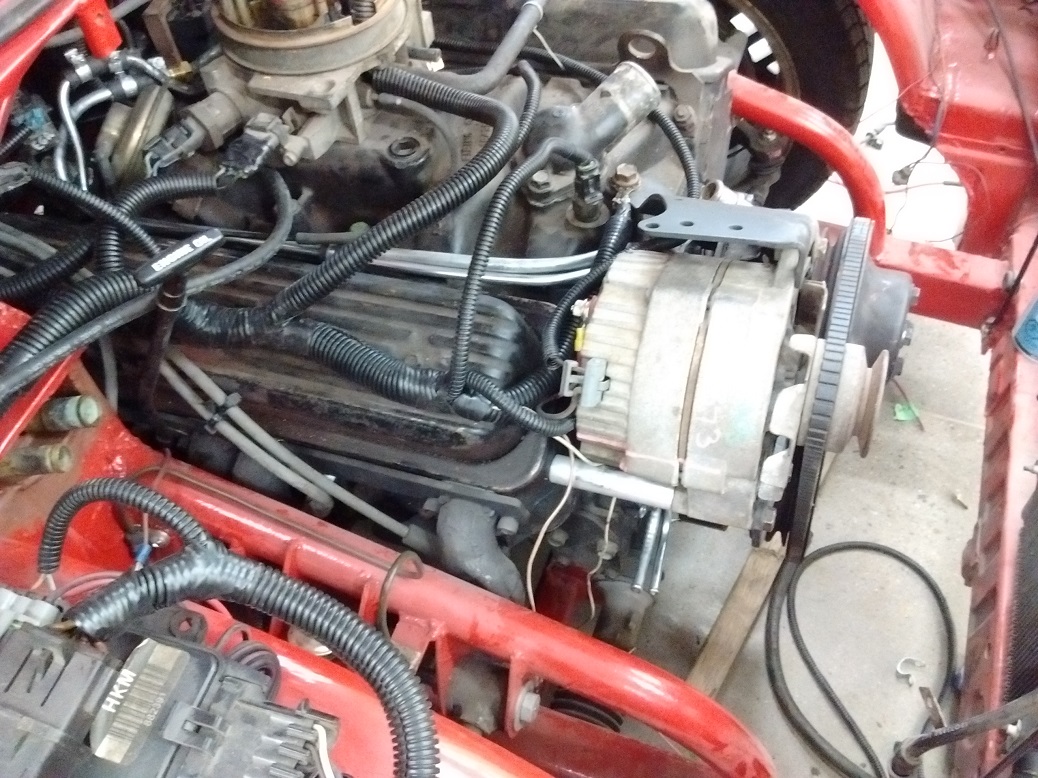
After two butt-kicking escapades with Megasquirting my Crusty Chevy, I put the HEI-8 all back in order on the Firefly. Cramped, eh? Even MORE fun to work on it.
Then it was trying to figure out where I left off three-odd months ago.
Ah yes. Wiring. Turns out I left things fairly well organized. Good! Also went through my pile of Firebird wiring clipping out all the connectors so they’re easier to find. Started making a list of what I need to get.

I pulled the plugs out of heater hose in/outlets and threaded the hose barbs back in so I can run a defroster. Wise, and potentially more legal should a vehicle inspection be ordered.
I finished wiring up the electrical to the engine (Coil +, tach, oil pressure, coolant temp), wrapped the loom a bit, and sat down inside to take a good look at the dash wiring. This, too, looks like I left it reasonably organized. I seem to have made everything that the ECU needs to plug into un-pluggable, my guess is so that it would be easy to remove entirely. I’m not really sure what my thinking was at the time.
I have to decide what to do about the battery. It will go in the passenger compartment, so I need to fab a sealed container for it. Then figure exactly how to run the wires. Plus I think ~now~ would be a good time to wire a disconnect so I am a bit more legal at the drag strip. Then I need to figure out where I’m going to put the switch at the rear, and still look “sleeper.”
Which wire runs the field on a 10SI alternator? Pin 2?
I also need to figure out where to run the gas filler, which to be ~street~ legal all must be separated from the passenger compartment via metal. I’m thinking the filler and disconnect mount behind the licence plate, and I make the inside back of the hatch seal against some sort of bulkhead panel that I have to fabricate. I don’t really want to move the factory fuel filler door, and sealing that properly to a new location would be challenging.
So, not a ton of progress, but I am getting my head wrapped around some details that thoroughly need to be detailed, and soon.
Picked up some 2/0 wire for the battery, as well as eyelets. Rubber grommets for whatever has to pass through something, and some heater hose because I ~am~ going to run defrost in the beast. Also some 1/2″ fuel line that I may or may not use to properly close up the PCV system.
Ordered a 4-post battery disconnect switch to be drag legal, but I haven’t exactly sorted out where that’s going to go just yet – not a lot of real estate at the back, and I don’t want to detract from the sleeper look on the street.

I have not been at all happy with the needlessly complex and rickety heater core mounting I had been doing. So I’ve hacked it all back and come at it from a different angle. I spent pretty much the whole day at this. Pics soon – the primer is drying right now. The new design is considerably more service-friendly should the core need replacing. Though once the dashboard is installed, all bets are off.
I also swapped out the allegedly 14ga wire in my MIG welder to something significantly more robust.
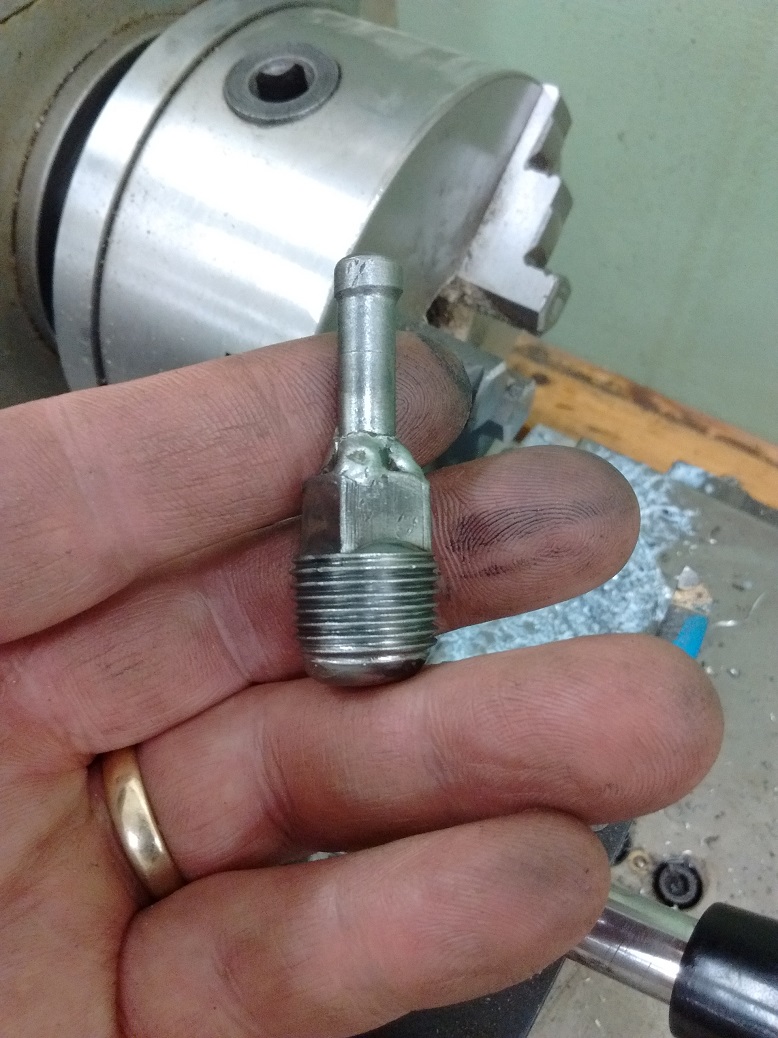
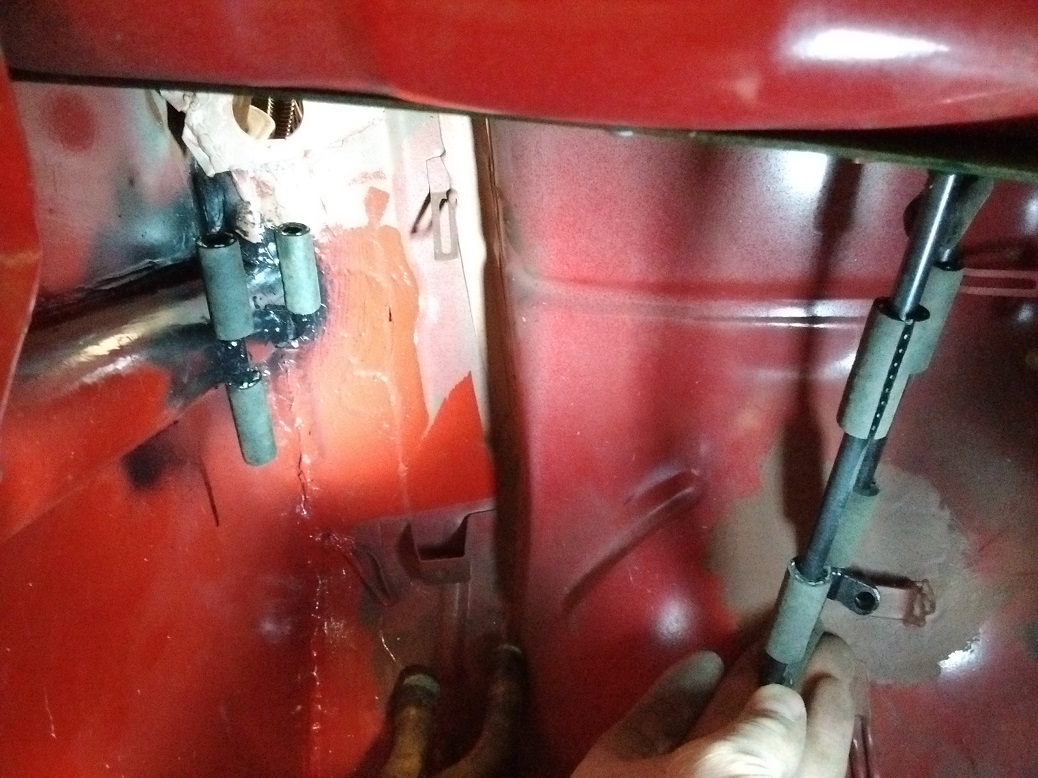
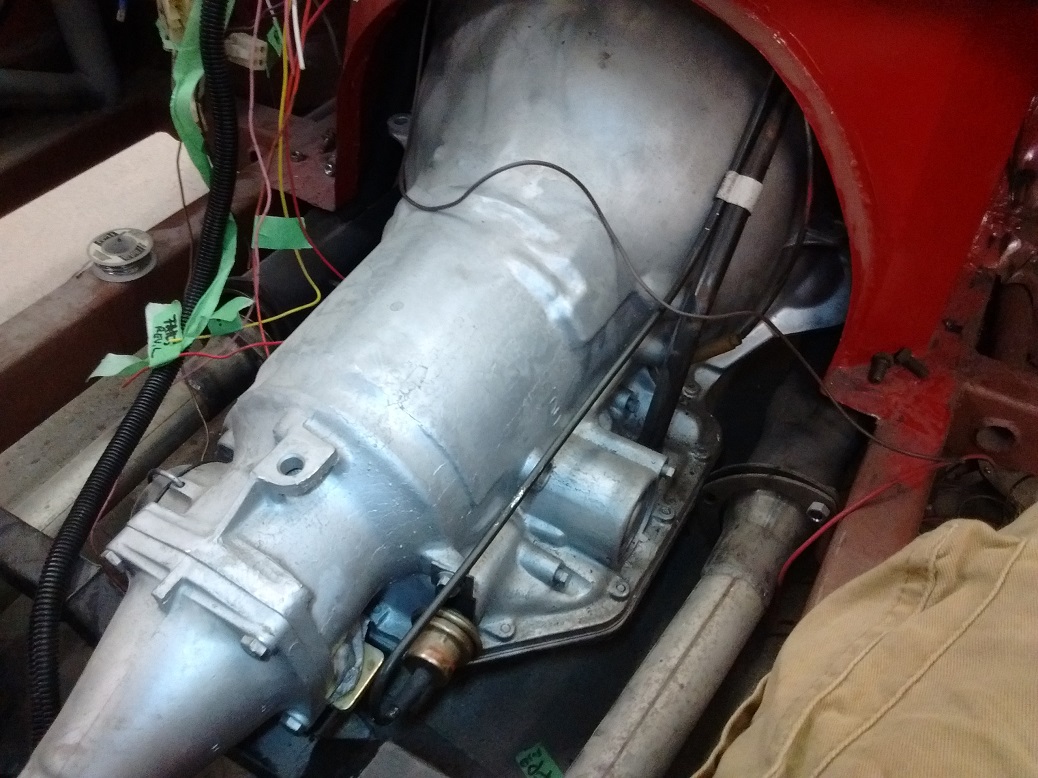
I also needed a port for the vacuum modulator on the transmission. I fabricated one using the manifold plug that was in a convenient hole, and a 5/16″ bolt. Turned down to 1/4″ on the lathe, welded together, shiny goodness.
And located in-situ.

I decided to put another coat of primer over the heater core opening into the engine bay. I’ll paint it red tomorrow, and probably connect the heater hoses at that time. Assuming they don’t kink like a drunken monkey trying to find their way there.
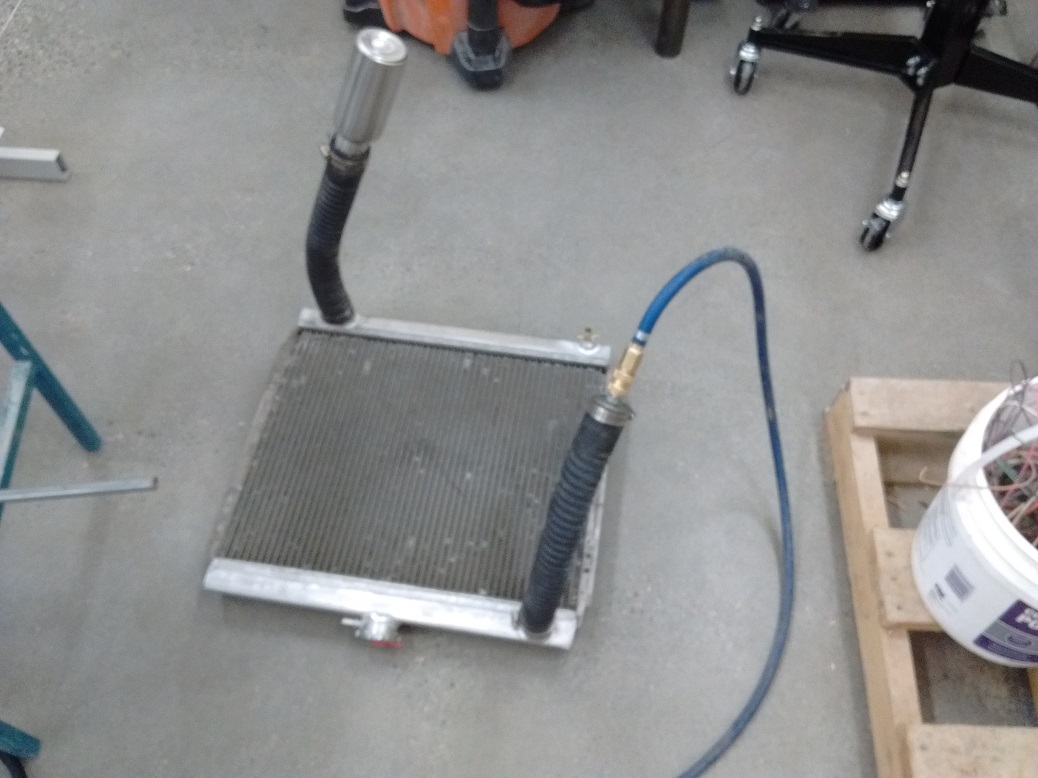
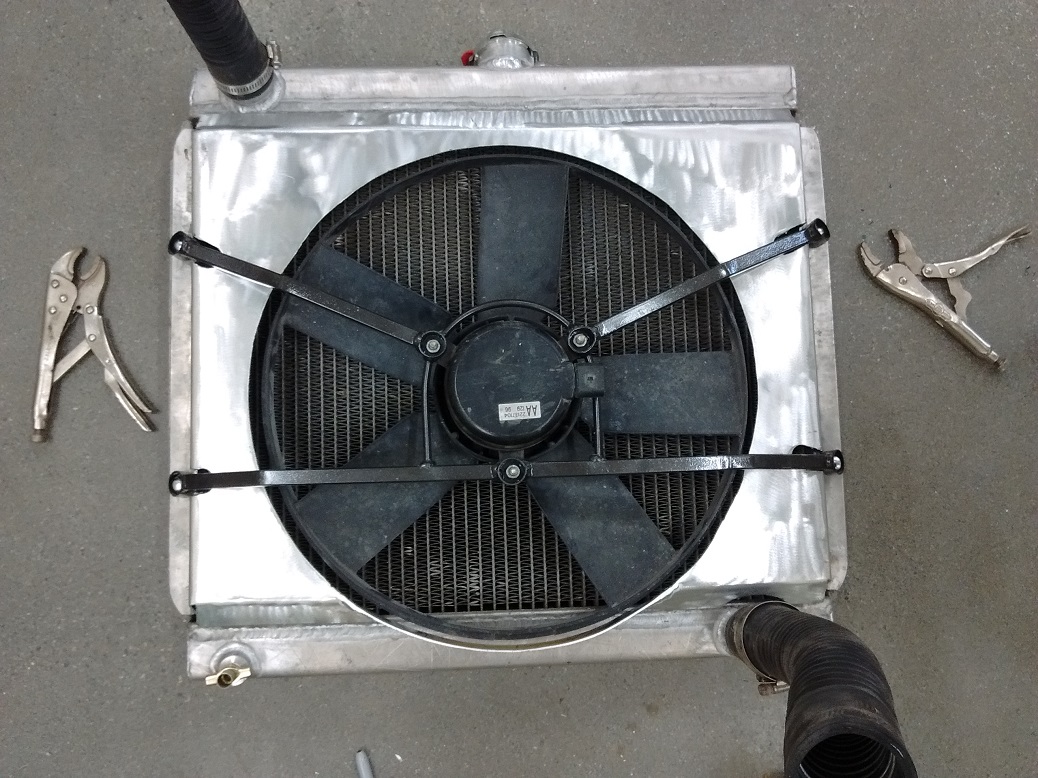
It was a year or so ago when I built this rad from a Ford Ranger core with a busted tank. I never tested it, so since it had to come out to deal with adding a heater, I might as well test it.
I machined a plug and threaded an air coupler, then just turned the compressor output to 10psi (yes, that’s a water bottle in the other hose). NO LEAKS! YAY! I was so giddy, I just couldn’t focus.
(July 2017)
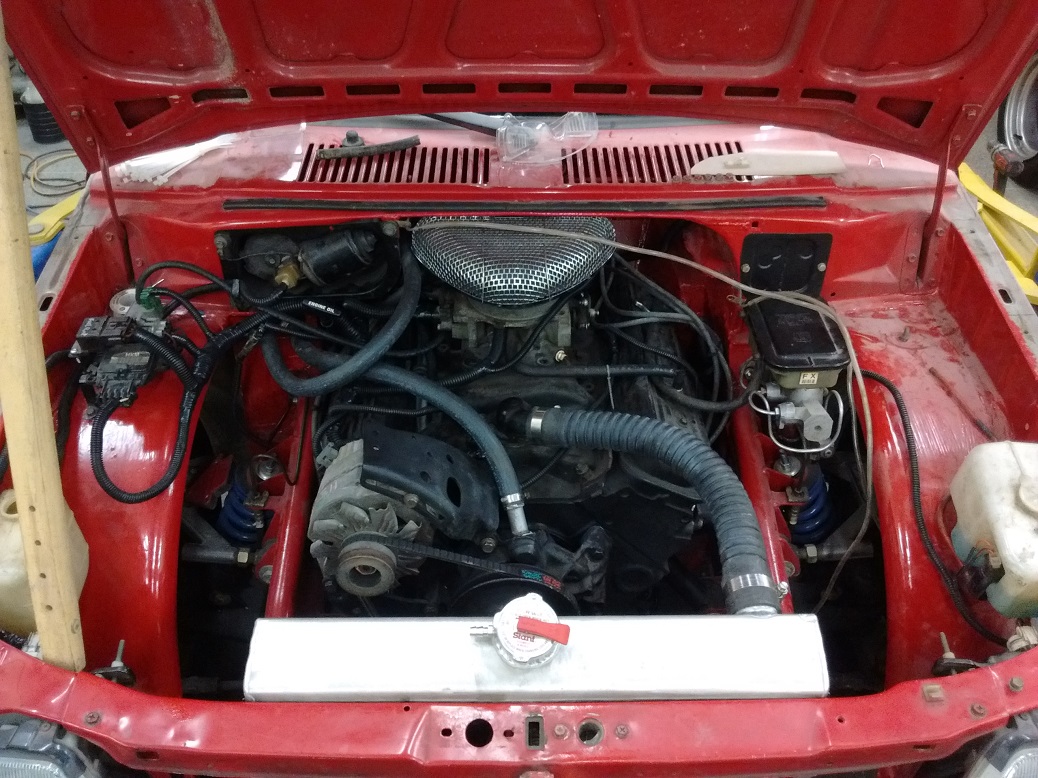
I got to thinking about how to run the fuel lines. I’d prefer to run the fuel lines down the back of the motor, but there isn’t a lot of room back there, and awful close to exhaust pipes. Then I remembered running passageways through the frame rail crossmembers to the rockers just for that. Just have to get the fuel lines out front.
I didn’t like the idea of running a lot of rubber under the hood, and those fancy braided hoses are pricey (though I can appreciate their appeal). I had a couple spools of fuel line, so I bent my own hard line for supply and return. I still have rubber connectors, only because I was connecting to the stub of the OEM TBI fittings. I may look at fabricating my own adapter to go from TBI to AN or something. I know they exist, but I already own the tools that can do make them.
After pulling the water pump off to run the fuel lines, I noticed the TDC mark on the harmonic balancer wasn’t super clear. I like to paint the line white so it’s easy to see.
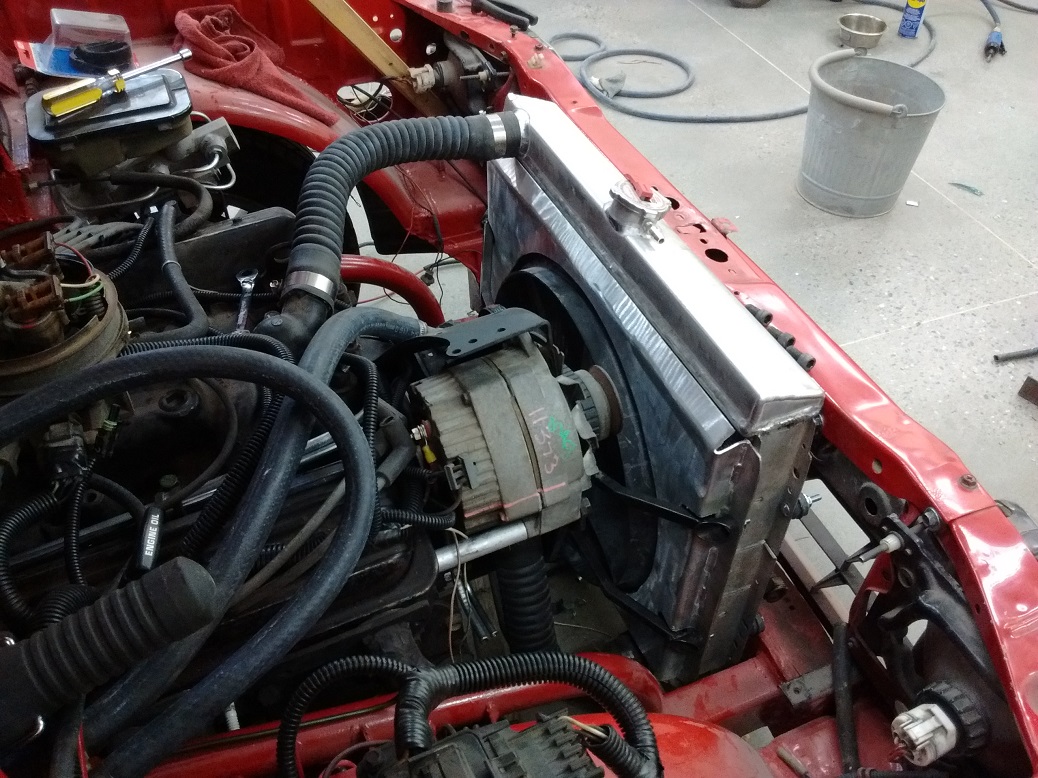
Fuel lines all buttoned up, and you can see the heater core poking out of the primered area right by the engine dipstick.
The heater core is going to install almost above the passenger’s unusually small feet. A couple hose covered pegs on the left will cradle the left heater core tank, whilst a rectangular loop will surround the right heater core tank. This loop has a pin at the top which is located in a nut welded to the fresh-air-closing-off-plate (because the engine is set back far enough that that air ain’t going to be all that fresh no more). The bottom is bolted to a nut welded at the wheel well. The whole thing pops out really nice and simple. VERY service friendly.
All this work is going to be really funny when I learn that I need to cut the wheel wells to clear the larger-than-space-saver-size wheels and tires. Hahahaha. Yeah.
The heater core, with CPU fan, with mounted 3D printed CPU-Fan-to-dual-sump-pump-flex-hose adapter, all cleverly located in a horrific space to work in.
Addendum – this got changed as the replacement heater core was not -exactly- the same as this one….
And, because I’m on a roll, I bent up a hardline for the TH350 vacuum modulator. This was my second attempt. The first one I made sucked.
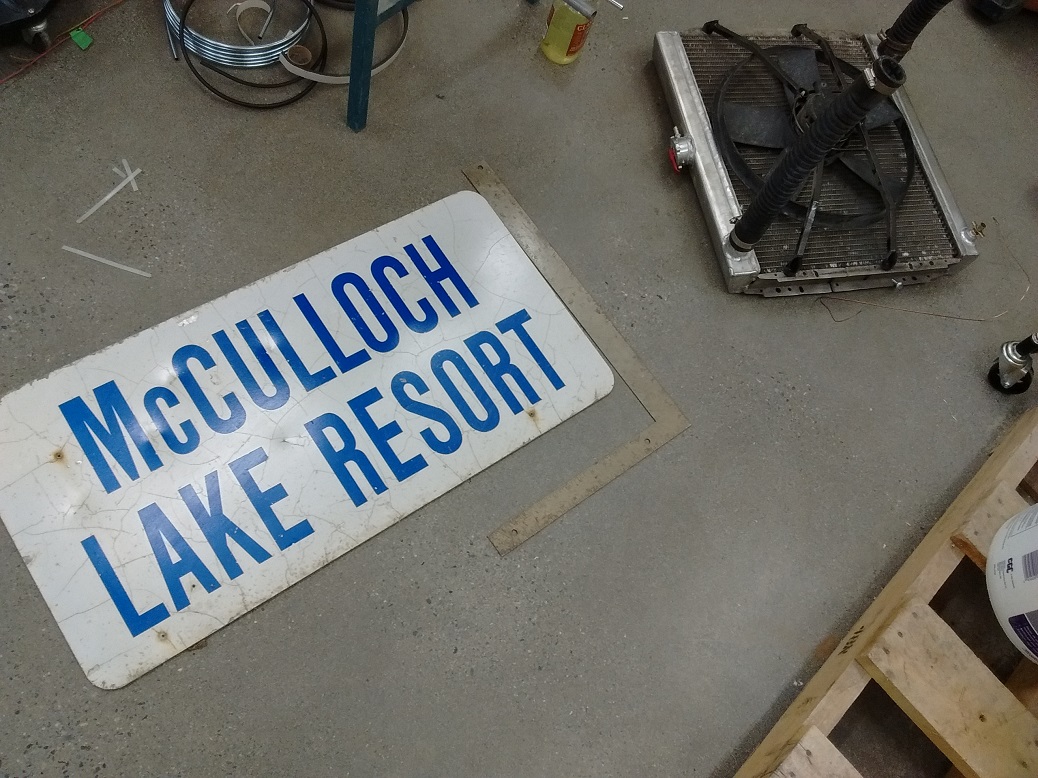
A while back I fabricated an electric fan mount, but I wasn’t totally happy with the lack of shrouding. I thought I could do better.
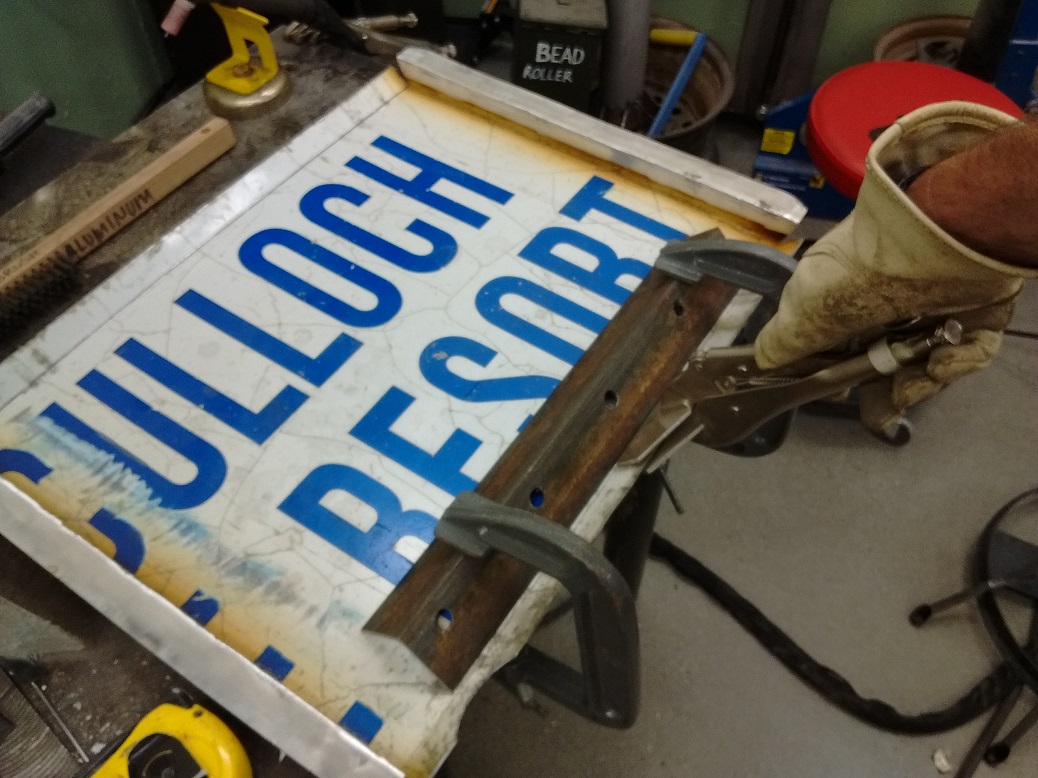
Scavenged road sign from highway maintenance scrap yard (rad and fan in background):
Cutting, bending, welding…
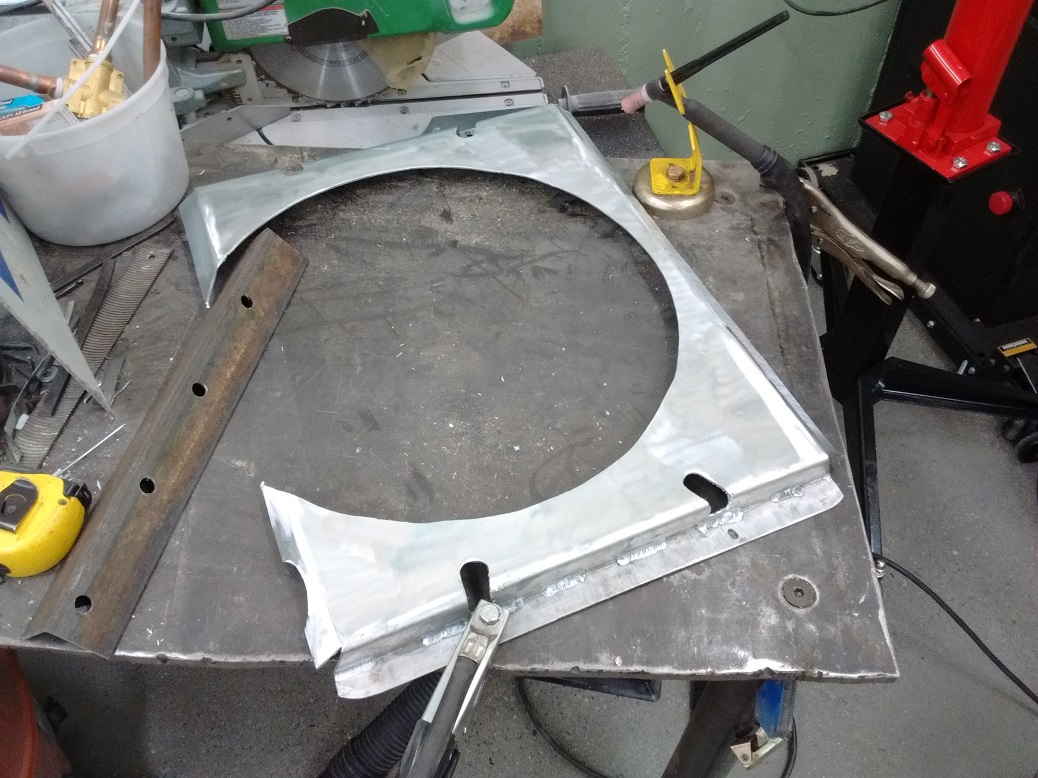
Notching to clear the fan mount.
More to come.
Rad shroud finished.
And mounted. Heater core hoses done too, though I think I should fab some sort of bleeder.
*sigh* Almost got there. I was up ’till 1am last night working on the Firefly, and by 11pm tonight my body was crashing, despite what my mind wanted to do.
I resolved a stray wire that apparently turns the light on inside the (now absent) stereo.
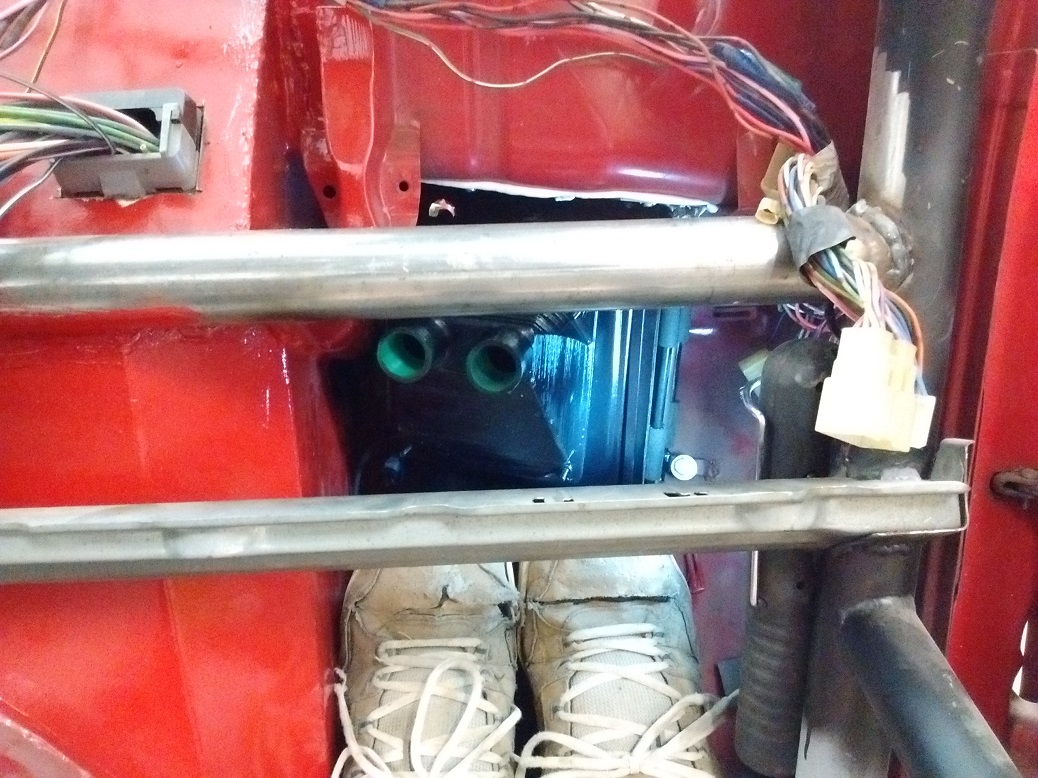
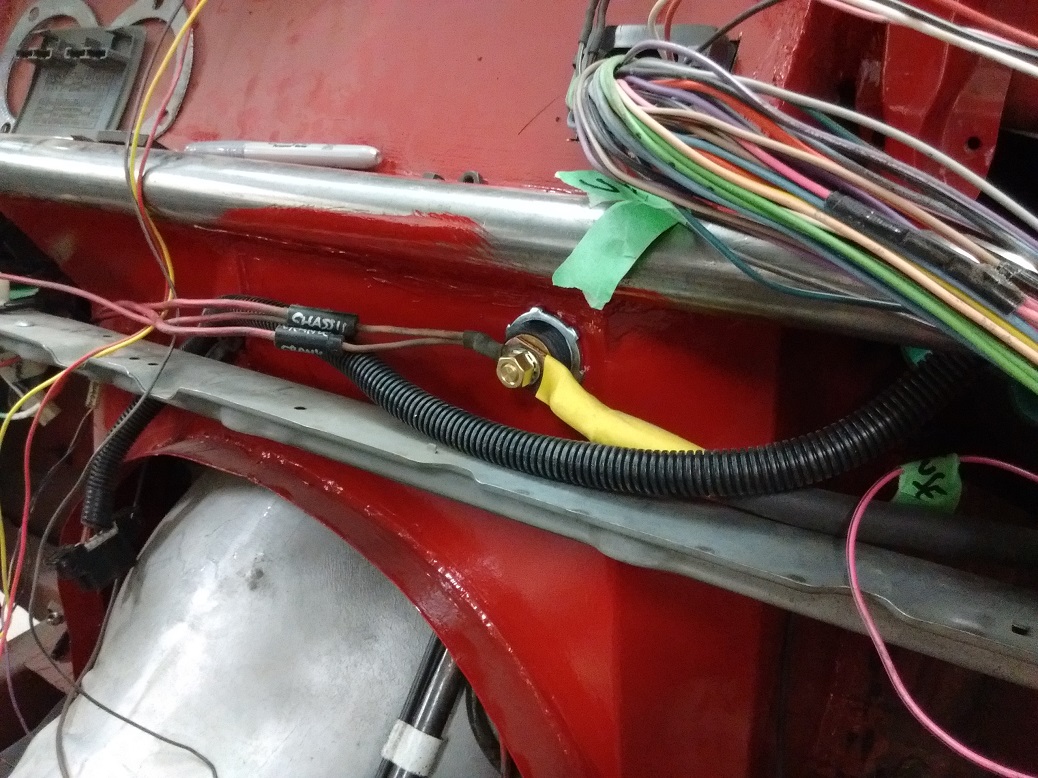
The battery bulkhead fitting is placed just behind the passenger side head. Lots of room on either side, and makes it easy to connect to the starter as well as run the EFI.
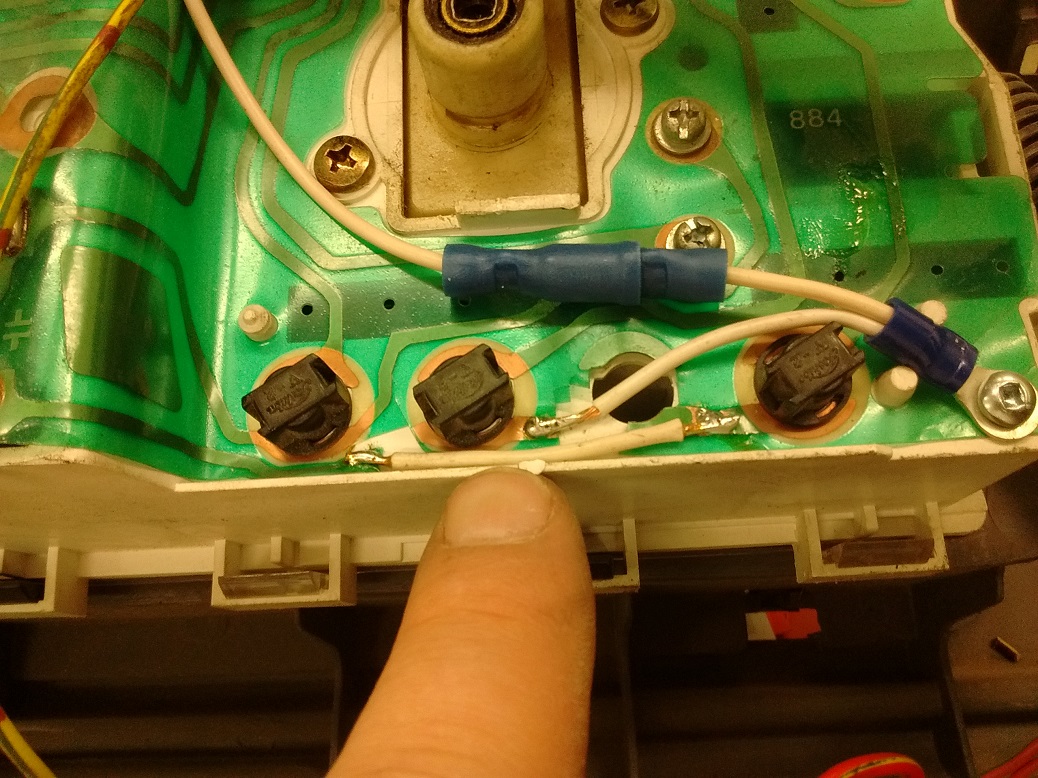
Suzuki deals with the “Charge” light differently than GM did. The light needs to see POS from the alt on one side and POS from the battery on the other side or the light comes on. To make this work, I needed to alter the gauge cluster circuit. I cut the common ground off of the “Charge” indicator lamp, corrected the rest of the ground, and tapped into it with a wire. To make it less drunk if someone has to remove the gauge cluster, I ran the wire through a pin I had cut out. Ideally this new wire then taps into keyed power, but I need to run this to the disconnect switch at the back.
The eyelet on the bottom right (above image) is merely there as a strain relief, it does nothing.

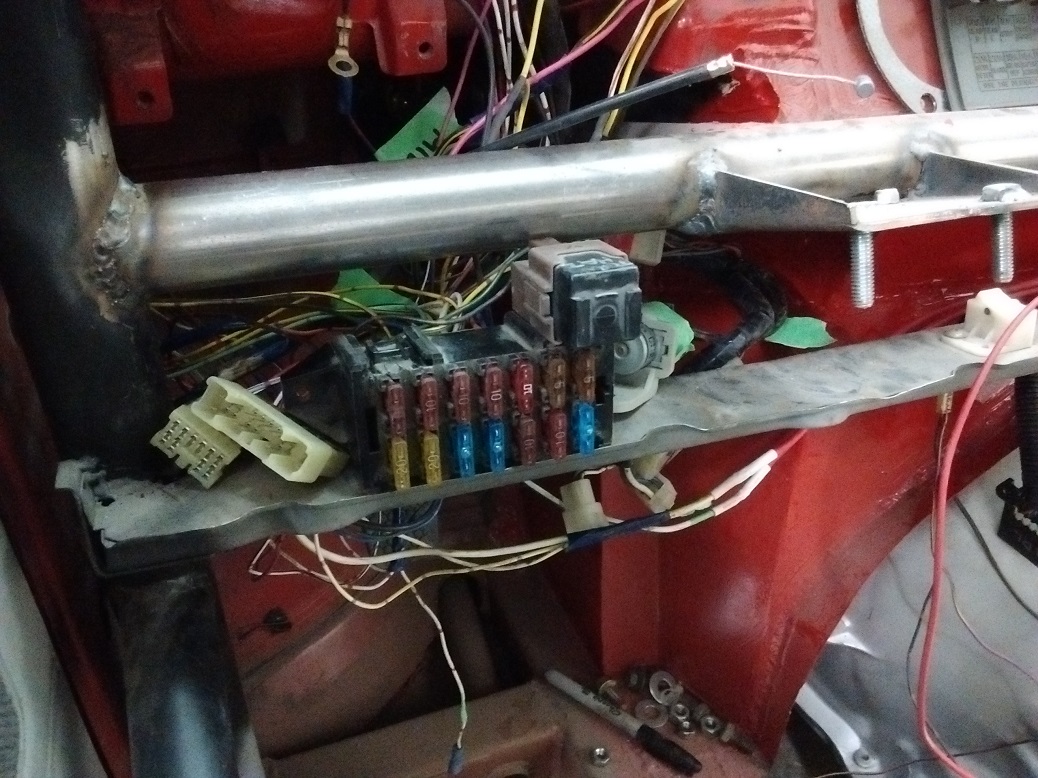
Fuse box got tidied up and mounted. Connected a few grounds.
I hoped to be able to light up the electrical today, but I think it’s best to be overly cautious and make sure it all looks very good before inviting the Prince of Darkness.
Where I’m working:

I hooked up a Main relay for the ECU et al. I probably didn’t need to, but it certainly keeps all of its current out of the fuse panel. Easy providing source through the plethora of fusible-link-and-fatty-power-wire that came in the Firebird.
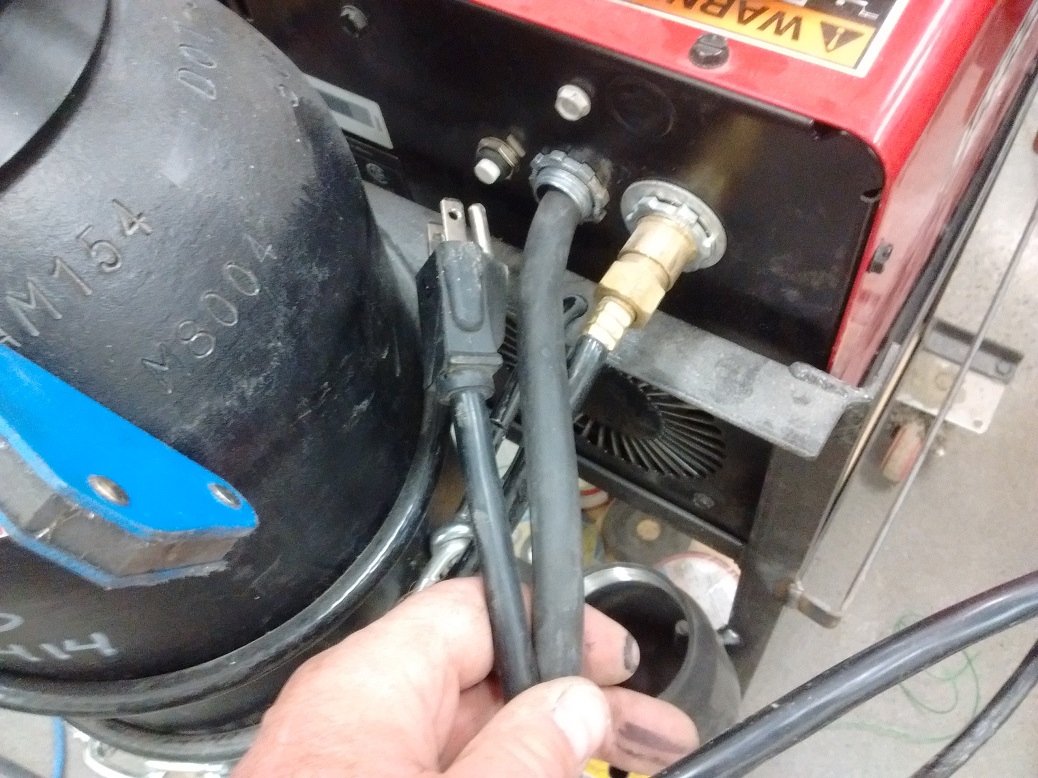
I used a fused pair of alligator cables to connect a battery to the car’s electrical. Using a 10A fuse means popping early before catastrophic melting of wires. That reminds me – I need to get some more fire extinguishers for the shop.
I did a final check-over of the wiring system, then held my breath and hooked up the battery.
The good news:
No smoke came out.
Wipers work on both high and low. Squirter works.
Signals work. 4-way works.
Brake lights work.
Park lights work.
Horn works.
Fuel pump relay clicks to prime (no pump attached yet, did not check for voltage).
There is 12V at the ignition coil when the key is “on.”
Check engine light, battery light, and oil pressure light are on when the key is on (engine off).
No headlights though. Juice going to them, but probably lost the ground in the dash harness somewhere.
No cluster lights when the lights are on – but the switches are backlit as they should.
No juice to starter solenoid (not connected, just checking for voltage).
No “bulb test relay” action. No relay at all. Probably related to the not-likely-going-to-crank issue. I need to find out where it went. I have NO extra relay in my dwindling boxes of electrical stuff.
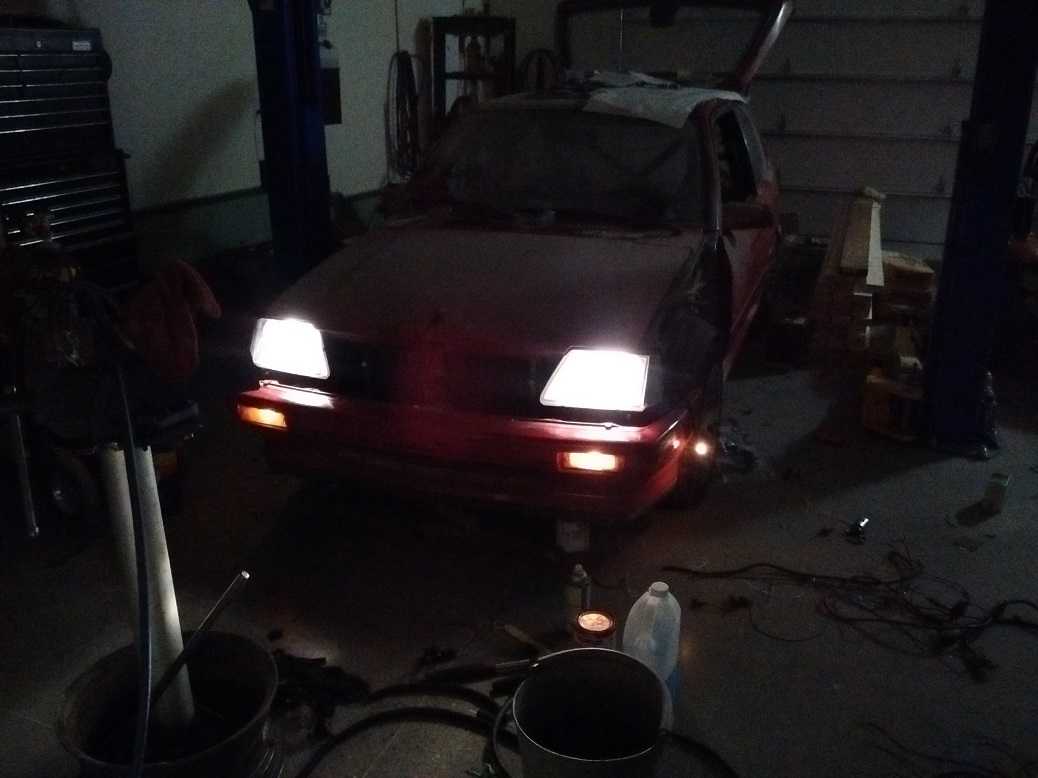
The lighting issue was tracked down to the main light switch (by the gauge cluster) making no contact at all. I disassembled the switch, cleaned the contacts, and ended up with high beams only, no low beams. High and low are determined by the signal stalk, so that, too, was disassembled, cleaned, and reassembled. And now we have lights! I cannot begin to describe how good this feels!

The “no bulb test” issue was tracked down to the “you-left-the-key-in” buzzer and the “clutch-pedal-cranking-switch,” while identical, are not interchangeable.
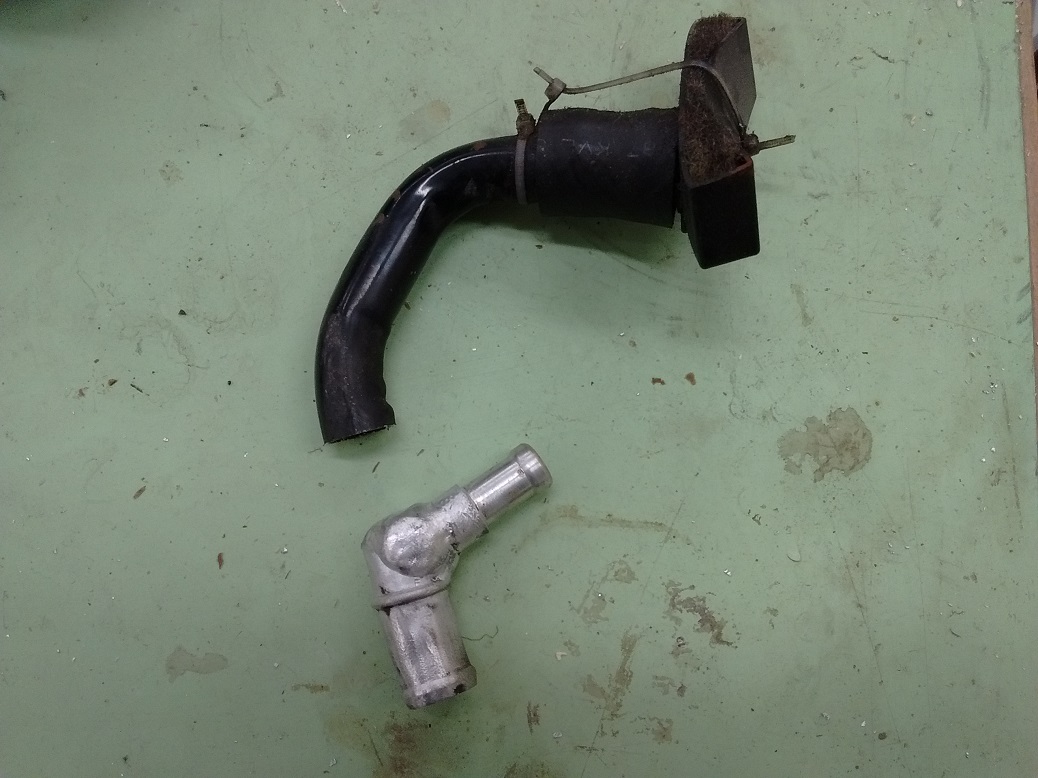
When I bought the Firebird, the previous owner had installed a 14″ chrome open-element air filter. Instead of properly connecting the PCV fresh air to it, he just zap strapped the factory filter to what was left of the tube. Not what I wanted.
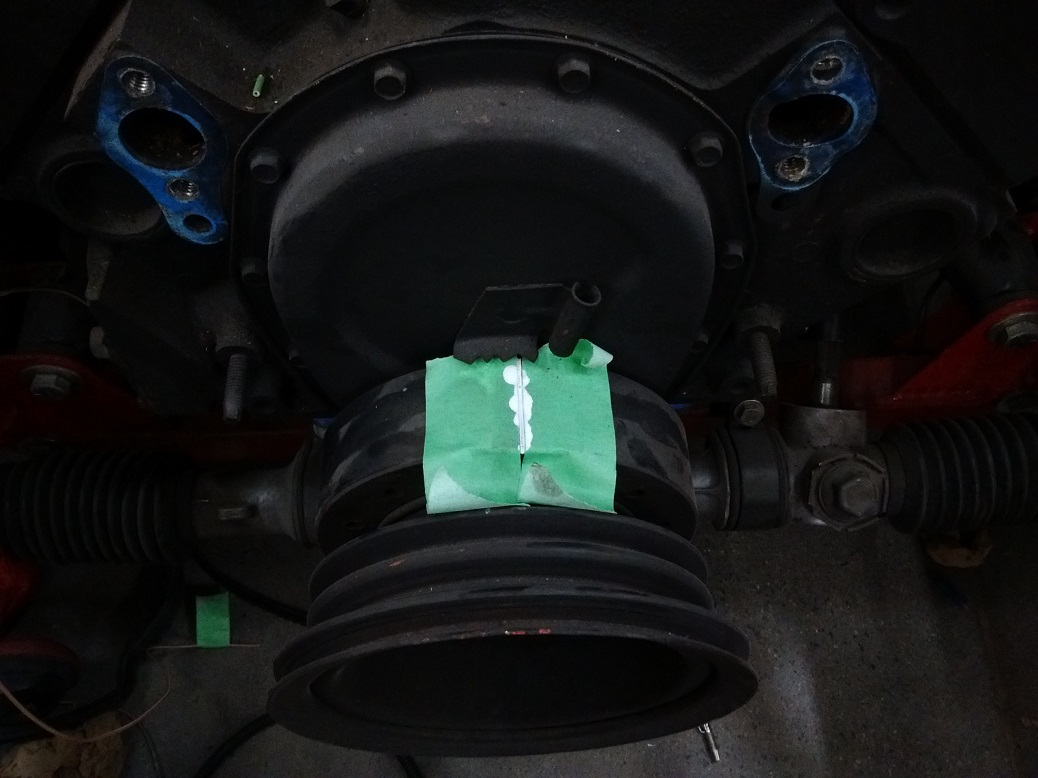
The air filter I am using is an Edelbrock Pro-Flow 1000 because it fits. It came with pieces to attach the PCV system properly, using 1/2″ hose. I went to LordCo and bought a couple feet of 1/2″ fuel hose (turned out they gave me 7/16″, but it worked). I then started machining a bung out of 3/8″ SCH40 pipe, but discovered that the PCV tube was aluminum, not steel, so I made another one out of 5/8″ solid aluminum round. These I TIG’d together (but didn’t even think to use my sand blaster to clean it up first – I’m not used to having everything accessible – haha! Consequently not my prettiest welding).
I also re-organized the fuel-relay/fan-relay/MAP-sensor/knock-sensor-module area and cleaned up the wiring on the motor.
I reconnected the wiper arms (that ~just~ clear the TBI and the distributor), and started figuring out the windshield squirters.
Tomorrow I need to put some work into the fuel tank. Turned out I made one heck of a mistake on it. Grrrr…..
On a cool note: the Firefly is Front Page of Grassroots Motorsports Magazine’s website today!
