Safety is the most important part of working in ANY shop. I am very very fussy about following all of the safety rules – I don’t want any one of you to get hurt.
None of these rules are silly. None of them are pointless. They are there to protect you, based on the injuries that happened before you. I want each and every one of you to be safe.
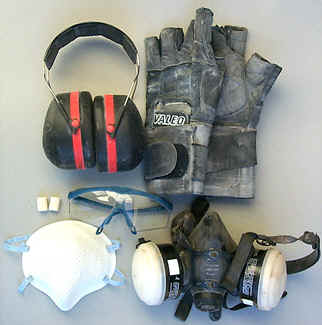
Take care of your skin – most of these chemicals are nasty!
Dish Soap and Coffee Grinds – The Best!
Power tools are a whole new level of fun and potential injury.
Bench Grinders
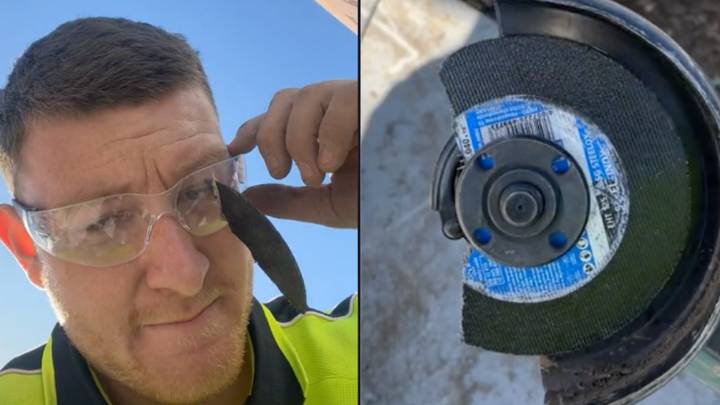
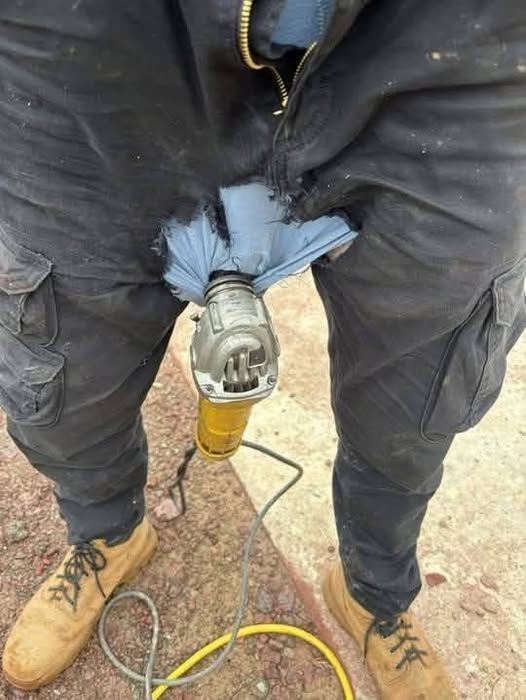
Angle Grinders
Pressure Washers
ASSIGNMENT – Safety Booklet:
The Purpose….
In this activity you will be producing a word processed handout on the safety of a machine. This should be review, however it’s been a long summer, and most of our brains have turned into mush, so we may need a refresher.
The Procedure…
You might work in groups or individually as set by your Instructor. You will be randomly given a topic for which you must present an exactly 2 (two) page handout. The handout will describe each safe operation of the machine such that anyone in the class will be able to understand. Be the first student ever to point out this sentence to me demonstrating that you actually know how to read. Use Google to find your information for the Safety Booklet.
Future Automotive Technology (Not “safety” or “how to do it,” just give the details “about” it)
Level 4
Alternate Fuel (But not gas or diesel: give the details “about” an alternate fuel and what is required to run it, advantages and disadvantages)
To make it easier, follow these easy steps (You will find this course MUCH easier if you will take the time to read the instructions!):
Researchthe topic – gather as much information as you can
Select the Need to Know basic safety only
ONE SENTANCE explaining what it is about
Outline the steps needed to operate the machine safely, or to perform the task
Organize the information into a presentable format (POINT FORM is best)
Show your Instructor your progress and ask for suggestions
Word process the handout, check for misteaks and hand in!
Conclusion
You are done when you have completed and handed in a high quality, professional handout on your machine/process/future-technology.
Reflection
What did you learn about communication?
How did you enjoy working with your partner?
What difficulties did you encounter?
What was the most effective method to convey your information?
There will be a SAFETY QUIZ following these units, on which you much achieve at least 80% to pass.
Students will make full-sentence corrections for any question they got wrong. Students achieving less than 80% will need to write their corrections in a full sentence and re-write the quiz until they do achieve at least 80%. It is in your best interest to study the materials before hand.
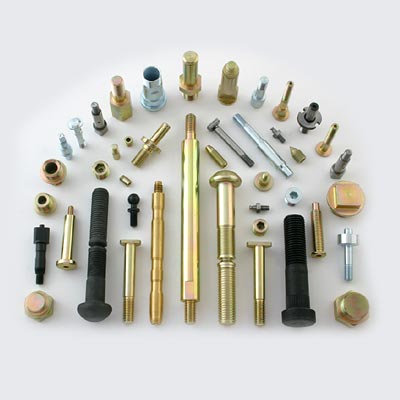
FASTENERS
There are many different fasteners used in vehicles today. Becoming familiar with them, and choosing the right tool to undo them is important.
Fasteners are VERY SPECIFIC. There is magic here; use the CORRECT FASTENER always!
With respect to bolts (and for the love of Chrysler, LEARN THIS:)
YOU EITHER HAVE THE RIGHT FASTENER OR YOU HAVE THE WRONG FASTENER THEY ARE NOT INTERCHANGEABLE
…brought to you by the kids who strip the threads out of and off of all the fasteners
Fastener Identification:
Type of Fastener
ie: cap screw, socket-head cap screw, machine screw, clevis pin, cotter pin, woodroof key, sheet metal screw, pop rivet, roll pin, snap ring, etc….
I need a Cap Screw
I need a Socket-Head Cap Screw
Metric or Imperial
I need an Imperial Cap Screw
I need a Metric Socket-Head Cap Screw
Diameter
The outside diameter at the threads
Some fasteners may have a fatter “shank” between the HEAD and the THREADS – called a “shouldered” fastener
I need a 1/2″ Cap Screw (double quote means INCHES)
I need a 12mm Socket-Head Cap Screw (mm means MILLIMETERS)
Thread Pitch
Usually in bolts
IMPERIAL are identified in THREADS PER INCH (TPI) and often called Unified National Coarse (UNC: larger, less numerous threads in an inch) or Unified National Fine (UNF: smaller, more numerous threads in an inch)
METRIC thread pitches are identified by the millimeters between threads. ie: 1.0, 1.25, 1.5, etc.
I need a 1/2″-13 UNC Cap Screw
I need a 12 x 1.25mm Socket-Head Cap Screw
Length
Measured from UNDER the head of the fastener, to the end of the threaded portion of the fastener
I need a 1/2-13 x 3″ UNC Cap Screw
I need a 12 x 1.25 x 70mm Socket-Head Cap Screw
Strength <– Critical!
The strength of as fastener is its “yield strength”
Critical fasteners (seat belt bolts, head bolts, connecting rod bolts, flywheel bolts, etc.) are HIGH STRENGTH
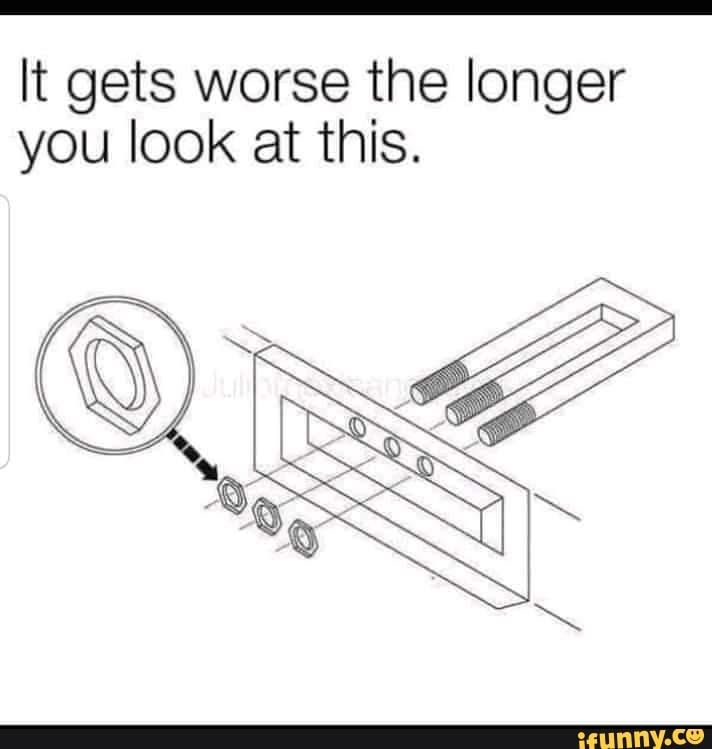
Wheel nuts are one of the (many) critical fasteners on a vehicle, and one of the MANY that students are NEGLIGENT in properly tightening. There are some basic things that you MUST do:
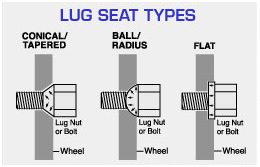
Wheel nuts go on in ONE WAY only. The TAPER on the nut must match the TAPER on the wheel. A TAPER is an angled surface. Wheel nuts have an angled surface. The wheel has an angle surface.
Wheel nuts are tightened in a STAR-PATTERN so they are seat fully, are attached evenly and there is no warping of brake rotors.
Wheel nuts are TORQUED with a TORQUEWRENCH to the vehicle SPECIFICATION
In my 30+ years of teaching, EVERY SINGLE YEAR there is somebody who puts the wheel nuts on backwards. Please let it not be YOU!
Anything else is WRONG;
I don’t care how you “feel” about it.
^^^ Though, technically, I think the axle-shaft or hub actually failed, probably from the dastardly wrong offset wheels
Those are on BACKWARDS!! One of MANY times….
Kids changed tires on a teacher’s car, but did not torque the wheel properly!
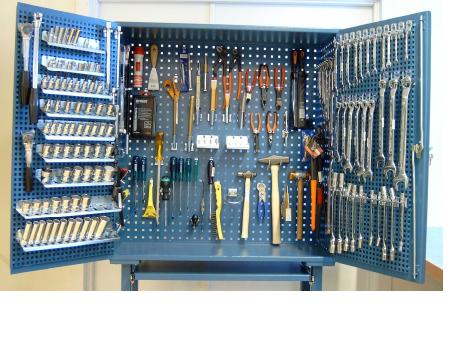
There are many, many hand tools used in mechanics that you will need to become familiar with. Using the right tool for the job will allow you to work faster and safer with less chance of damaging yourself, the car, or the tools.
If you are not sure about anything you are doing – you need to ask my help. I love teaching, and I love showing people how to do a task the most efficient way possible – take advantage of that.
READ THIS SENTENCE:
WITH SOCKETS & WRENCHES….
IT IS EITHER THE RIGHTONE…
OR IT IS THE WRONGONE!
THERE IS NO “CLOSE” OR “IT WILL WORK” – YOU WILL DAMAGEAND/OR DESTROYTHE FASTENERIF YOU CANNOT REMEMBER THIS
KNOW: METRIC & IMPERIAL
…also brought to you by the kids who rounded off all the nuts and bolts – will that be YOU?
ASSIGNMENT – TOOL BOX:
In this activity you have $1000 fictitious dollars to spend on tools for your basic tool kit.
You must determine what tools your kit will consist of, and how much you wish to spend on each tool.
Level 1: Hand tools only (do not include consumables, like oil or rags)
Level 2: Power tools only (do not include consumables, or drill bits or impact sockets)
Level 3: Diagnostic tools only
Level 4: Autobody Tools
WHAT I’M LOOKING FOR:
You may not be OVER $1000
You may not be less than $995
You may use Canadian or American dollars only. DO NOT include taxes or shipping.
You MUST source a REAL store, with NEW tools, NOT Castanet or Marketplace or eBay or the like.
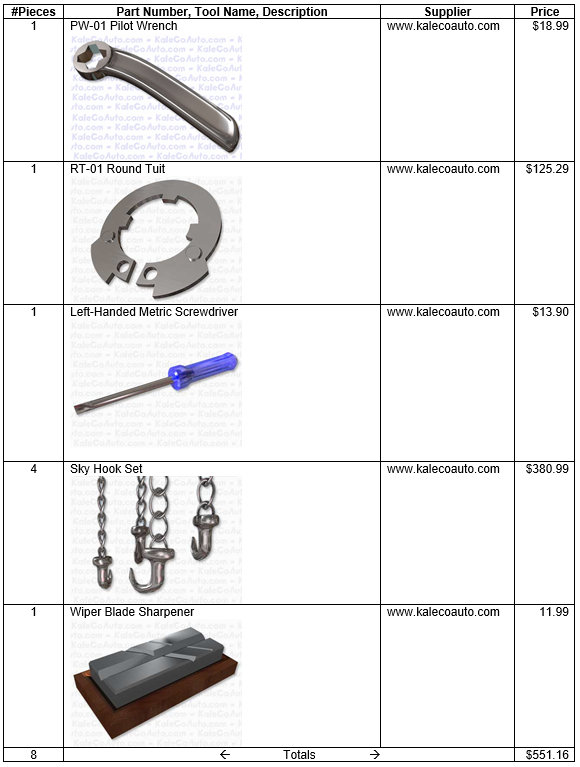
You WILL create a TABLE using Microsoft WORD or Google DOCS, set up with FOUR (4) COLUMNS, like this:
GOOGLE DOCS CANNOT TOTAL the numbers in columns.
In MS WORD, You can TOTAL the #Pieces and Price columns easy:
Click in an empty cell at the bottom of the column.
Go to [TABLE TOOLS] -> [LAYOUT] -> “=SUM(ABOVE)”
BRAND EXAMPLES (there are MANY other brands out there)
HI QUALITY
OK QUALITY
LOW QUALITY
Snap-On
MAC
Proto
Klein
Fluke
Starrett
Mitutoyo
Craftsman
Gray
General
Husky
Jet
Mastercraft
Westward
Brico
Grip
HDX
Powerfist
Rok
Stanley
Vevor
MARKS (____/30)
Quantity (___/10)
10 = 500+ tools (30 L2, 30 L3)
9 = 400 tools (25 L2, 25 L3)
8 = 300 tools (20 L2, 20 L3)
7 = 200 tools (15 L2, 15 L3)
6 = 100 tools (10 L2, 10 L3)
5 = 50 tools (5 L2, 5 L3)
Quality (___/10)
10 = Snap-On
9 = MAC, Proto, Milwaukee, Ridgid
8 = Craftsman, Maximum, Gearwrench
7 = Mastercraft, Husky, Stanley
6 = Fuller, Irwin, Ryobi
5 = Powerfist, Brico, Grip
Appropriate (___/10)
10 = Everything is appropriate
9 =
8 = Some things curiously missing (ie: sockets but no ratchet, punches but no hammer)
7 =
6 =
5 = Wood shop tools? Really?
4 =
3 = You won’t be working on ~my~ car.
2 =
1 = That kid who did one table saw only
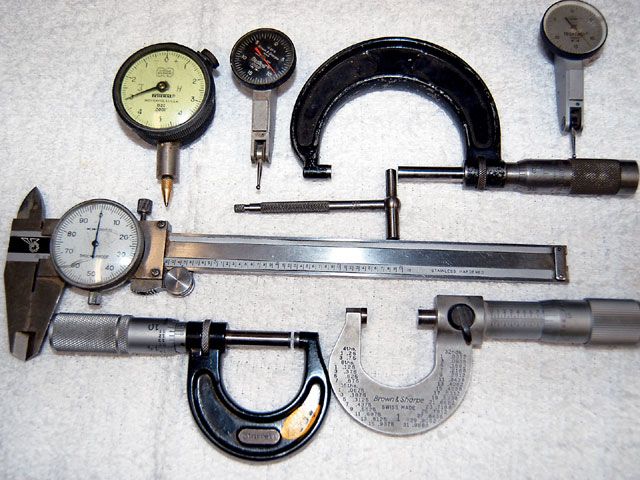
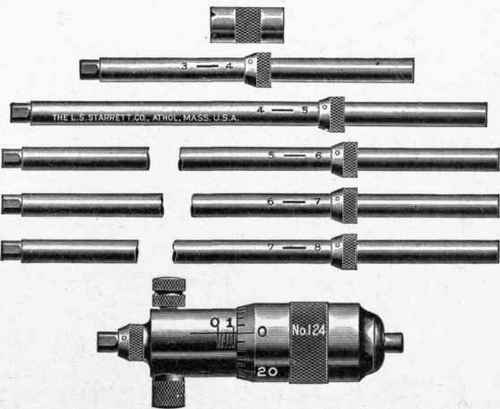
PRECISION MEASUREMENT
How do you know if it’s good?
You Measure it!
Nothing lasts forever. Virtually all the parts in a vehicle are very precisely made. In order to perform the best, these parts must stay within an acceptable range of wear.
The difference between “good” and “worn out” can be as little as the thickness of your hair!
You cannot measure this wear with a ruler; you must use more precise tools such as a Micrometer and a Vernier or Dial Caliper.
I made a lot of mistakes when I was starting out as a mechanic. Being inexperienced and careless, I broke a lot of things that didn’t need to be broken. Broken parts slow you down, and makes the job become more expensive and more time consuming than it needs to be.
Getting your head wrapped around “The Way Things Are Done” can really help you out.
“Learn from the experience of others
You don’t have enough time to make them all yourself.”
You will be working on other people’s property, and as such there are some things you need to keep in mind.