Tutorial 1: Extrusions, Sketching, and Cuts
Introduction
Extrusions are one of the most basic ways to design a part in Fusion 360, and sketching is an important part of the design process. In this section, you will learn basic operations by creating a simple part using an extruded protrusion. You will then modify the part using a cutting operation.
Starting Fusion 360 and Creating new Part
Start Fusion 360. It should open to a blank screen.
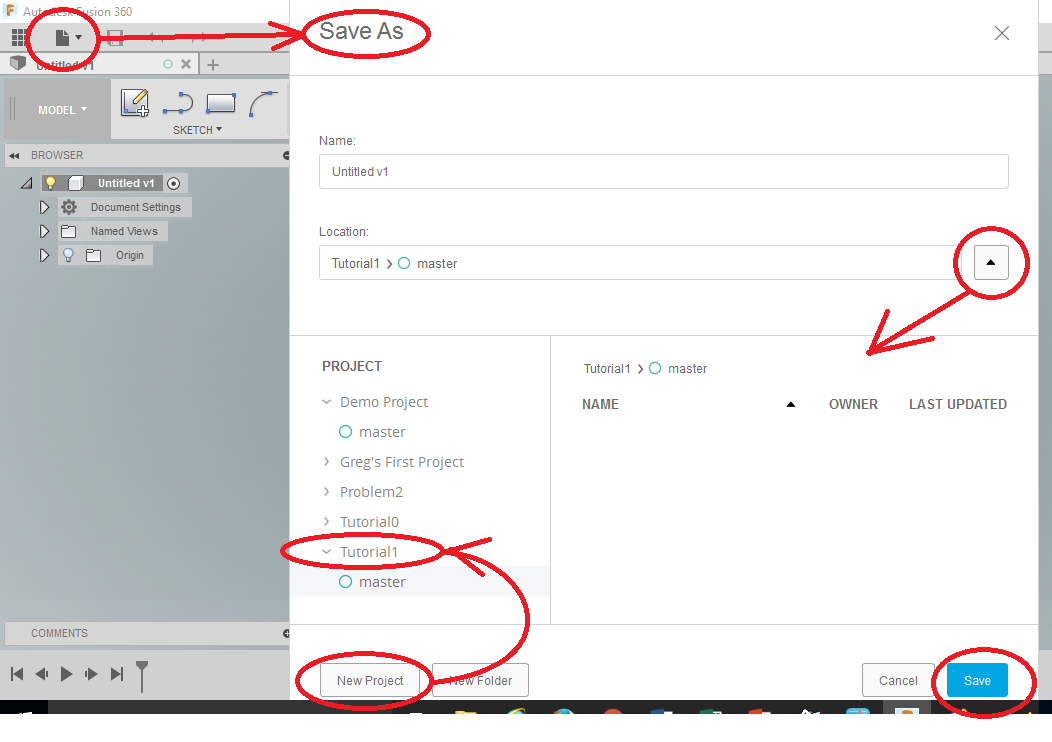
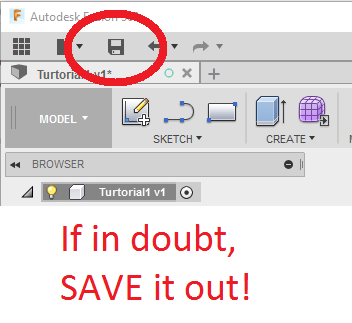
YOU MUST KEEP YOUR FILES ORGANIZED!
FOLDERS, NAMES, and LOCATIONS ARE IMPORTANT TO KEEPING YOUR FILES ORGANIZED!
Immediately pick FILE and “SAVE AS,” Create a [NEW PROJECT] folder, and label it “Tutorial1“ – Get in the habit of SAVING!!
Sketching and Protrusion
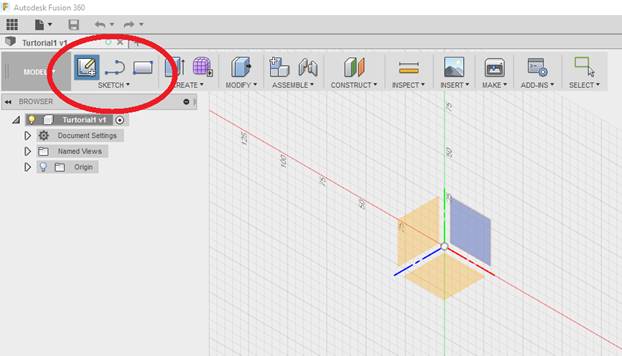
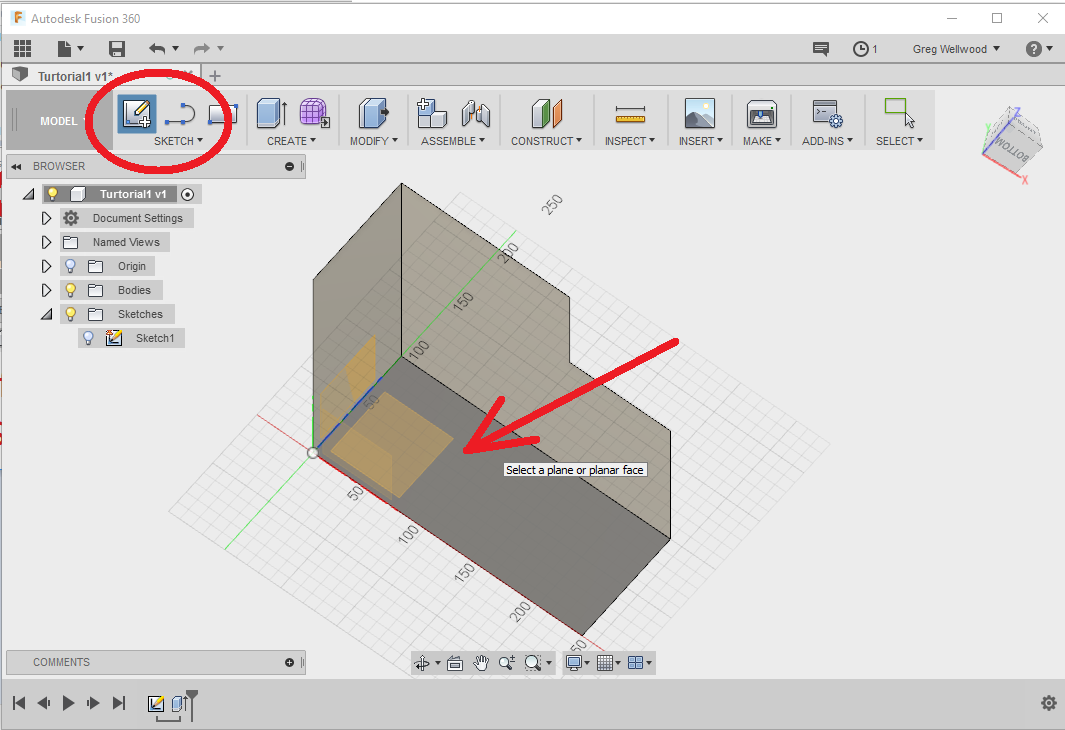
Select the Create 2D Sketch icon from the 3D Model Ribbon Menu , and the Front/Right/Top planes will appear
Select the Front plane (highlighted above), which will take you into Sketch Mode. This will allow you to sketch in the xy plane and extrude in the z direction.
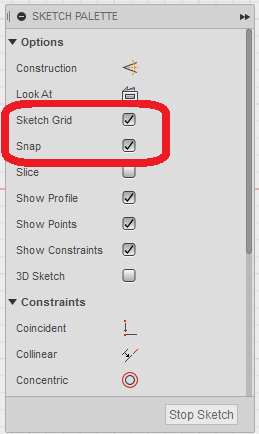
In the SKETCH PALETTE window (right side of your screen) and select SNAP and SKETCH GRID.
Select LINE from the SKETCH menu.
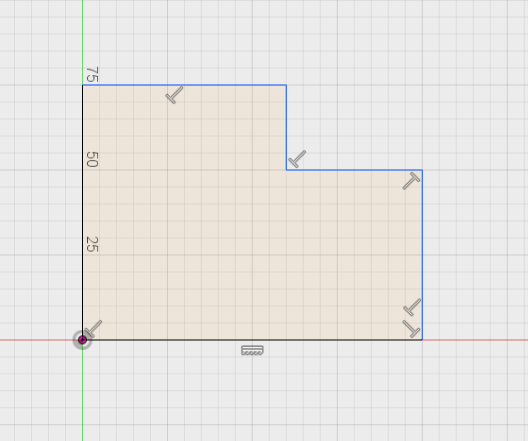
Draw the image shown below. Right now, actual size does not matter. We want to get an idea down first, then work out dimensions later.
Use the left mouse button to click points A, B, C, D, E, F and A shown below.
Zoom in by scrolling the wheel of the mouse, or by double-clicking the wheel of the mouse to center the entire drawing.
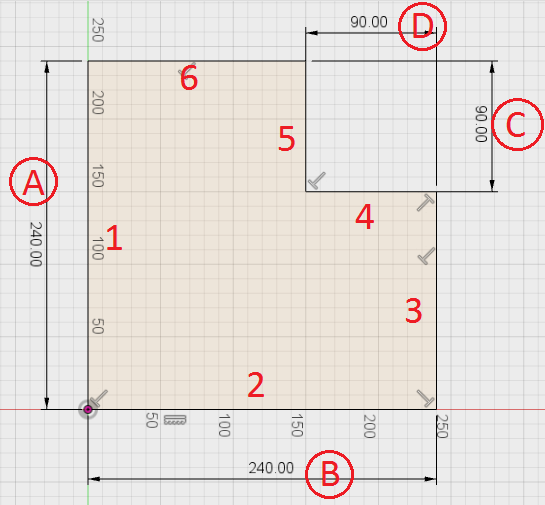
Now we will dimension the shape. Follow the steps below:
Select [SKETCH DIMENSION] from SKETCH menu (or just type “D” on the keyboard)
Click Side 1 with the left mouse button to select the line you want to dimension, then click point A with the left mouse button to place the dimension. You will be given the option to change the number – make it match the drawing below.
Continue, dimensioning Side 2 placing the dimension at B, Side 5 at C, Side 4 at D, correcting the dimensions to the drawing below.
Notice we ONLY have JUST enough dimensions to clarify the part – NOTHING MORE. No redundant dimensions!
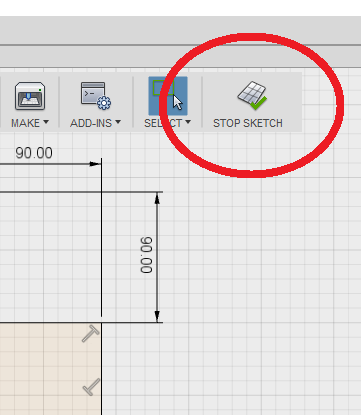
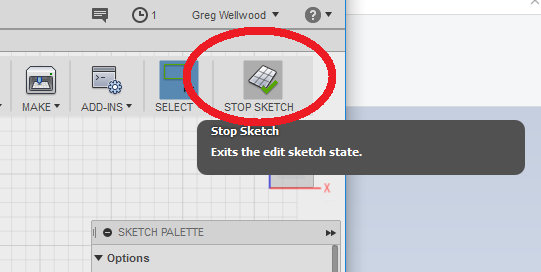
Click [FINISH SKETCH] to Finish Sketch. USED TO BE CALLED “STOP SKETCH”
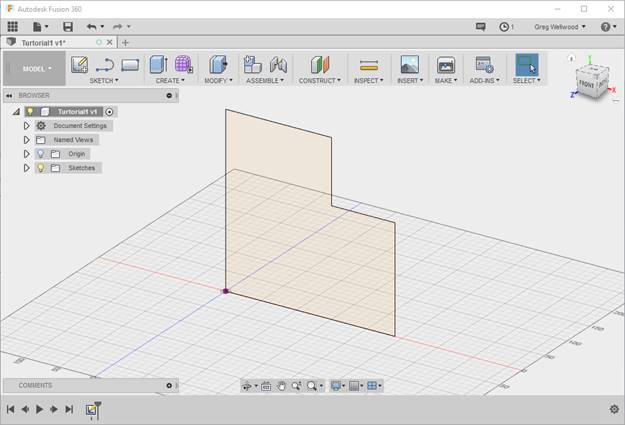
Nothing will really change on your screen, but hold SHIFT down, and while holding the MIDDLE MOUSE BUTTON, rotate your sketch so it looks like this (you can spin the cube around in the top right of your screen, but I find it cumbersome):
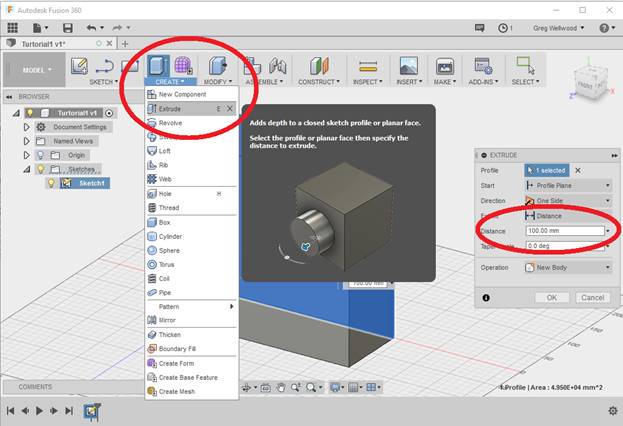
From the CREATE MENU, select the EXTRUDE, then click the shape you just completed. Set the EXTRUDE DISTANCE to 100. Notice (and play with) some of the options for HOW you can extrude a SKETCH.
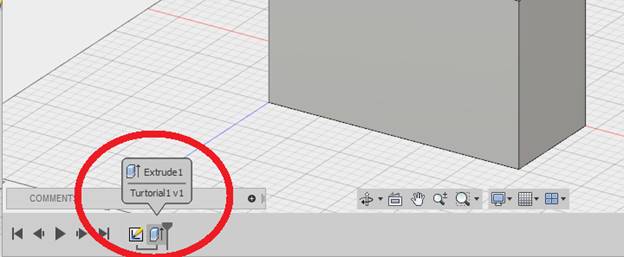
From the TIMELINE at the bottom left of your screen, Double-Click the icon of the Extrusion you just made. This will allow you to edit it. Play around however you like, but leave the extrusion at 100 when you are done.
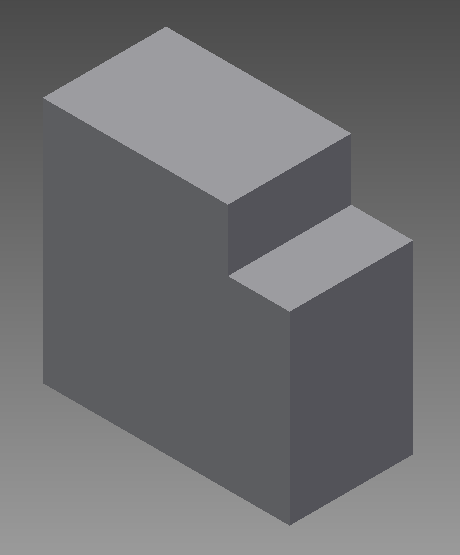
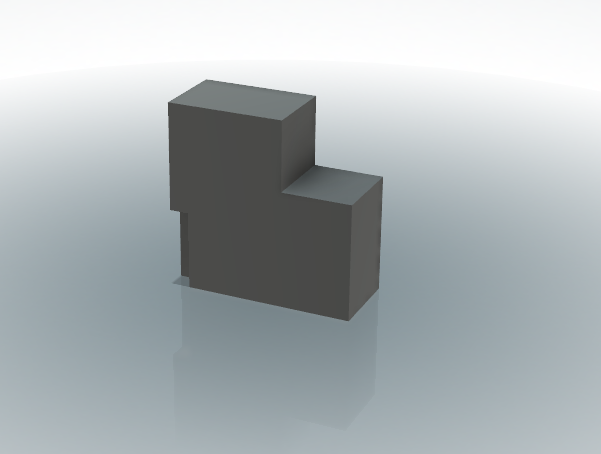
Play with your view until you can get it to look like this (try the Top/Front/Right corner of the View Cube)
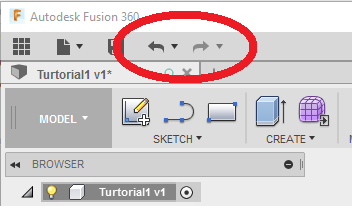
You do have Undo and Redo options in Fusion, however, the Browser Bar and the Timeline can be used to modify features you have already created. Just double-click on the part you wish to alter, and it will take you to where you can alter the part. We will explore this further in Tutorial 4.
Save your file on a regular basis – things go wrong, eh?!
Creating Cuts
Select CREATE SKETCH from the Sketch Menu at the top of the screen, as in Step 1 of the previous section, except this time…..
Use the SHIFT button and hold the WHEEL of the mouse to rotate the object around until you see the bottom plane of the object, then click to select the bottom of the object.
Use Rectangle from the Draw menu to draw a 25 x 25 square in the top left corner of your object (you can edit the dimensions to what you need as you dimension them).

FINISH SKETCH and head over to Extrude
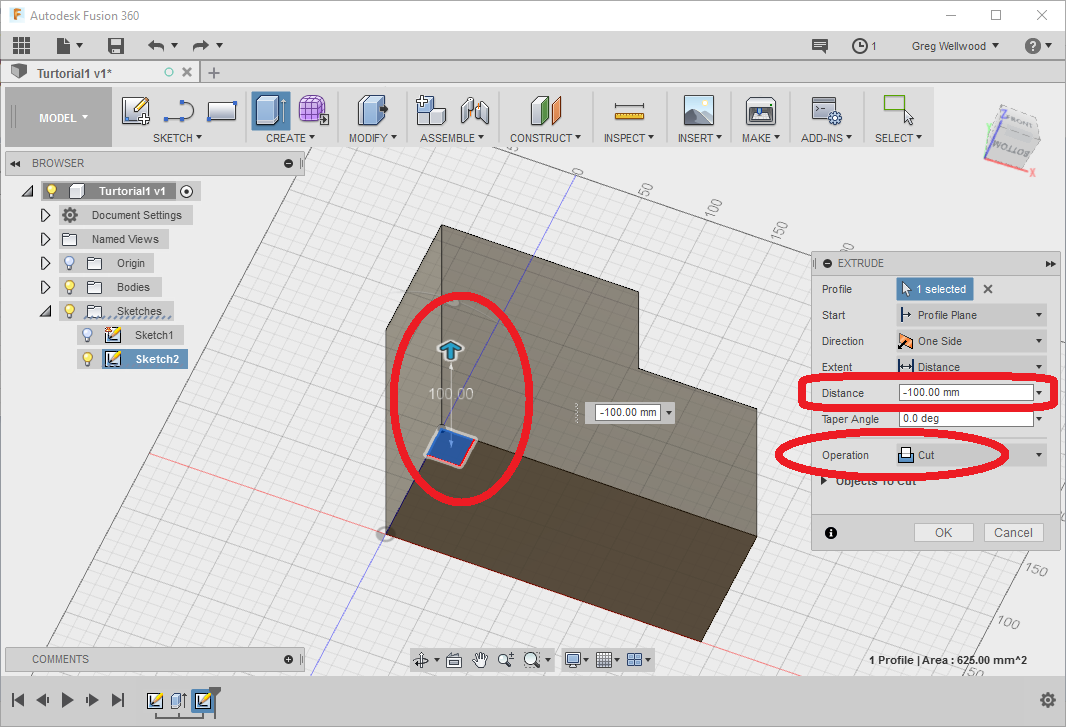
Clicking Extrude and pick the square you just drew. It probably figured out a solid into a solid will likely be a cut (a subtraction). Set the extrude settings as shown (notice the extrude distance is negative):
Click OK and you should now have this (rotated a bit for visibility):
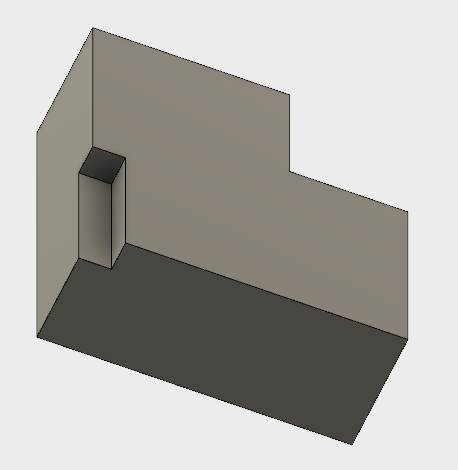
Here it is again, with some shadows, reflections, and perspective view. Ain’t Fusion awesome?:
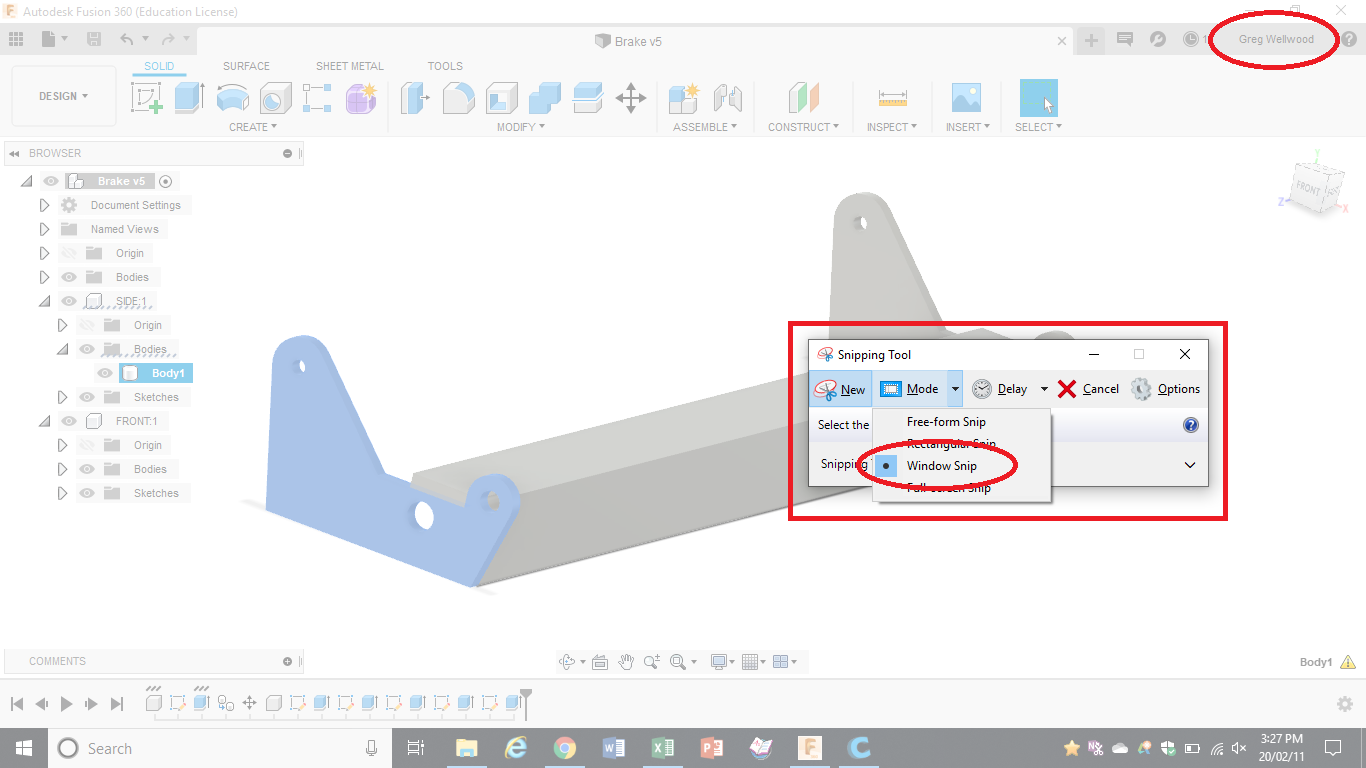
WANT IT MARKED?
Use the SNIPPING TOOL to do a WINDOW screen capture, and save the file into the HANDIN FOLDER with YOUR NAME and TUTORIAL/PROBLEM NAME (ie: wellwood-tutorial-1.png)
Now complete Problem 1.