
Tutorial 4: Feature Modification and Manipulation
Introduction
The ability to modify and manipulate features is important technique in Fusion. In this section, you will learn how to use the model tree to modify various aspects of a feature.
Feature Modification
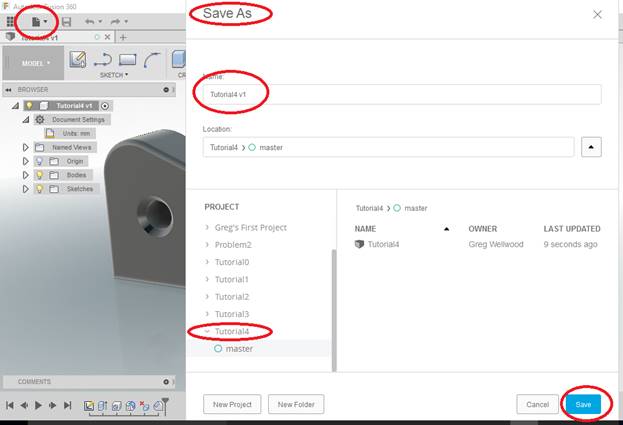
Start Fusion 360. Open “Tutorial2“, and and right away SAVE AS “Tutorial4“.
YOU MUST KEEP YOUR FILES ORGANIZED! FOLDERS, NAMES, and LOCATIONS ARE IMPORTANT TO KEEPING YOUR FILES ORGANIZED!
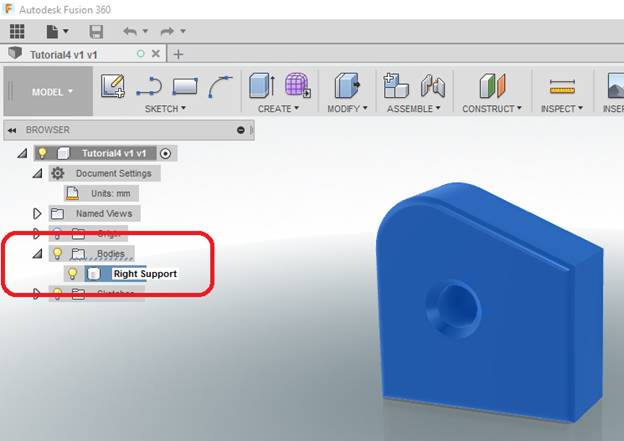
Take a look at the Browser Bar on the left side of your screen. The Browser Bar lists all the MAJOR parts and details of your object. The first part will be renamed.
Click the triangle beside Bodies to get it to Drop Down, then double-click “Body” and rename it Right Support. The entire part should be highlighted.
Next, we will modify the dimensions of the part and a reference will be added.
DOUBLE-CLICK on the first SKETCH in your TIMELINE at the bottom of the screen.

Fusion will enter the SKETCH MODE and you should see the following (I have GRID turned off):

Double-Click on one of the dimensions of the object, then HOVER over that dimension. NOTICE how it has labeled that dimension. It may say something like “d1: 240mm (or d0, or d2, depending on what you dimensioned first).
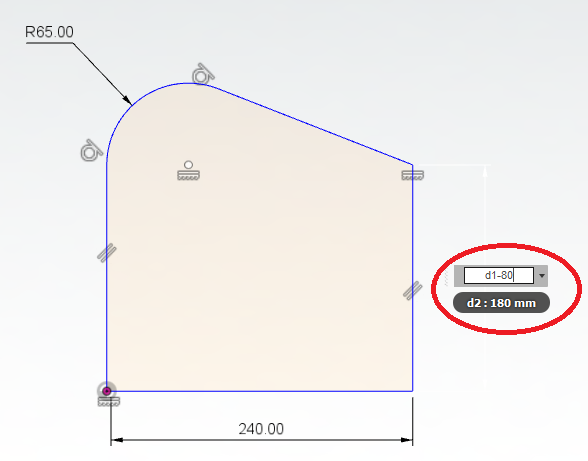
Let’s set up a “Parametric Relation”, which will make one dimension “related” to another. This makes it SUPER EASY to make changes to a drawing, since all (or critical) dimensions will be related to the one you change. Double-click the bottom horizontal dimension for the bottom of your object, and see what D number it is. In my drawing, the 240mm measurement is called “D1”, and the 180mm Vertical measurement is D2.
Double-click to edit the 180mm vertical dimension, and edit it to be “d1-80” (or whatever “D#” YOUR bottom dimension is (click once to see). This will ensure that whatever you change the bottom to, the vertical will always be 80mm smaller.
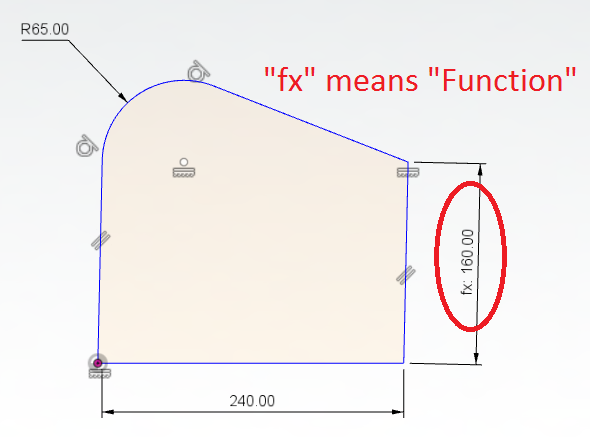
Once you hit enter, you will see the dimension is now “fx: 160” – it changed from 180 to 160, according to the relation you just set.
Now change the bottom dimension from 240 to 220. Notice the vertical dimension changes with it. Cool!

OH MY GOSH! MY DRAWING WENT DRUNK!
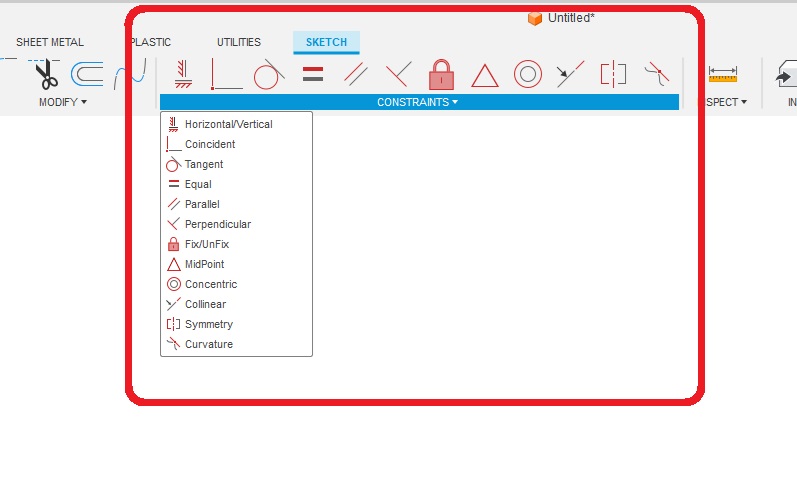
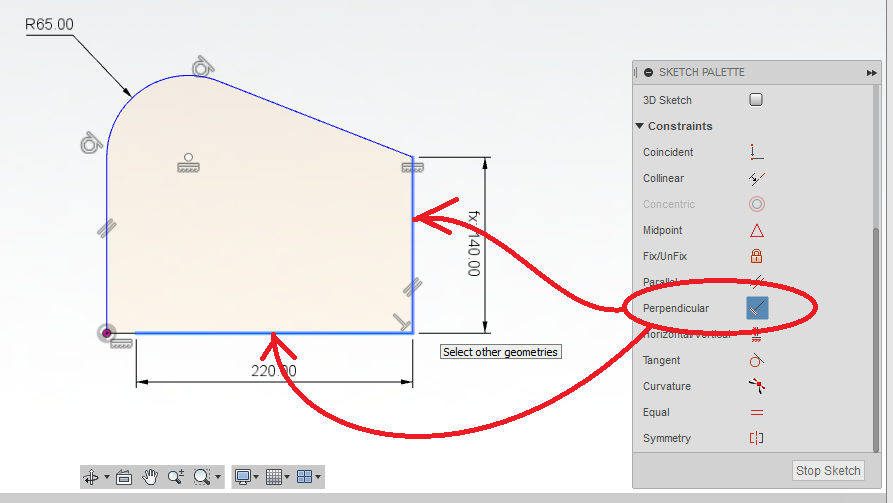
If this happened to you, you might need to add some CONSTRAINTS. My drawing didn’t stay SQUARE (90° corners), so I used [Perpendicular] from [Constraints] in the SKETCH PALLETTE, then clicked two lines I WANTED perpendicular, and it got sober.
CONSTRAINTS is at the top of your screen:
Fix it like this:
Click [FINISH SKETCH] to exit the Sketcher and rotate the object and examine the changes.
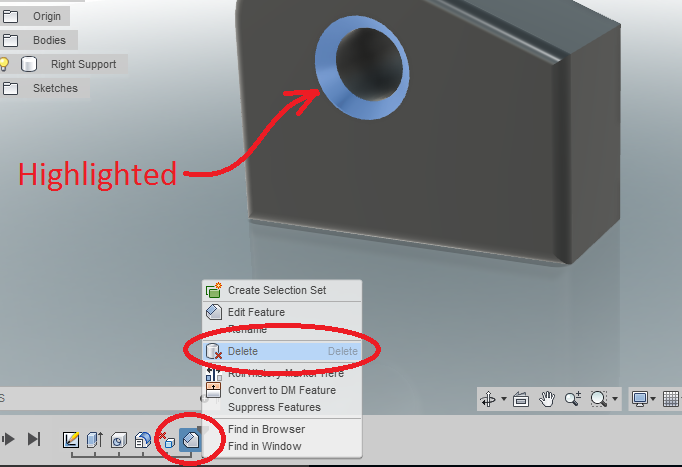
We want to delete the chamfer. Right-click on the Chamfer branch of the Timeline, and select [Delete]. Boom! It’s gone!
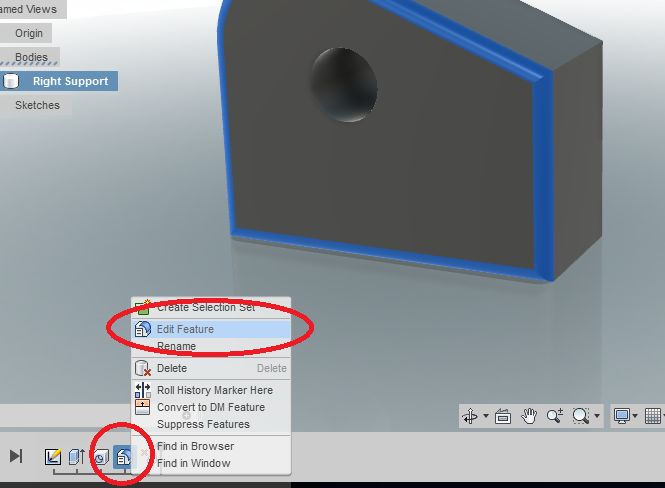
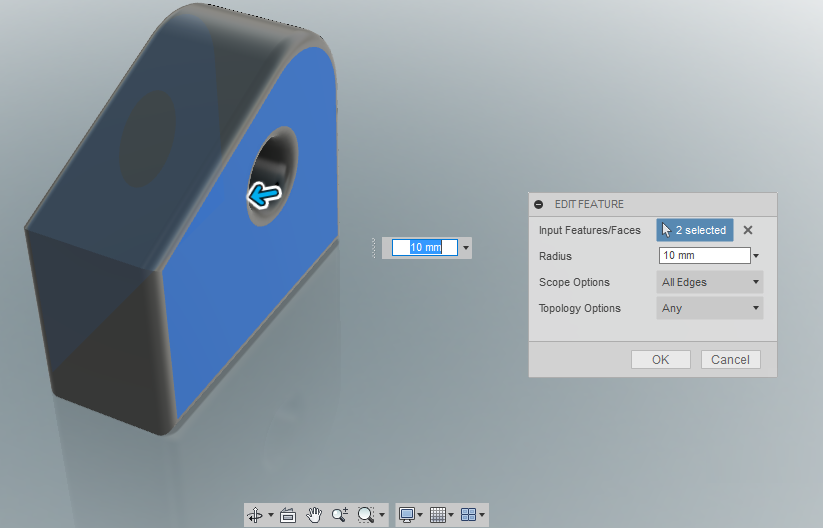
Next, a fillet will be added to the edges on the other side of the part. Right-click Fillet1 on the Browser Bar, and select [Edit Feature]
Now hold the SHIFT button down to rotate the object around and click the face on the other side. The Rule Fillet should now also include the back side. Click [OK]
Rotate the object and make sure you didn’t miss anything.
WANT IT MARKED?
Use the SNIPPING TOOL to do a WINDOW screen capture, and save the file into the HANDIN FOLDER with YOUR NAME and TUTORIAL/PROBLEM NAME (ie: wellwood-tutorial-1.png)
Now complete Problem 4.