HOW TO PRINT FROM AUTOCAD
Yeah, they didn’t make this easy.
There are TWO parts to printing from AutoCAD. It makes sense when you get into complex drawings.
FOLLOW this tutorial. You’re likely not going to read it at all, and then it will all go wrong, and then I will come and read this tutorial to you. If you want to prove to me that you actually read it, the code phrase is “fluffy kittens.”
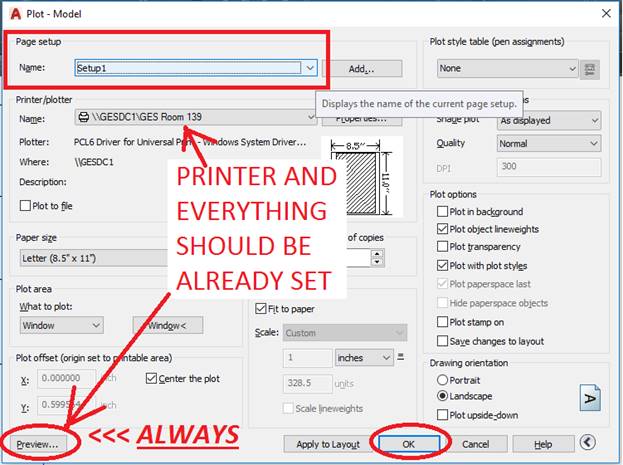
STEP 1 – PAGE SETUP
THIS TELLS AUTOCAD WHAT YOU WANT TO PRINT. IT DOES NOT ACTUALLY PRINT AT THIS STAGE.
From the Big A on the top left of your screen, pick [PRINT] and then [PAGE SETUP]
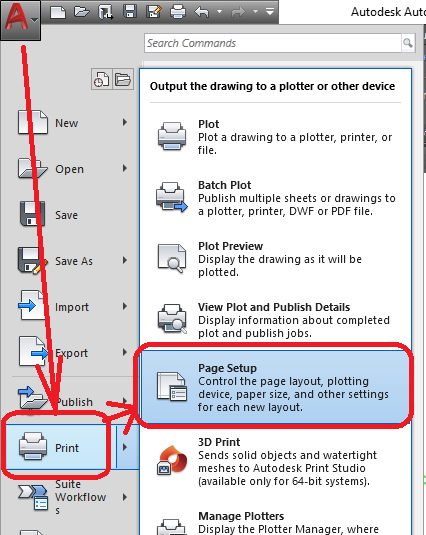
From the PAGE SETUP MANAGER click [NEW]. If you know that you are going to print different pictures from the same file, give it a name that makes sense to you (like “Elevations” for Elevation views).

Here, I just accepted whatever it gave me for a name, and changed these settings so I can print to the Classroom Printer:
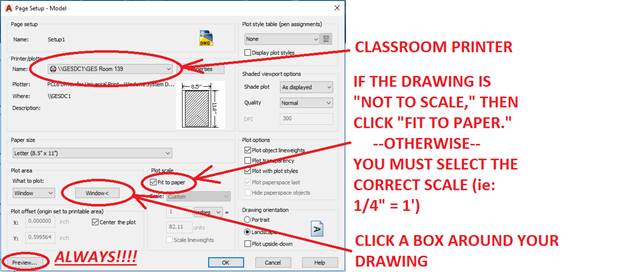
IF (and ONLY IF) the PREVIEW looks good, click [OK]. This SAVES the settings/view. ALWAYS DO A PRINT PREVIEW EVERY TIME!
SPECIAL NOTE FOR ACHITECTURE: AutoCAD is not able to plot to the BIG Plotter. To overcome this, we will print to a PDF file (ARCH D size paper), and then Adobe Reader CAN print to the Plotter.
STEP 2 – PLOTTING
THIS TELLS AUTOCAD TO PRINT THE SHEETS YOU SET UP.
From the BIG A on the top left of your screen, click [PRINT] and then [PLOT]. If windows or errors pop up, just click “continue” or whatever you need to do to make it continue.
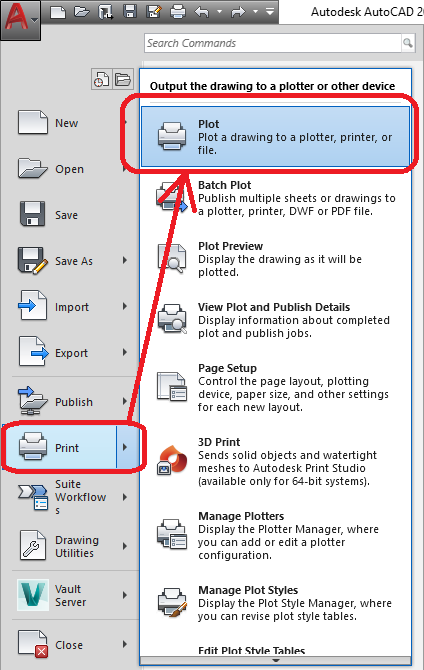
Pick the PAGE SETUP NAME, and everything you set should automatically fill in. DO THE DANG PRINT PREVIEW, and if it’s all good, click [PRINT]
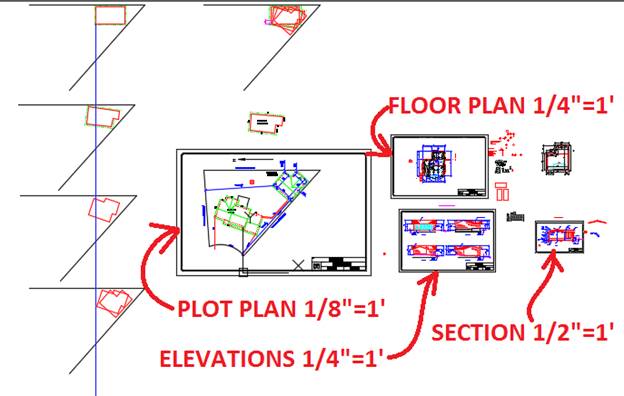
My workshop CAD drawing has FOUR different printable drawings, all with titleblocks scaled to fit. The CAD file also includes my experimentations as I tried to figure out the best floor plan layout: