This continues to get easier as technology improves.
You have to wrap your head around how 3D printing works. Sometimes you can print something assembled, sometimes you have to print each piece individually.
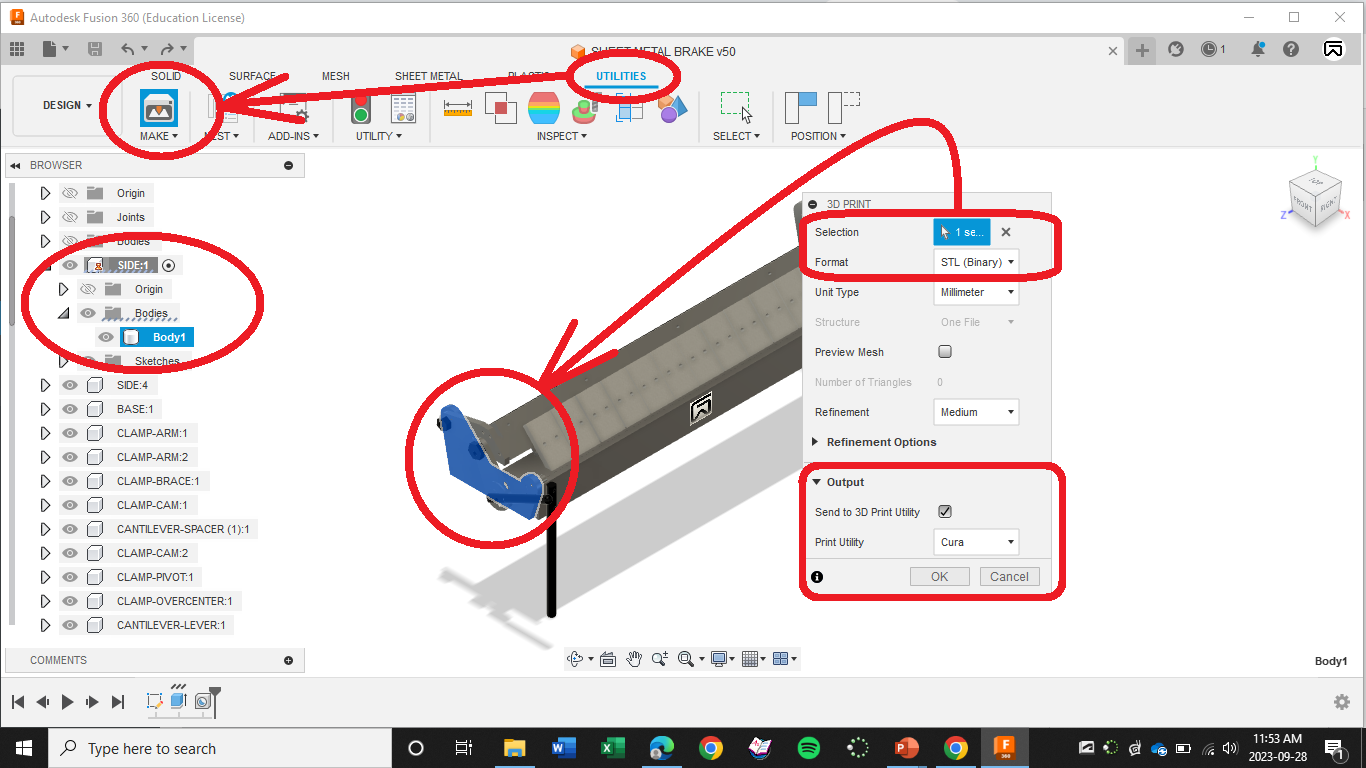
GO TO UTILITIES in the ribbon menu, select “MAKE” and choose “3D PRINT.”
FROM THE 3D PRINT POP UP MENU, click SELECTION and pick the BODY (component) you want to print and change the file type to “STL.” IN THE OUTPUT section, set “PRINT UTILITY“ to CURA (or whatever utility your computers currently use).
Cura should automatically open your STL file.
If this is your first time running CURA, just say “yes” to everything, don’t bother registering or anything, until CURA is open on your computer.
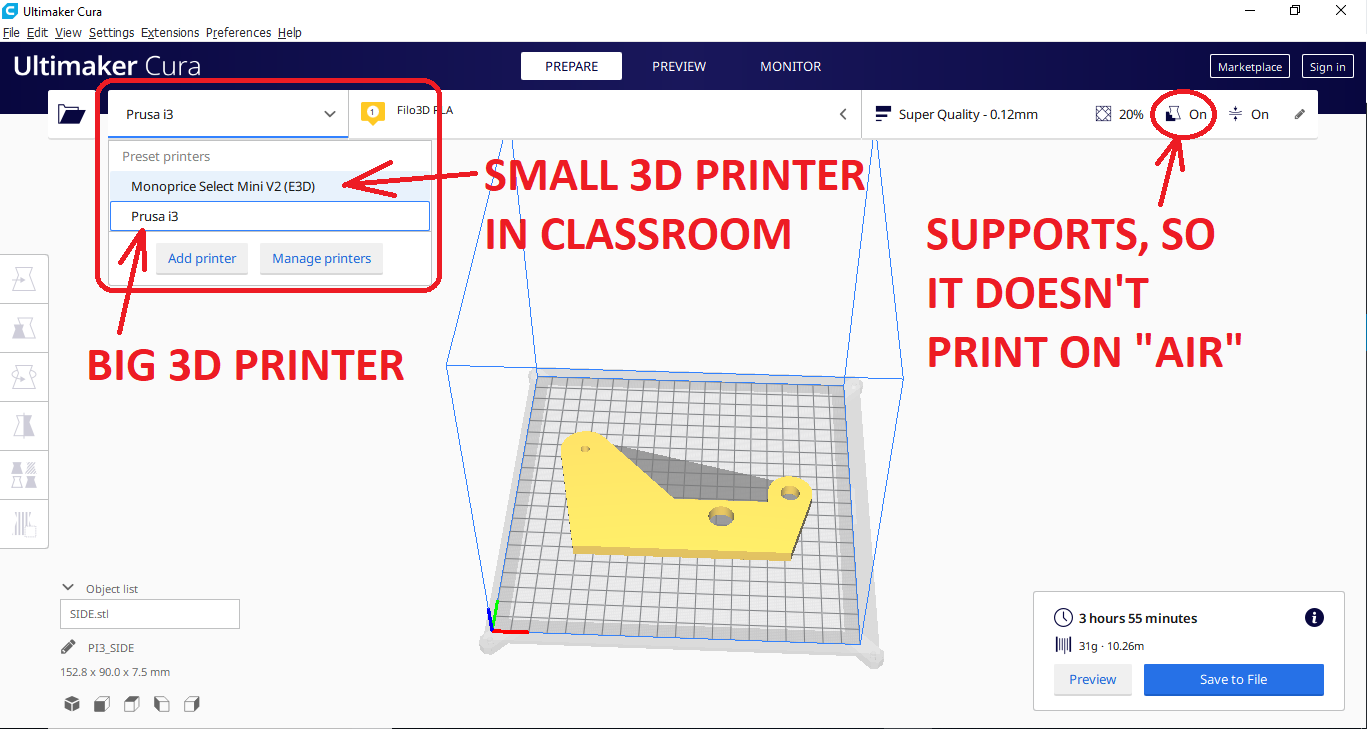
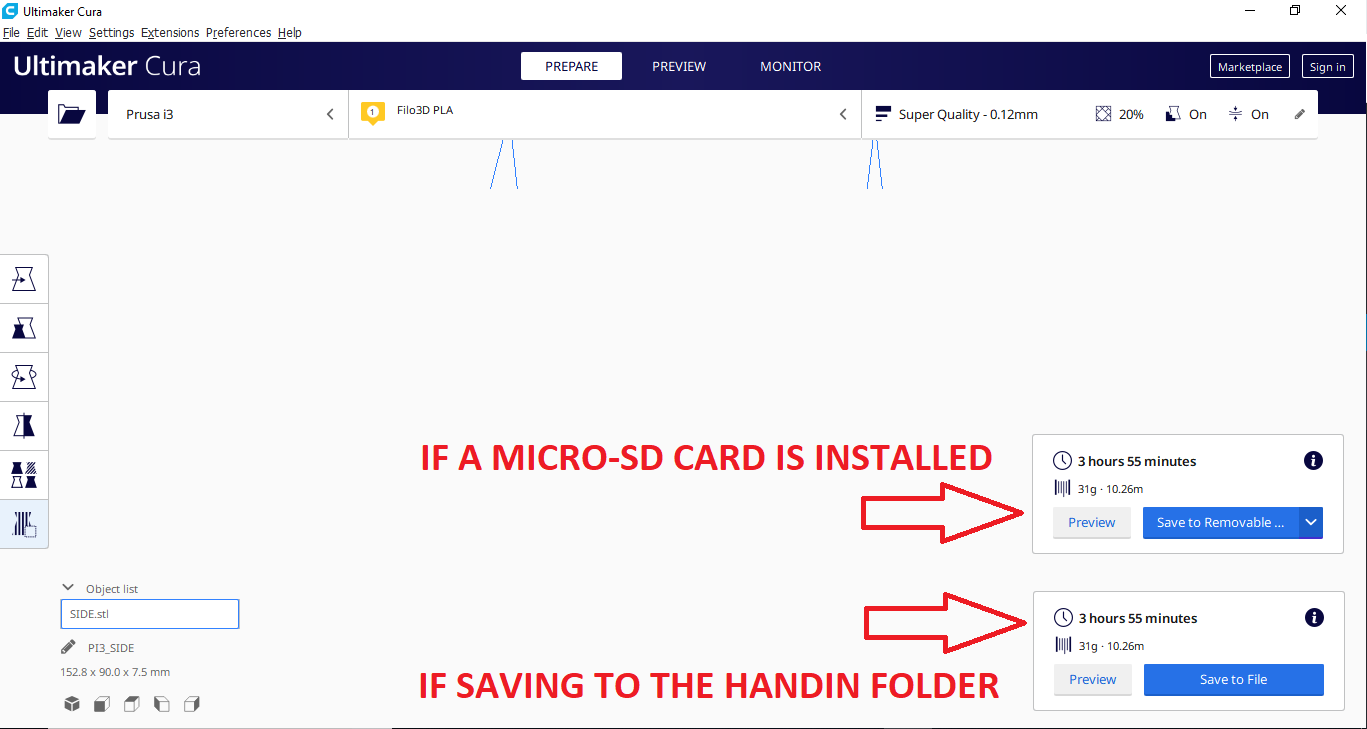
We have four printers. The CLASSROOM PRINTER is NON-NETWORKED. You need to ADD this Printer: MonoPrice Select Mini V2.0 (E3D). It is NOT a networked printer. You will need to tell CURA that we are printing to this printer. We will be using a MicroSD card.
(We also have one larger MonoPrice Maker Select v2.0 which is a “Prusa i3” to Cura)
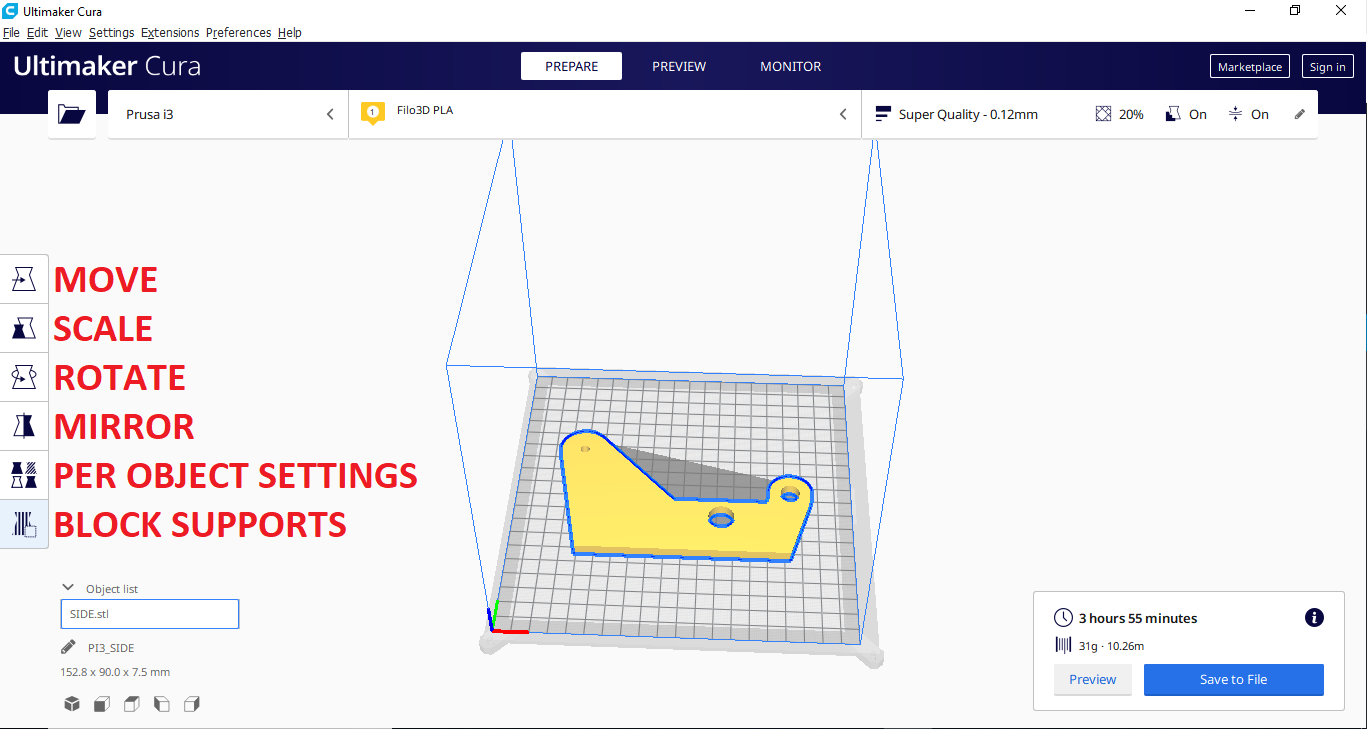
You SHOULD place the object such that DETAILS are facing UP (less supports!!)
You may need to scale your project UP or DOWN. Make sure you scale ALL parts the SAME.
You can print as many items as will fit on the printing surface. You do NOT have to do them one at a time.

WE PRINT PLA HERE.
Other materials exist, but PLA is reasonably healthy to be around while it’s printing.
INSERT MICRO-SD CARD into the computer – you might need a card reader
SLICE your design (this tells the 3D printer what each printable layer needs to be)
SAVE the .gcode file to the appropriate place (external drive?). IT MUST BE GCODE!
If using a MICRO-SD card, *** MAKE SURE *** you correctly *** EJECT *** the card through the software (avoids card corruption)
PREPARING FOR THE PRINT:
ALCOHOL WIPE the printing surface. This makes it stick better. The surface may not even have fingerprints on it.
UHU GLUE the printing surface lightly. This makes it stick better. It may need a scraping if the glue is getting too thick.
SELECT PRINT using the rotary wheel on the printer, and find your file. It’s not as hard as you think – just pay the heck attention to what you’re doing.
WATCH the print begin. It will push out a booger of plastic first, then begin printing your shape(s). If it appears to be sticking and looking ok, you don’t have to sit and watch it (however mesmerizing).
REMOVE the print by gently slicing the plastic off the surface with the putty knife or a long X-Acto blade
- DO NOT PLACE YOUR HAND IN THE PATH OF THE BLADE
- DO NOT RUIN THE PRINTER SURFACe
- Again: