
[ Start ] [ Index ] [ Sold 2019 ]
In which I attach more body to frame, build a crossmember, build a rad, and build a fuel tank.
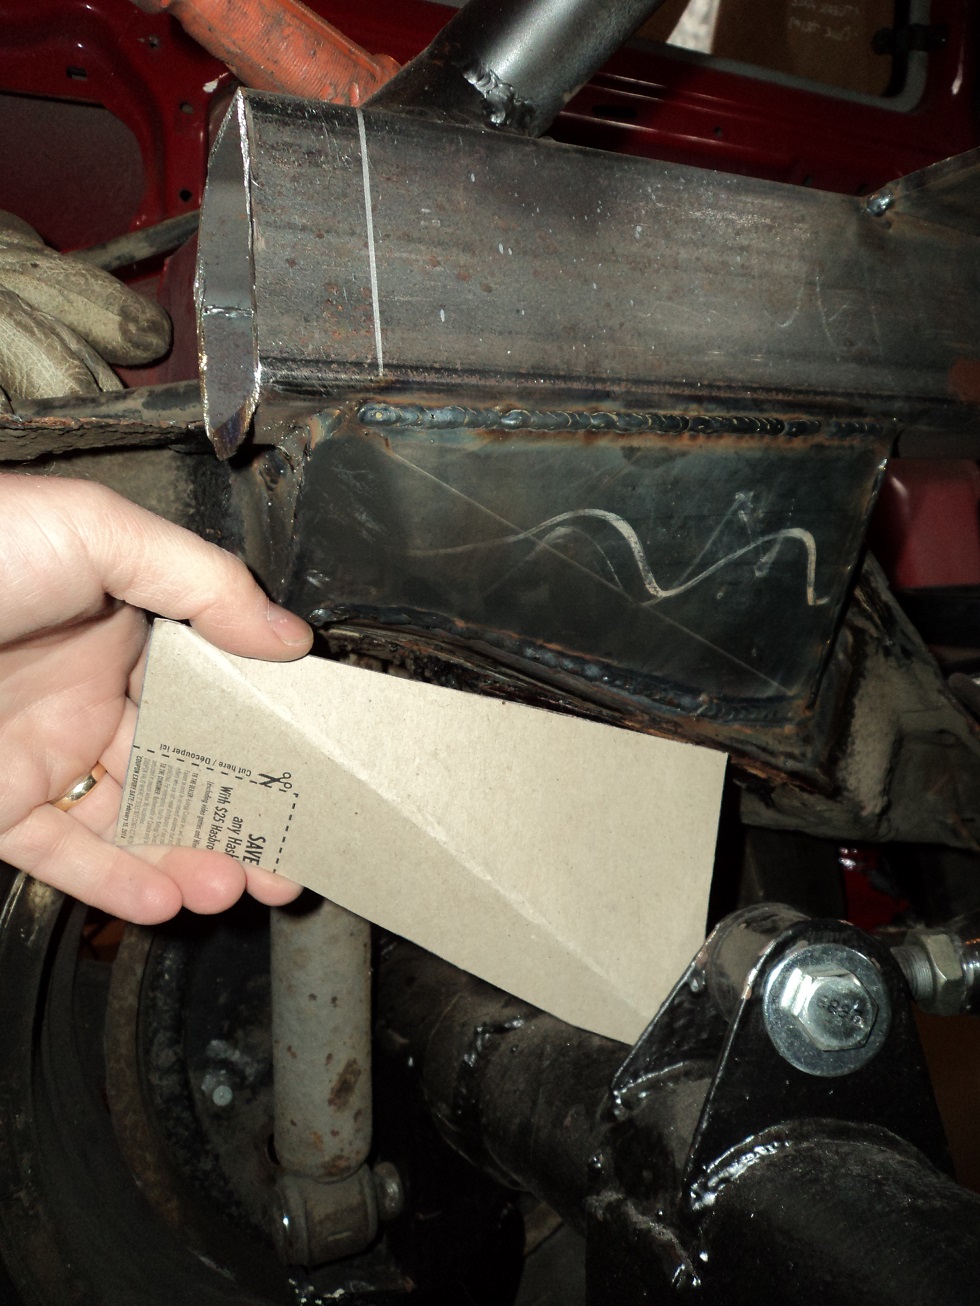
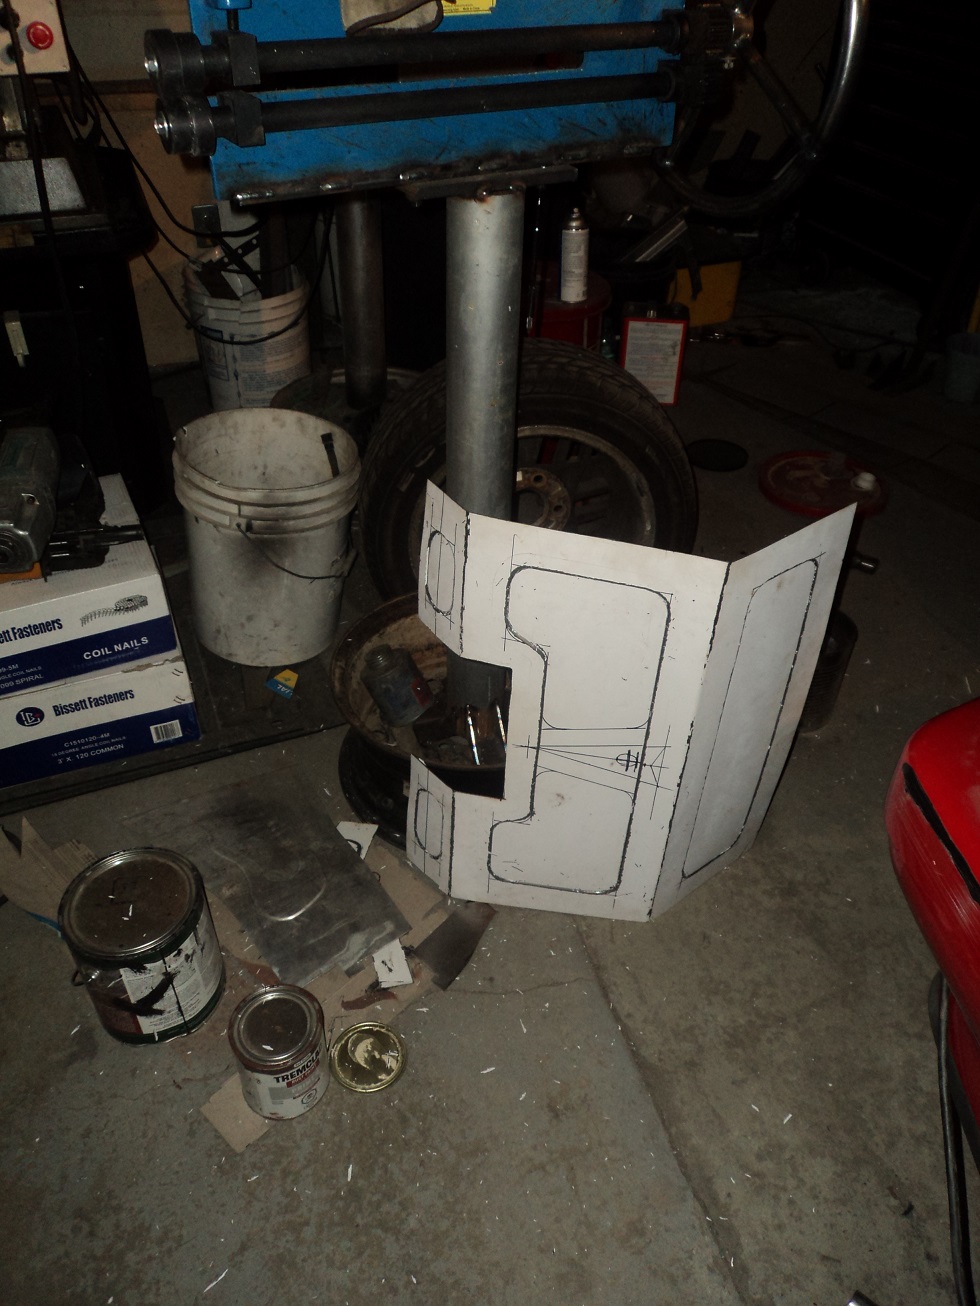
Patterns.
I took this picture mainly to show my students that “The Old Man” uses cardboard to shape the sheet metal. I figure if I do enough of these, they might be inspired to believe that it is easier to make it fit in cardboard before they waste their time and money in metal. “If you can’t make it out of cardboard, you won’t be able to make it out of metal.” I know, I know, “the Old Man don’t know nuthin.” They’ll learn.
(March 2015)
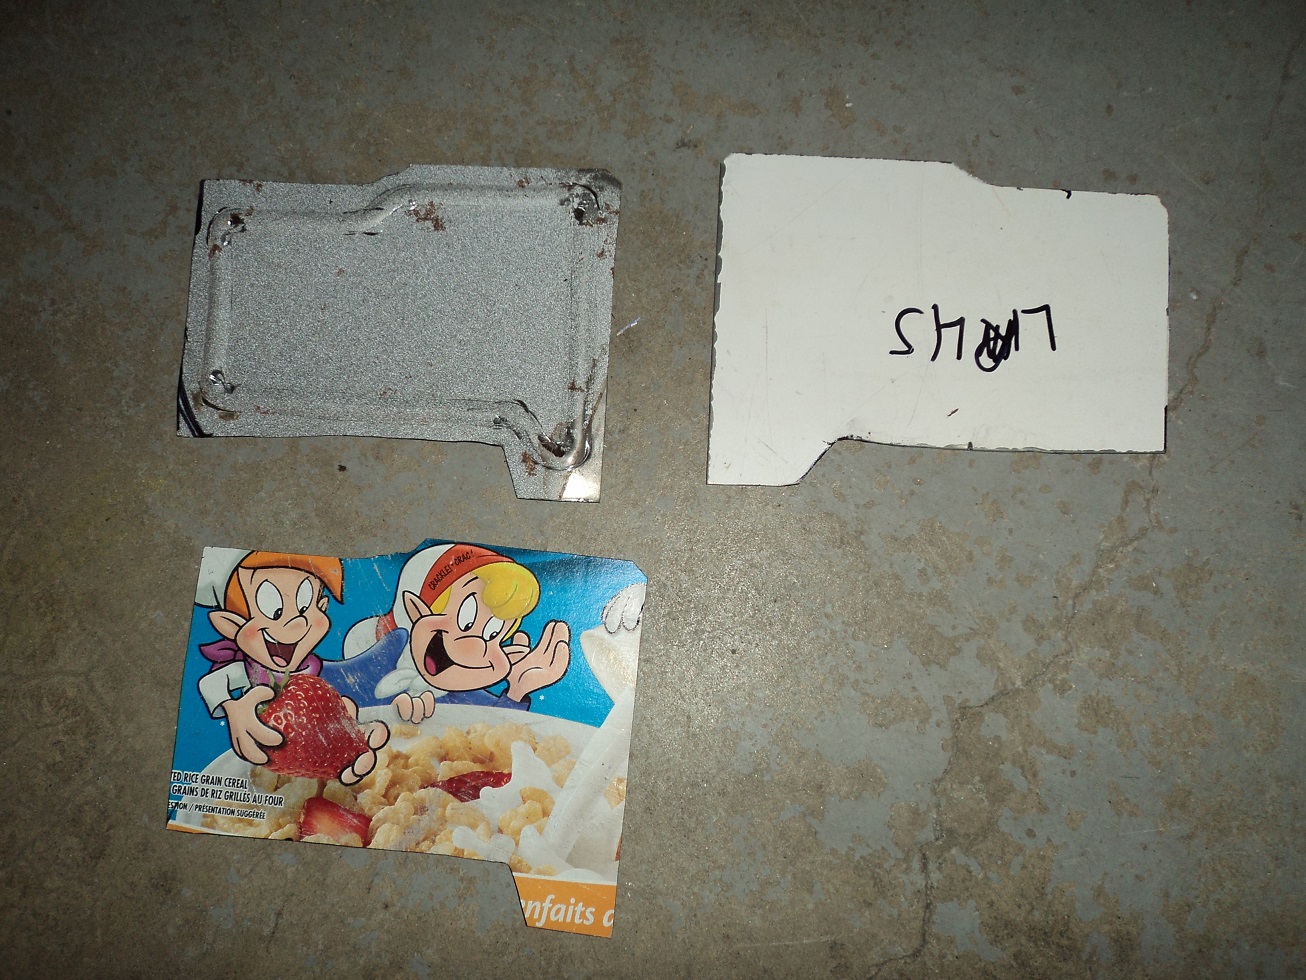
Meanwhile, cardboard patterns, sheet metal, and getting some bead roller practice. Yes, I changed my mind on the patch on the right. “Make your big pieces first, that way when you screw up – they become your smaller pieces.”
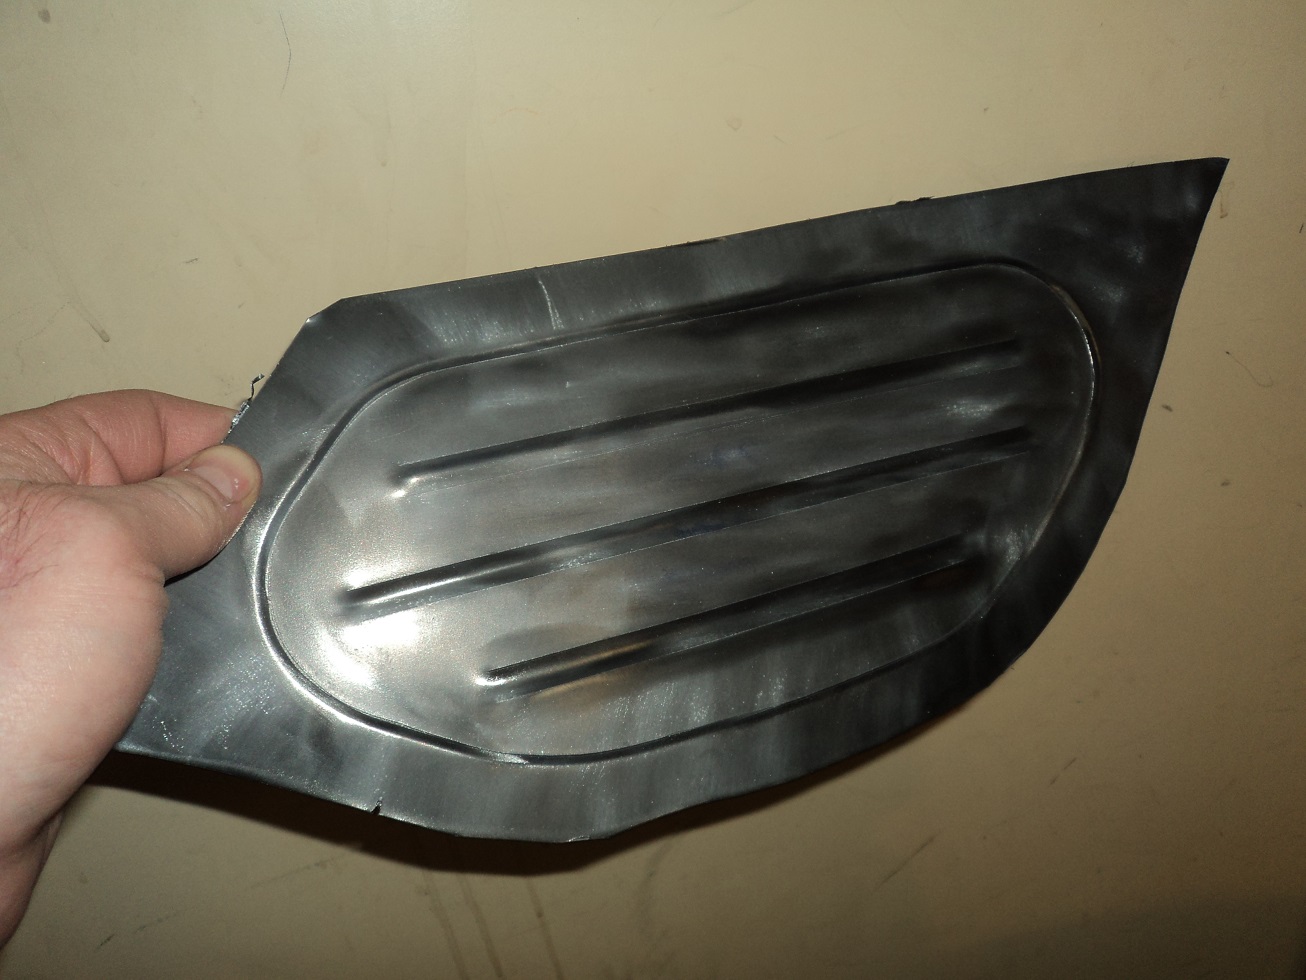
Patch panel for the left side of the rear frame kick up. Fun with the bead roller, rolling an inset around the perimeter, and raised beads through the center.
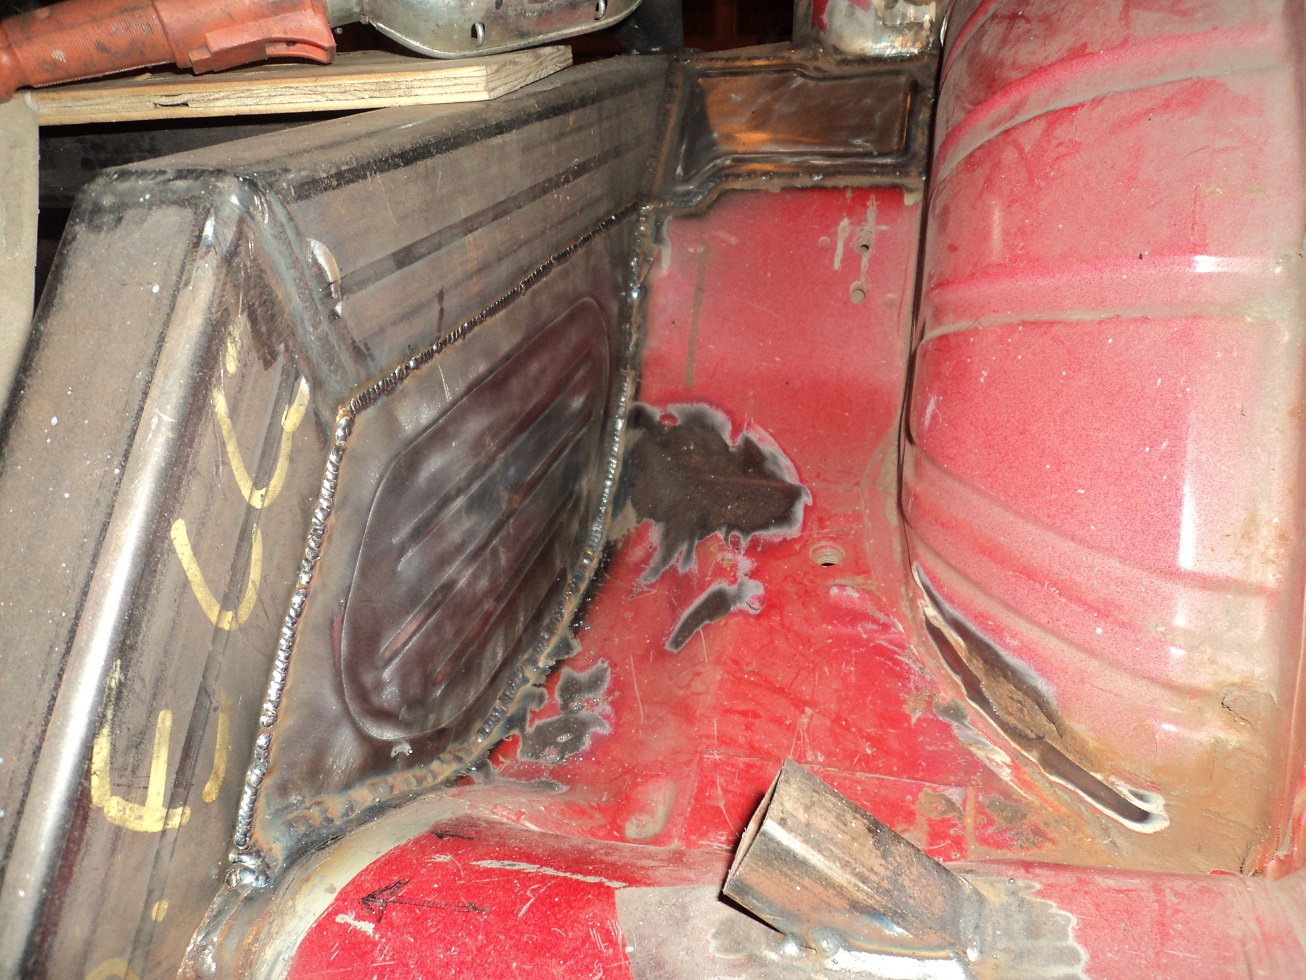
Also drilled holes to help run brake and fuel lines from the front to the back without getting too close to the exhaust pipes. Hard to do.
Notice anything new?
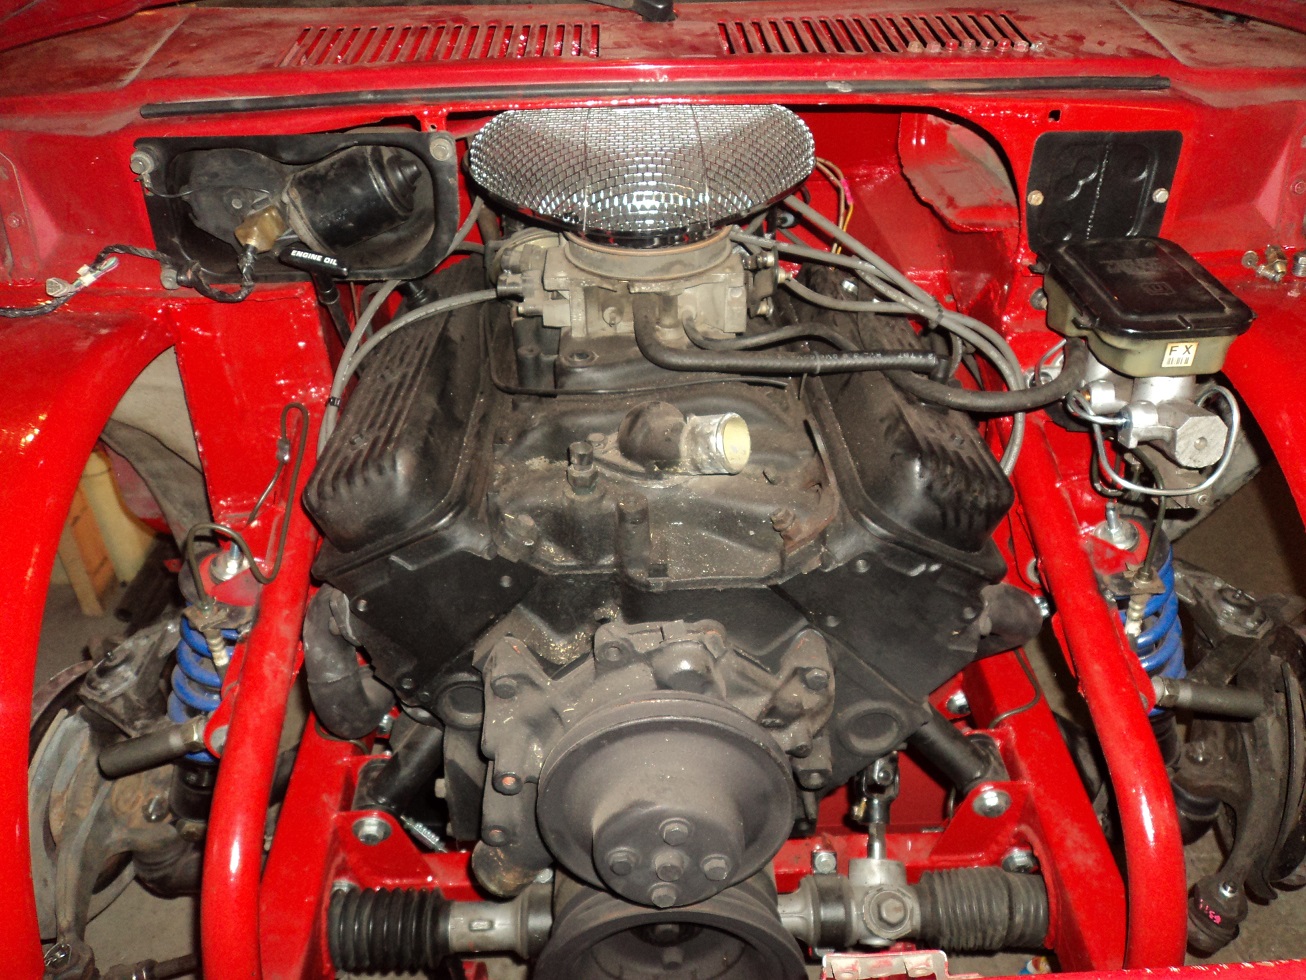
If you said “I see that you have finished plumbing the front brakes,” you’d be right!
I ran into a snag.
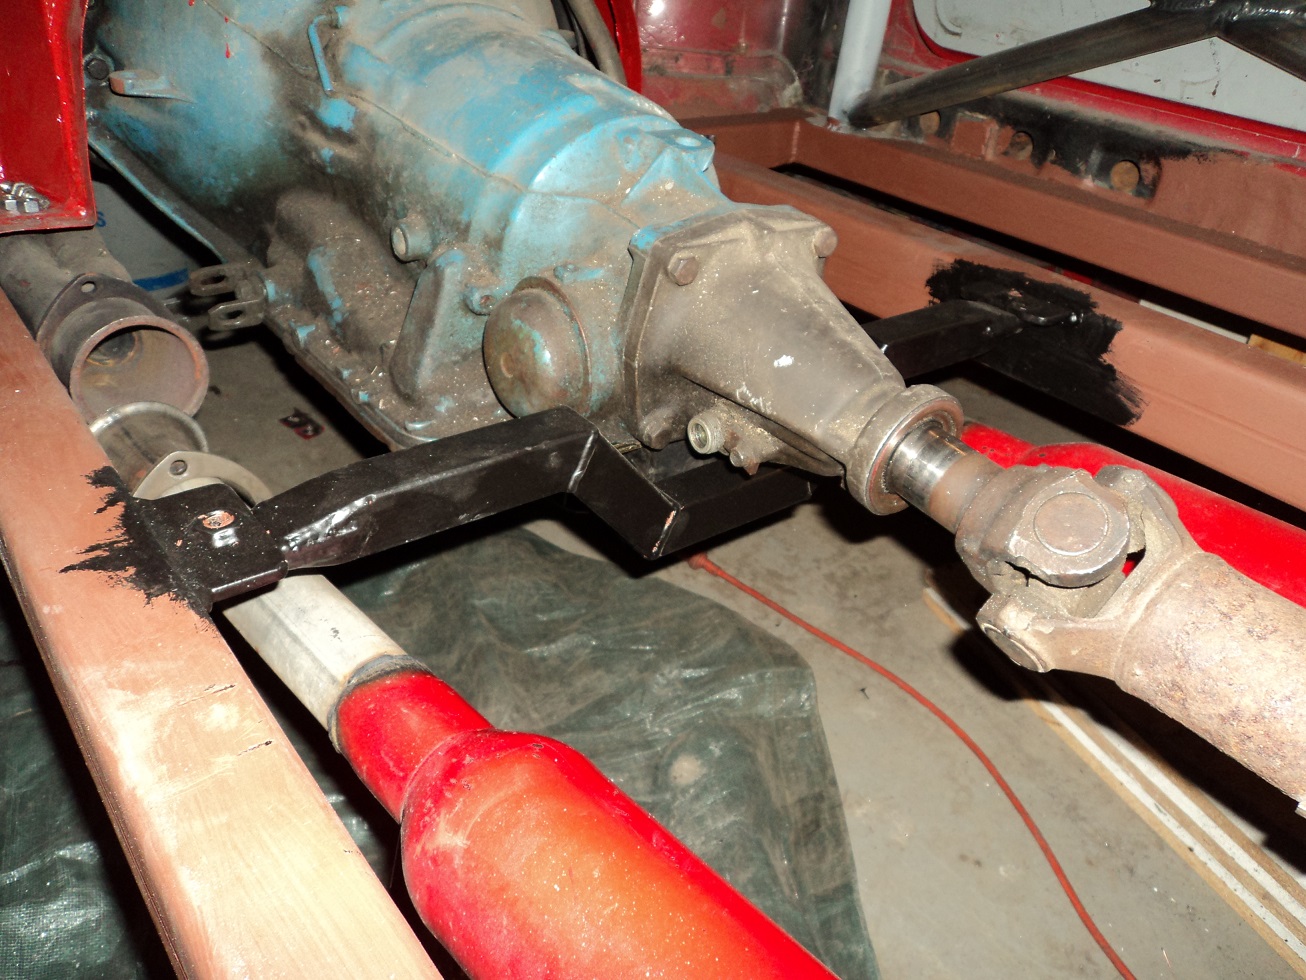
I went to remove the transmission crossmember so I could cut off the now unused Firebird Torque-Arm mount, and found I could not remove the crossmember. Or at least, I certainly would not be able to once the floor is in the car.
So…. I need to figure out something that is easier to deal with.
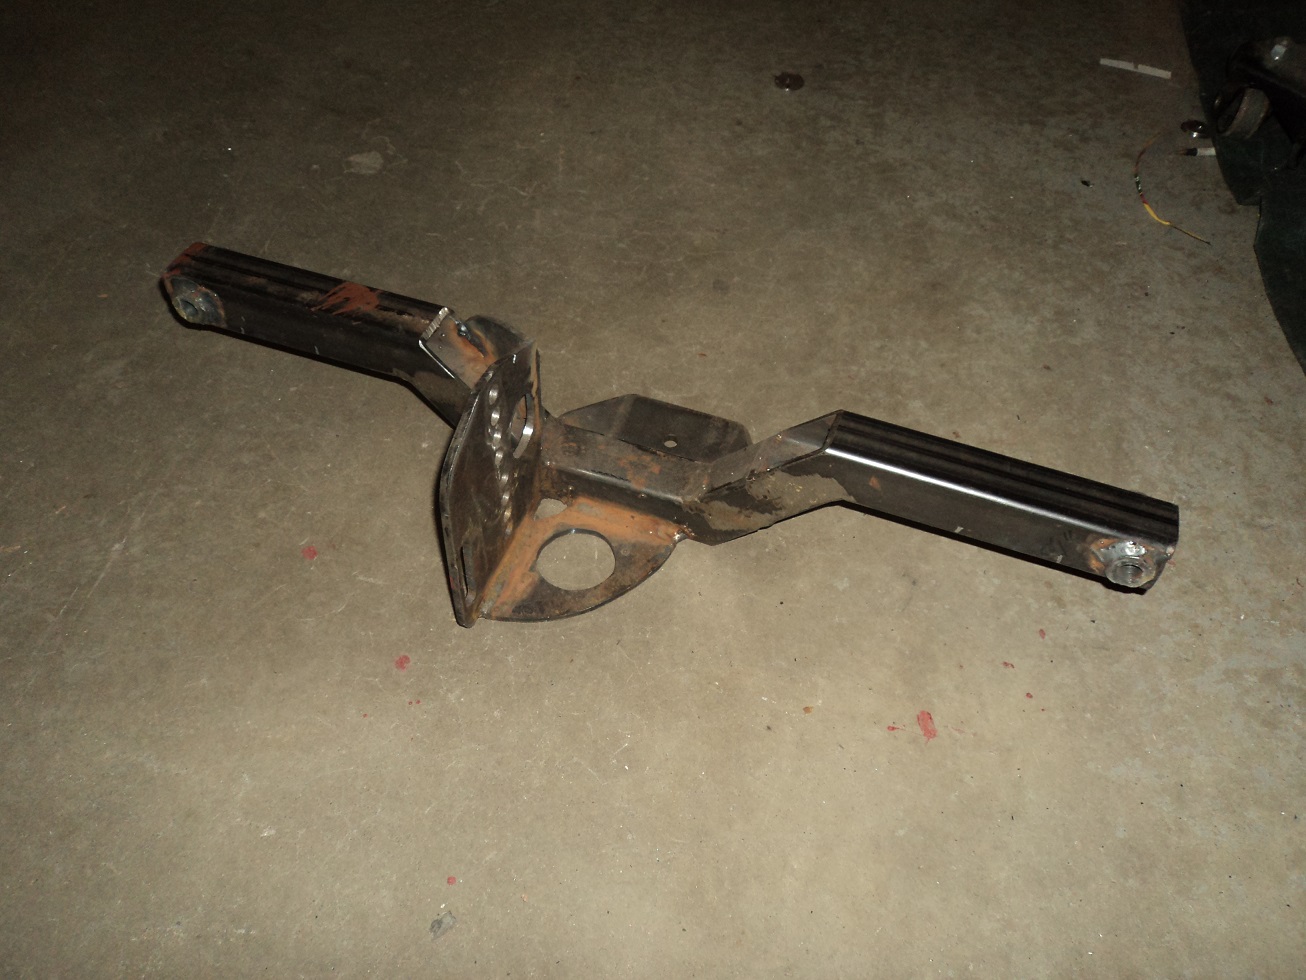
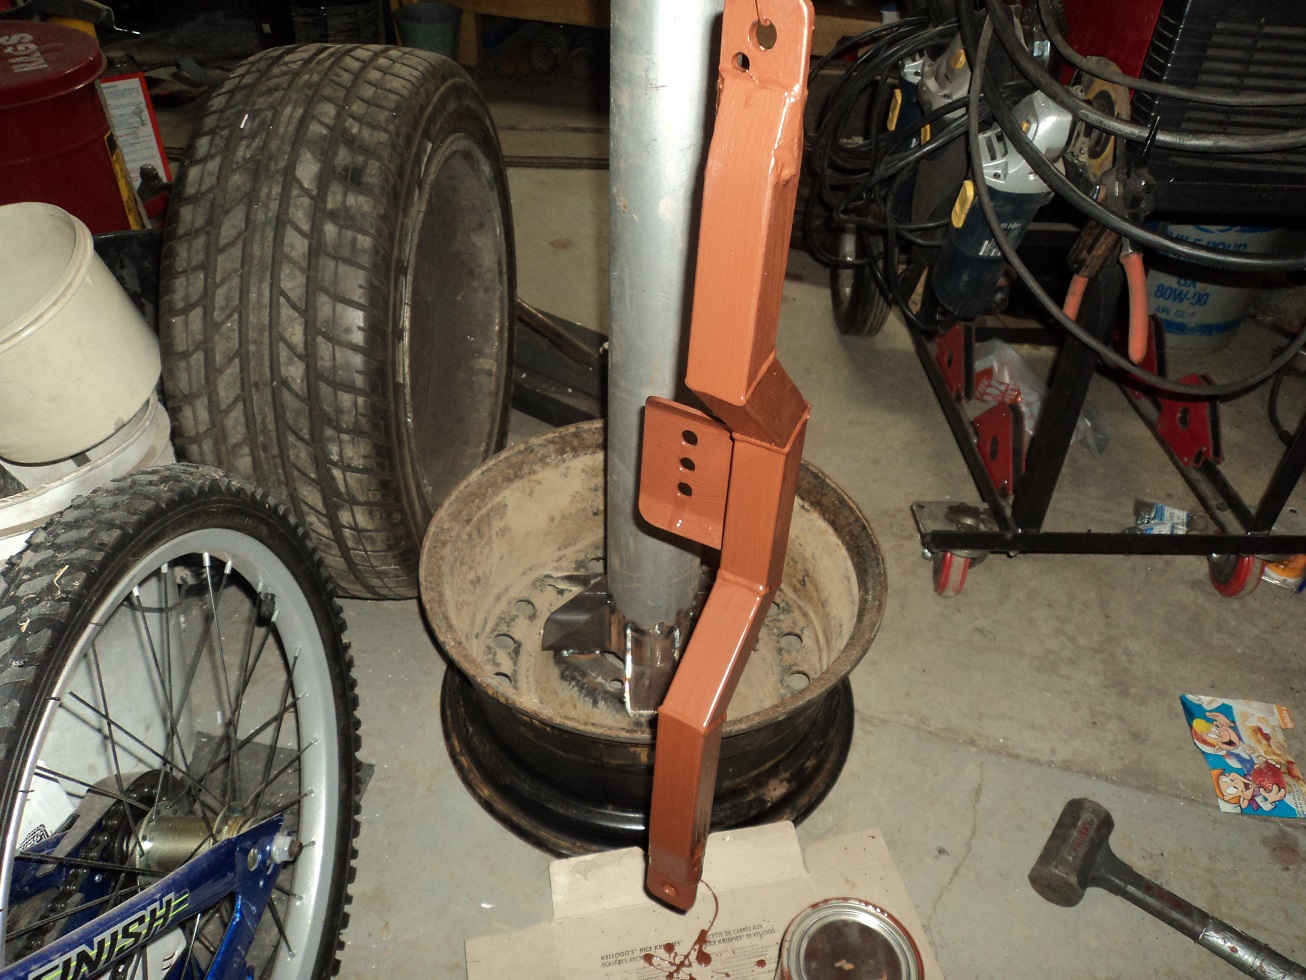
After a bit of thinking, this is where I am. Crossmember needs to be easy to remove. Previously, it was designed very robust to deal with the Firebird torque arm, which I am no longer using.
Cool thing: this is all steel I found in my back yard.
The ends of the cross member will be sliced at the ends to fit the “ears,” which will be bolted to the tabs welded to the frame.
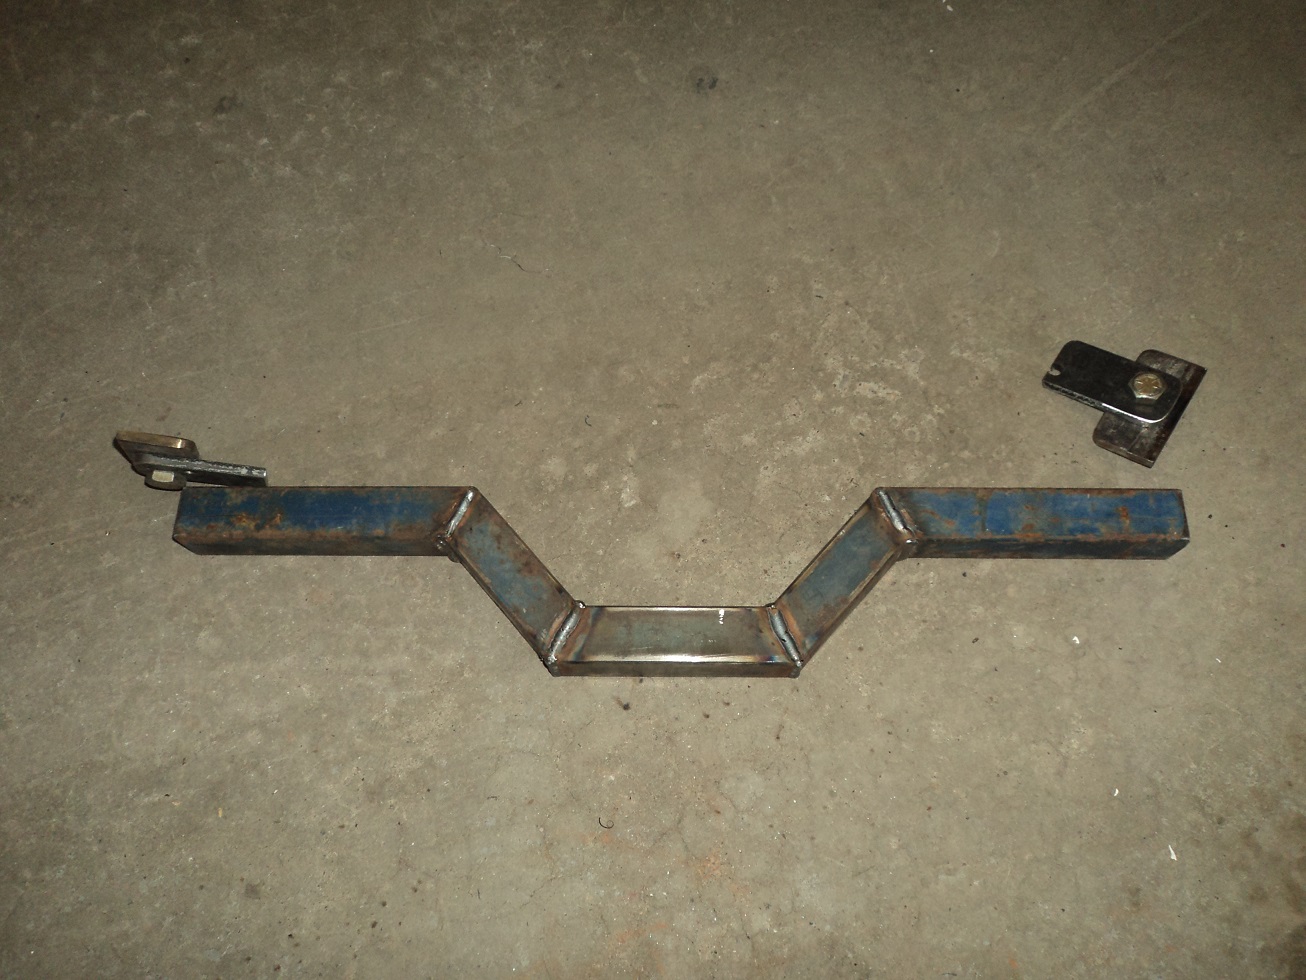
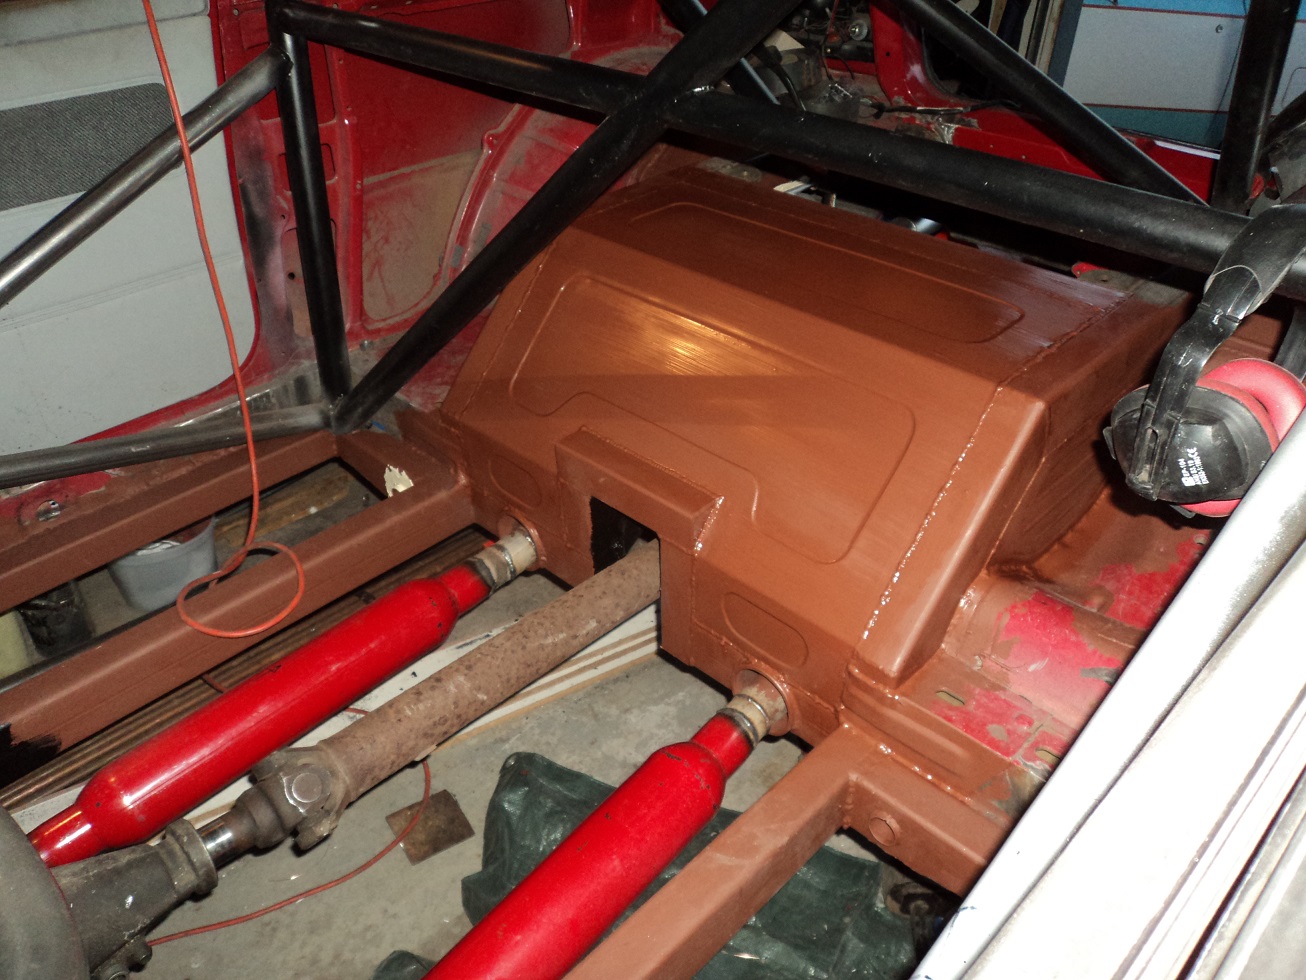
Got the crossmember sorted out, and primed:
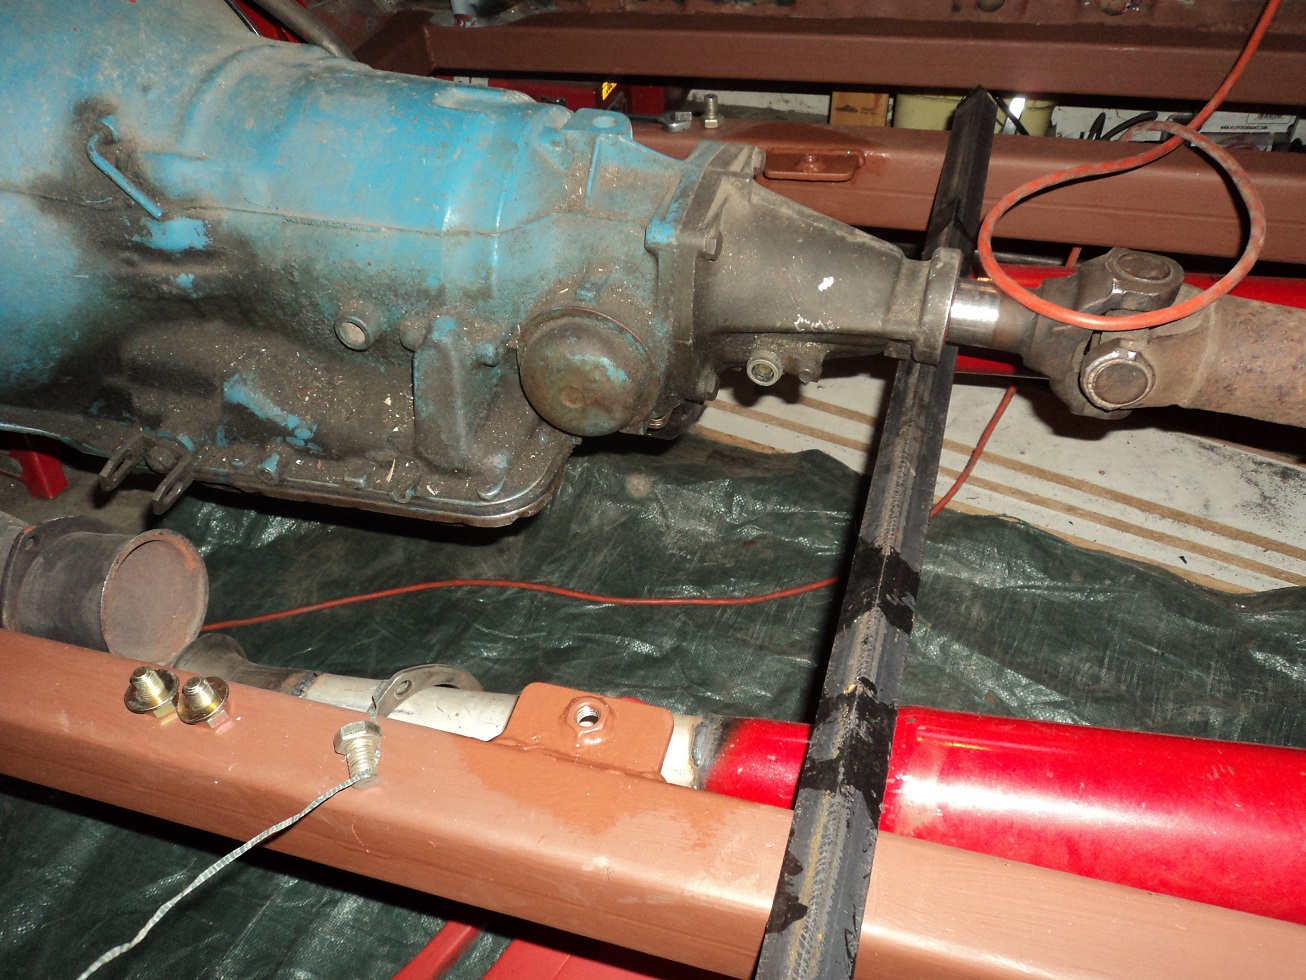
New tabs off the frame. Crossmember will bolt to the underside of the tabs. Not ideal, but neither is this project.
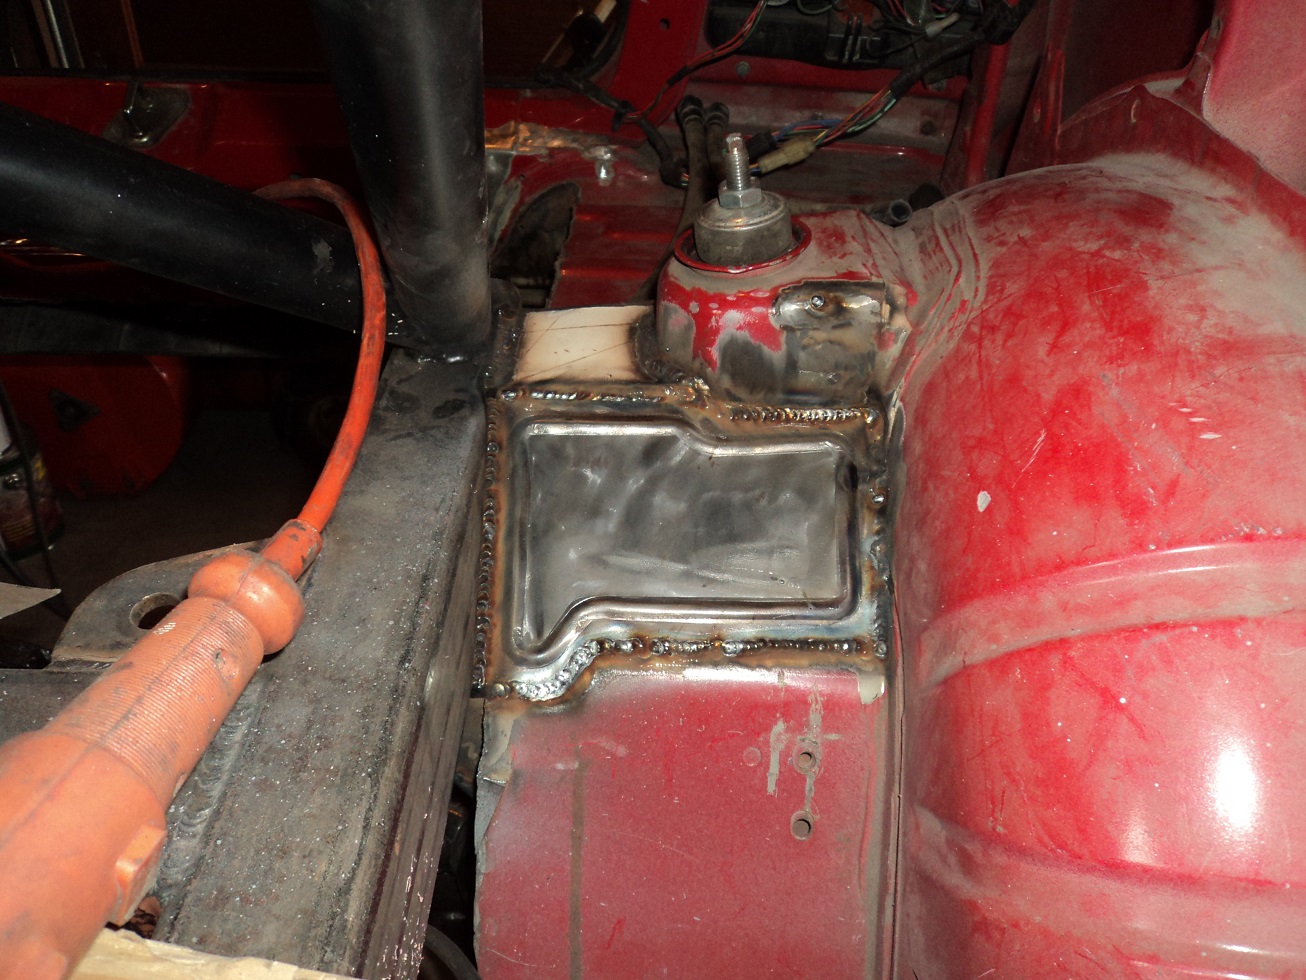
Also finished bead rolling and primering the patches on the rear sides. Also patched a rust hole in the left rear wheel well (seen in earlier pics).
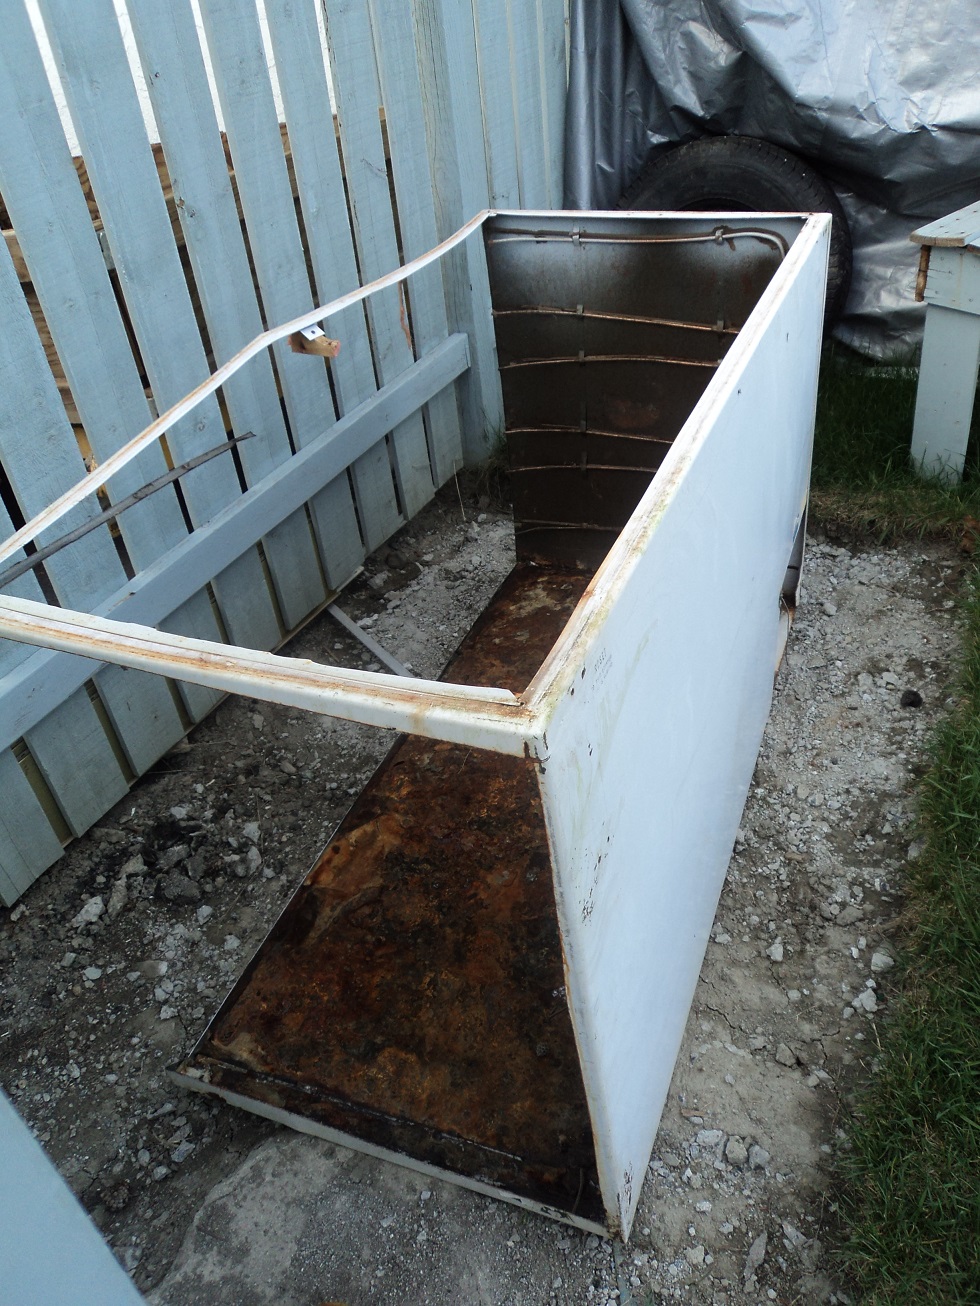
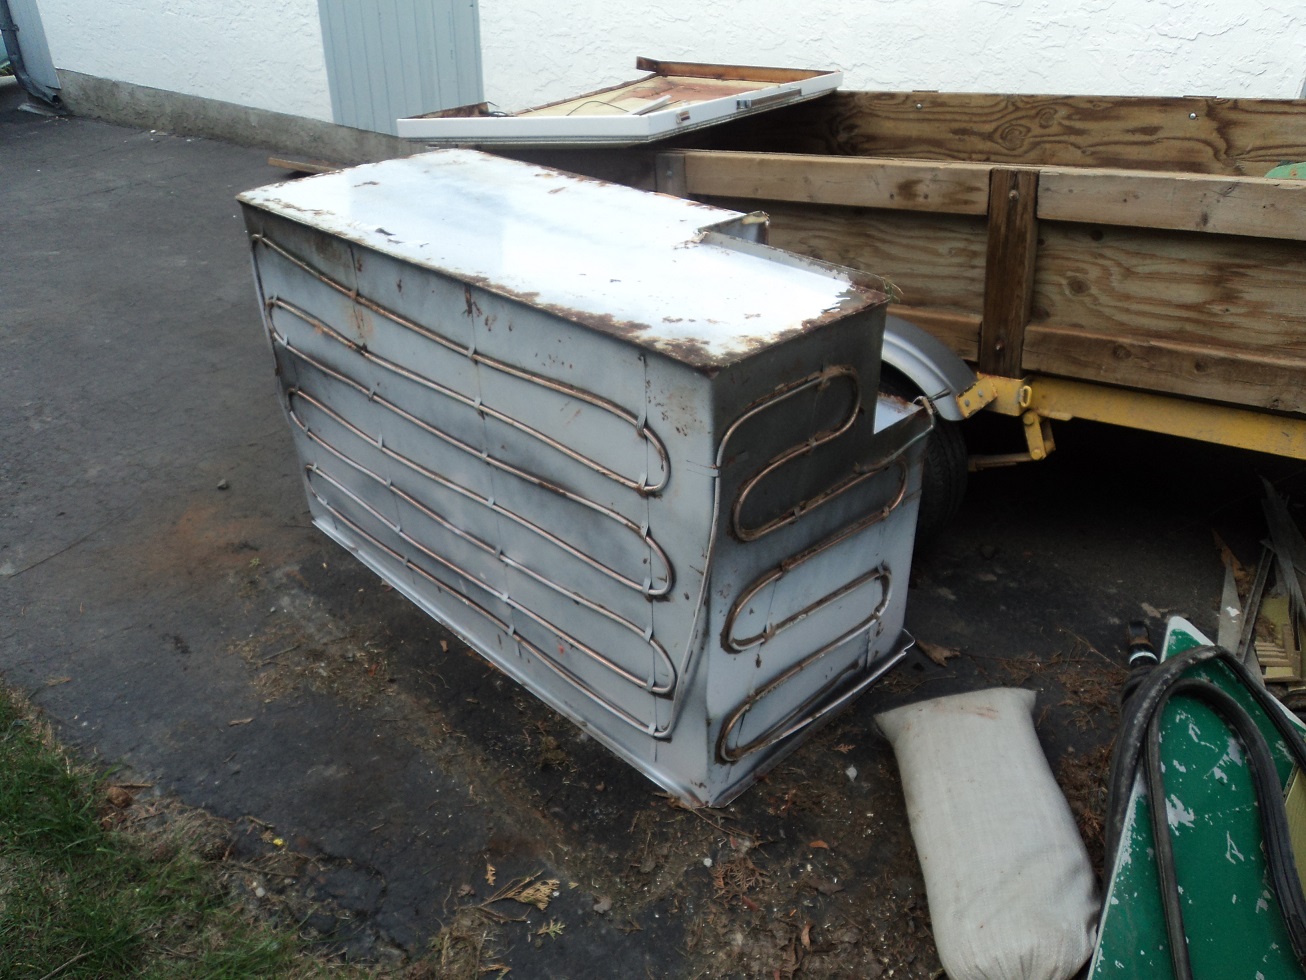
The freezer still has quite a bit more life left in it. I might be able to make this work really well!
I started working out how to build radiator tanks, and I think I’ve decided what the dimensions have to be. Not sure if I have the right aluminum at home or not – it was left over from the sheet of used aluminum I bought for the floor on The Lethal Locost.
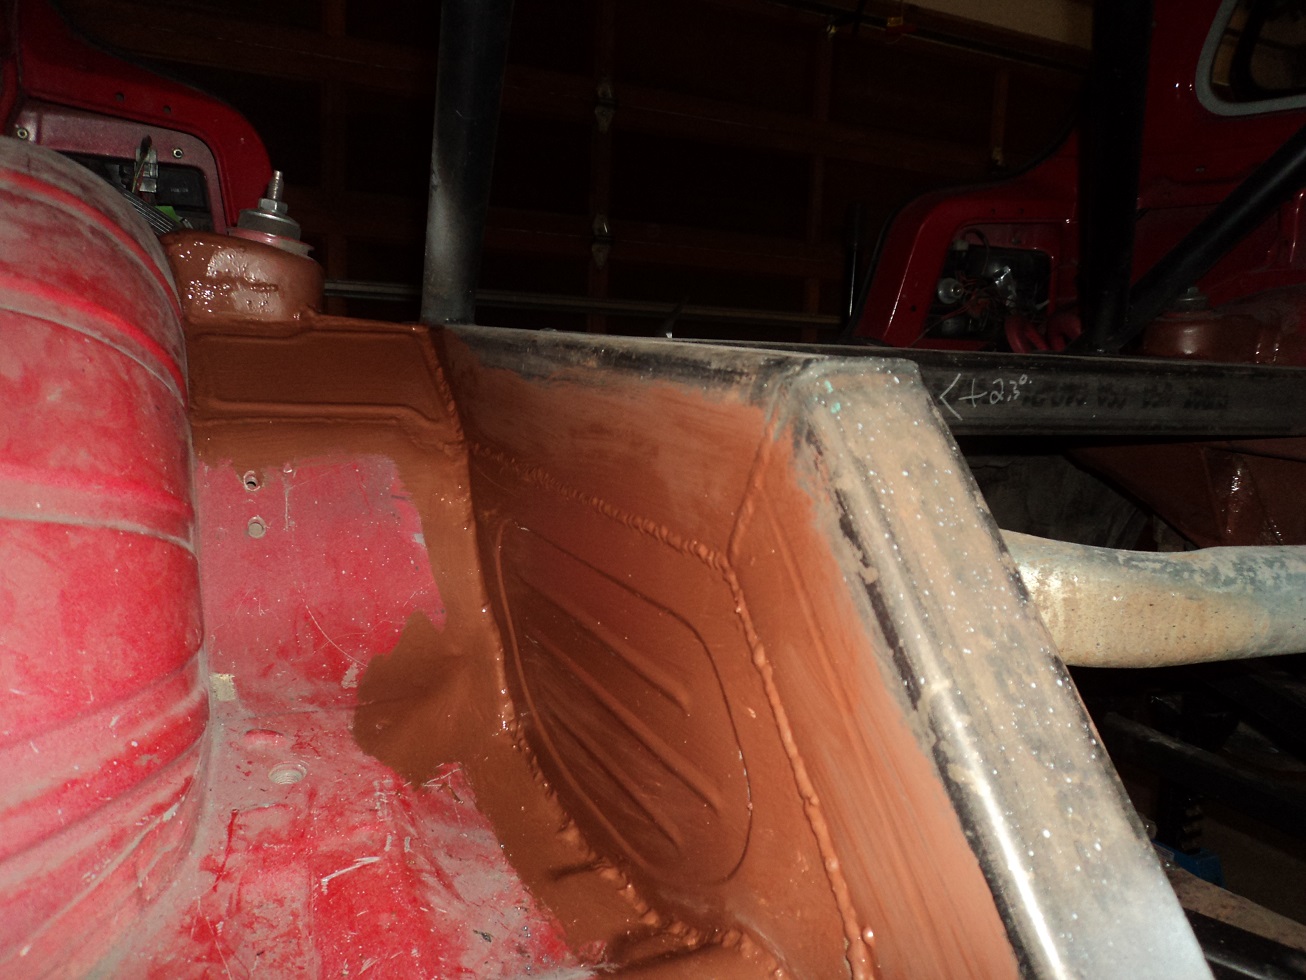
Also finished cutting and folding the interior panel for behind the seat backs. Used the 3′ sheet metal brake I fabricated last fall. Worked AWESOME!
I intended to bead roll something cool into the panel, but it seems I am not ready for that level of complexity. I wanted to emboss “FIENDISH”, but then changed my mind to the Pontiac symbol, then decided to just do a perimeter shape and move on. Fun challenge too, because I didn’t think about the limited reach of this bead roller.
(April 2015)
Also tried rolling flames into some scrap, and I experimented with my tipping wheel and trying to figure this stuff out. I am a long way off.
It’s kind of fun getting lost in the garage for hours.
Back panel put in. It seems a bit “drummy.” I’m thinking a couple of raised beads through the center might have reduced that. Too late now. Wait for a sale on Peel-n-Seal I guess.
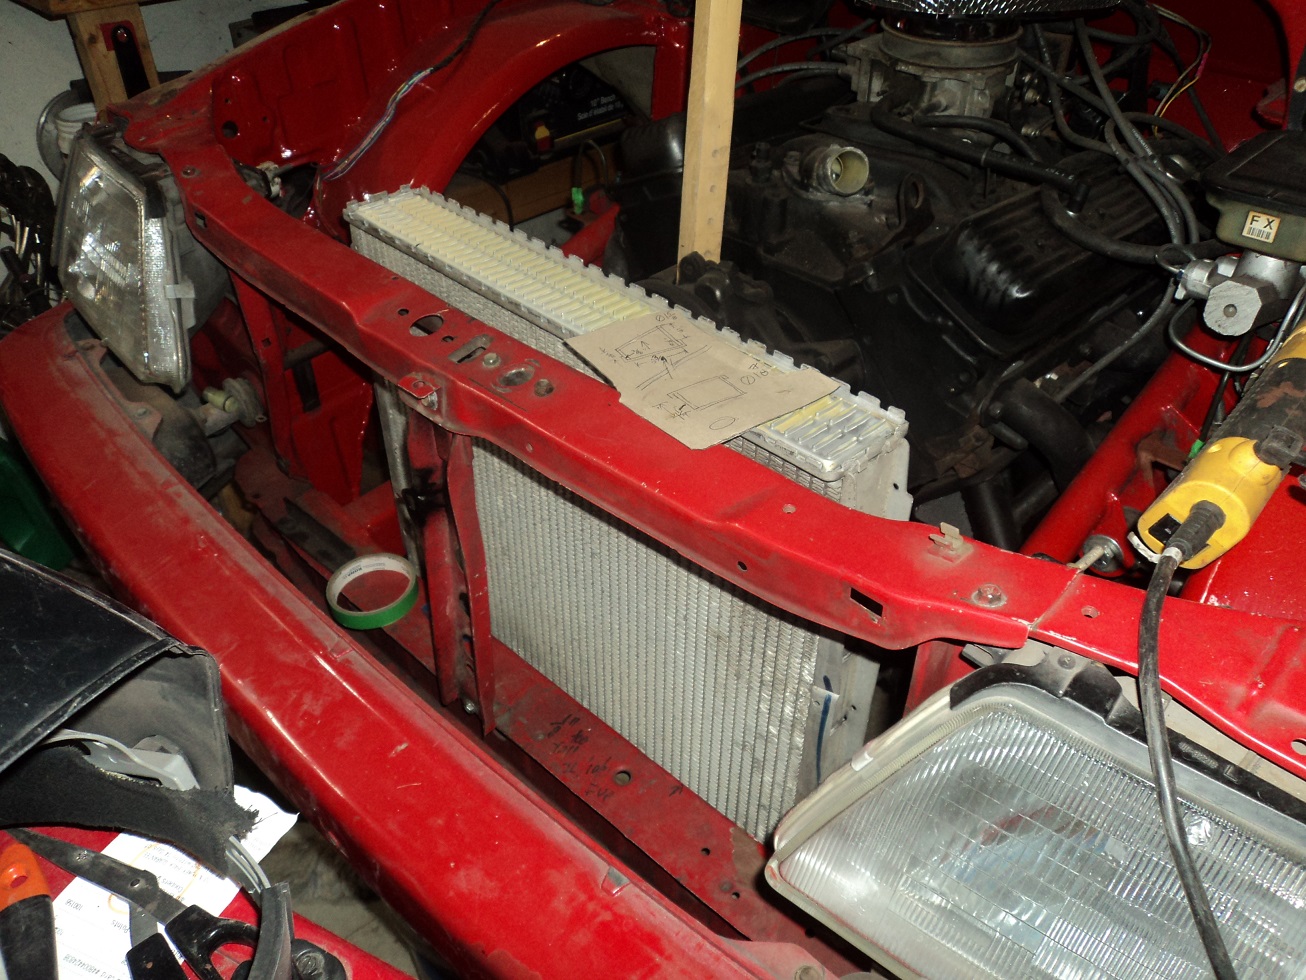
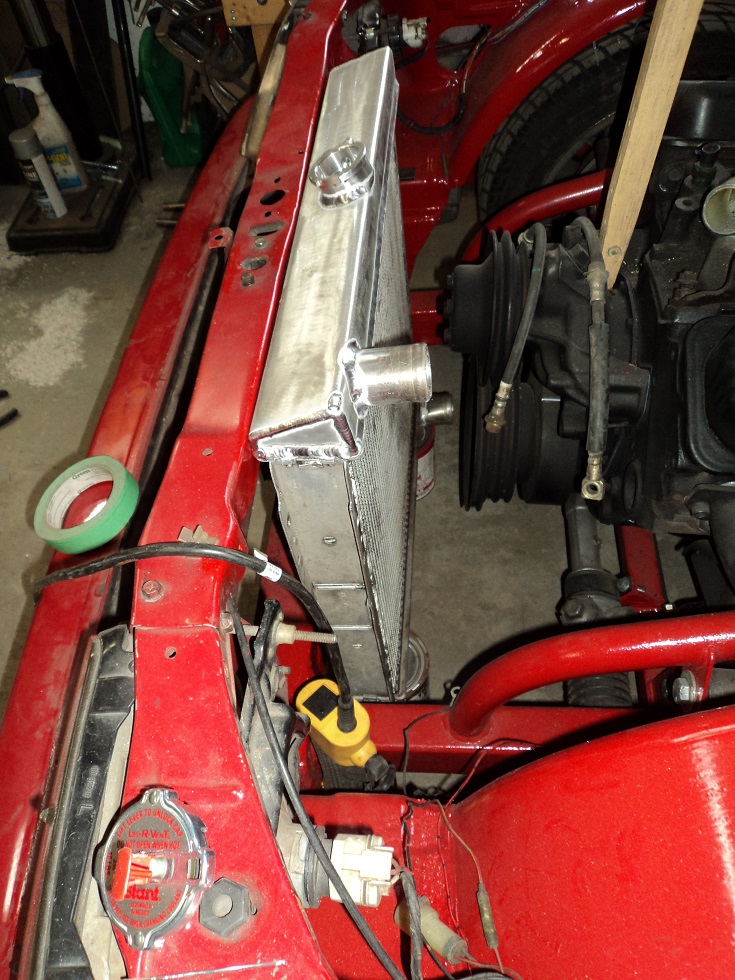
Also working out rad tanks. That there is the core from a Ford Ranger that I got because a tank had split. Rad should fit under the hood easily, and not protrude below the bumper. I also have been enjoying a spot weld cutter, and removing old bracketry that is no longer needed.
Oh yes – the new and improved transmission crossmember – now actually removable. Such a treat.
I recently spent some time with my friend Liam of Burr Fabrication (Armstrong), who helped me immensely in fabricating a gas tank, and gave me tips in welding my own rad tanks to the Ranger pickup core.
Today, I worked on the lower radiator tank (no pics – boring), and the lower rad house outlet.
Lower water pump inlet is 1-7/8 diameter. That makes the circumference 5.89″. I cut a strip from the same scrap aluminum I used for the tanks.
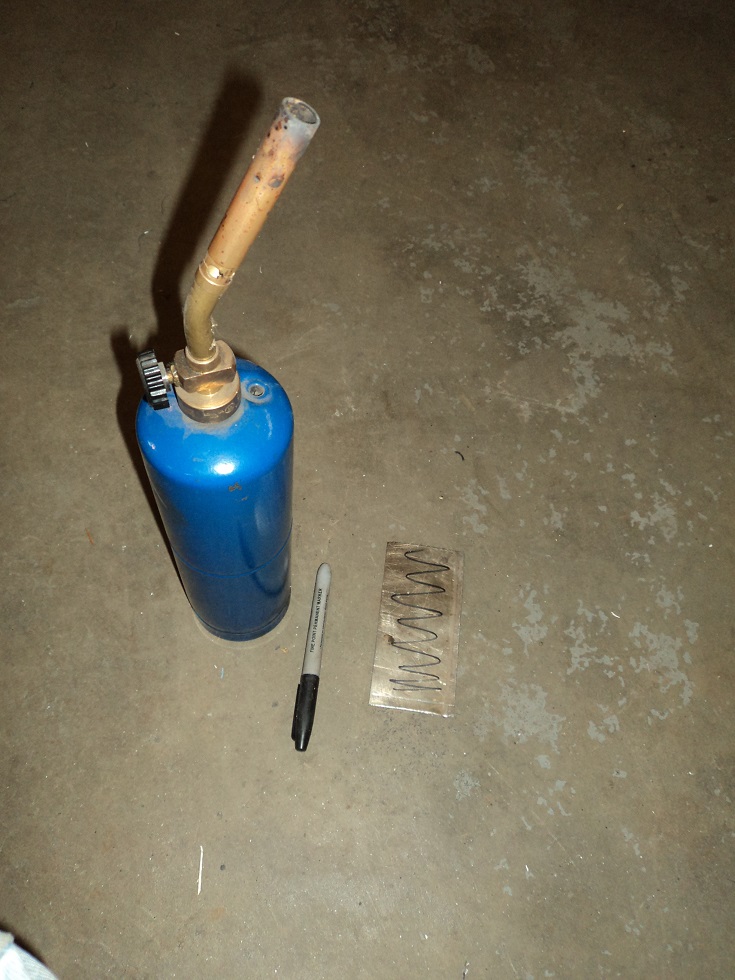
Anneal the aluminum by scribbling a Sharpie on the aluminum, then heat it with a torch until the ink is gone.
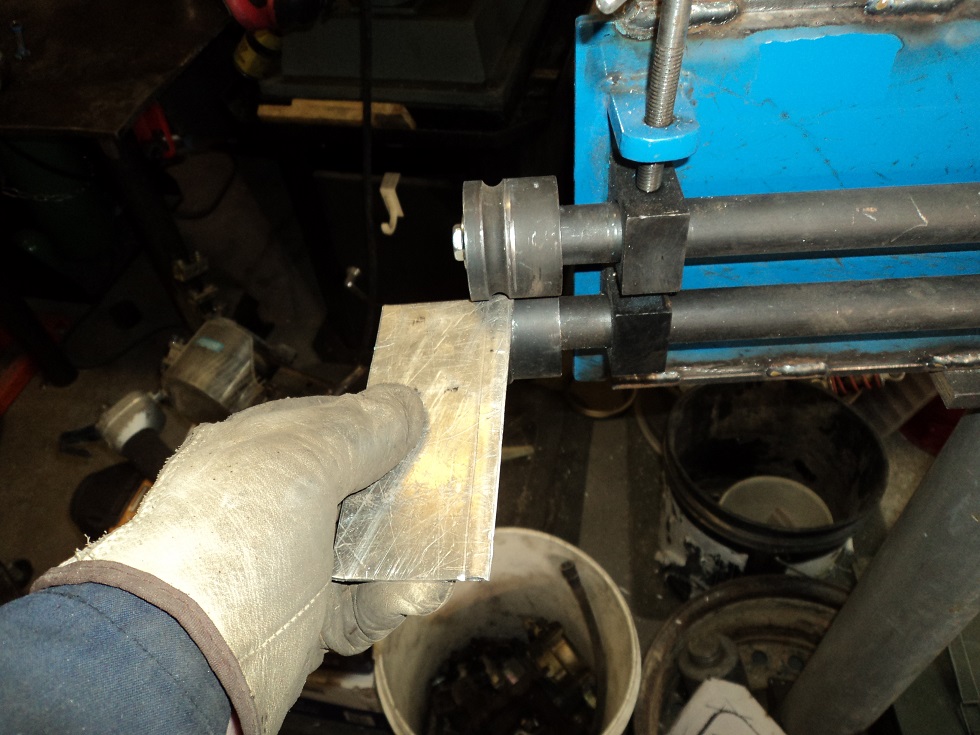
Then I ran one side of the sheet through the bead roller for a hose clamp antipoppinoffinator.
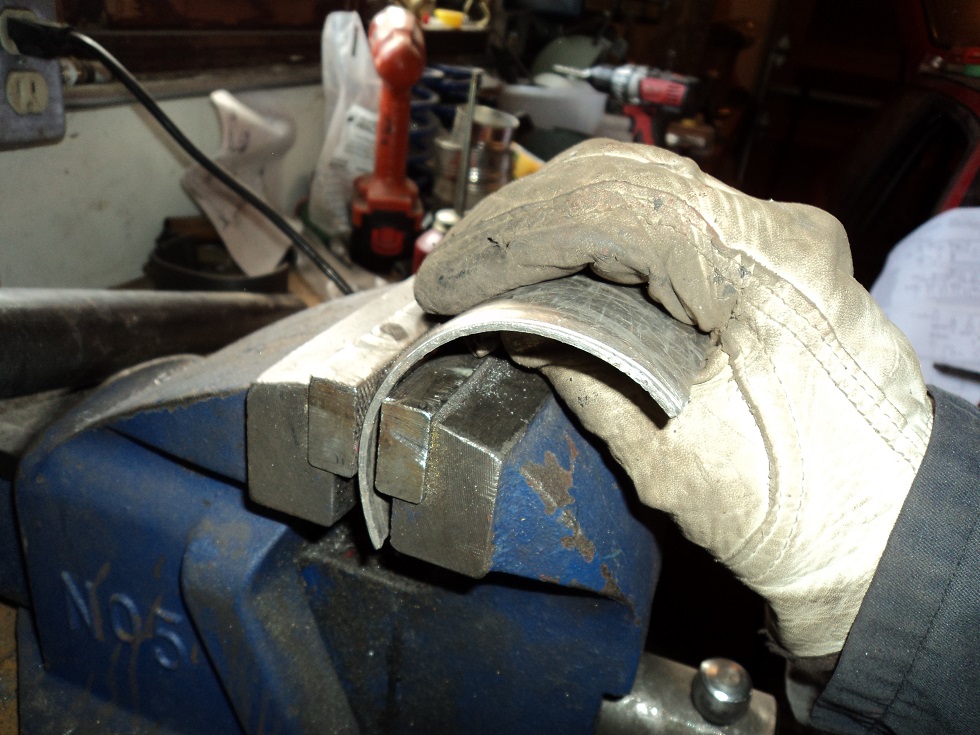
I started curving the sheet by bending it bit by bit by hand in my vise.
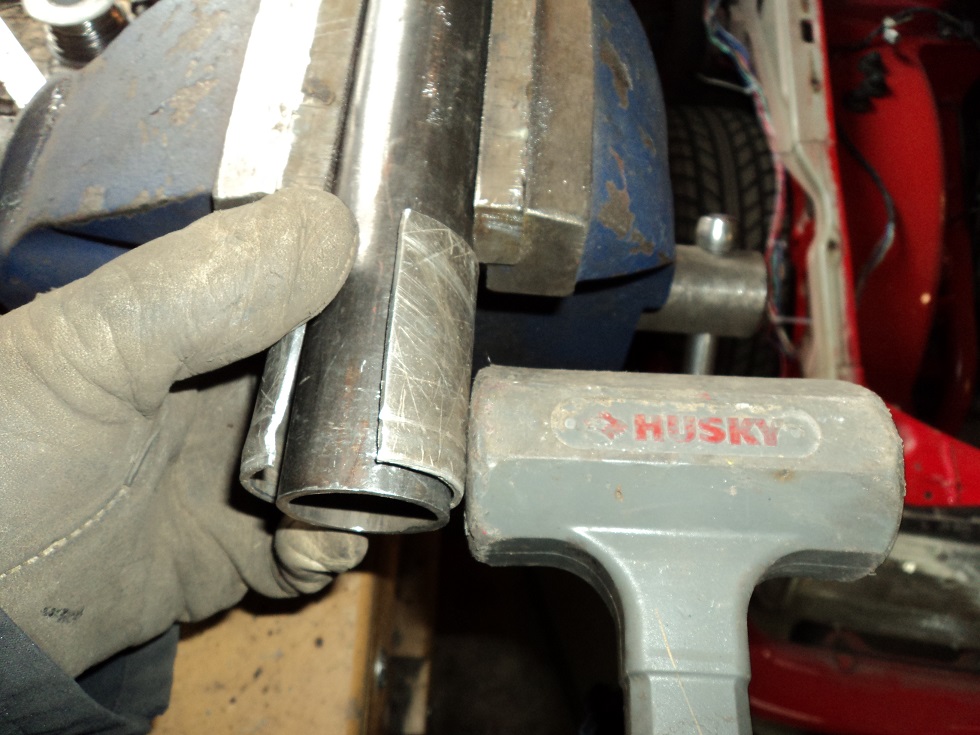
Then persuaded it into round using a dead-blow hammer around a piece of tubing.
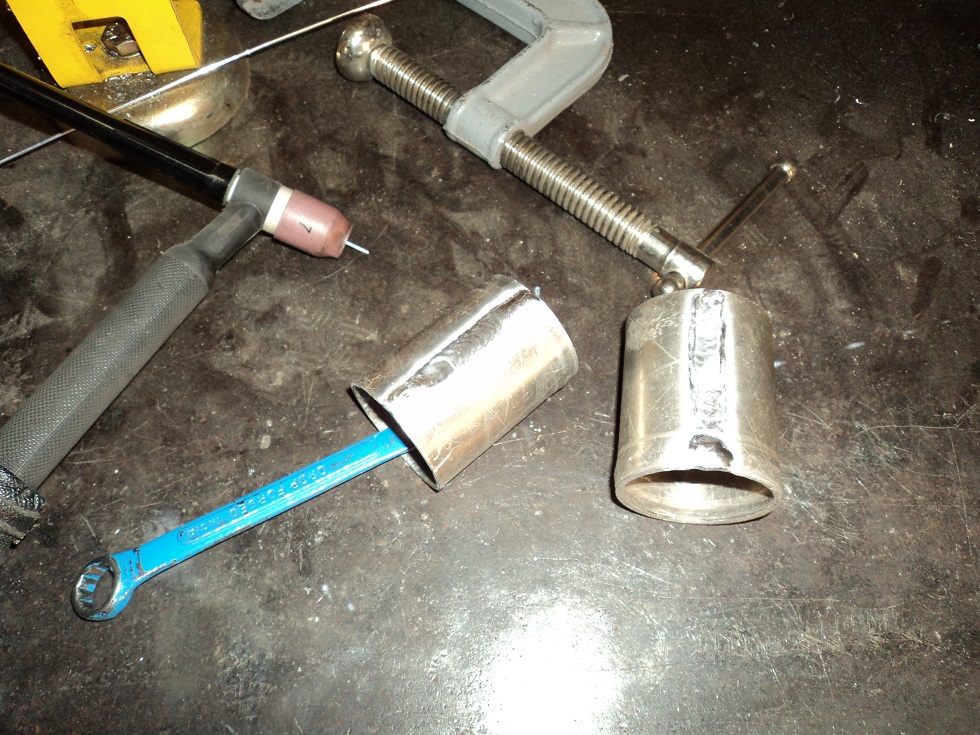
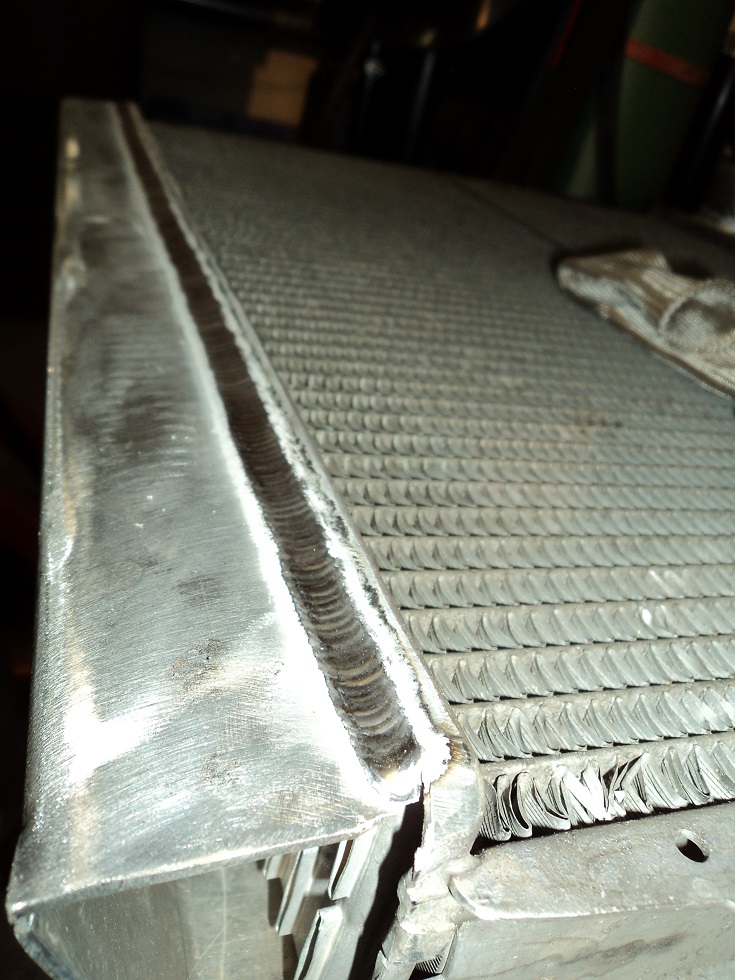
Then TIG welded the seam inside and out. Top hose inlet is there too.
The outlet is squished on one end to fit the tank. The hole was shaped with a carbide cutter on a die grinder. Spraying the cutter with WD40 keeps the cutter from bunging up with aluminum.
Magical TIG goodness.
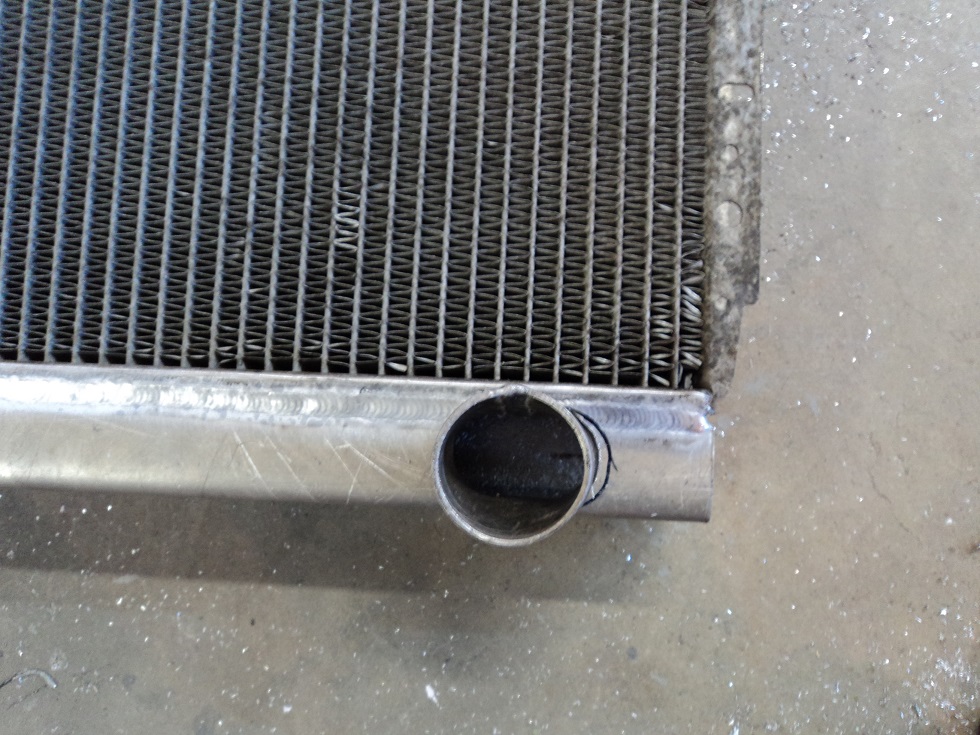
I’ll finish the top tank and hose inlet, flush the rad clean, then cap the ends.
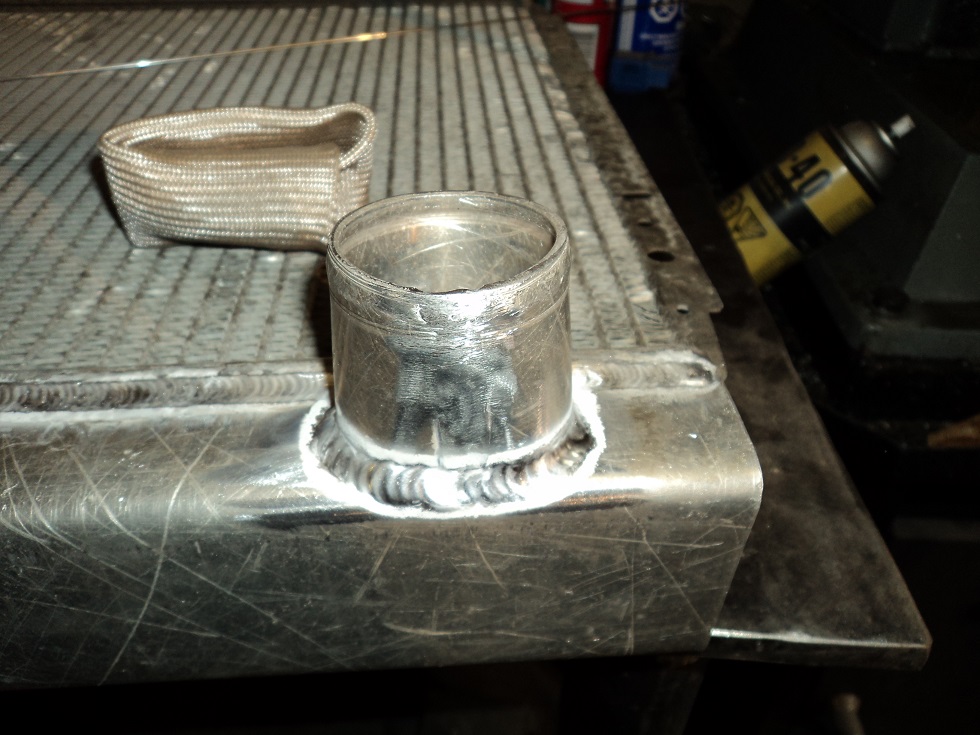
Attached the top tank, hose inlet and filler neck.
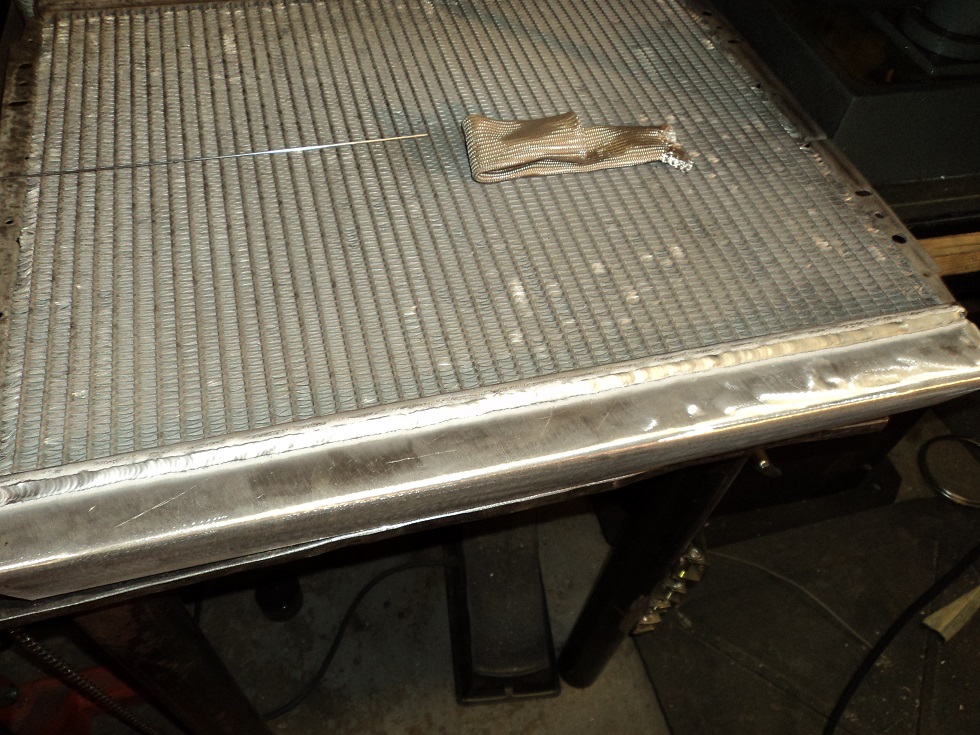
My fingers were cooking after this one.
Basic weld bead, then another pass using the only the pulser to “wet” it together nicely.
I’ll likely cap the tanks tomorrow, add a drain cock, and hopefully be done with the rad.
Got the tank sides done and capped, and drilled a hole for the soon-to-be-attached draincock.

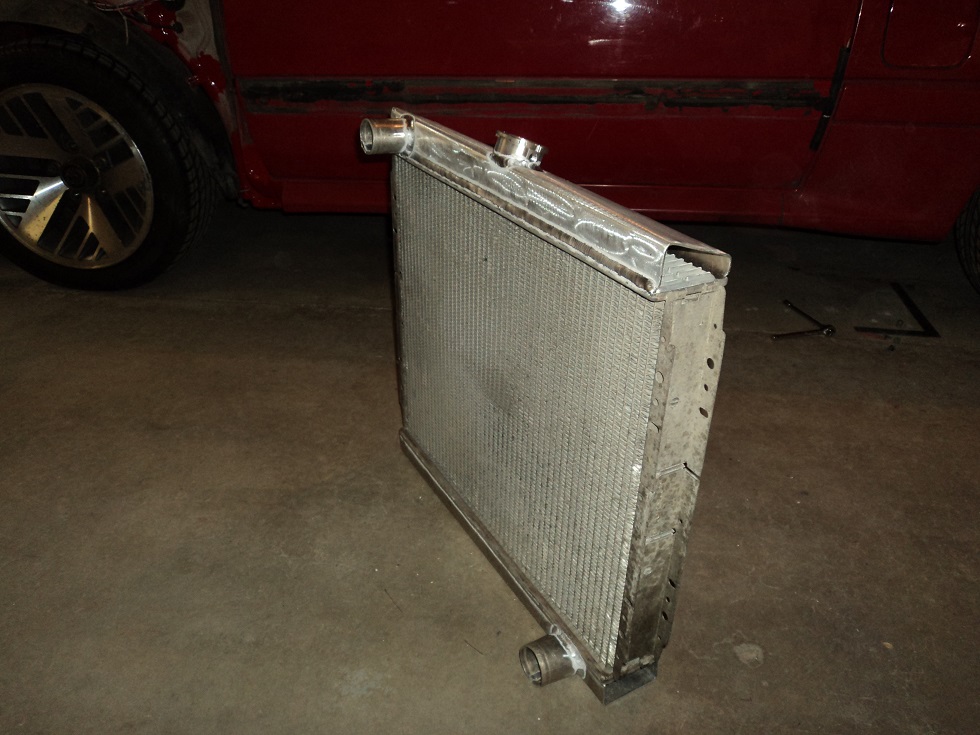
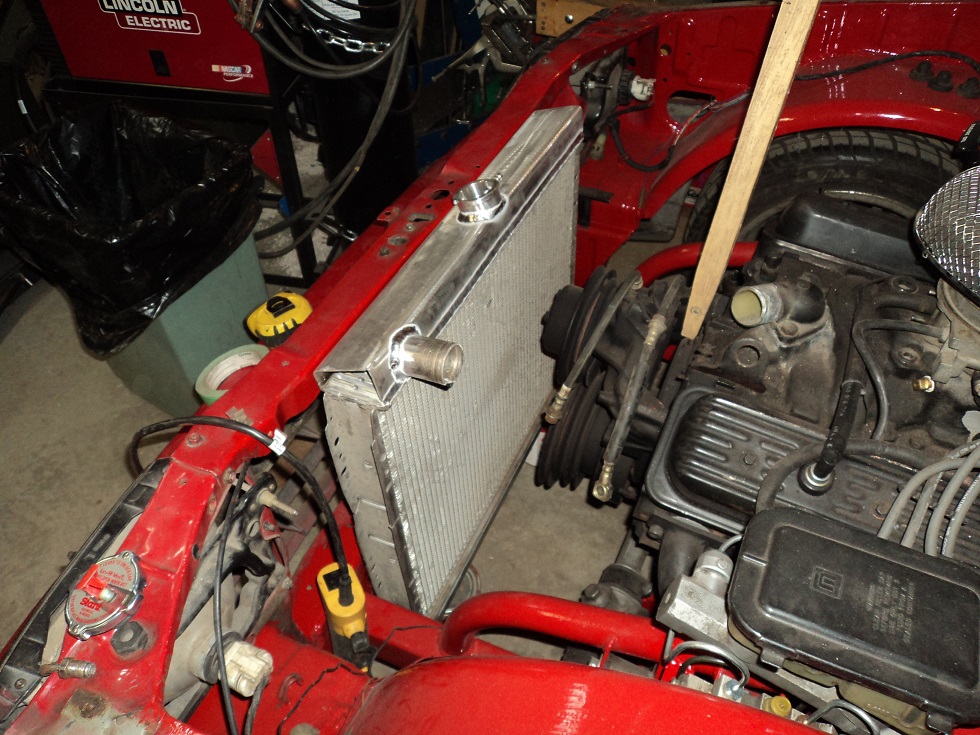
Not much different than you have seen already. Working out how to mount it (May 2015).
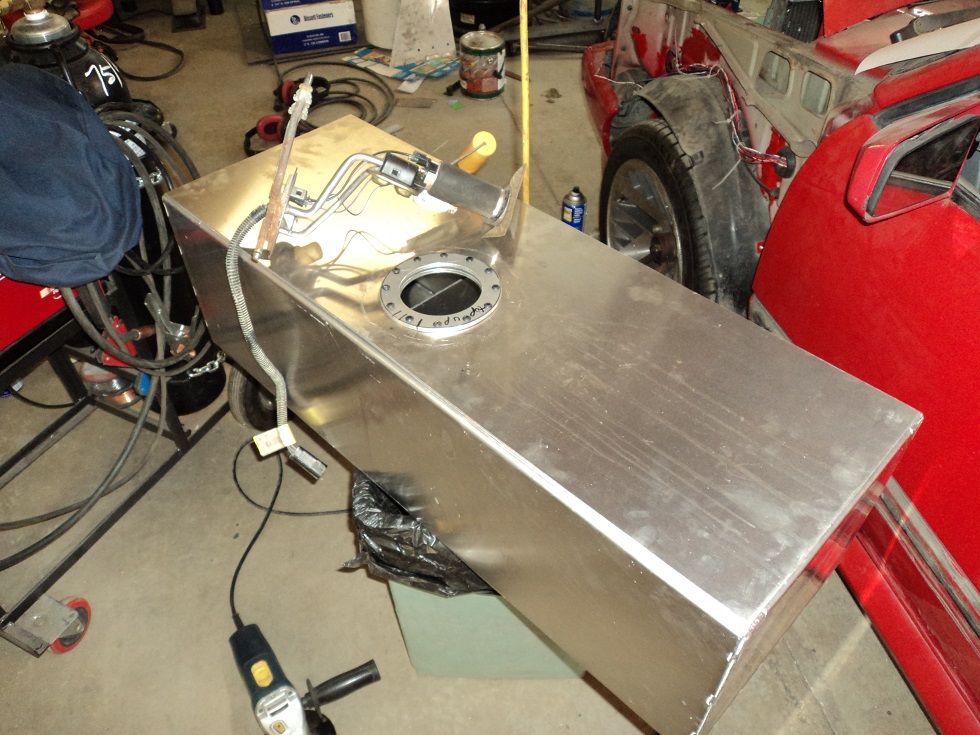
I have an idea on how to do the gas tank. Liam (Burr Fabrication) and I threw together a basic gas tank, currently not quite finished. The pretty welds are his.
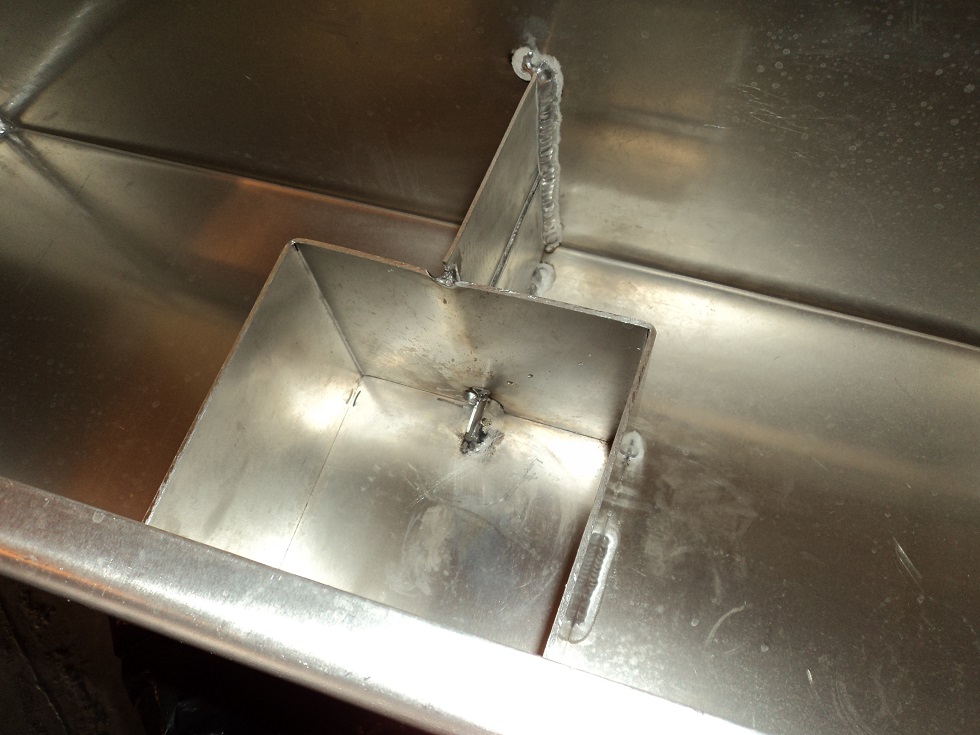
I’m using the ’88 Firebird fuel pickup, so the tank was made to suit. We built a basic sump, with a hole forward so fuel can get in, with a more difficult time getting out. I’m not worried about trap doors and maximum g’s – I’ll likely roll it long before fuel starvation becomes a problem. Once I got home and my sub-conscience stewed on it for a while, I widened the hole and added a divider, so in a corner, the only way the fuel can get from one side of the tank to the other, is through the sump (shown).
The top looks like this, with the pickup and o-ring sandwiched between a ring welded underneath, and a ring bolted through the top into it.
That might be as far as I go with it this weekend.
Going to check on my building permit – it’s been two months of waiting…..
Trimming the back hatch area to fit the tank. What’s that bogging down my cutting disc??? Oh. That.
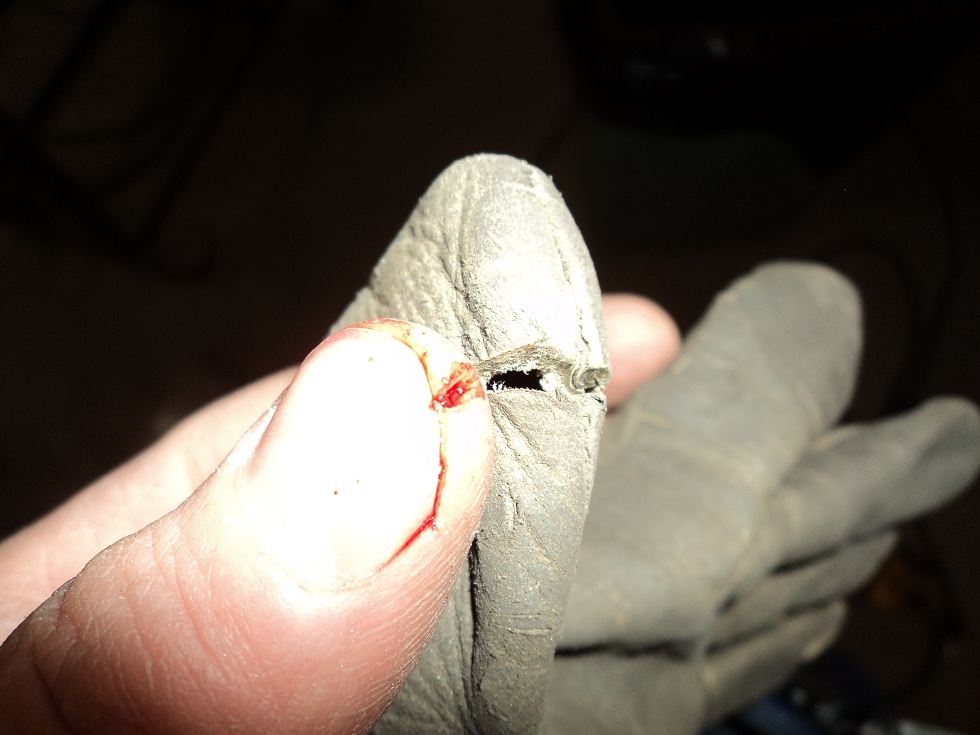
You don’t fully own a project, until you’ve bled on it.