[Timing Belt] [Spark Plugs] [Fuel Pump] [Lowering Springs] [Rear Sway Bar] [Widened Wheels] [Breathing] [Things Gone Wrong] [Gauge Trio]
I started my apprenticeship at a Hyundai dealership back in the 80’s, and I don’t think I ever fully recovered….
However:
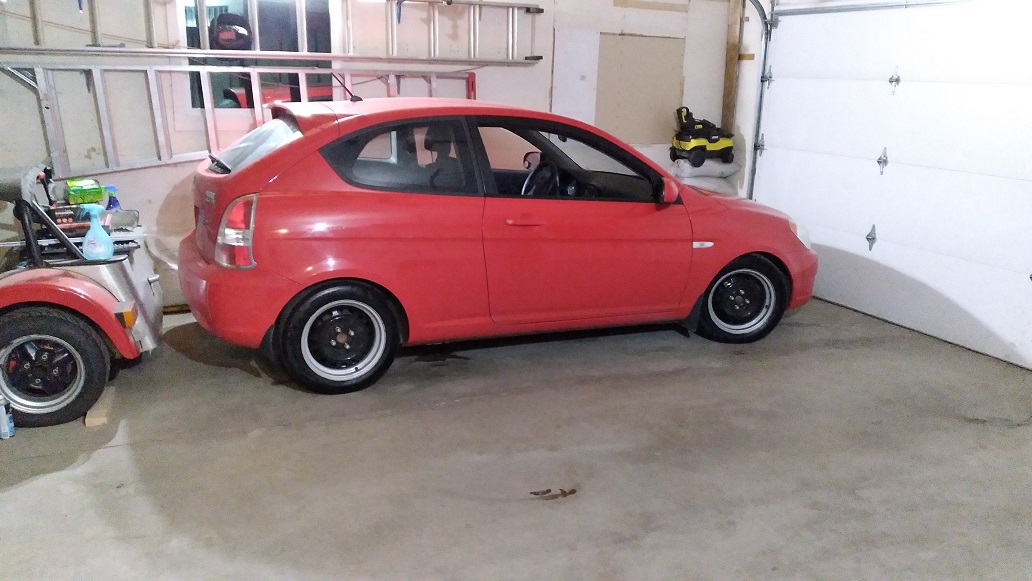
I am surprised how much I enjoy this car! I loved it so much, I bought another!
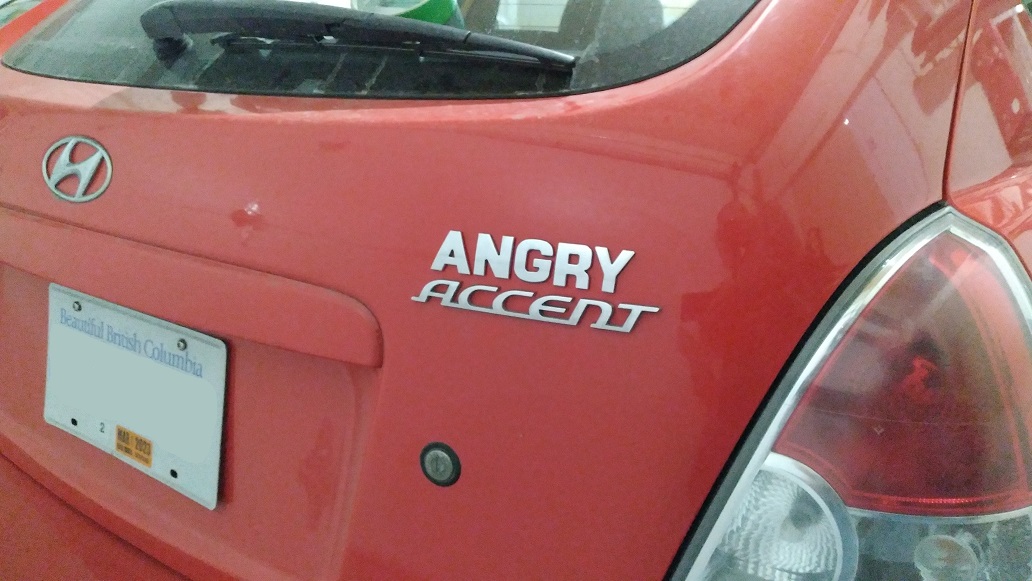
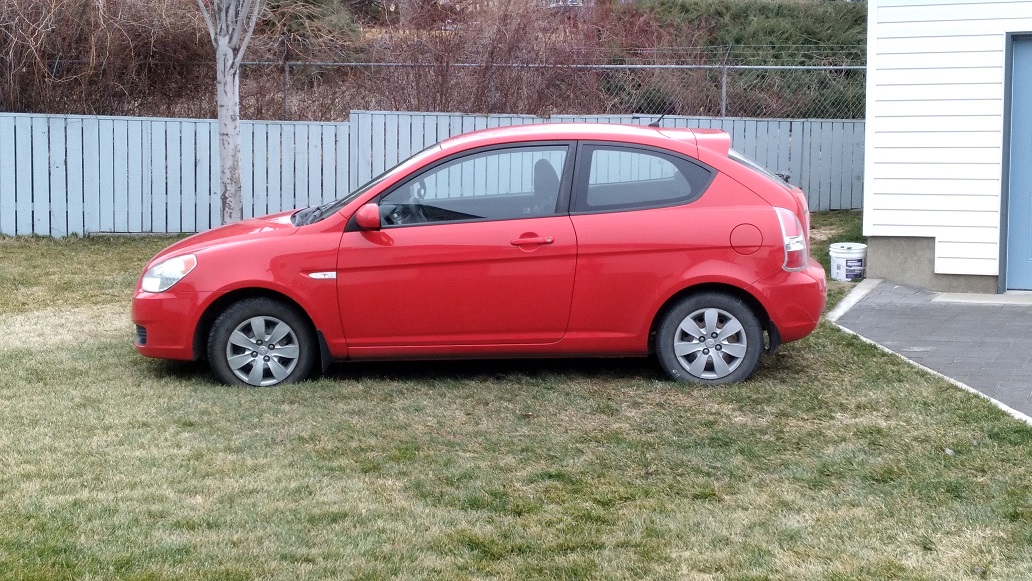
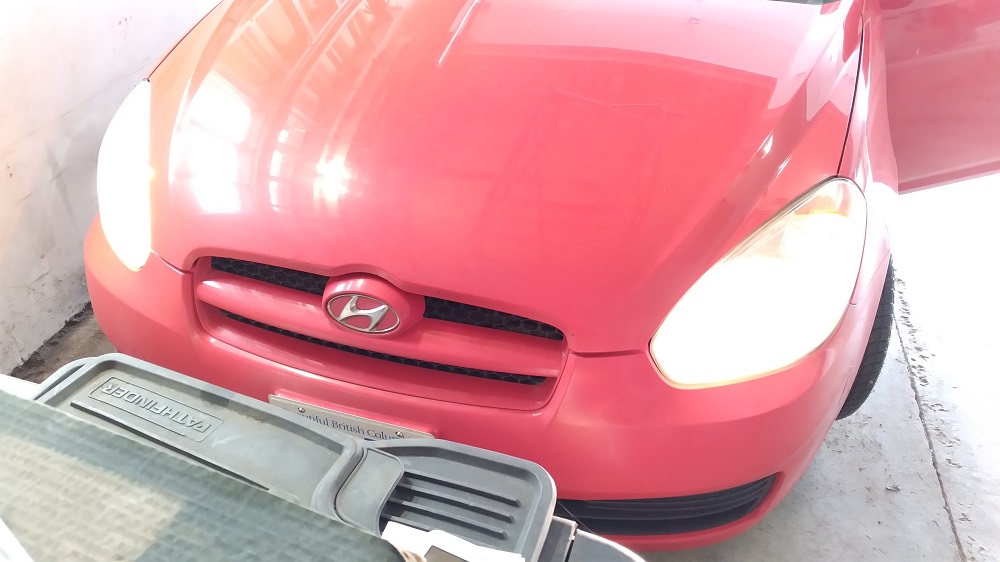
In the wake of 2022 gas prices vs. daily driving The Crusty Chevy ($140 of premium for 150km of driving, PER WEEK), I bought this little suppository. 2010 Hyundai Accent (MC chassis). In theory, I can save upwards of $7000 a year in gasoline alone. Which will free up some money to finish the ’61 Apache sooner. Wheee!
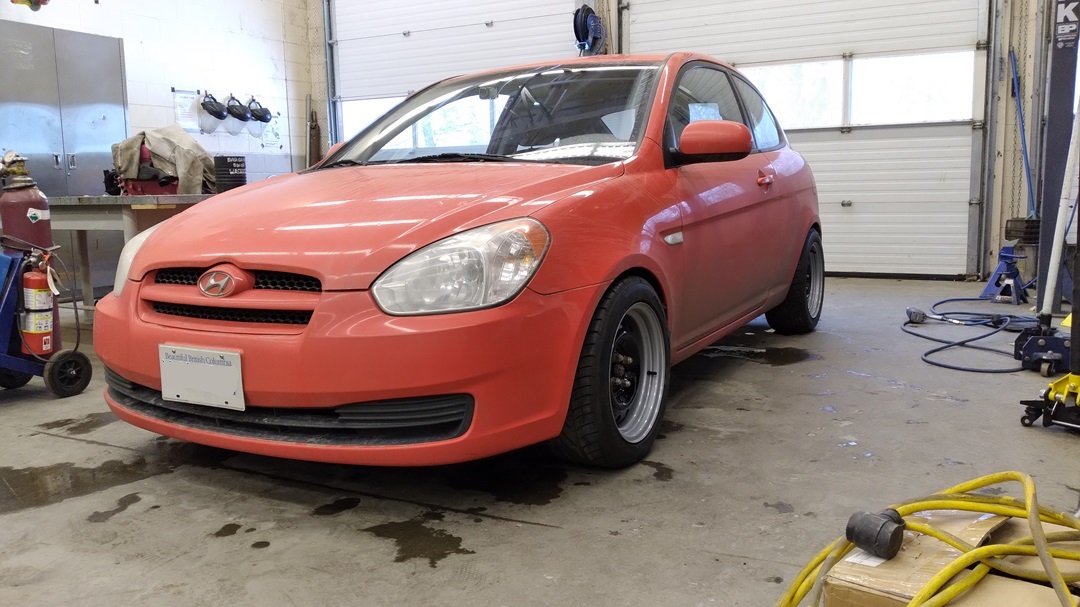
Goal: A stock-appearing but meaty-looking “Hot Hatch.” But cheap. For now.
Spoiler! This is what it’s going to look like:
Inspiration: The Korean Hot Hatch I Never Knew Existed
Let’s Begin!
FULL SERVICE
When you buy a “new to you” car, you are inheriting whatever was or wasn’t done by the previous owner(s).
In this case, I am the 4th owner, and the car came with the full CarFax that shows LOTS of regular oil changes, and not much else.
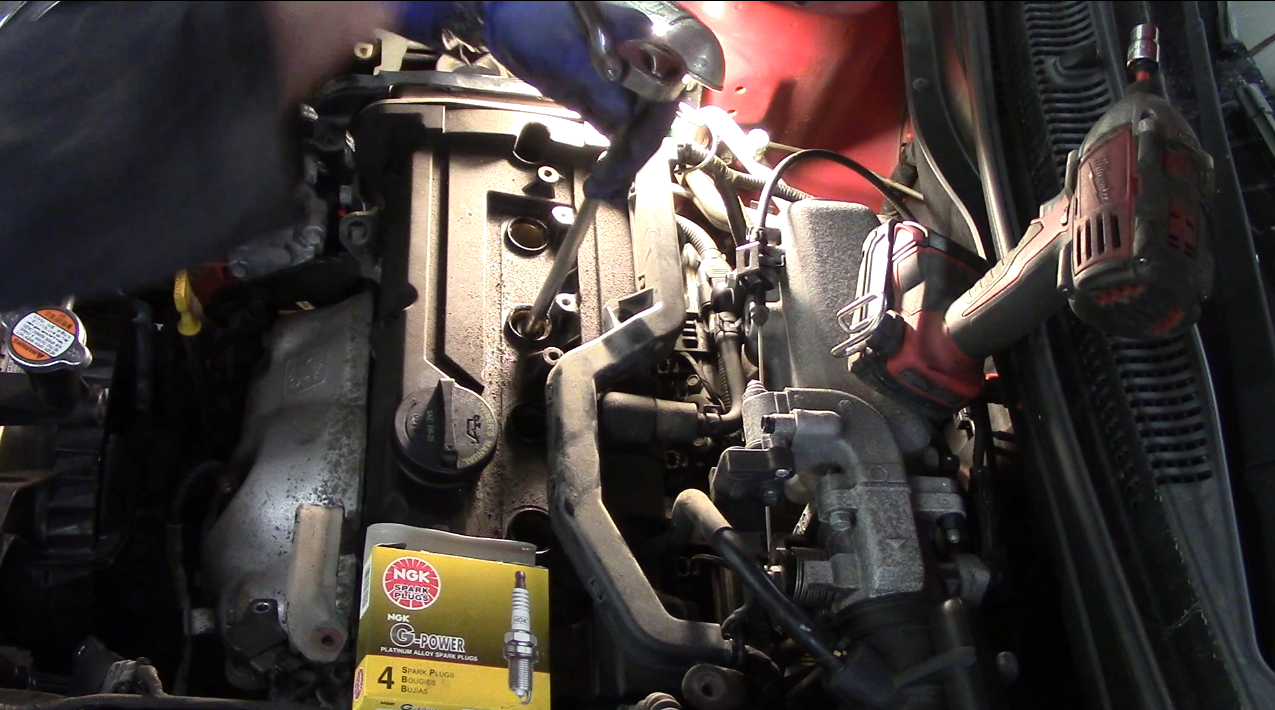
TIMING BELT
- Timing Kit: Gates TCK282 (does not include water pump)
- Water Pump: Dayco DP346
- Power Steering Belt: ACDelco 17260
- A/C Belt: ACDelco 4K320
- Alternator Belt: ACDelco 4K332
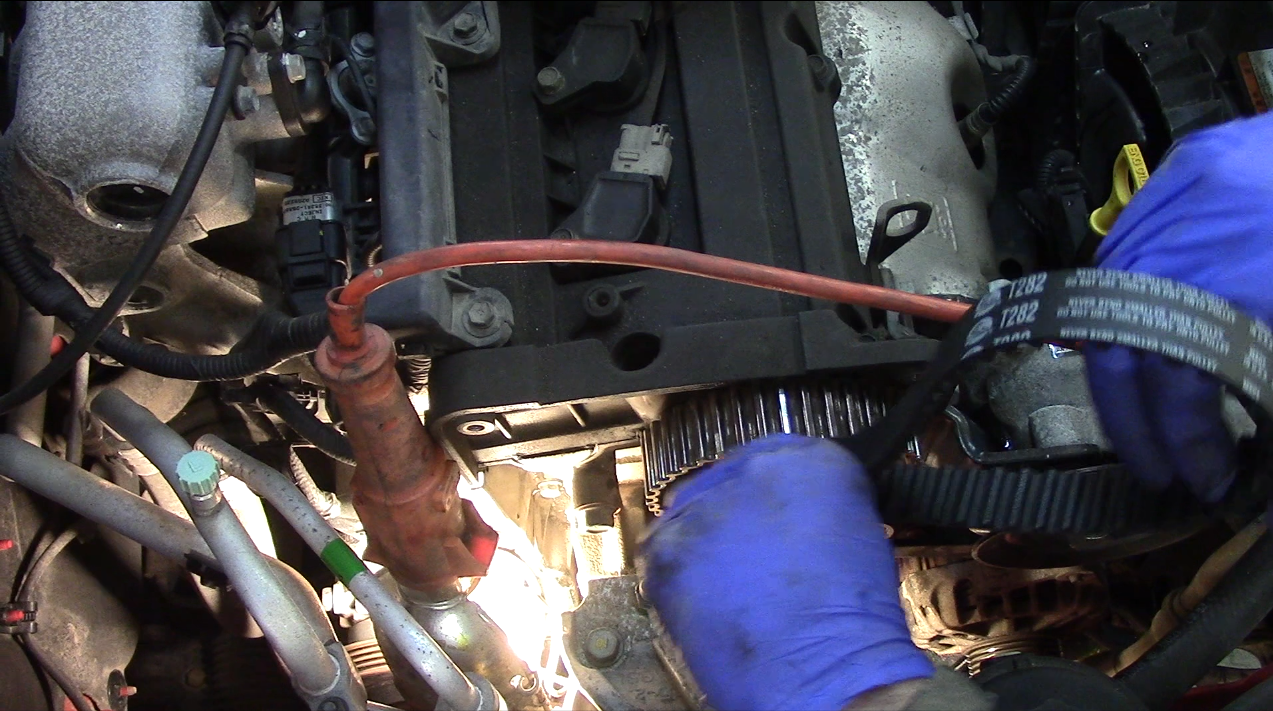
The factory service interval for the timing belt is 100,000km. I have no record of any belt being done, and being an interference-engine, and at 180,000km, I thought it best to change it. Buy a kit that includes a water pump. I mean, you’re in there anyway.
Super simple to do, you don’t even need to remove any motor mounts. I replaced all the accessory belts while I was at it as well.
SPARK PLUGS
- NGK BKR5EGP
A good indication of the shape of the engine can be had in reading the spark plugs. There was nothing of significance here, other than I should consider replacing the spark plug well seals. Someday. I replaced them with new NGKs gapped to 0.040″
Later, I replaced the ignition coils with a set from NGK, as I had a misfire mainly at idle, but only with the A/C (air conditioning) on. These Hyundai’s are notorious for bad ignition coils.
Two Years Later….
Excitingly, these NGK coils lasted only two years, and gave me a nasty bucking/surging misfire mostly under light acceleration. To test, I swapped in the coils from my wife’s Happy Hyundai, and the problem went away. Instead of spending another $150 for new NGK coils, I bought a set of four no-name coils off Amazon for $39. So far so good.
Why are they dying?
I think a contributing factor might be the plastic engine cover “catching” hot air coming off the exhaust and holding it all in where the coils are. Coils don’t like heat. To test, I removed the decorative engine cover.
A Further Two Weeks Later….
The $39 Amazon coil packs were pretty much good, but the car was just a teensie bit “off.” After four hours of steady highway driving there was the smallest “bucking” on occasion, but only after things were well warmed up and you had been driving for a while.
I ordered Hitachi coil packs off Rock Auto. Which, it is discovered, are made in China. And one needed to be clearanced slightly with sandpaper to fit.
Interestingly, the spark plugs I had installed three years prior (and reduced to 0.035″ gap two years ago) had opened up to 0.060″ – wow! Are these things hard on plugs too??
FUEL PUMP
- Carter P76534M
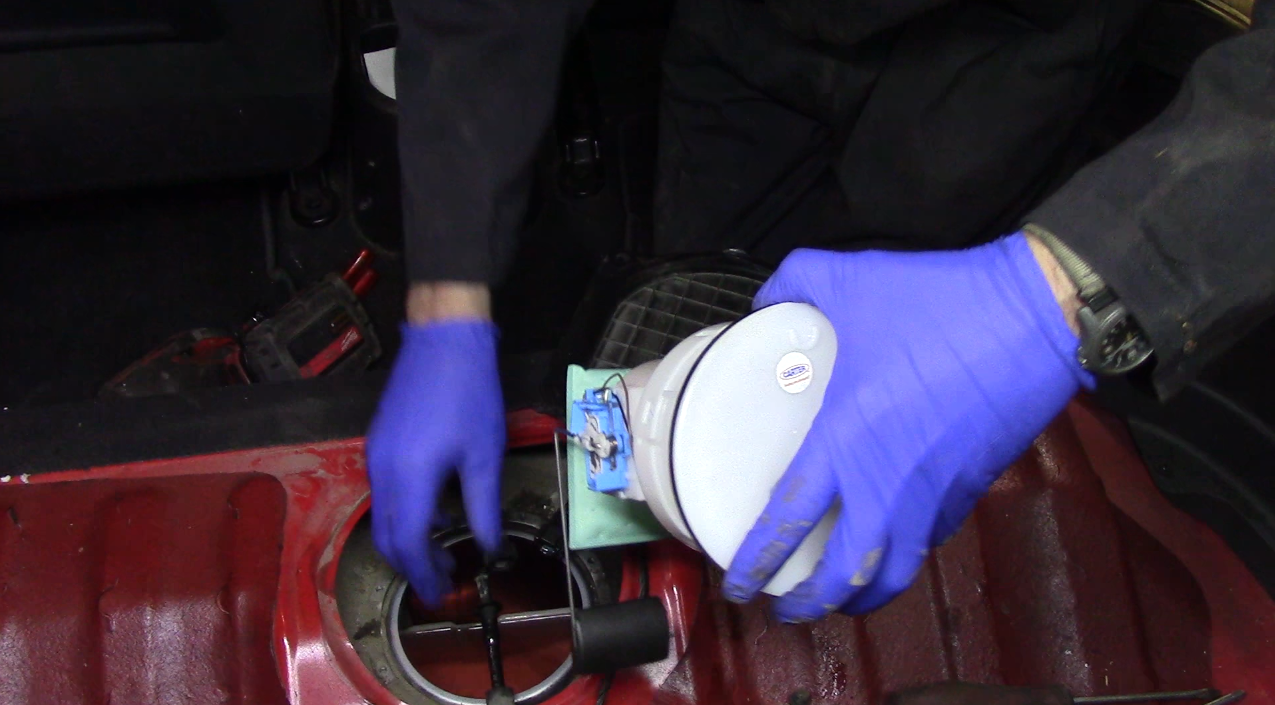
Cheap insurance, really. Replacing it in my garage on a weekend is still convenient, and cheaper than a tow bill when it is inconvenient.
I can’t believe Hyundai merely glues plastic for an access cover.
OIL CHANGE
This car had a recent oil change when I bought it. I change oil every 3 months anyway.
After a few months of driving, I notice what I suspect is lifter tick. I did an oil change with Mobil 1 and a half-liter of ATF. No real improvement, so I will probably do a couple Seafoam flushes and see if we can’t clear some junk out of there.
FILTERS
Someone had installed a K&N Filter in this car. Not sure why, but there we go. I’m not a huge fan of K&N Filters, but it has one.
WEE PROBLEMS
The front rotors had an issue which a quick skim took care of.
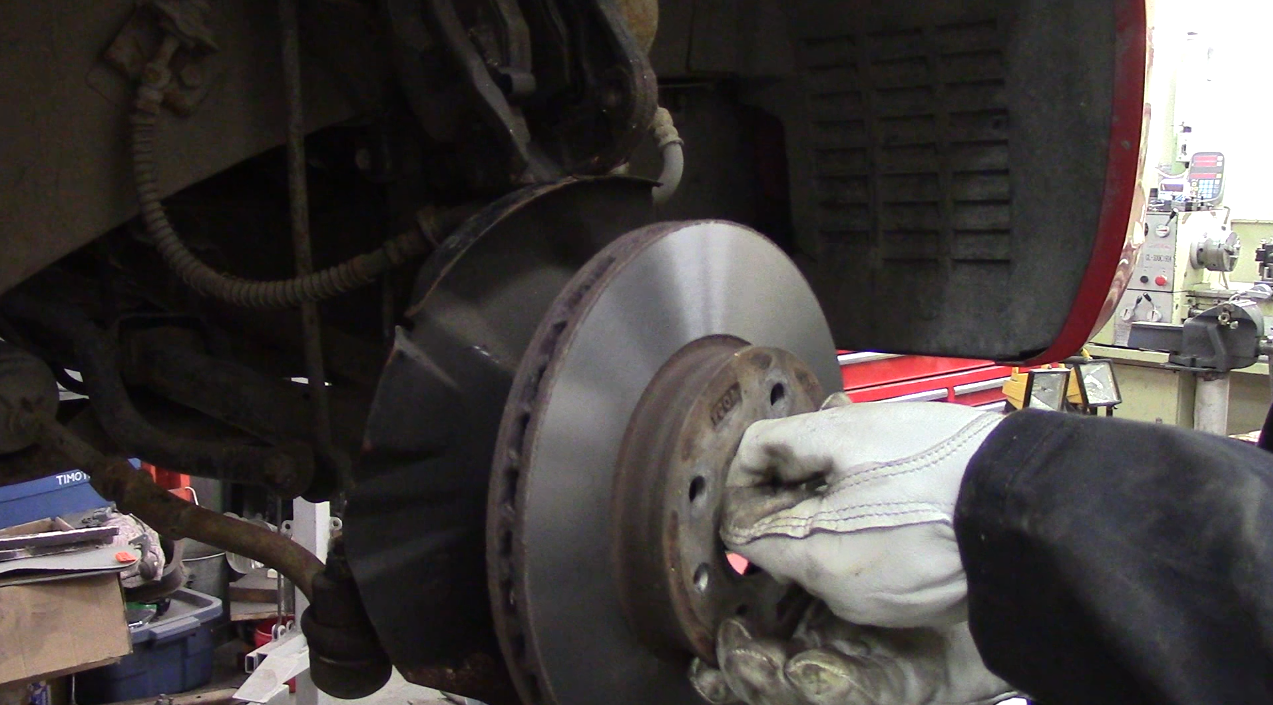
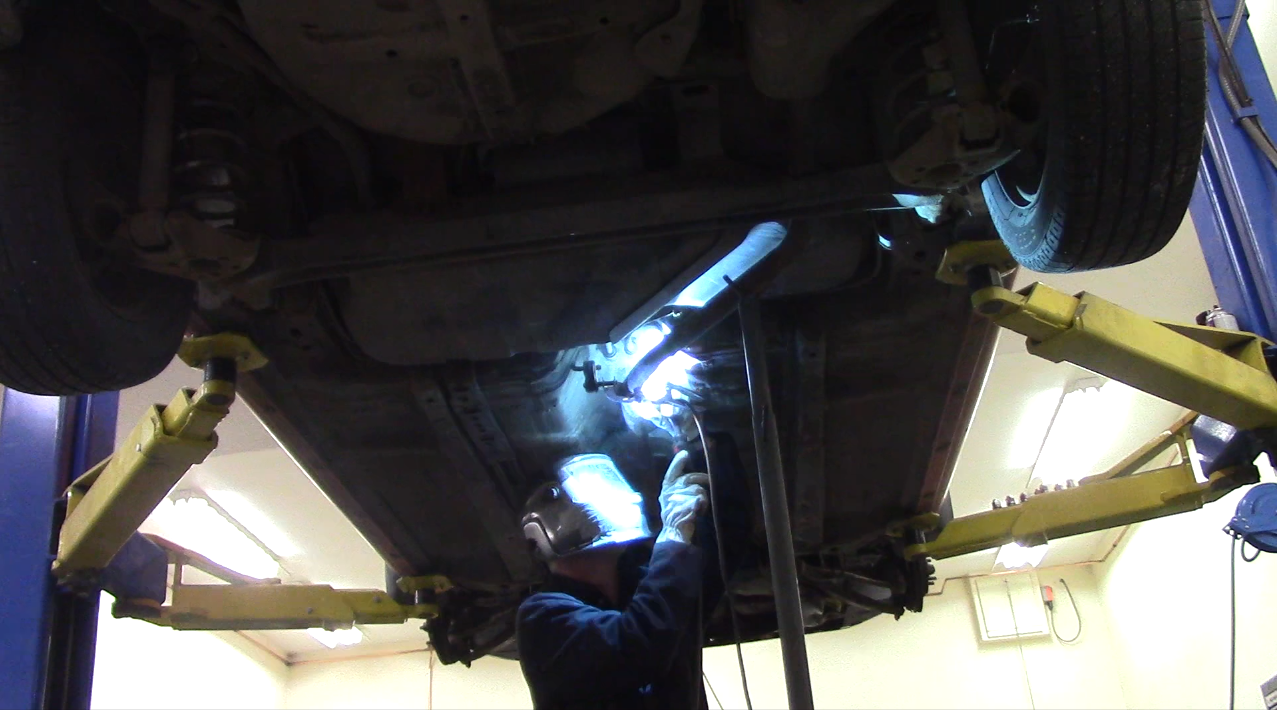
And most of the exhaust hangers had rusted off. I did my best to weld rust back together.
DRUM BRAKES
Yes, these got replaced too.
It’s supposed to be a cheap, economy commuter. But I know me.
LOWERING SPRINGS
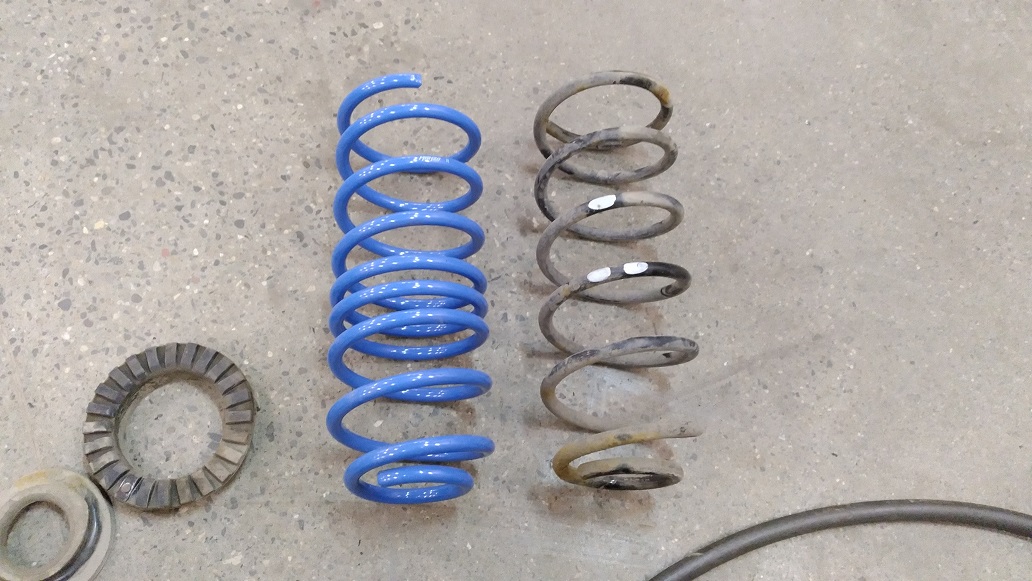
To be honest, the car wasn’t even home two hours before I ordered these:

“Manzo” springs on eBay for $117 CDN.
Allegedly lowers the car 1.5″ front and rear.
Before:
Stock vs Manzo spring:
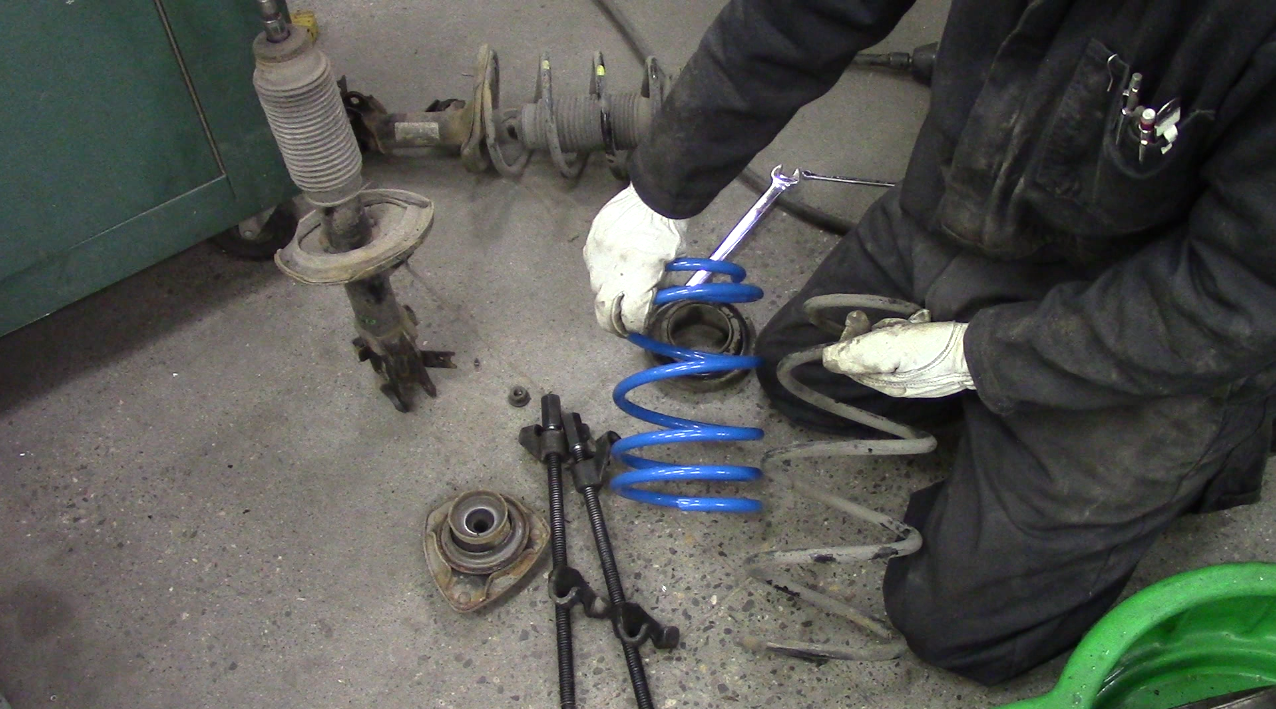
Front and rear bumpstops were also cut in half. The fronts just pull out of the dust boot and can be pressed back in, while the rears need the new “bottom bellow” sanded down in diameter to fit inside the dust boot.

Full length:
Cut in half:
Re-fitted:

The springs are decent. If I didn’t tell you they were lowering springs, you likely wouldn’t know by ride quality alone. There is a LOT less “porpoising” in gear changes, which is delightful – it was nasty before. I did cut all the bumpstops in half (update: rear shocks were bad – they eventually got replaced with SE shocks).
After:
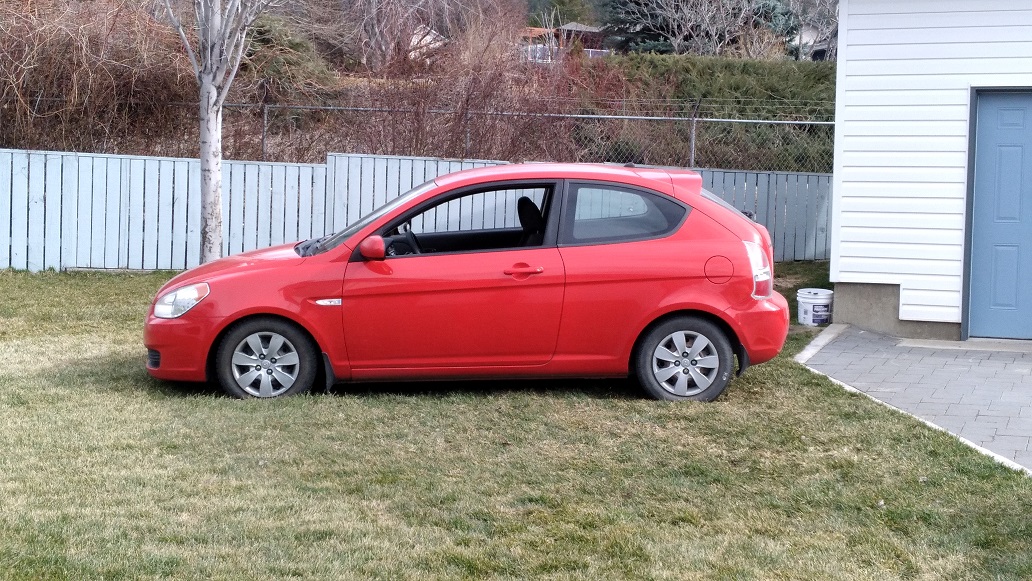
Doesn’t really look “lowered,” but it does look a whole lot better.
Could probably trim the front bump stops a little smaller (maybe cut 2/3 off?). These springs are right on the edge of “spring rate” vs “travel.” Any lower, and you really need to go a lot stiffer. I did go back and cut another coil off the rear springs to sit more level.
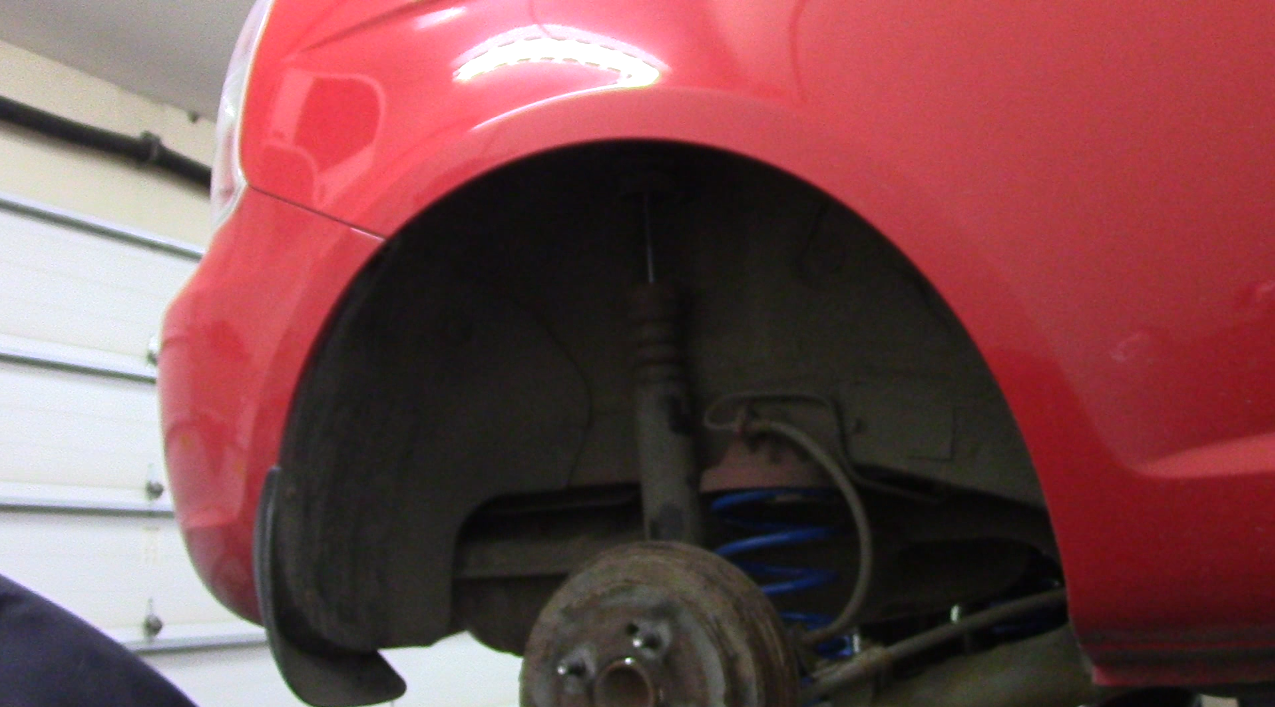
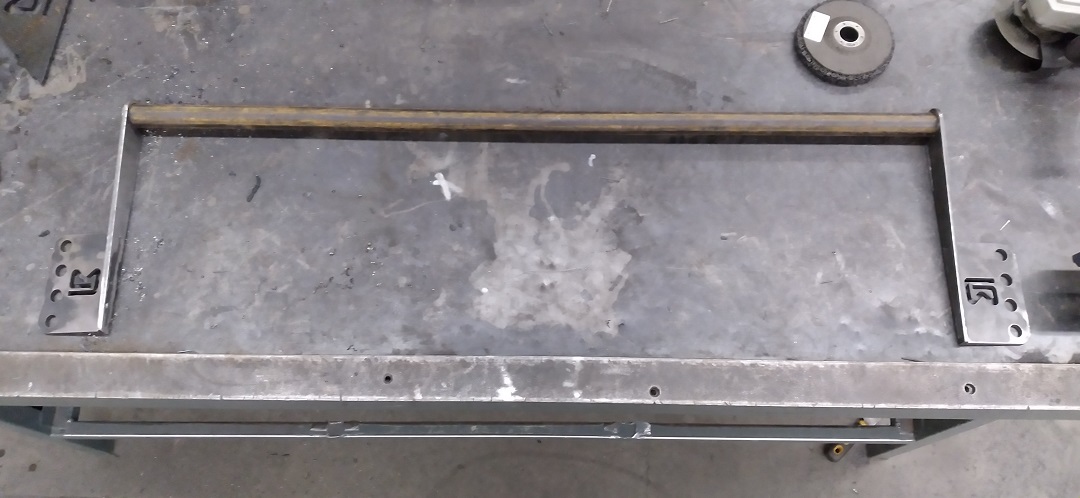
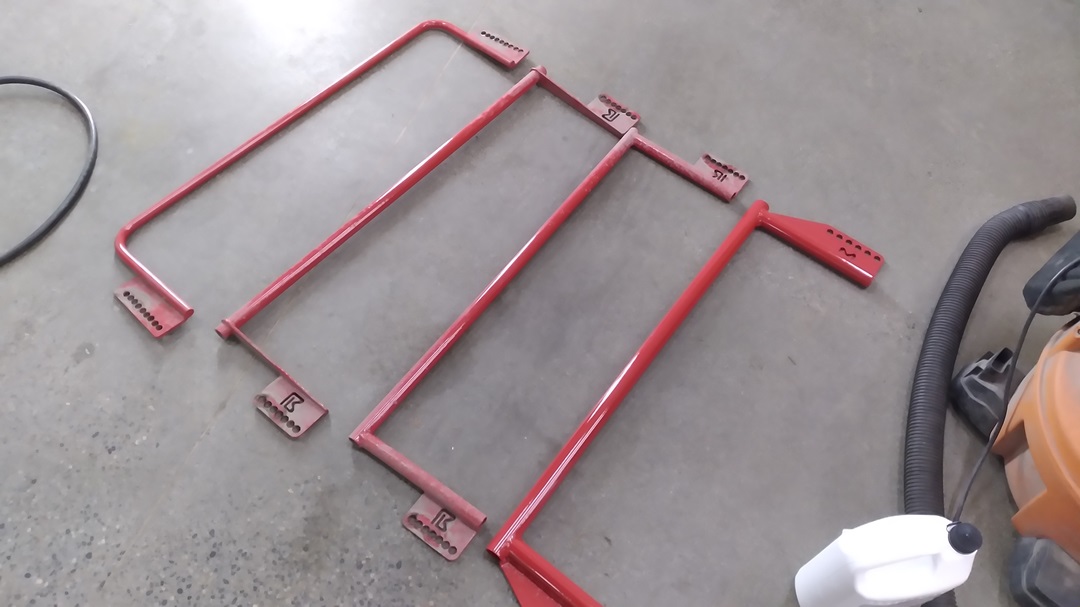
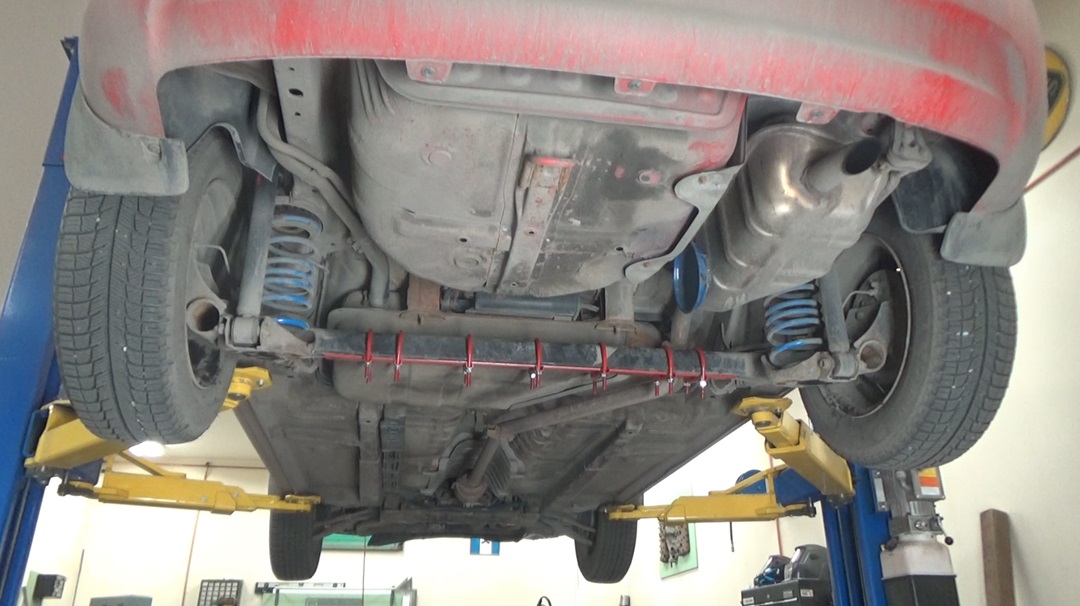
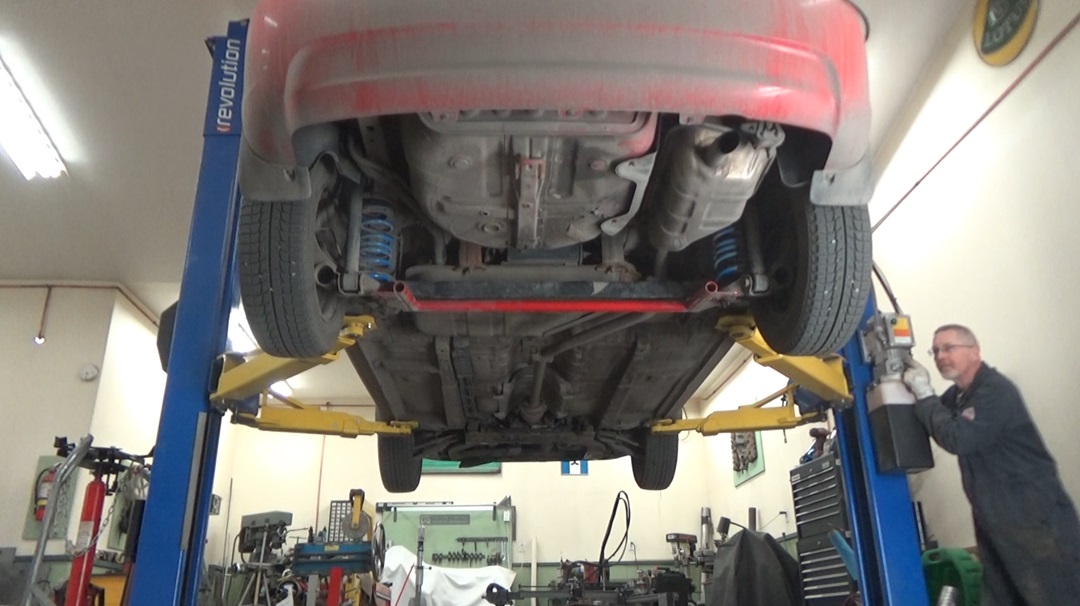
REAR SWAY BAR
There is precious little aftermarket available for these cars.
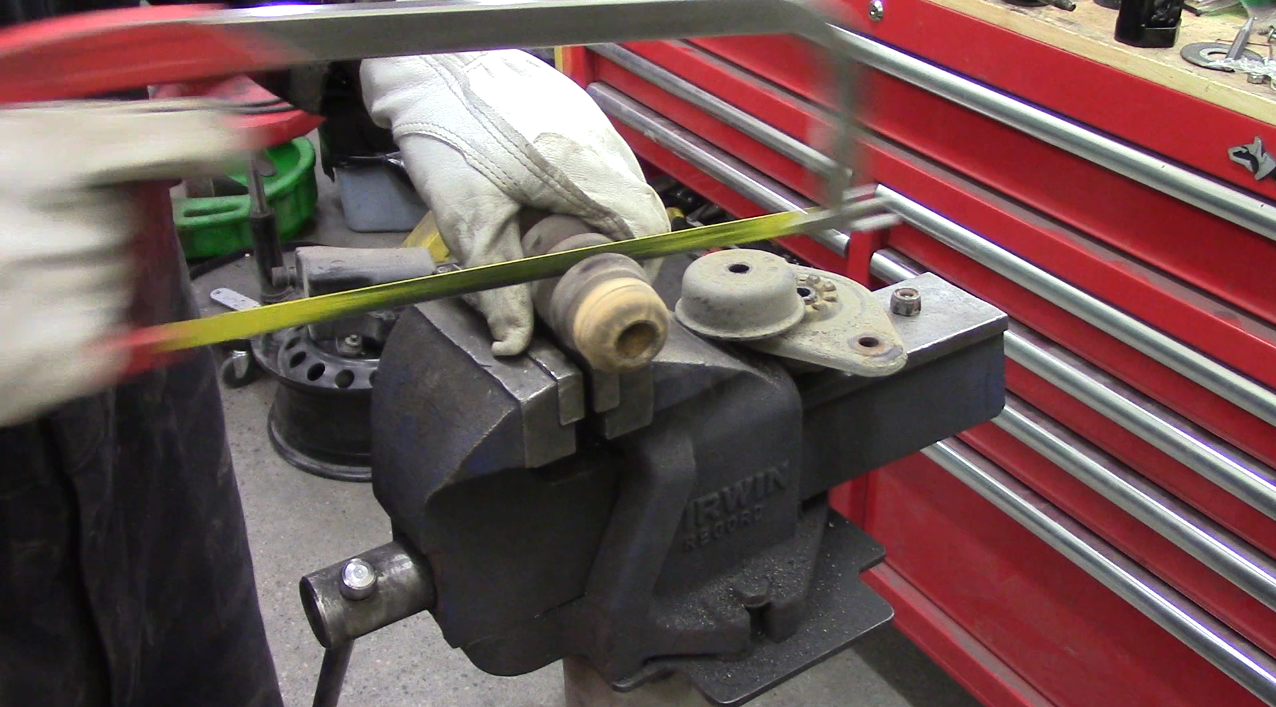
But there is a rear sway bar! A rear bar is the best upgrade you can do to any front-wheel-drive vehicle. The aftermarket bar is 16mm – that’s all I need to know!
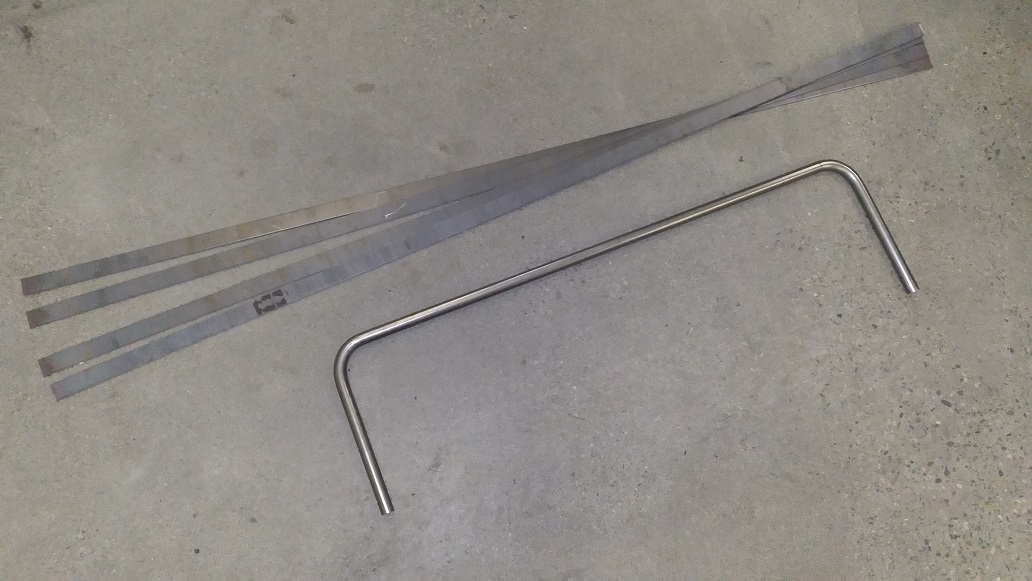
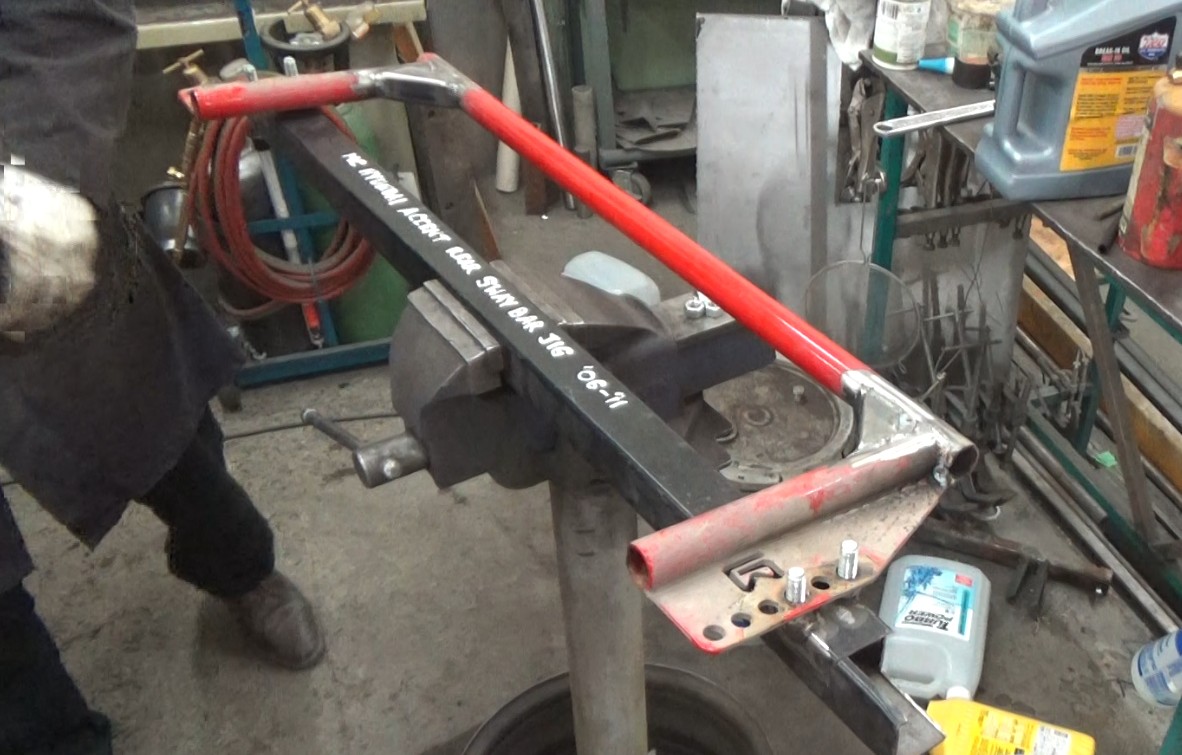
Bent up out of 19mm because I didn’t have any 16mm. The flat strips are for later.
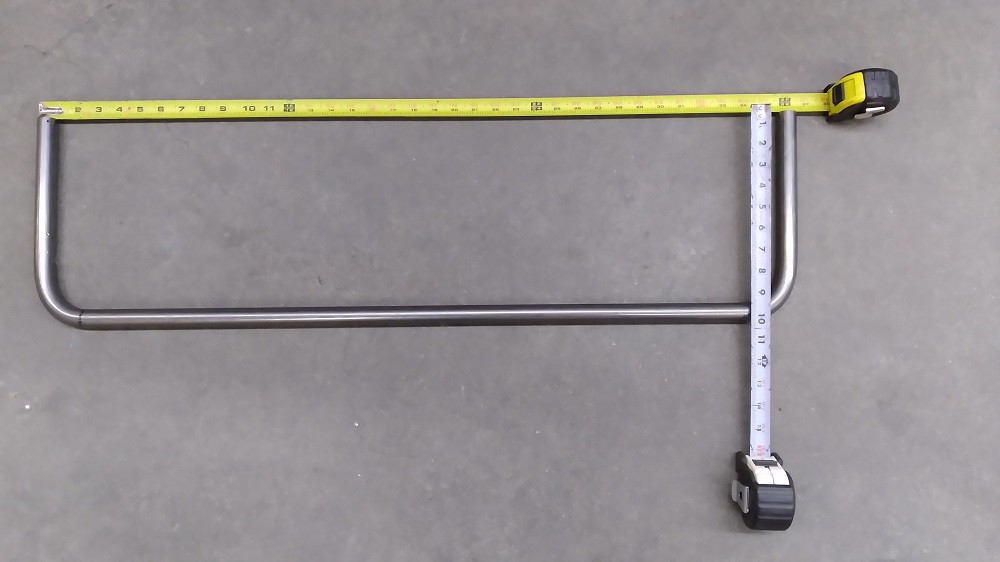
Sway bar, welded to brackets, bolted through existing holes in the spring pocket, with adjustability:
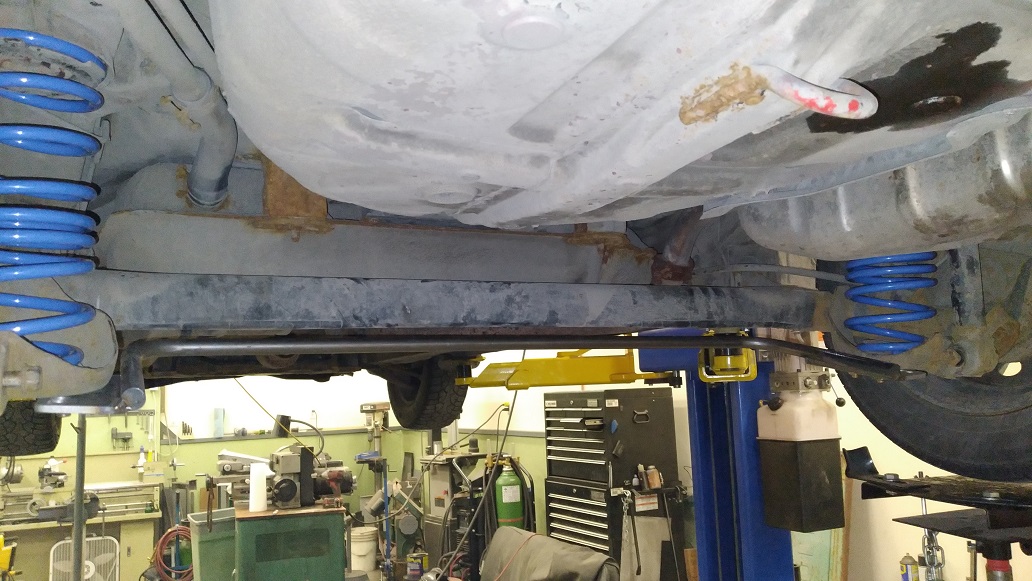

Brackets are 5×3″ with 1/2″ holes every 0.566″. Bar is 36″ wide outside-to-outside, with 10″ legs.
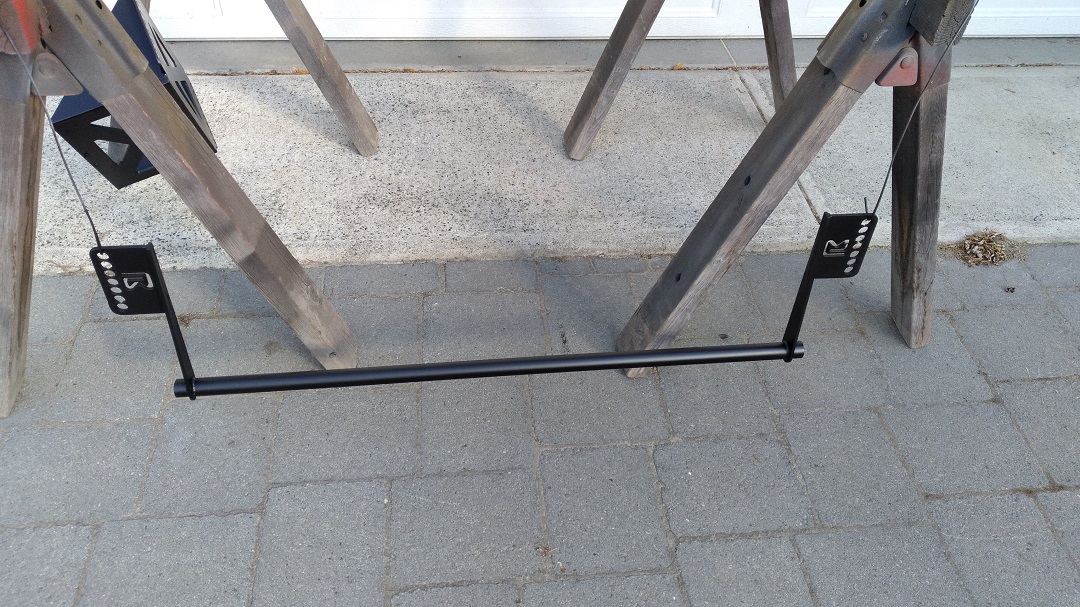
Epoxy Primed and Polyurethane Enameled:

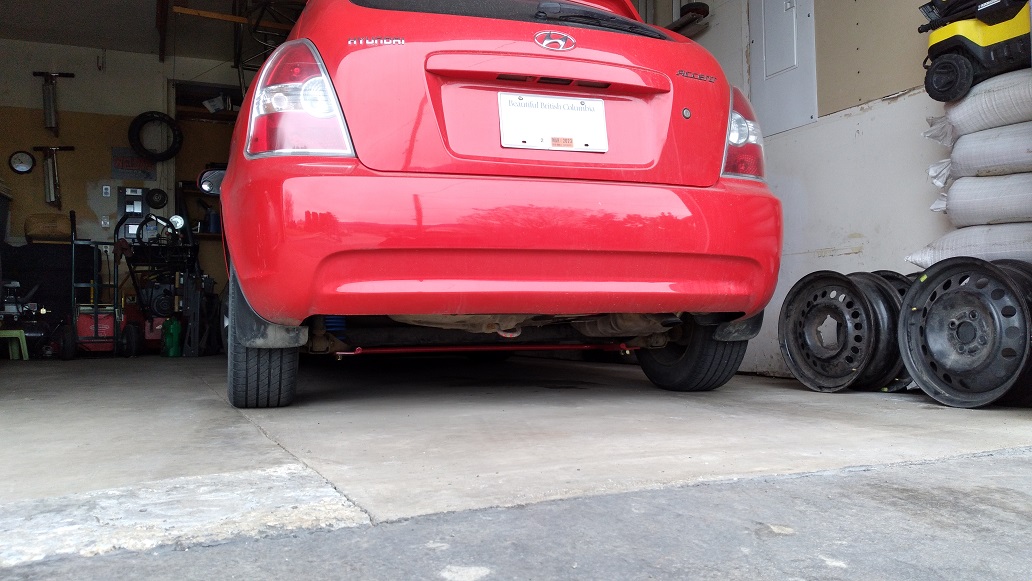
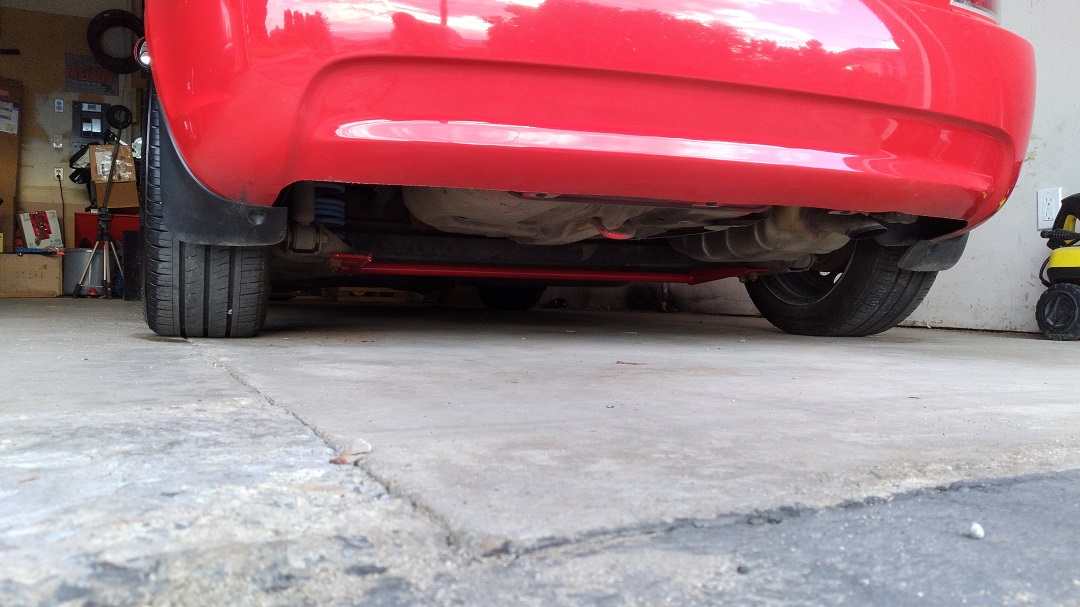
The bar makes a difference in handling.
I was expecting more of a hatchet-murderer, but it just feels really good. When I autocrossed FWD in the past, I tended towards a LOT of rear bar – I’d either pull off a really good time, or spin wildly out of control. This is “playful” but not “white-knuckled.” Considering I likely will never autocross this, It’s decent. I may bump it up a notch.
The bar:
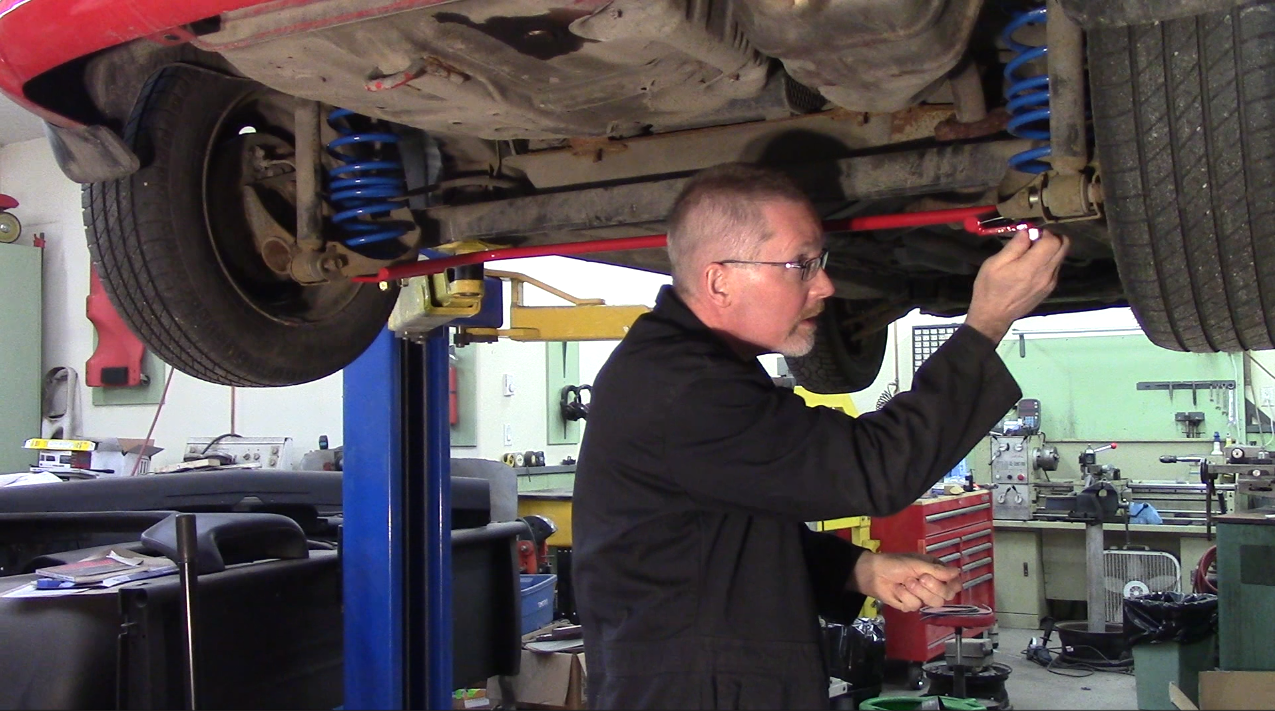
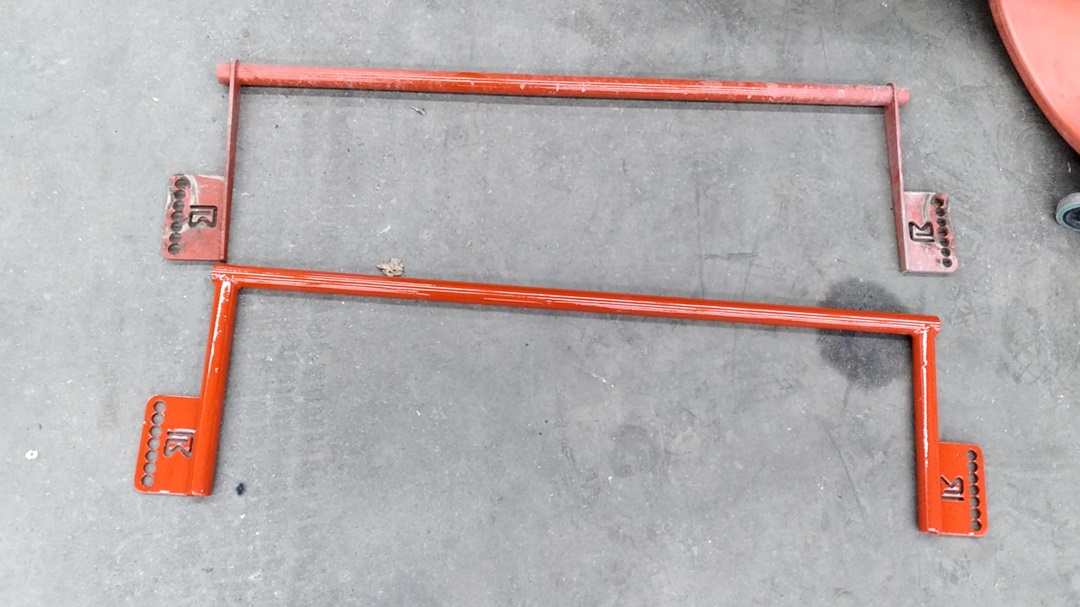
I ran that 3/4″ rear sway bar for about six months, and then decided I needed…..
MORE COWBELL
7/8″ bar (to be painted):

According to online calculators, the aftermarket 5/8″ (16mm) bar adds about 50lbs/in roll resistance, the 3/4″ (19mm) bar adds 100lbs/in, and this 7/8″ (22mm) bar adds 190lbs/in roll resistance.
More improvements were made to handling once I Autocrossed it. First impression: needs still more rear bar!
So. Needs more rear bar. Let’s do some calculations.
Back to our online calculators, let’s crunch some numbers:
5/8″ Solid: 50lb/in
3/4″ Solid: 100lb/in (100% stiffer than aftermarket; feels “meh”)
7/8″ Solid: 190lbs/in roll resistance (90% stiffer than 3/4″; feels “acceptable”)
3/4″ SCH40 Pipe: 210lb/in (10% stiffer than 7/8″)
Let’s try that.
Raw parts fabricated:
Primered:
Painted and installed:
That bar felt slightly better, go figure.
3/4″ SCH40 Pipe v1.0: 210lb/in (pretty much only 10% stiffer than 7/8″; feels only “good”)
Maybe the arm design is inadequate. I think the flat is flexing instead of making the bar twist. Let’s improve that:
3/4″ SCH40 Pipe V2.0: >210lb/in?? (Different arms; feels “good”)
But I want more.
1″ Solid: 330lb/in (60% stiffer than 3/4″-SCH40″) ???
I went to 1″ SCH40 pipe next: 575lb/in. (270% stiffer than 3/4″-SCH40; feels “nice!”)
This time, when jacking the car behind the front wheel, the back wheel is only a fart behind in coming off the ground.
3/4″ …. 3/4″ SCH40 with bad arms …. 3/4″ SCH40 with good arms …. 1″ SCH40
As an experiment, I tried “boxing” the Torsion Beam axle. The rear axle is designed to “twist,” acting like an extra spring and/or be a pseudo-independent solid axle. The theory is by closing the upside-down “C” shape and turn it into a “D”, it will twist less.
Short answer: “No.”
This was 28″ long 3/16″ x 3 flat bar, with trimmed muffler clamps. I drove it not far, and took it off. It was nowhere near enough for me. I went back to my 1″ SCH40 bar:
The 1″ SCH40 bar broke two years later. No problem. Re-welded and gusseted:
So far:
5/8″ Solid: 50lb/in (this is what’s available aftermarket)
3/4″ Solid: 100lb/in (100% stiffer than aftermarket; feels “meh”)
7/8″ Solid: 190lbs/in roll resistance (90% stiffer than 3/4″; feels “acceptable”)
3/4″ SCH40 with pipe arms: 210lb/in (10% stiffer than 7/8″; feels “good”)
1″ SCH40 pipe next: 575lb/in. (270% stiffer than 3/4″-SCH40; feels “really nice!”)
Untested:
1.375 x 0.120″ tube: 660lb/in (15% stiffer than 1″-SCH40)
1.375 x 0.125″ tube: 680lb/in (18% stiffer than 1″-SCH40)
Possibly next: 1.250 solid: 850lb/in (50% stiffer than 1″-SCH40)
Or: 1.375 x 0.188″ tube: 890lb/in (55% stiffer than 1″-SCH40)
1-1 /4″ SCH40 pipe: 1440lb/in (250% stiffer than 1″-SCH40). Oh my. That might be much.
Oh, and….
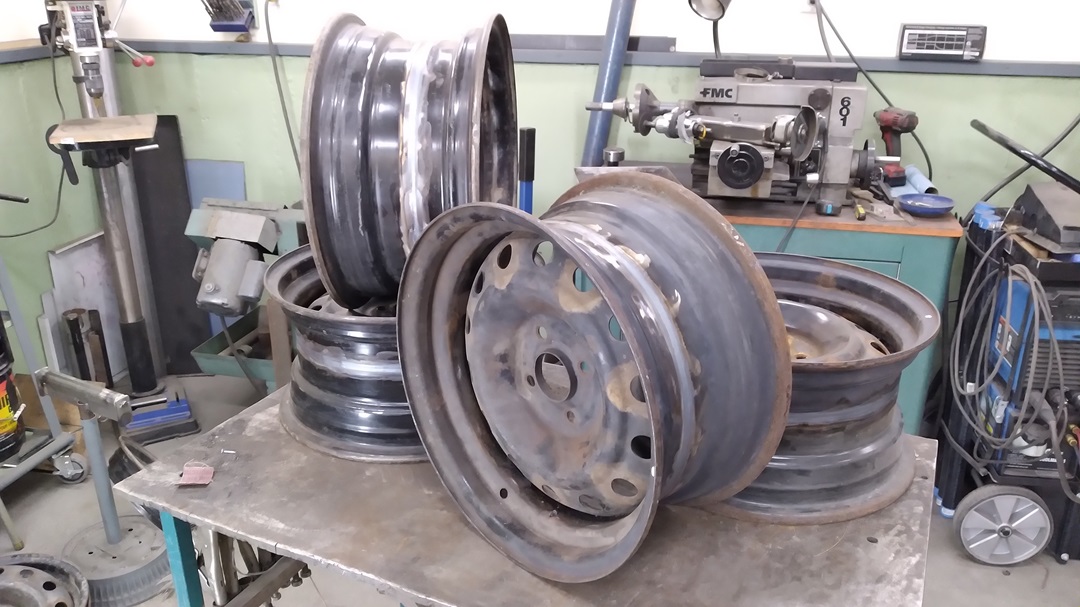
WIDENED STEELIES
I want some decent tires. This car came with the base 175/70R14. Not decent.
I also don’t want mags. I want 15″ steelies, and I really want the wheel lip to come right out to the fender edge. Nobody makes those. So….
Initially I banded a set of wheels from 15×6 to 15×7, but those went on my wife’s “Happy Hyundai.”
But of course, I now must go wider.
To do that, I’ll need eight wheels.
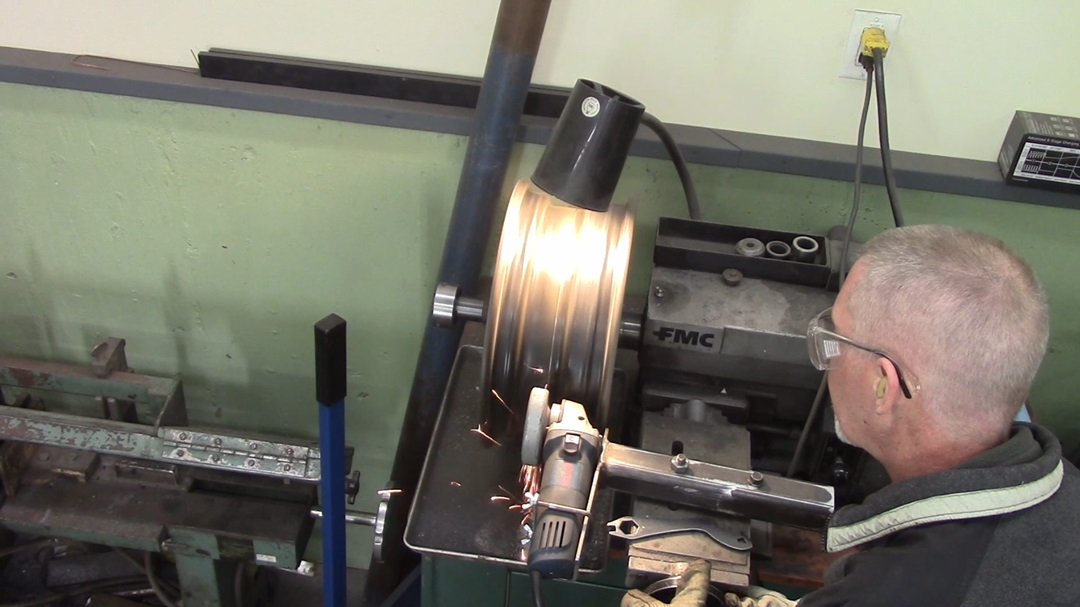
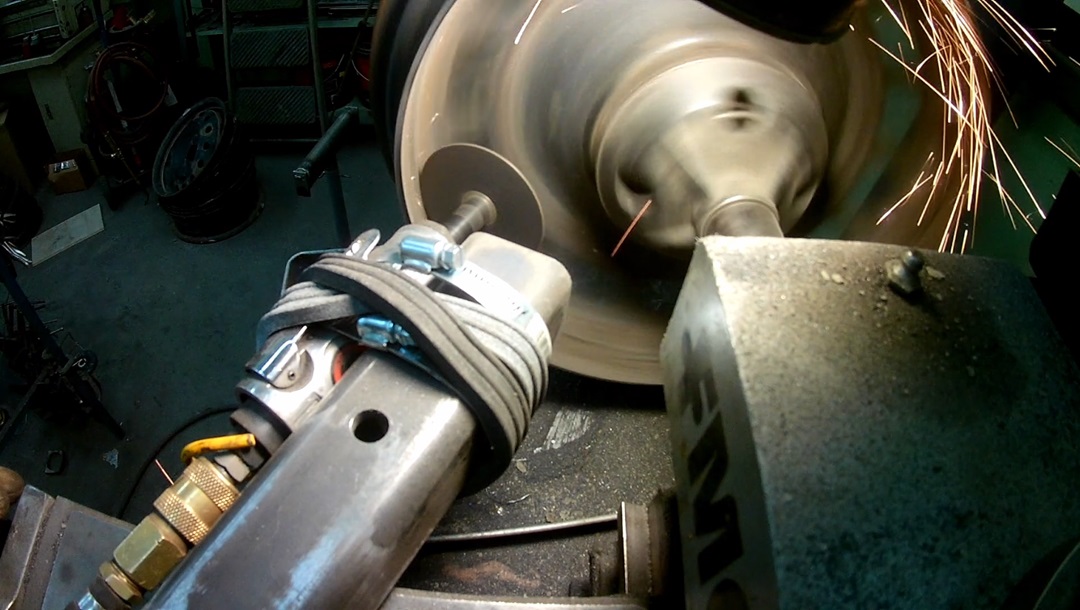
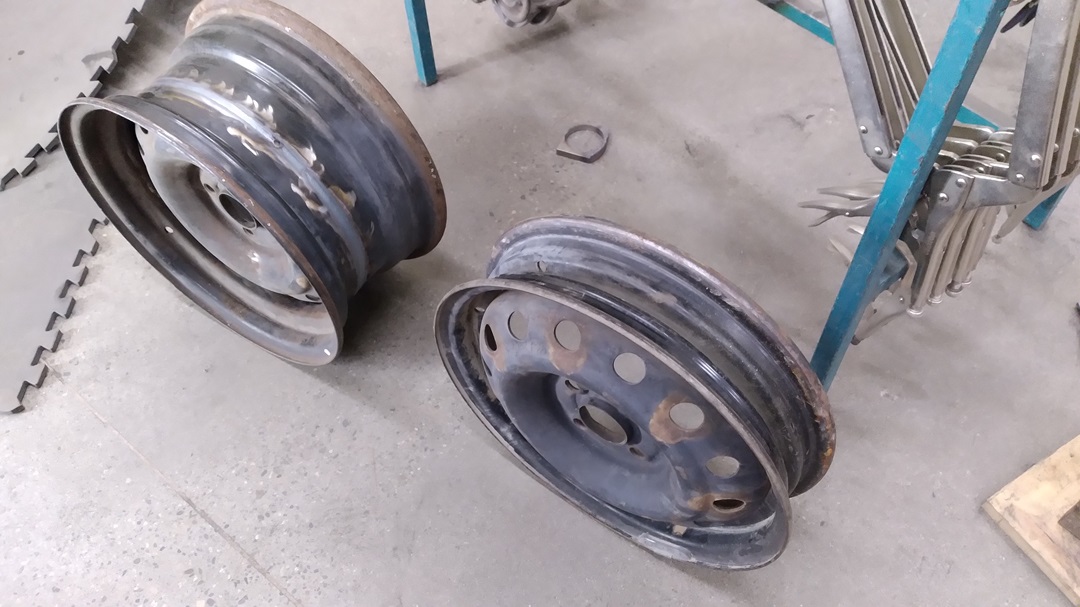
First step, fabricate an angle-grinder mount for your brake lathe. We all have brake lathes, don’t we? These wheel halfs were 0.125″ thick, so you can follow your cutting depth indicator to cut just enough/ Takes the guesswork out of how deep to cut.
One set of wheels were cut 5″ from the backside:
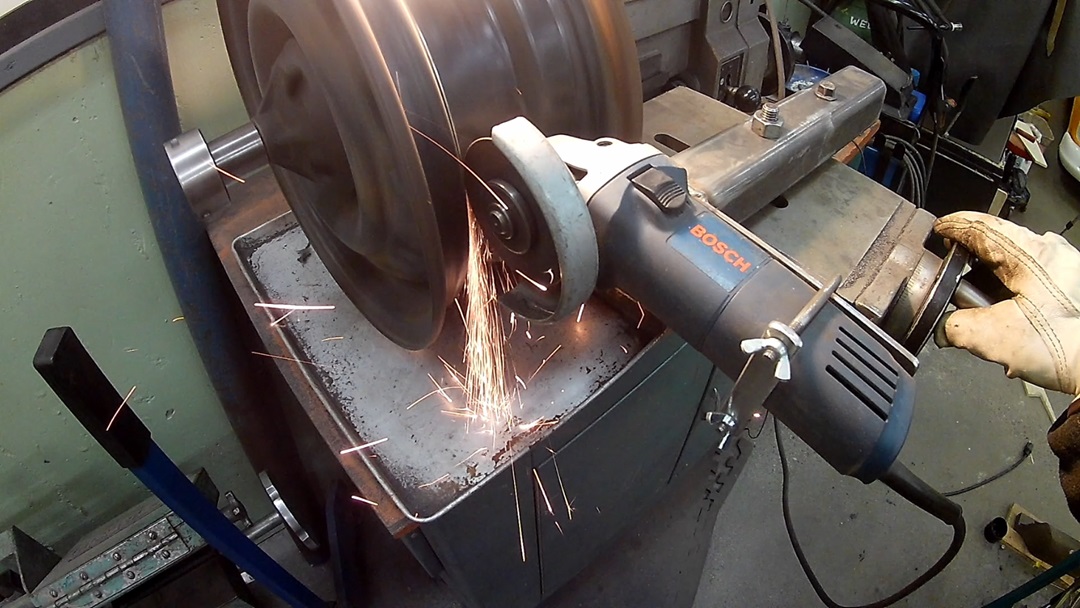
Another set of wheels were cut 3.5″ from the front side:
The centers had to be removed from the 3.5″ fronts:
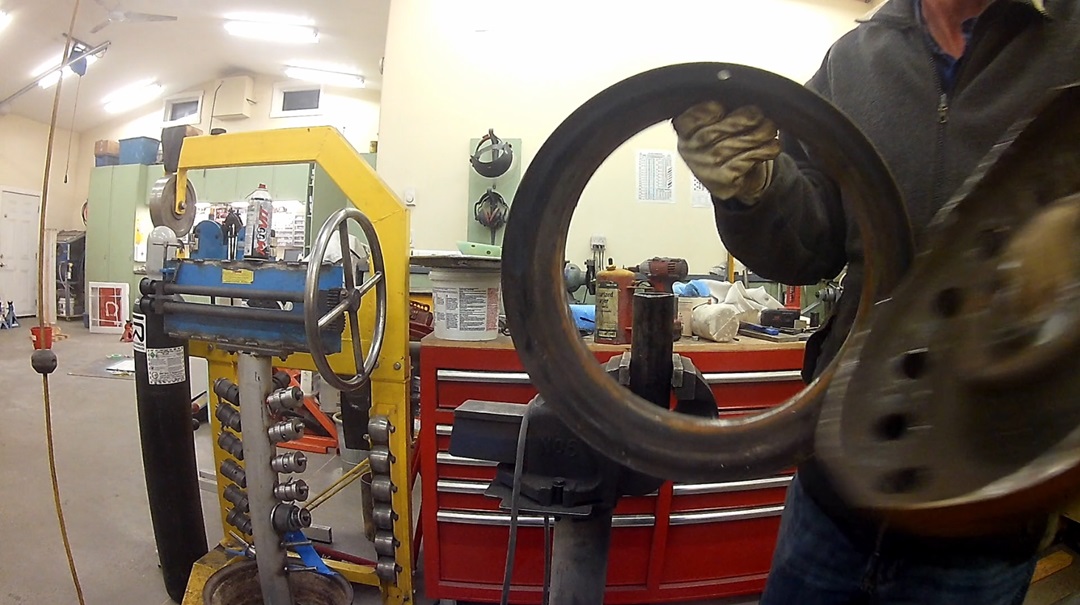
15×7.5!
Not wanting to waste anything, 15×3’s, anyone?
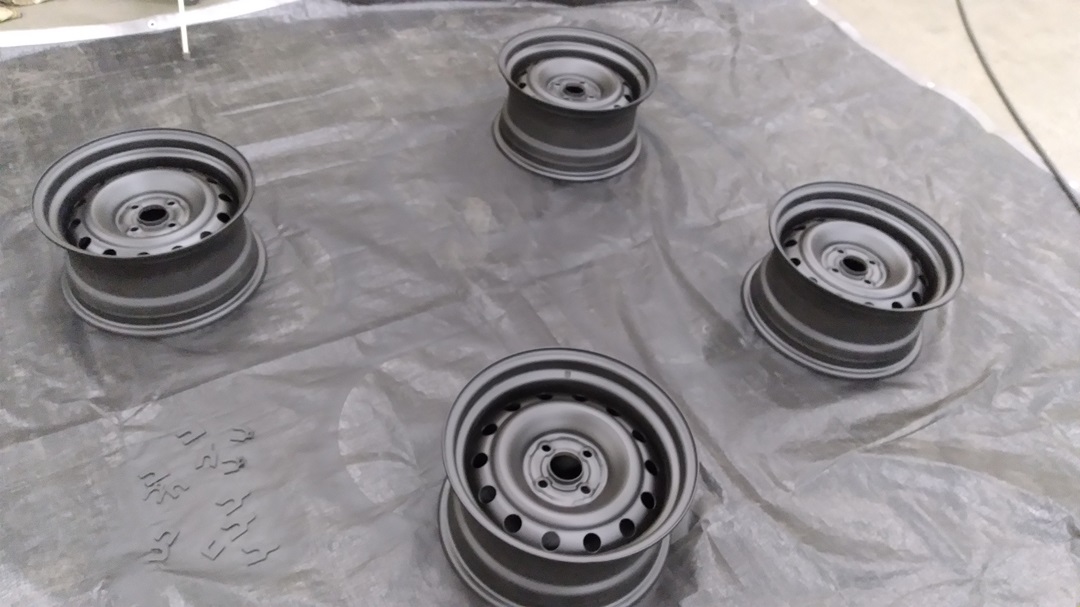
Blasted and epoxy primed:
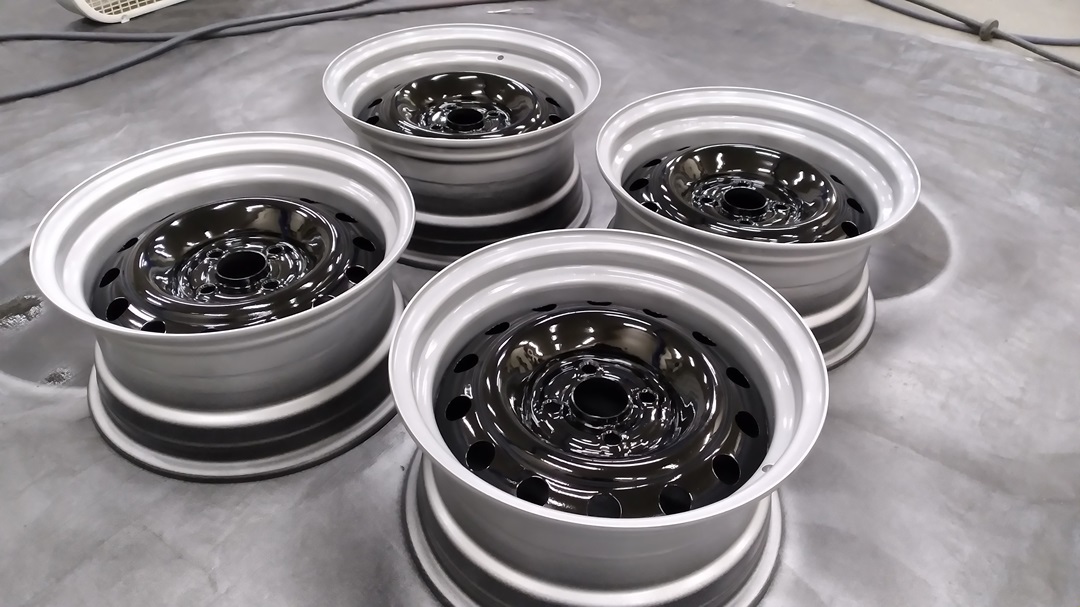
And sprayed with PPG Delfleet:
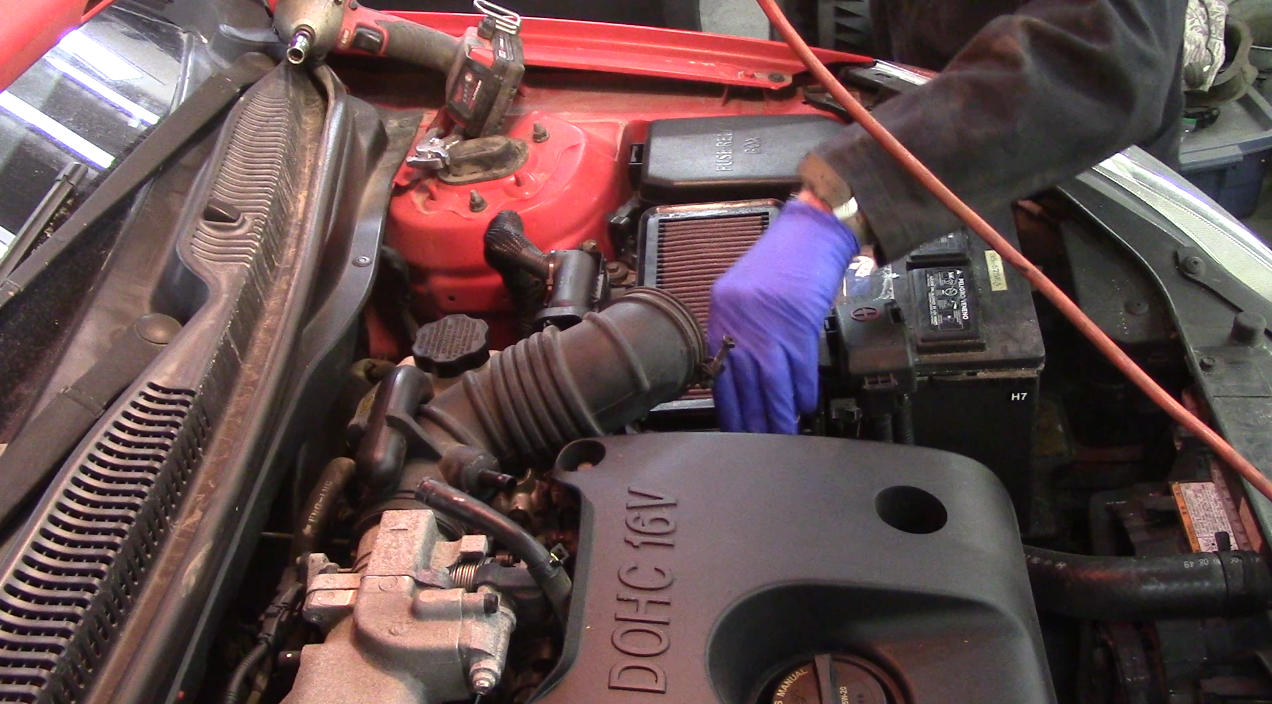
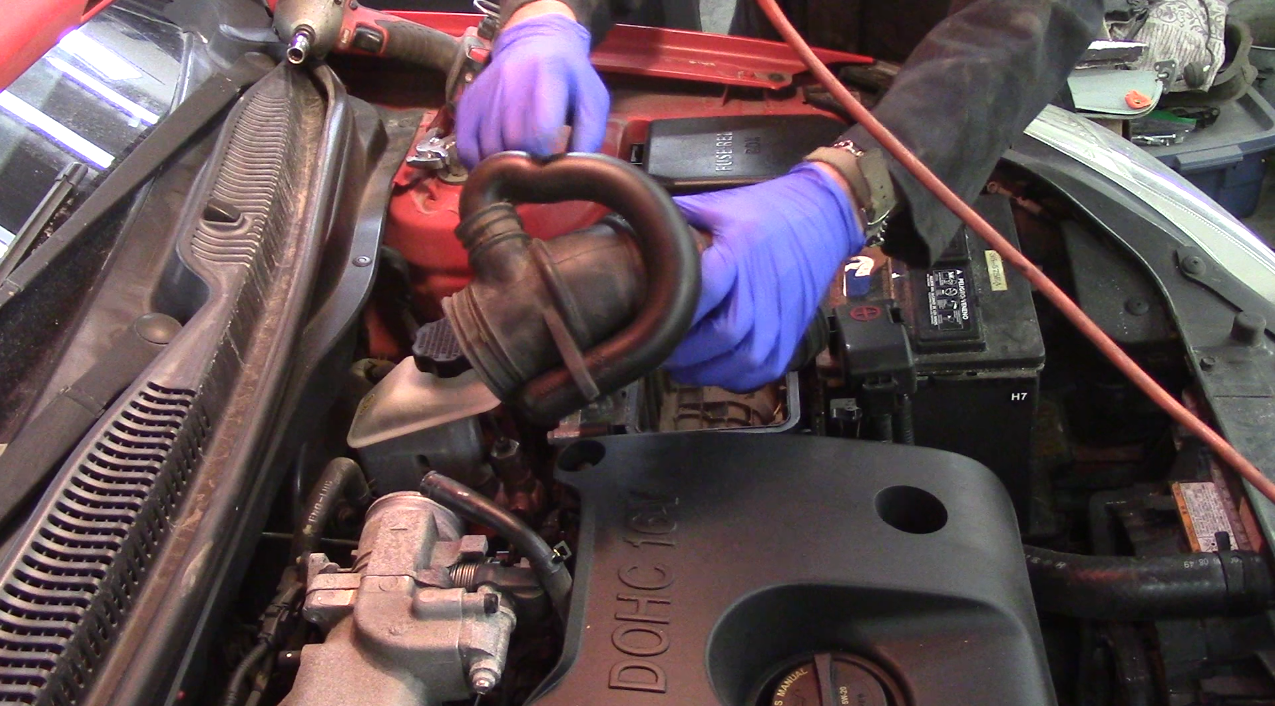
BREATHING
INTAKE
The car came with a K&N Filter, which is well known to flow lots of air.
The factory inlet is somewhat restrictive, and there are a couple resonators that can be removed to make the intake a bit more throaty. The factory set-up is VERY quiet.
I removed the “Tube Branch” u-shaped resonator at the Throttle Body, and machined an aluminum blanking plug to fill the hole. NOTE: The Tube Branch filters out an annoying tone at idle – keep it! I call it “The Phallic Philter.”

I also removed the large resonator behind the bumper in front of the driver’s wheel. I left the hole from the ducting to the inner fender open.
Slightly “sportier” sound, but nothing to write home about.
There is, however, an annoying constant med-low frequency tone at idle now which was probably absorbed by the U-pipe “tube branch” I removed. I put it back (see note above).
EXHAUST
Coming soon. Likely: 2″ with resonator and turbo muffler. I like loud, but I’m also not 16 anymore.
GIGGLES
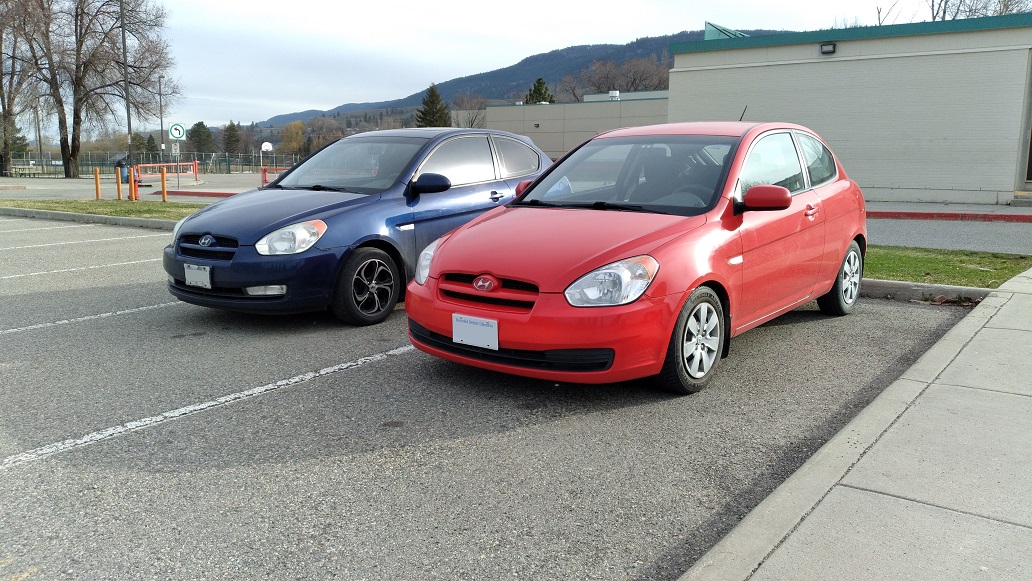
Co-worker’s car and mine:
At a 50% off sale at Pick-N-Pull, I bought a stereo bezel so I can try and adapt a gauge trio in the “goodie box” under the stereo. Also picked up a new driver’s seat because the left bolster was crushed and the upholstery was wearing through. Shampooed the interior (and the new driver’s seat) today.
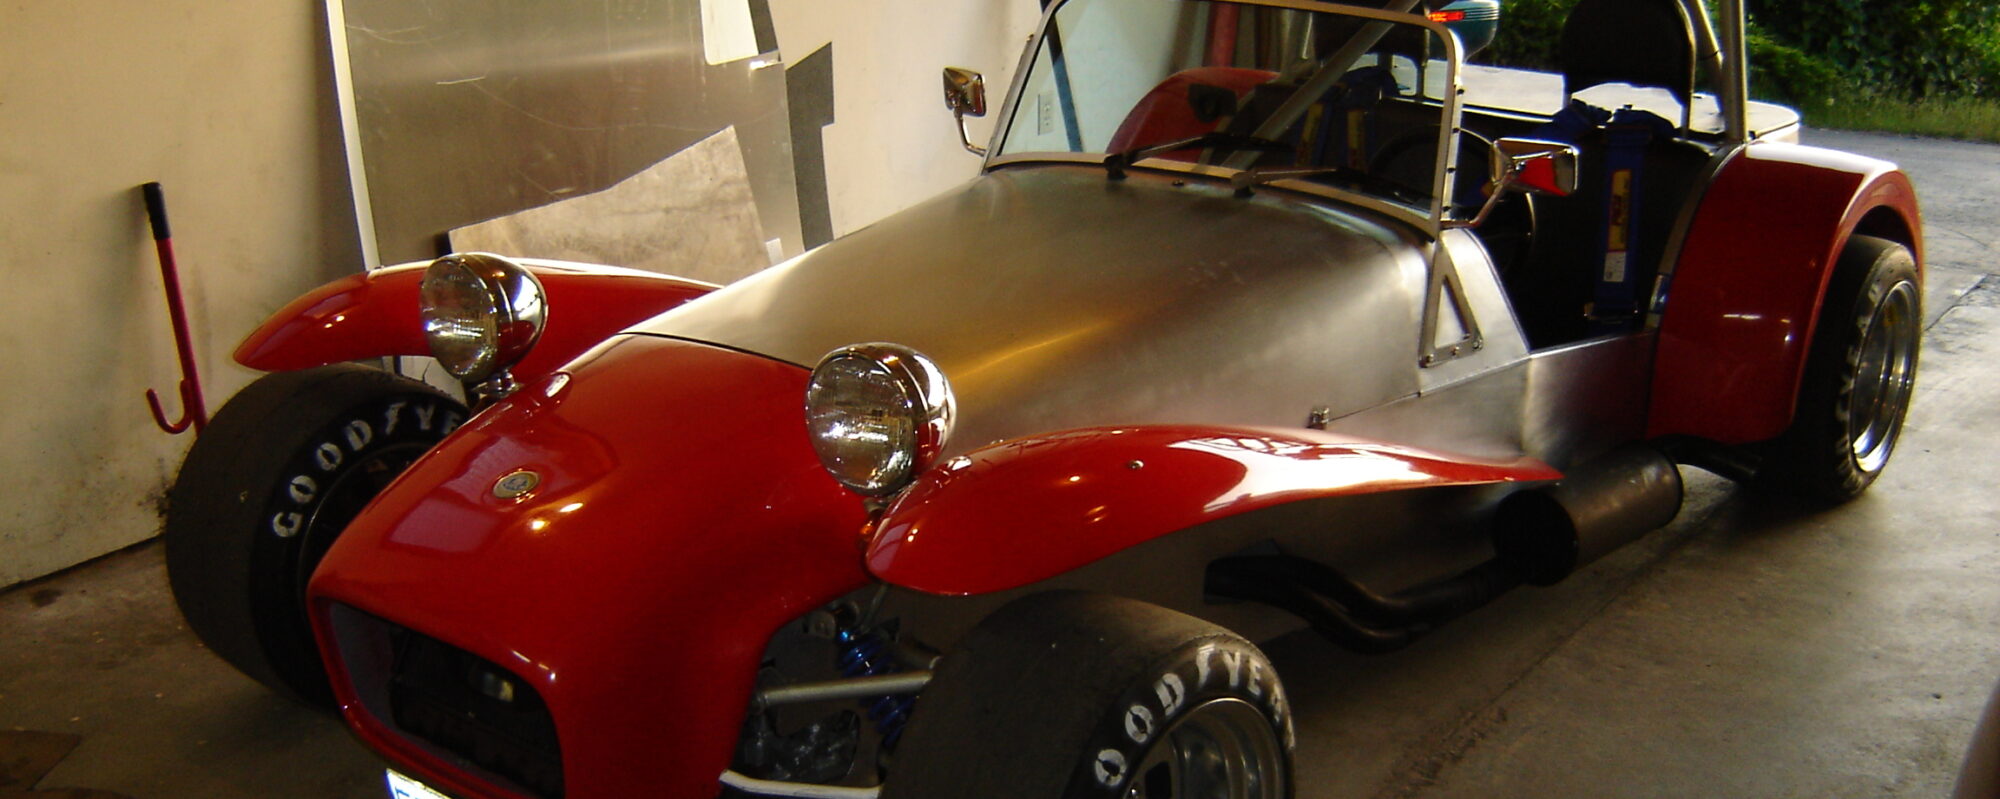
Look how small the Locost is to the Accent! (and the old 15×7″ wheels in this photo).
There was an Accent SE there, the shifter knob was gone, but the nice steering wheel, bigger front sway bar, and other bits were there. I debated pulling them, but did not.
THINGS GONE WRONG
KNOCK SENSOR
After the first oil change with the car (Mobil 1, 5W20), a P0328 code popped up, which means “Knock Sensor High Input.” Not sure how you test that, and all was good before, so I replaced the sensor with a Hyundai one.
Code came right back. I messed around with the plug and connection to no avail. I could hear detonation while I pulled hills at speed. Wondering if maybe I broke the senso installing it, I ordered another sensor – this time Bosch (have not yet installed it).
I eventually did an oil change to Rotella 10W30 and the tappets got WAY quieter, and the code went away. I still have the Bosch one in a box.
HEADLIGHTS
The Accent takes a 9003 bulb. One burned out, so I bought a pair of Hella H4 replacements. Interestingly, the bulbs I removed are “Made in Germany” H4’s, and I’m replacing them with “Made in Korea” H4’s into my Korean car. I don’t know if I should be excited or disappointed.
Note: I like how if I leave the headlights on after shutting the car off, the headlights stay on until I open my door. I really like that feature.
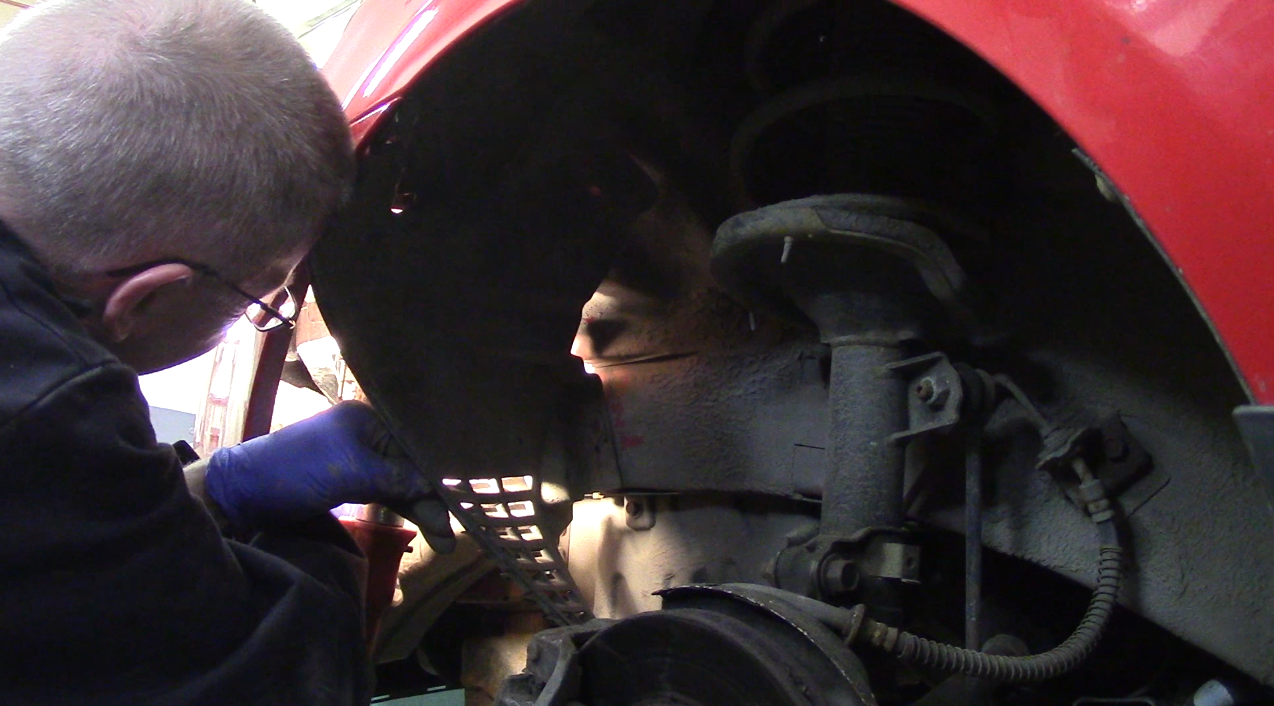
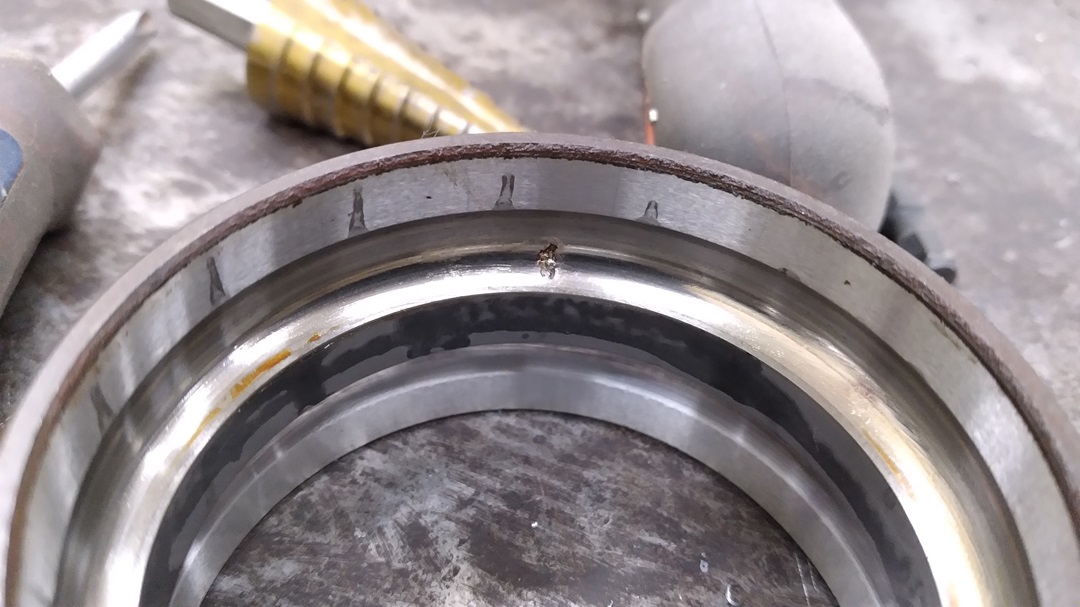
REPLACING A WHEEL BEARING
Noisy when loaded.
See the wee defect?
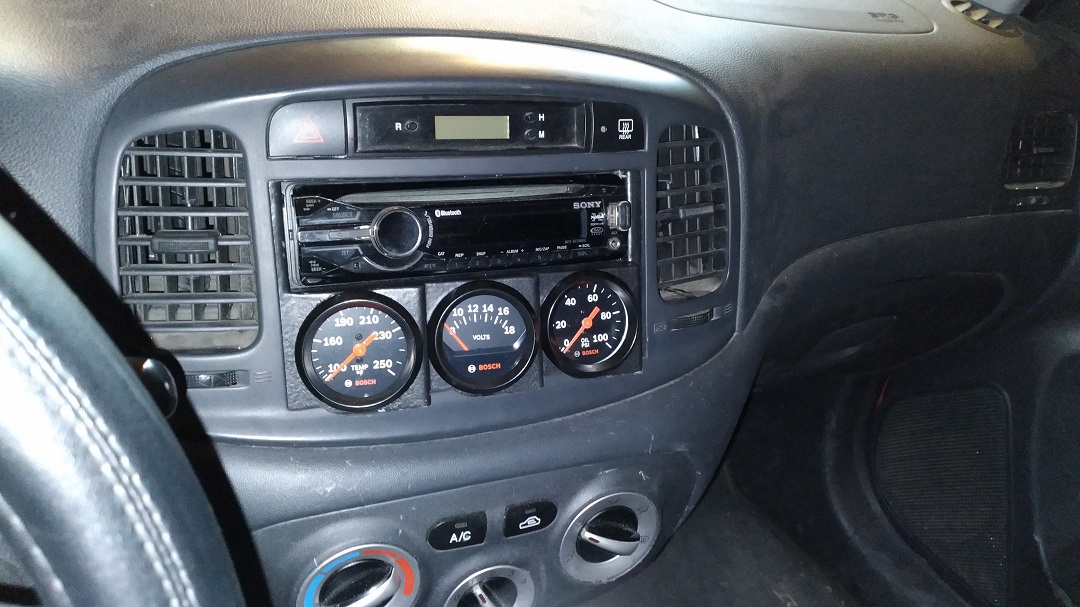
GAUGES
THIS took a fiendishly large amount of work. The angled DIN pod came from Amazon, but is NOT actually DIN size. I also had to fabricate how it mounted, since the stereo/pocket bezel does not have anything to do with where the stereo/DIN-pod is actually placed.
Lots of fabrication, and it fits good enough.
Stereo is a 2011 model, so technically “period correct.”
The temp gauge is a capillary action mechanical gauge, and you really shouldn’t “T” into the ECT sender because so much depends on an accurate number to the ECU, so since the heater hoses flow engine coolant all the time, I’ll just sample that. I fabricated this adapter out of 1″ CRS, for the 5/8″ hose at the engine end.
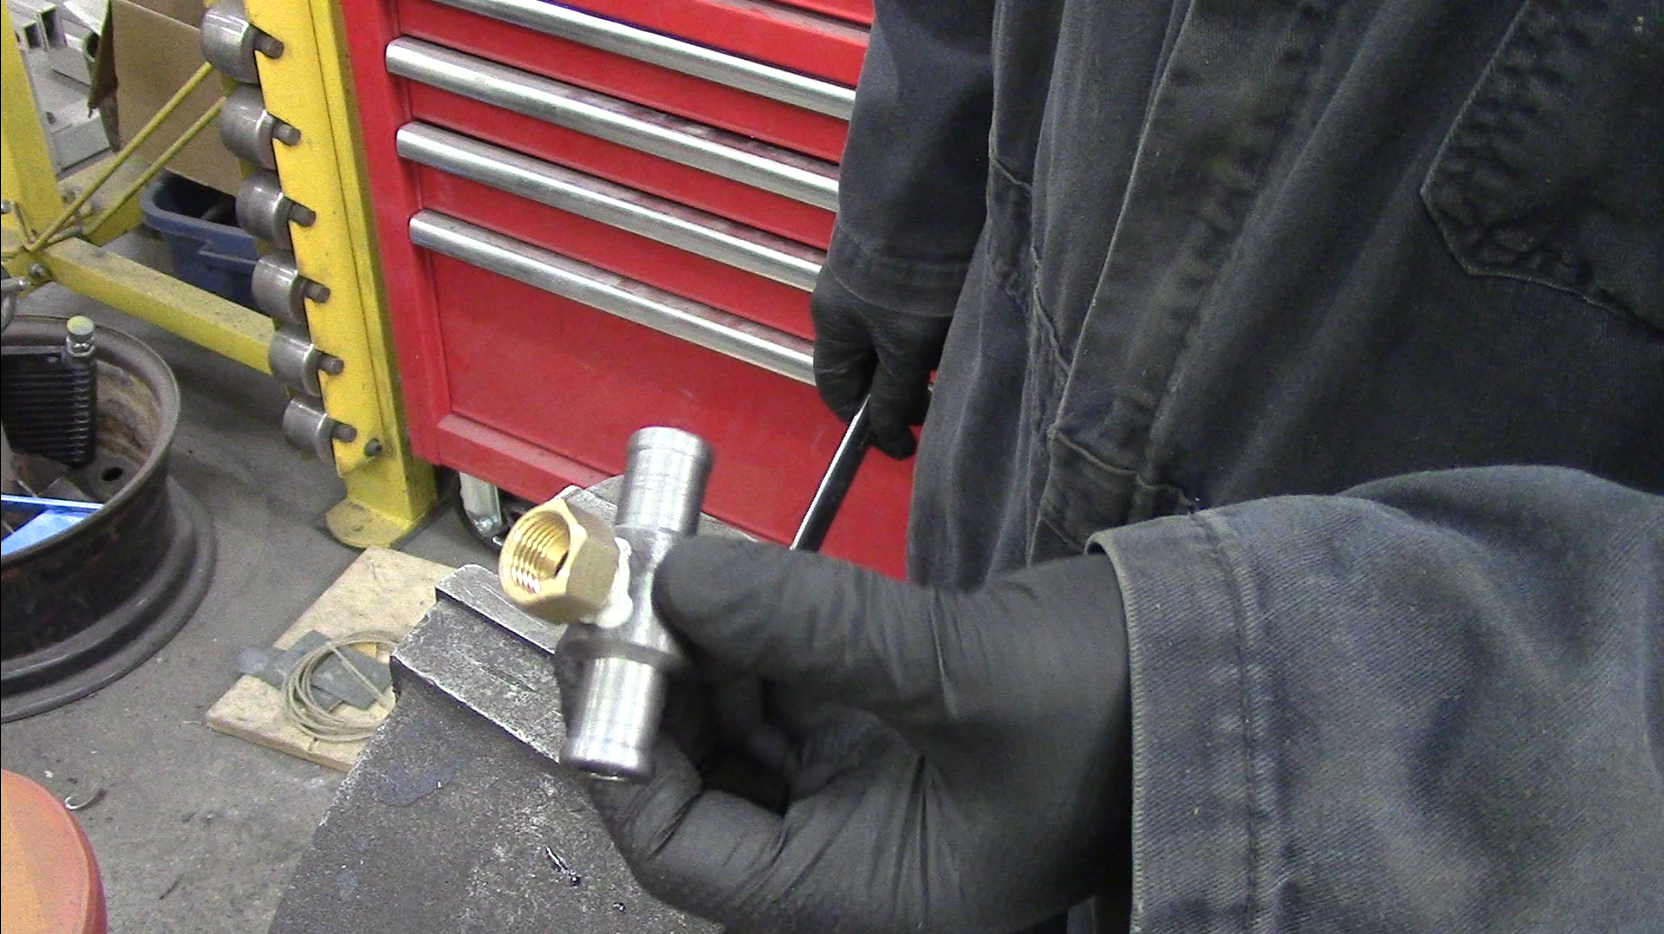
That really didn’t work, so I ended up putting the capillary bulb in the tube coming right out of the water pump.
At the bank with my sweetie and her car, the Happy Hyundai: