
[ Heinous Honda ] [ Suspension ] [ Drivetrain ] [ Miscellaneaous ] [ Racing ]
5-pt. Harness
When I ran in my first Solo II Autocross, I discovered the limitations of the Honda seat belts. They do a good job of holding you onto the seat vertically, and they prevent you from smacking the windshield horizontally, but they don’t do much to restrain you laterally.
I would recline the seat slightly, then snap the shoulder strap such that it “locks” in place, then I would raise the seat back so the belt was gripping me tightly. It was hokey at best, and I still had to hang on desperately when I sailed around the cones. The only real solution is a 5-point racing harness.
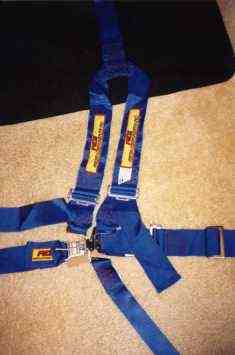
A Racing Harness is a kick-butt seatbelt that is adjustable, but doesn’t self-adjust like a factory belt. They usually secure your lap, both shoulders, and often (and recommended) a crotch strap as well (this keeps the lap belt from digging into your gut as the shoulder straps try to restrain you in a head-on collision). The number of fastening points the belt has is called the number of “points” of the harness. For example, the 5-point harness I bought attaches to the floor in five points (or holds you down in five points of contact).
I went around to some of the local speed shops, all of which quoted me $150 CDN for a harness (one shop wanted that much for a cheezy non SFI-rated non-competition quality harness!). I had a harness sent up from the states, at a cost of $120 CDN, only to find the particuular style I ordered (Y-type shoulder harness) is illegal for Solo racing, so I sent it back ($35 UPS) hoping to exchange it for a proper dual-shoulder type. Unfortunately, they did not have any of the proper type, so I could only have my money refunded. Then, as luck would have it, a local big-name speed shop had some in stock, and after $115 CDN, I now have the right harness. Total cash out of pocket: $150. Figures.
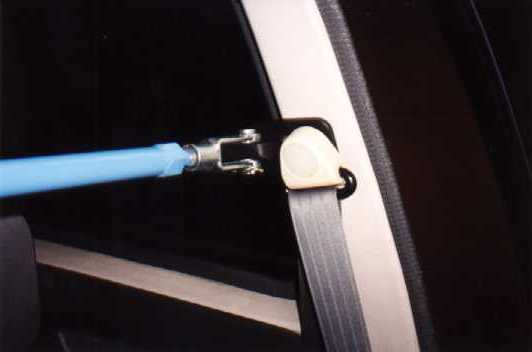
I installed the harness using the original lap belt bolts, which were long enough to secure both the factory and the racing belts. I also fabricated a steel bar which attaches to 1/4″ steel brackets mounted at the shoulder strap bolts on both sides, behind the seats. The bar is pinned in place with 1/2″ Clevis ends (1/2″ Grade 5 bolts with Nyloc nuts for competition). The bar is (and shoulder harnesses are) easily removeable for back seat access. I also drove around with the harness when I first got it – they are a pain the royal bottom in a street car. It’s nice to have them removable.

Racing Seat
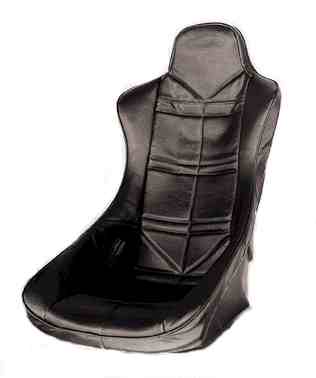
Although the factory Honda seats are very supportive, comfortable and all-round just plain nice, a racing seat can improve your driving noticeably.
A good racing seat can easily set you back a cool $350CDN or so. The cheapest seat I found was the Jaz Products Turbo Pro. At a mere $180CDN, it is indeed cheap, and pretty good.

Seats do not come with any usable mounting bracket. You can buy a generic bracket, or (as I had hoped), you can fabricate your own. To make the seat mount easy, I used a set of existing seat rails from the previous seats in the car (the original seats were hideous – I lucked out and found a perfect match at the wreckers), and fabricated a variety of brackets to adapt the Jaz seat tot he car. Oh, the joy of poor planning….
The first seat bracket was merely 3/4″ square tubing welded together, bolted to the rails and bolted to the seat. Looked nice, it even allowed me to adjust the seat position (cool!). Unfortunately, the seat ended up being so high, I hit the roof with my head.
The second seat bracket resulted from cutting up the existing bracket, and dropping the centre 1.25″ to lower the seat. Now my head didn’t hit, but I still forgot to notice that the floor was angled 10°. Now, ten degrees is significant. Over a 12″ span, that’s a 2″ drop! This seating position is too reclined for me – I didn’t like it. The angle is only made worse by the fact that the seat has about as much padding in the upholstery as an old sock.
The second bracket began as a 1 x 1/8″ flat steel strip to mount the front as low as possible. This strip was welded onto the existing rails, as bolts would have been too high. The back of the seat was mounted with a 2 x 3/8″ flat steel bar, going straight across. This produced almost 2″ of drop that I needed to offset the floor. It might work!
Once the seat was mounted and I was happy with it, I strung the harness through it, as well as the factory 3-point seat belt. I will soon add a seat back support, as I am leery about the crash-worthiness of the seat (that and my car is due for another rear-ender soon….).
Driving around in the seat, I discovered that the padding was not really conducive to comfortable driving. In some ways I regret the purchase. There was not enough padding under the thighs to effectively support you. You end up holding yourself up by your butt-bones. I fabricated a support out of a 2″ block of styrofoam, shaped to support me nicely. I cut and stitched some black vinyl to cover the foam, fastened to a base of plywood which was then screwed down to the seat using #10 screws. Presto! Much more comfortable!
Although the seat holds me in really well, especially with the harness, I think next time I would not bother with a racing seat. It’s a lot of set-up, and it’s just plain uncomfortable getting in and out of it every day.
Paint
When I finally got up the nerve to do the paint on the car, I re-discovered why I didn’t chose autobody as a career. I don’t have the patience for it.
My first stage of body work was the “fill the holes” stage. I took a lesson from a “Home Handyman” and sprayed expanding foam in the holes around the back fenders, and when it dried I shaved it to the shape of the original fender, and slathered metalized Bondo over top. Tremclad flat black covered the Bondo because “Flat black hides a multitude of sins.”
The car also had a minor head-on collision before I got it, and the fenders had been pushed into the doors, which when opened, dented the fenders. I pried everything back to where it looked like it should be, and re-shaped it with Bondo, and my friend Mr. Flat Black. The rubber bump strips were also shot (from being in Ontario), so I pulled them off and filled the holes with Bondo.
Stage one lasted for about a year before the rust demons came back, taking with them a corner of the hatch, the rear wind deflector and the rocker panels (Interestingly, rockguard will maintain the shape of metal that once was).
Stage two was considerably more involved.
- New rocker panels were hand formed (by Autobody student David C. – Good Job!) and welded in
- All previous Bondo was ground out, and spray foam (Ick. What was I thinking?) removed
- All the side rubber trim holes were filled with metal
- Replacement metal around the fuel filler door was fabricated and welded
- Metal patches were made for the the bottom sides of the hatch
- Patch panels were made for the bottoms of the A-pillars (at the bottom – it hides behind the rubber fender panel and fender, above the mudflap)
- The base of the windshield pillar was also patched, as the rust was getting nasty here. Keep in mind that if you want to race, it is in your best interest to get a solid car
- Rear fender edges were hand made by bending an “L” shaped strip of metal, then hammer forming it to follow the wheel arch, then heat shrinking it to follow the fender contour. The gaps between the new edge and the remaining intact quarter panel were patched by “jigsaw piecing” it together with small pieces (It may not be the best way, but it worked for me)
- A new fuel filler adapter panel was ordered from Honda (less than $30, and 3 weeks delivery)
- All welded replacement areas were sealed using a combination of short strand fibreglass filler, undercoating, rockguard and/or silicone
- All welds were ground down
- Large quantities of Bondo were used. We’re talking large here. When I lived in the Okanagan we called it a “Rutland size can of Bondo,” here at the coast it’s a “Surrey size” (Every community has it’s area…)
- Three coats of Lacquer base Primer/Surfacer were used, with glazing putty to hide imperfections
- Four coats of Limco 1-2-3 Acrylic Enamel “Gothic Gray” top coat (NOT base coat/clear coat as per factory)
In total, I spent 100 hours of labour, and about $200 in paint, Bondo and supplies. Would I do it again? No, no, no, no, no, no.
I chose to do a single stage paint for a couple of reasons. It’s easier (spray once), it’s cheaper (no clear to buy), and it’s easier to touch up when something goes wrong in future (and knowing my luck…). After it was painted, I discovered another reason: the lower level of gloss better hides the defects.
It turned out fairly well. There are some defects, but the waves aren’t so bad that you could surf off them. When you’re sanding and sanding and sanding, at some point as your mind turns to oatmeal you start saying “You know, there are better things I could be doing with my life.” I must admit that spraying the paint was fun, but I just don’t have the skill or patience to do a really good job of the bodywork.
Keep in mind, that I basically taught myself how to do this from a book (Haynes Body Work Manual, and various Texts from school), and asked the Autobody teacher for some pointers. I did it all myself. Next time, I’ll be better skilled (next time??).
And now I have all these cans of Flat Black to get rid of….
Potential Modifications
Here are a few potential modifications one could undertake on a Third Generation Honda Civic that I have done enough research on them that I am confident in their success (some I have done):
- Front torsion bars from a Civic Wagon
- Front sway bar from Civic Wagon or 86-89 Acura Integra
- Rear internal sway bar from 86-89 Integra (Civic: 15mm, Integra LS/RS: 17mm, SE: 19mm)
- Rear coil springs from Civic Wagon or 86-89 Integra (stiffer)
- ’85 Civic 1.3L Rack and Pinion (3.55 turns lock-to-lock vs. 3.89)
- “Big Brakes” front rotors and calipers from 88 Civic DX/Si (same caliper piston size)
- “Big Brakes” front rotors and calipers from 86-89 Integra (larger caliper piston size)
- “Big Brakes” rear brake drum assembly (8 1/4″ vs. 7 1/8″ Easy swap)
- “Disc Brakes” rear disc brakes from 86-89 Integra (use Integra proportioning valve!)
- EFI ECU from 86-89 Integra (for Si Civic, raises redline 500 rpm)
- 1.6L DOHC 86-89 Integra motor (Details) (118 hp, easiest swap on Si Civic)
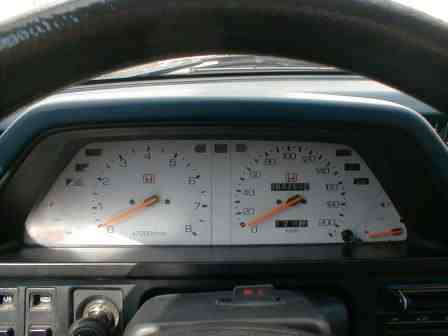
White Gauges
Pasi Törrönen, a fellow Civic owner, spent some time to come up with White Gauges for the 3G Civic. These are available to DOWNLOAD HERE as a printable CorelDraw! file. Awesome Work!
Conclusion
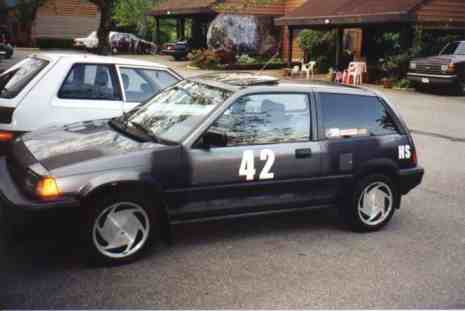
As it stands, the Civic corners really really well. It is a blast to drive! With large tires on wide rims, the car is brutal to steer. It takes a lot of effort (no power steering) to maneuver this beast, but if you’re into it, it’s a hoot. With a big rear sway bar, the car is more stable in the turns, it can really be thrown into corners, but the heavy steering effort makes it less than smooth. The next step should be to swap in a power steering rack. Preferably one that’s quicker lock-to-lock.
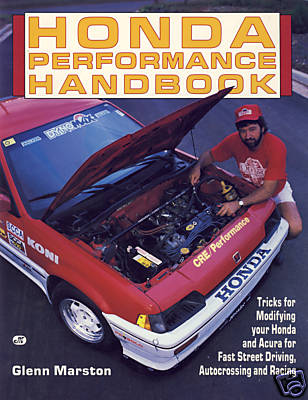
I recommend buying “Honda Performance Handbook” by Glenn Marston (ISBN:0-87938-387-9). It is chock-full of information on these and all Hondas. Also, visit www.hondabook.com where you can buy another excellent book on hopping up Hondas.
Once I started autocrossing, I sat down and studied the rulebook. I discovered that the novice series is scored using PAX (Performance Adjusted indeX). What this means, is competitors can compete in a wide variety of vehicle class and preparation, yet be able to compare them all equally – a handicap, if you will.
Let me give you an example of what this means. My Civic previously competed in C/SS. The PAX for C/SS is 0.836, which means my 50 second run is really considered 41.8 seconds. Great, you say? Well, my friend’s four door beater Nissan Micra on pizza cutter Walmart tires 52 second run, competing in H/Stock (0.781) pulls in a 40.6 second time. Now compare another competitors D/MOD (0.908) done-to-the-nines former Players Championship 1-LE “Race” Camaro on racing slicks runs 45 seconds, but nets a 40.86 second time.
The beater Micra beats us all!!
Is that fair? Well, yes – it puts all the cars on an even playing field. As the Solo veterans say: “The only way to win PAX is with a stock car.” (note: Regular racing is scored differently!)
My solution: Get my butt into H/Stock.
So, I yanked my wonderfully fabricated strut tower bar, front and rear sway bars, Weber, big brakes, and virtually everything that did not come with the car originally. For competition I remove the cold air intake tubing, replacing the factory inlet. For the 2001 season, I will use the 13″ steelies I have for my winter tires, and run the R compound tires for racing. Using factory size rims, I can at least replace the rear Lightspeed bar only (for the one allowable preparation point in stock) for racing. Bummer that all this work and experimentation is for nothing. Oh well!