
[ Start ] [ Index ] [ Sold 2019 ]
In which I fit a dipstick, and complete the 4-link suspension.
I don’t understand how people make money building custom cars.
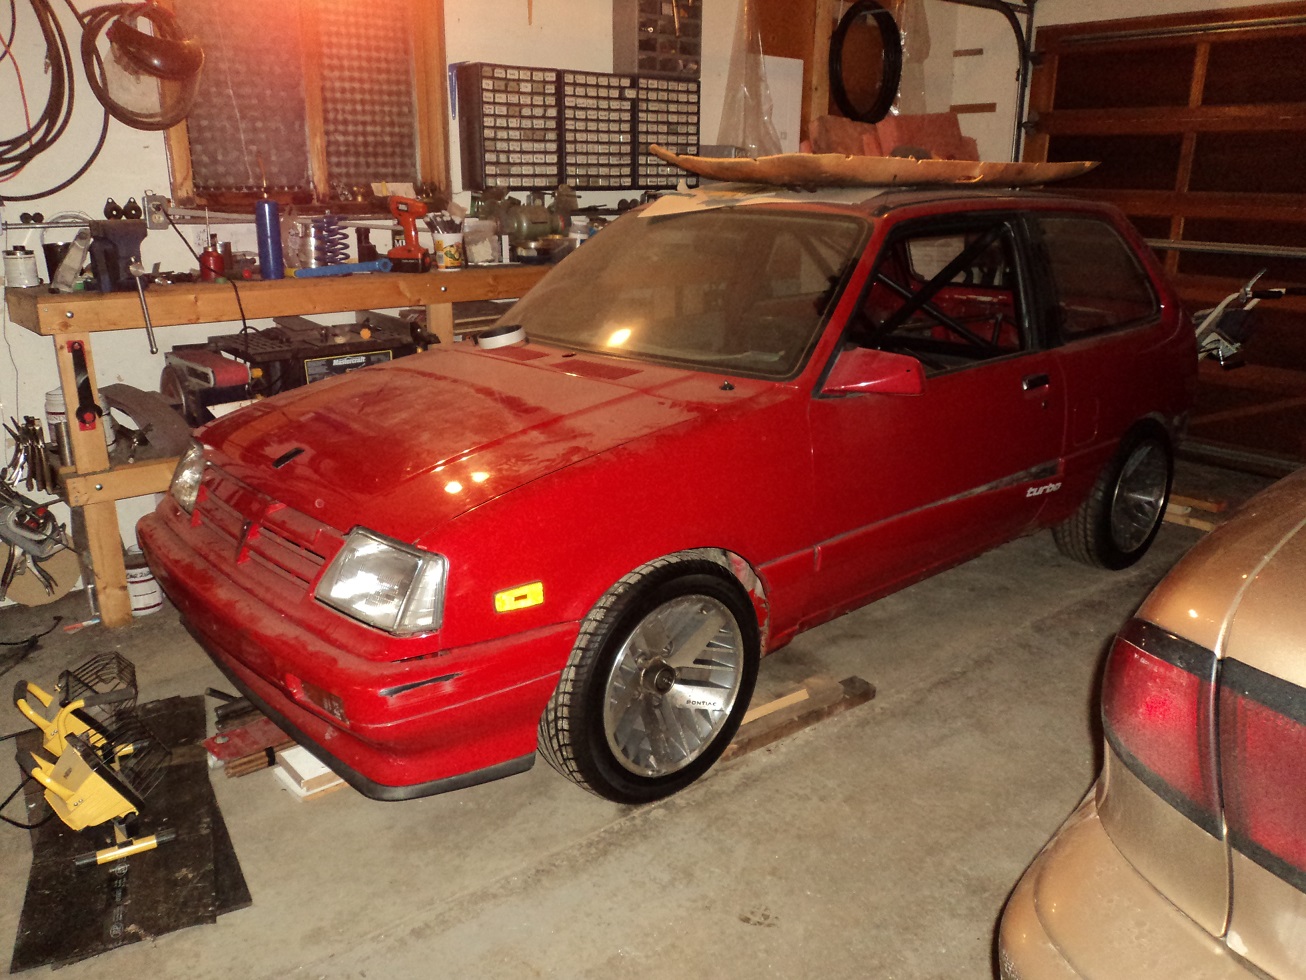
Today I modified the dipstick tube. That took all day.
I tried to alter the original tube so that it could actually be accessed, actually be installed in the block, and yet clear the header, and clear the temp sender, all whilst the block was in the car. Hahahahahahaha.
Part way through tapping it into place, it jammed real good. This meant dropping the pan to get it out, or sure as shooting it will break off and I’ll have to drop the pan AND get a new tube. Might as well deal with the weeping front seal. And a speedi-sleeve. And oh look – the timing chain is sloppy. And so on. This is why I cannot make this build “challenge friendly” – I have a hard time balancing “Giterdun” with “Geez, y’know, this really aughta be fixed.”
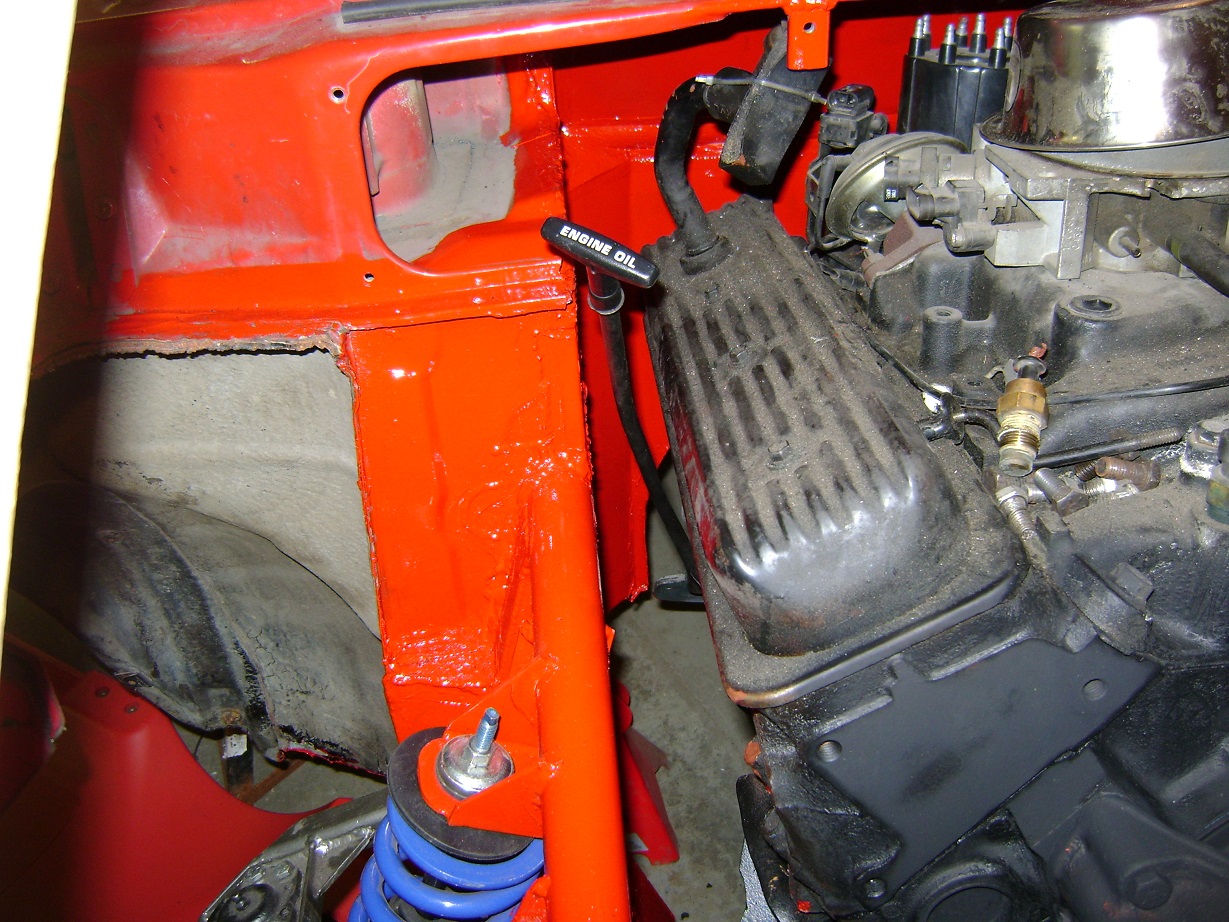
Yay dipstick. Can you tell this took all day? (June 2014)
You will likely notice I painted the engine bay. Day before yesterday I seam-sealed everything. Painted yesterday.
Also bought fuel lines, new spark plugs, and tomorrow I will pick up some header collectors.
OK, so I lied.
The headers were a painful ordeal to install. There is almost no room to get in there at all. I had to remove the temp sender in the head, as well as what I believe is the knock sensor (threaded into what would be the block drain). The newly located dipstick tube was uselessly placed.
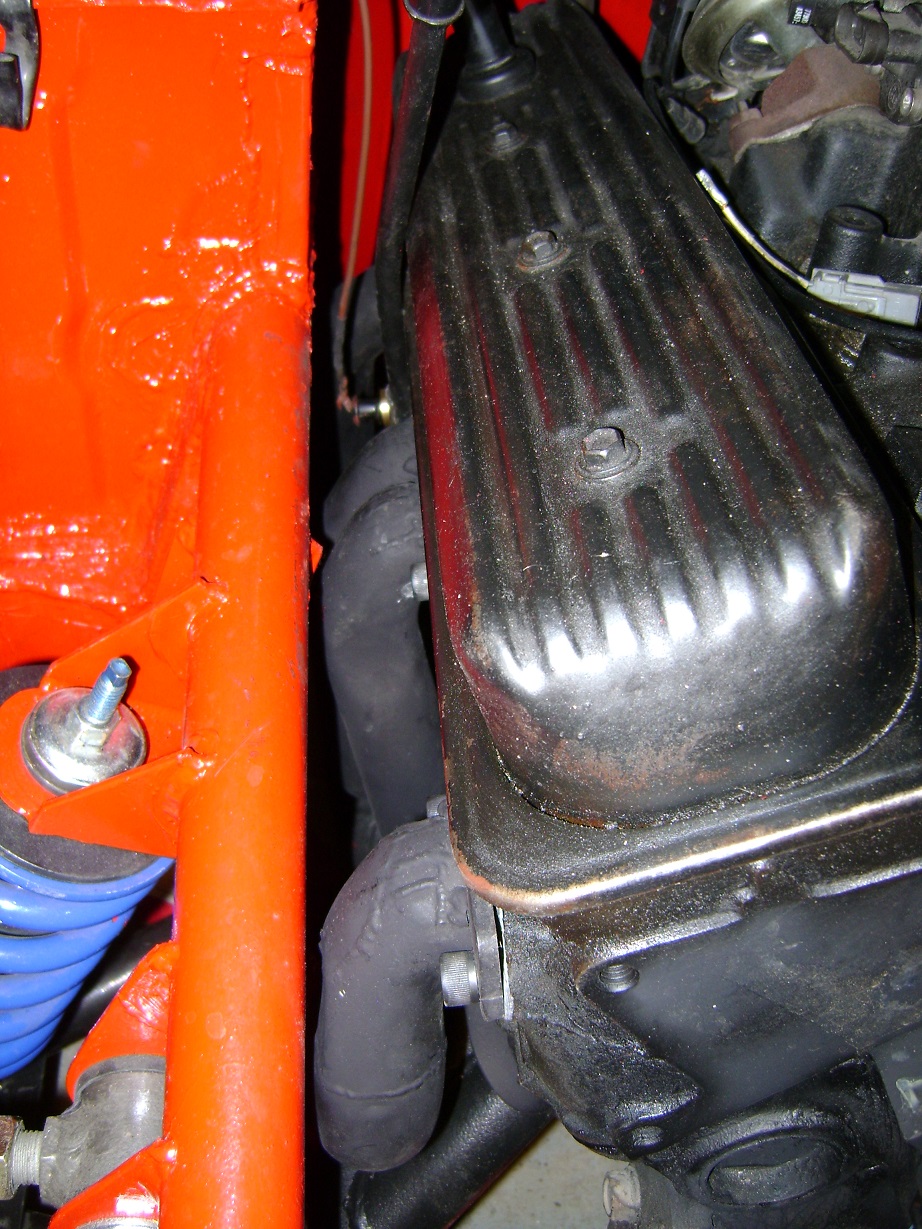
Yes, my manly mitts could get in there, sort of, with the use of colourful metaphors.
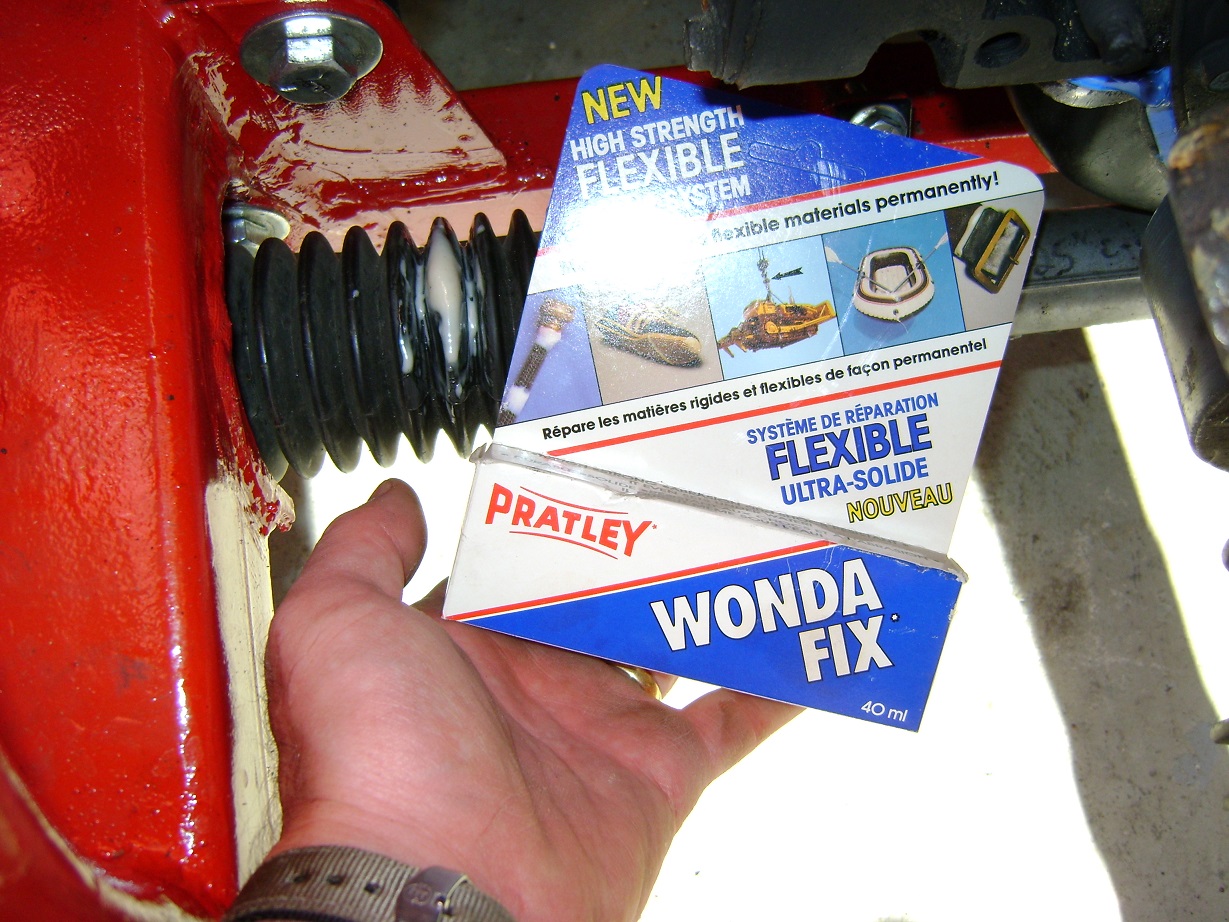
Way back when I was welding up the front, I somehow melted a hole in one of the rack boots. I didn’t really want to spend the gas to find another at the wreckers (daily driver at the time of this writing is 19L/100km), and the local auto parts store has ~never~ stocked this item.
Instead, I tried Wondafix, a flexible adhesive that mixes like an epoxy. It can fill holes. It’s Wondaful. I used a Nitrile glove on the inside supported by a large washer to provide backing, and then mixed up two layers of Wondafix. Neat stuff.
I broke one of the spark plugs trying to install them. Turns out the spark plug socket I was using was from the school, and the inner bushing had since been liberated as is always the case. Wish I had noticed earlier. I will use ~my~ socket for the last plug. *sigh*
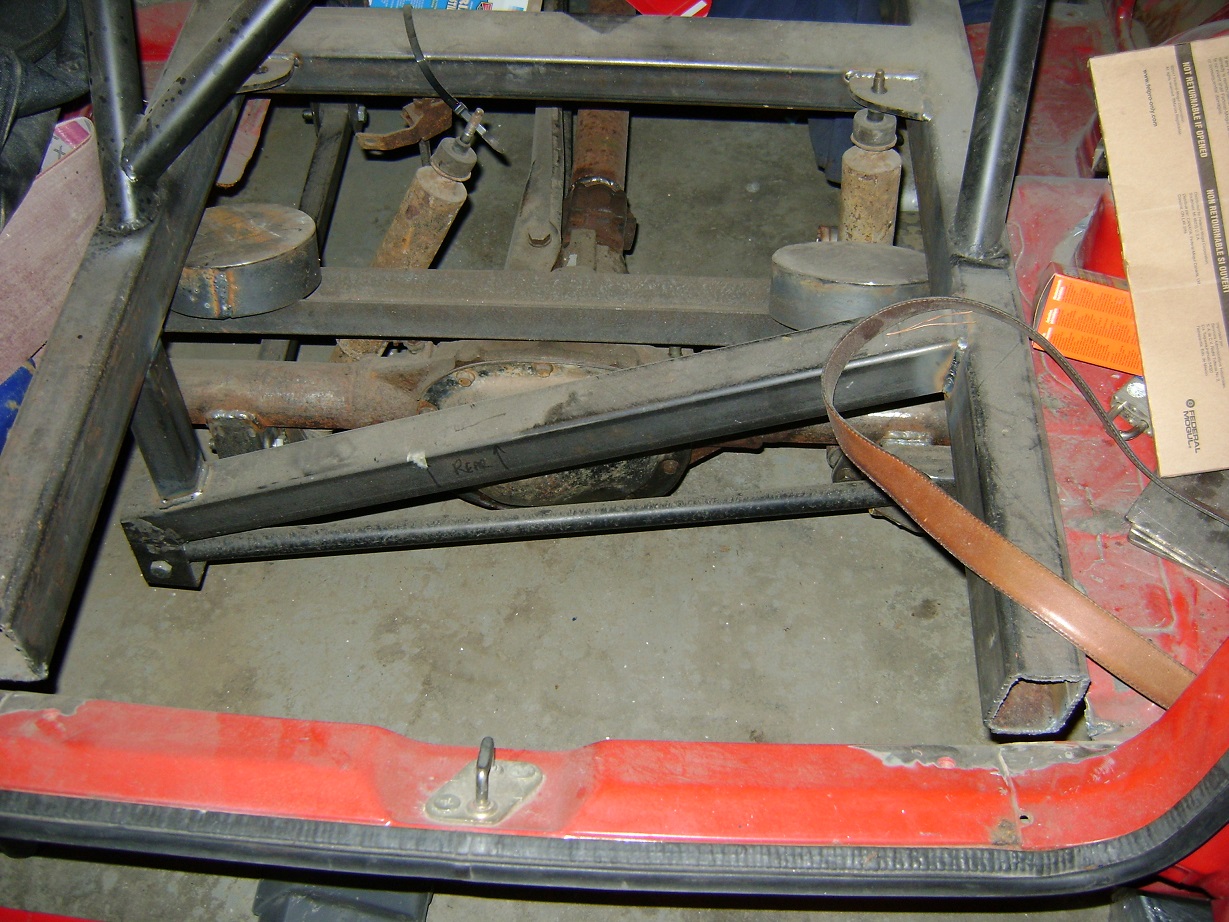
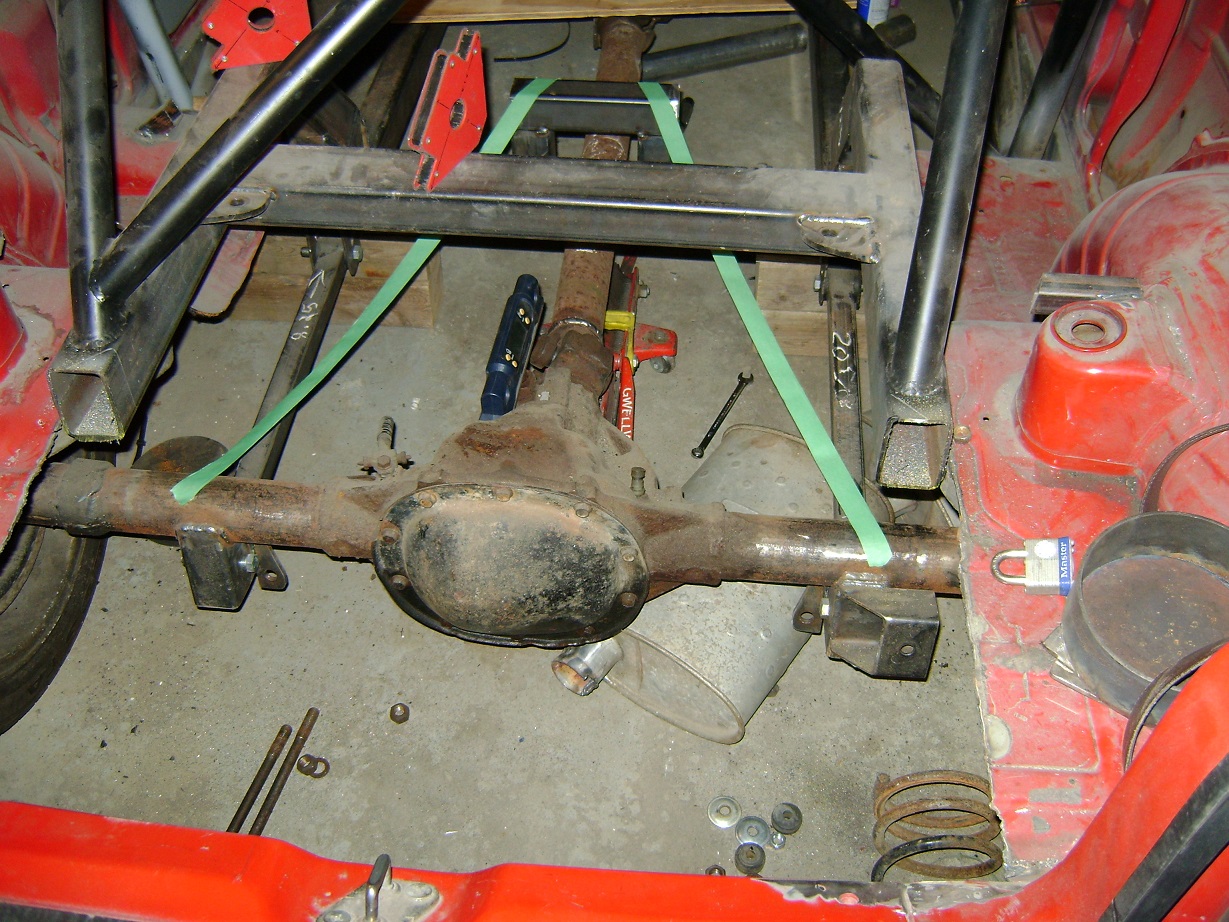
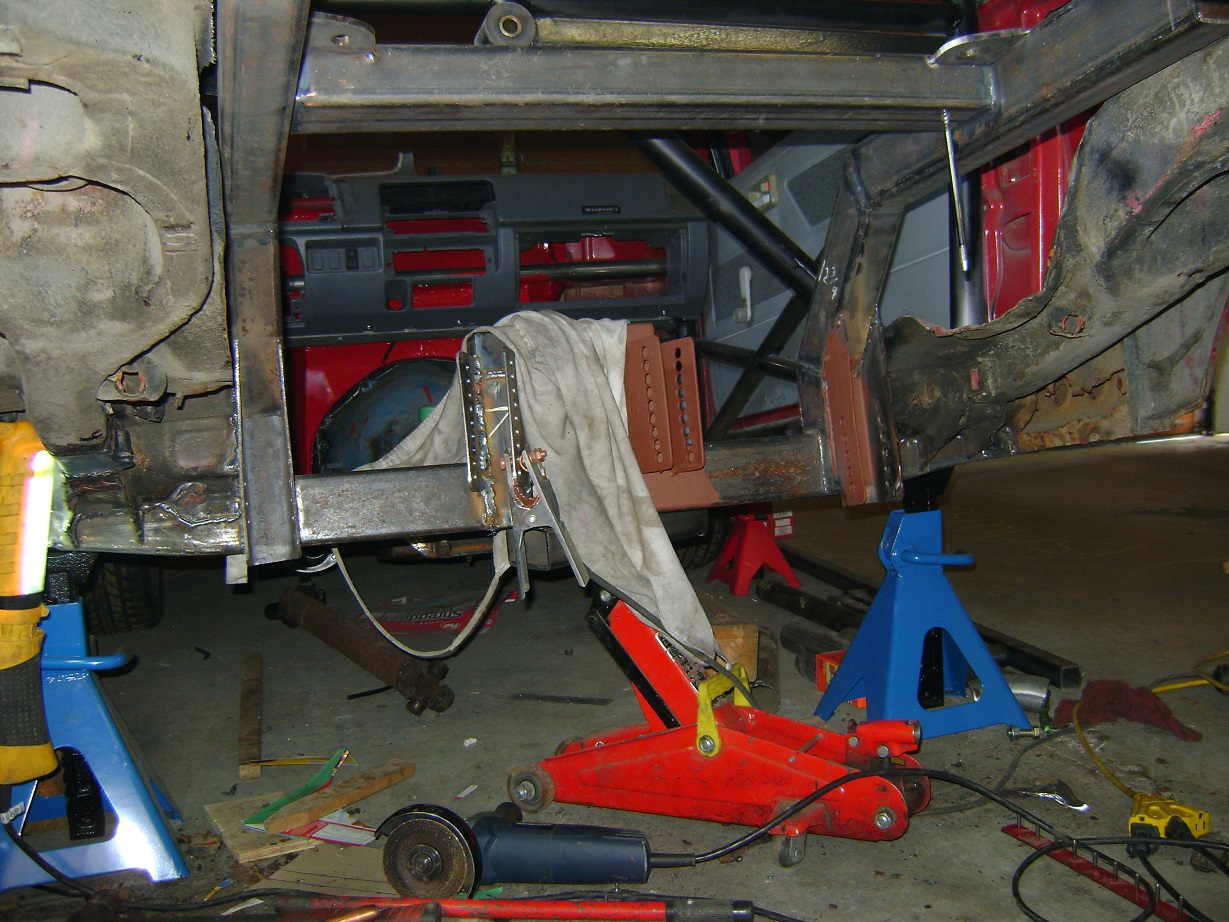
So I started working on the rear suspension.
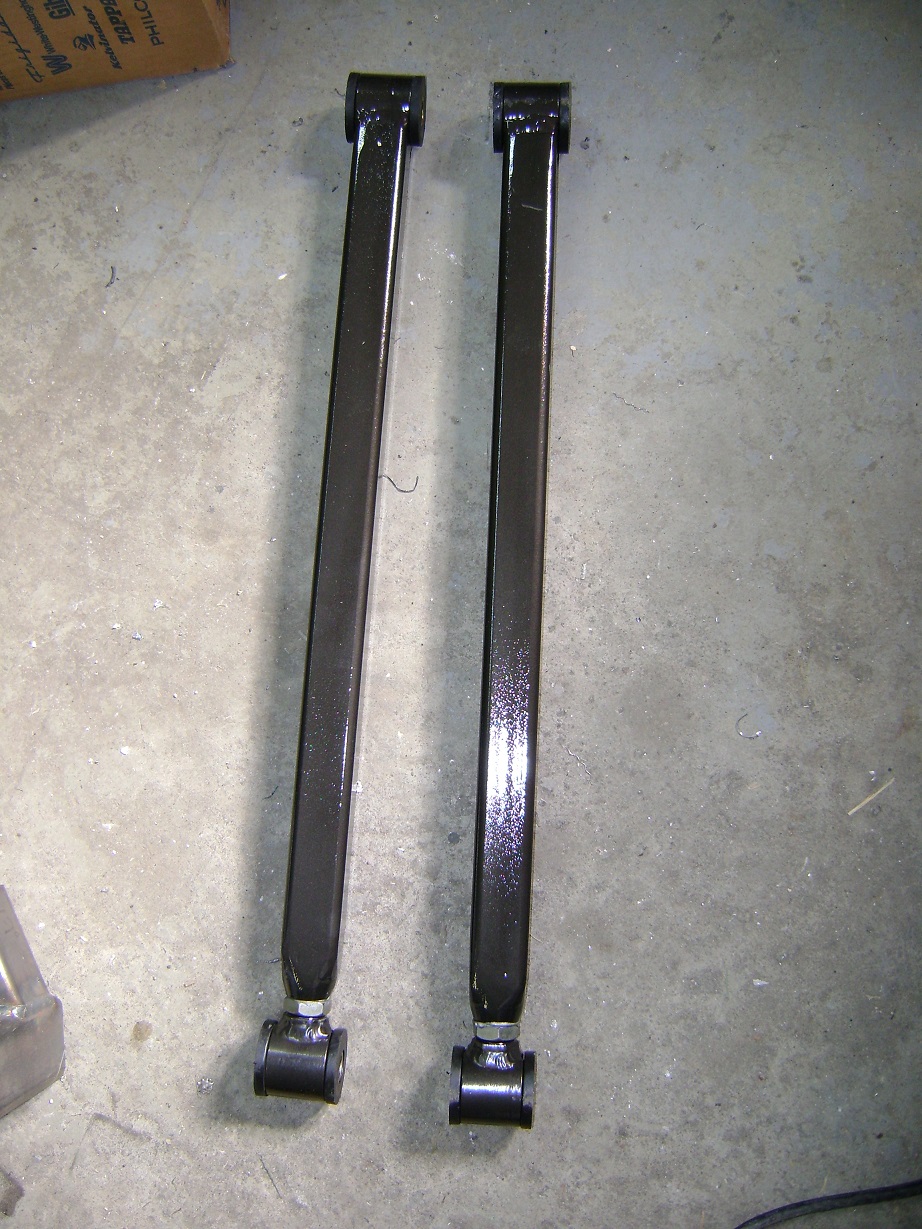
I originally built the rear using the torque arm and panhard of the Firebird, but that is running into packaging issues with the exhaust, gas tank, and seats. So I will be changing it to a triangulated four link. I can keep the lower links, but I need to fabricate new upper links.
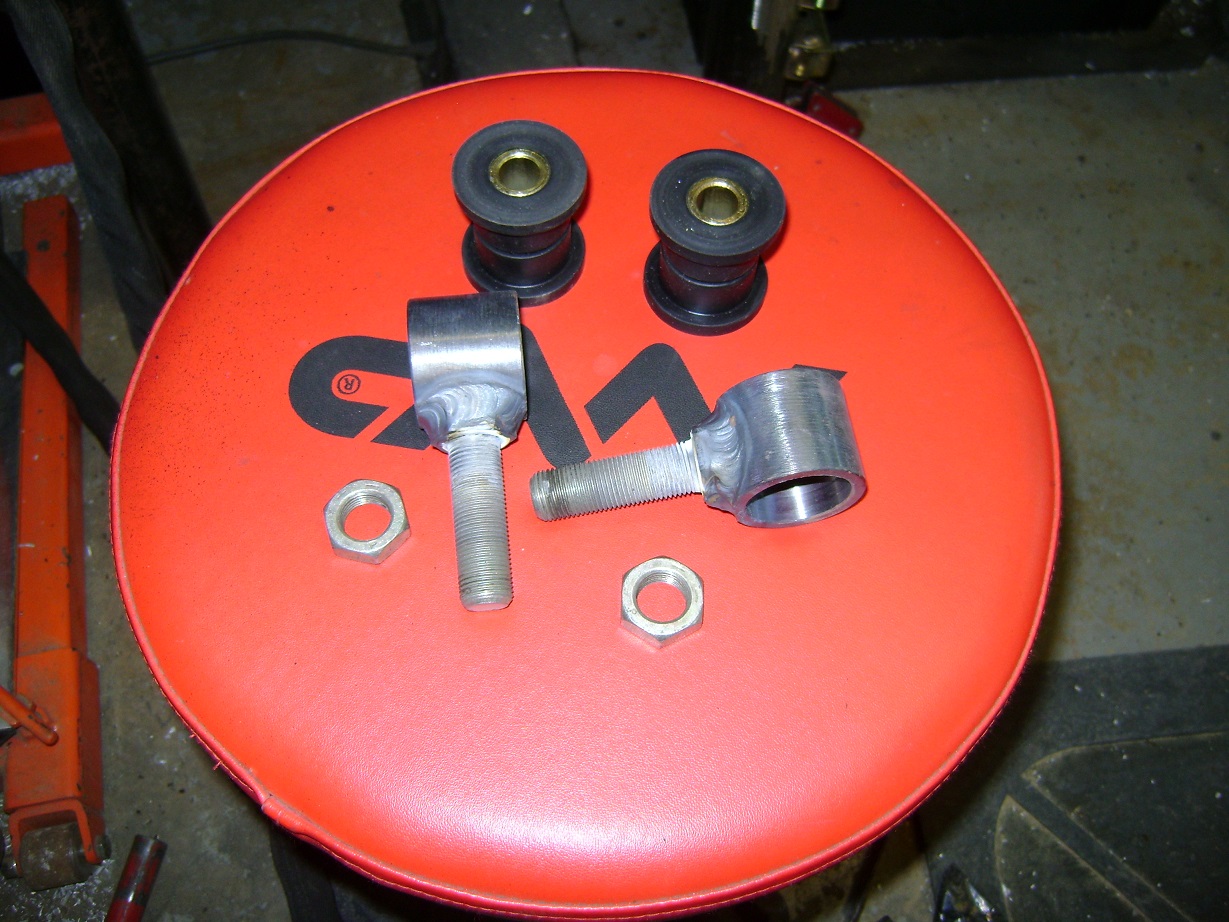
I turned a couple ends, and will pick up some 5/8″ bolts to make the ends adjustable.
Not much room like this. Where’s my Sawzall??
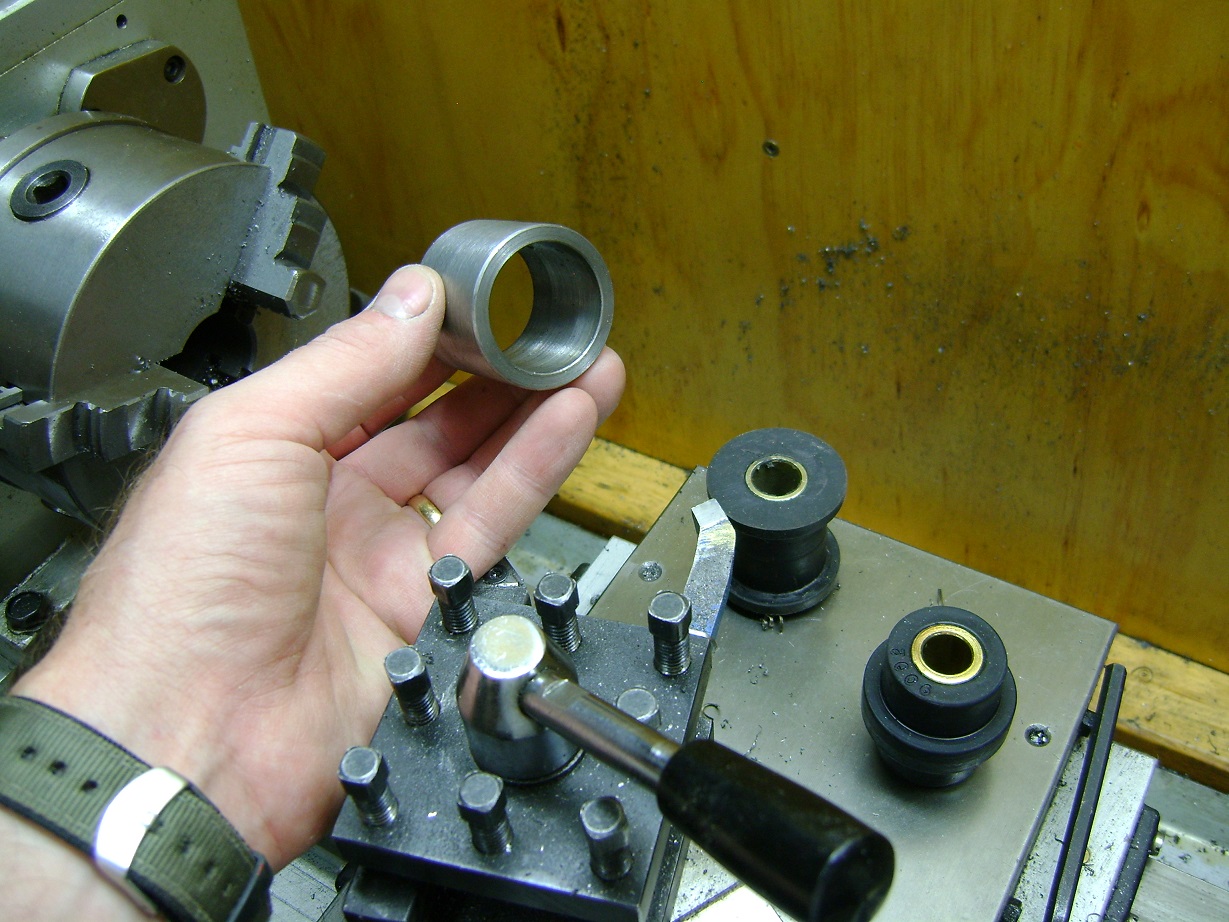
Ends for the four-link bushes
The bottom of the dashboard has a metal strip that supports it. I trimmed the support and welded it to the door bars. I did not try to find out if I can still remove the dashboard this way. Hope I don’t have to find out it can’t.
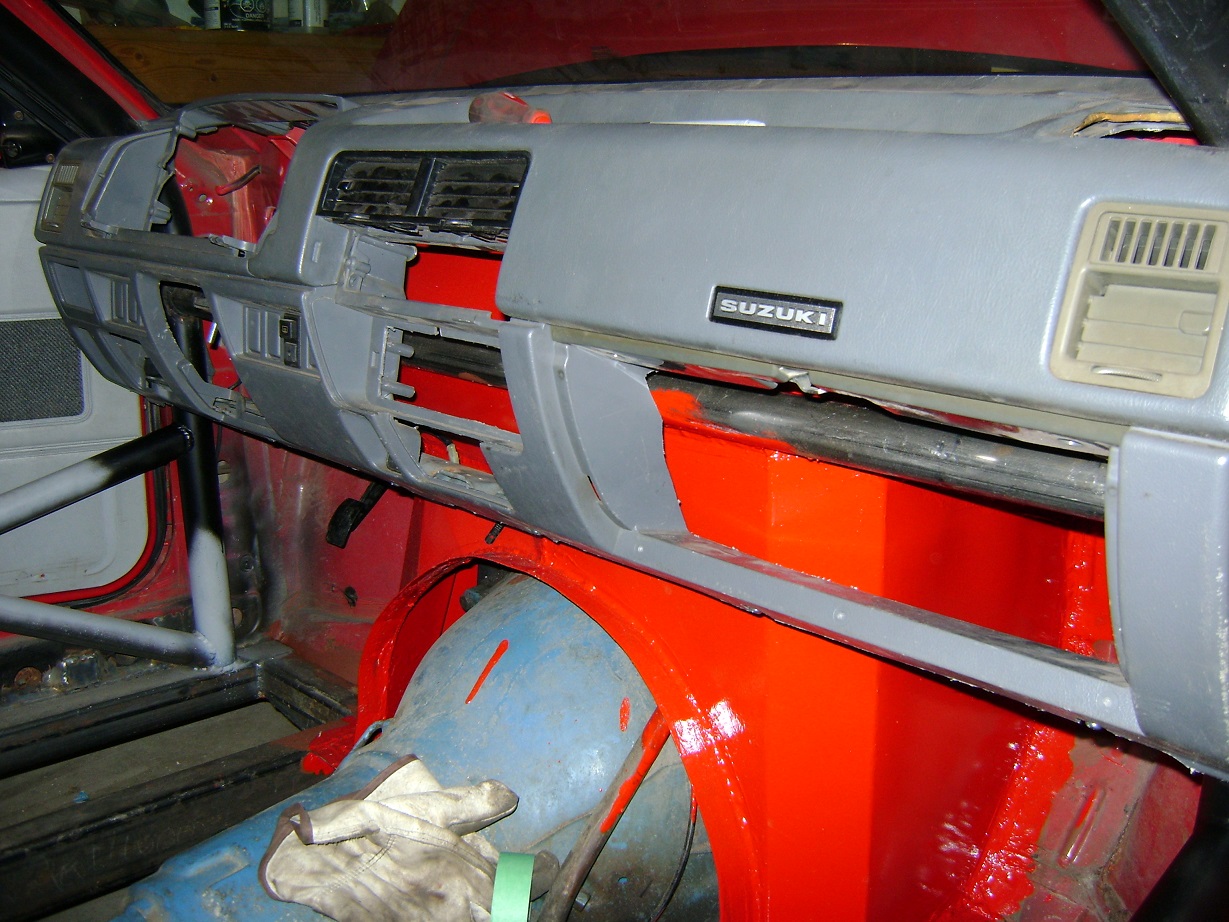
The OCD among you will be drawn to the paint drips. You will get over it. Once assembled, nobody will see it.
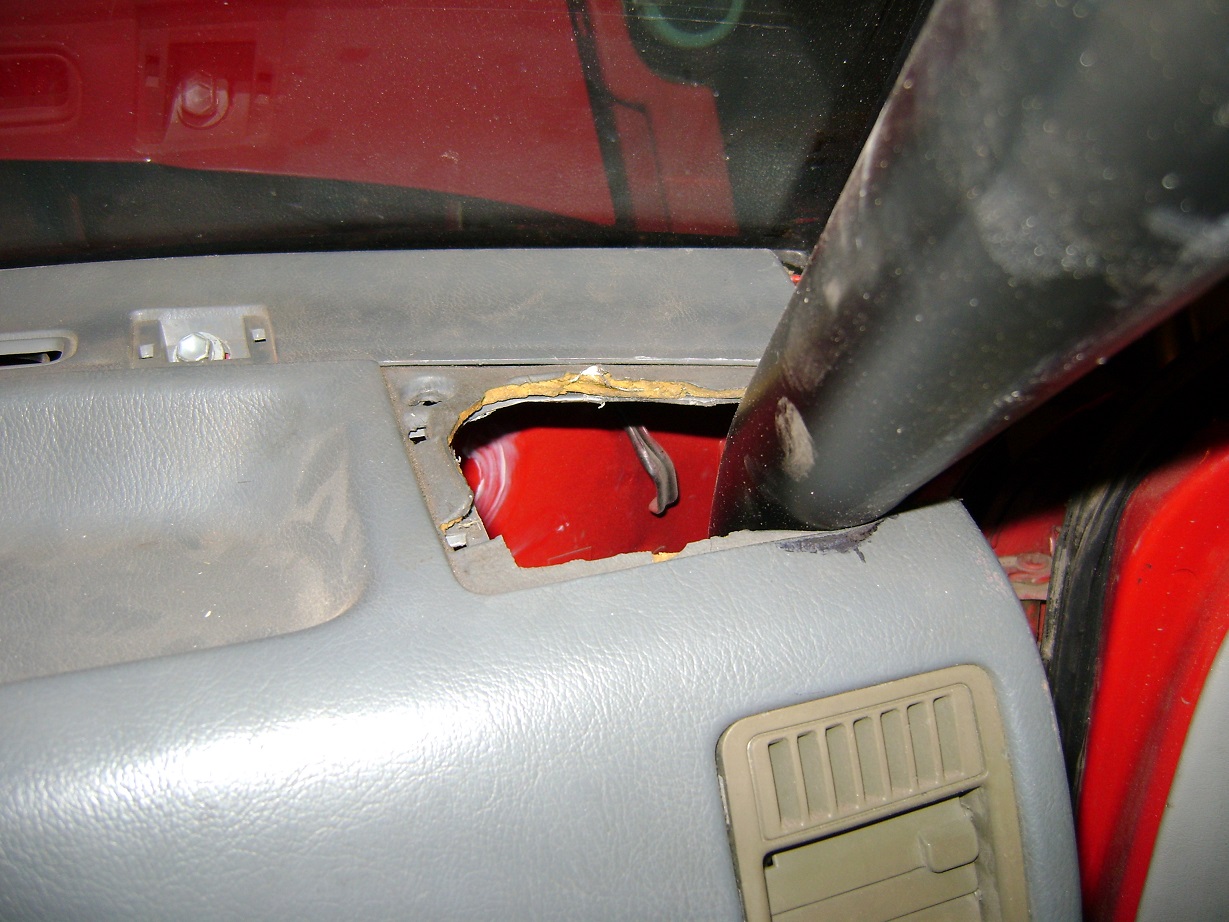
Hope I can find the speaker grills.
If I can find the heater/defroster components, I could get a heater in this thing, and drive it in winter.
Also spent a couple hours of staring at the back suspension to figure out what I want to do to change it.
I yanked the panhard bar off along with the frame ends and the bar mount.
I removed the Firebird torque arm, and did some measuring and mocking up of triangulated upper control arms.
I also fabricated some adjustable end link bushes for the upper arms.
![IMG_0387[1]](http://gwellwood.com/wordpress/wp-content/uploads/2014/07/IMG_03871.jpg)
Bungs to be welded into square tube upper arms
TIG welded goodness because I’m out of control
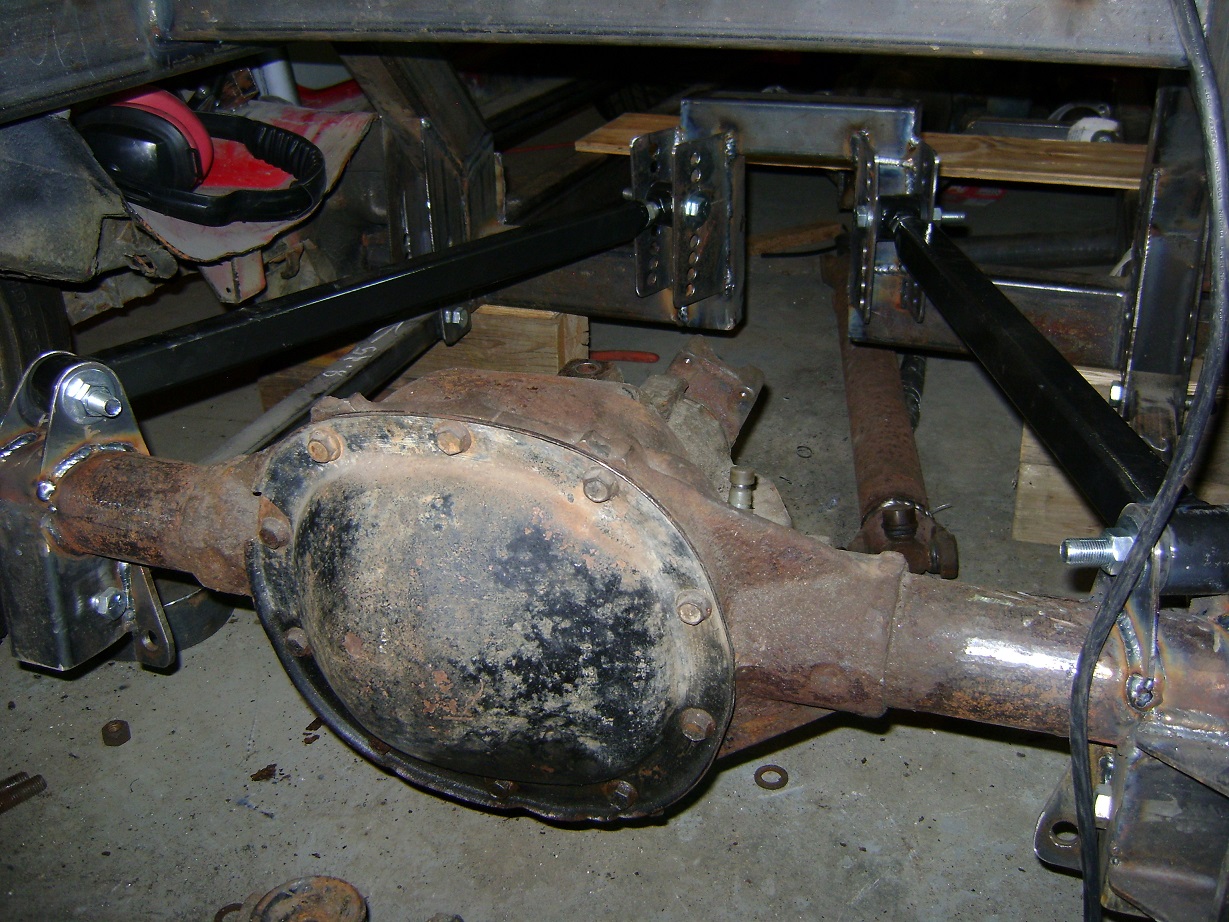
Finished fabricating the upper trailing arms, adjustable to correct any pinion-angle/driveline-vibration my guestimates screwed up on.
(July 2014)
Here they are roughly where they will be. I drew up what would be adjustable forward mounts so I can change anti-dive without changing pinion angle. Brackets yet to be made. Had to get a new abrasive disk for my chop saw.
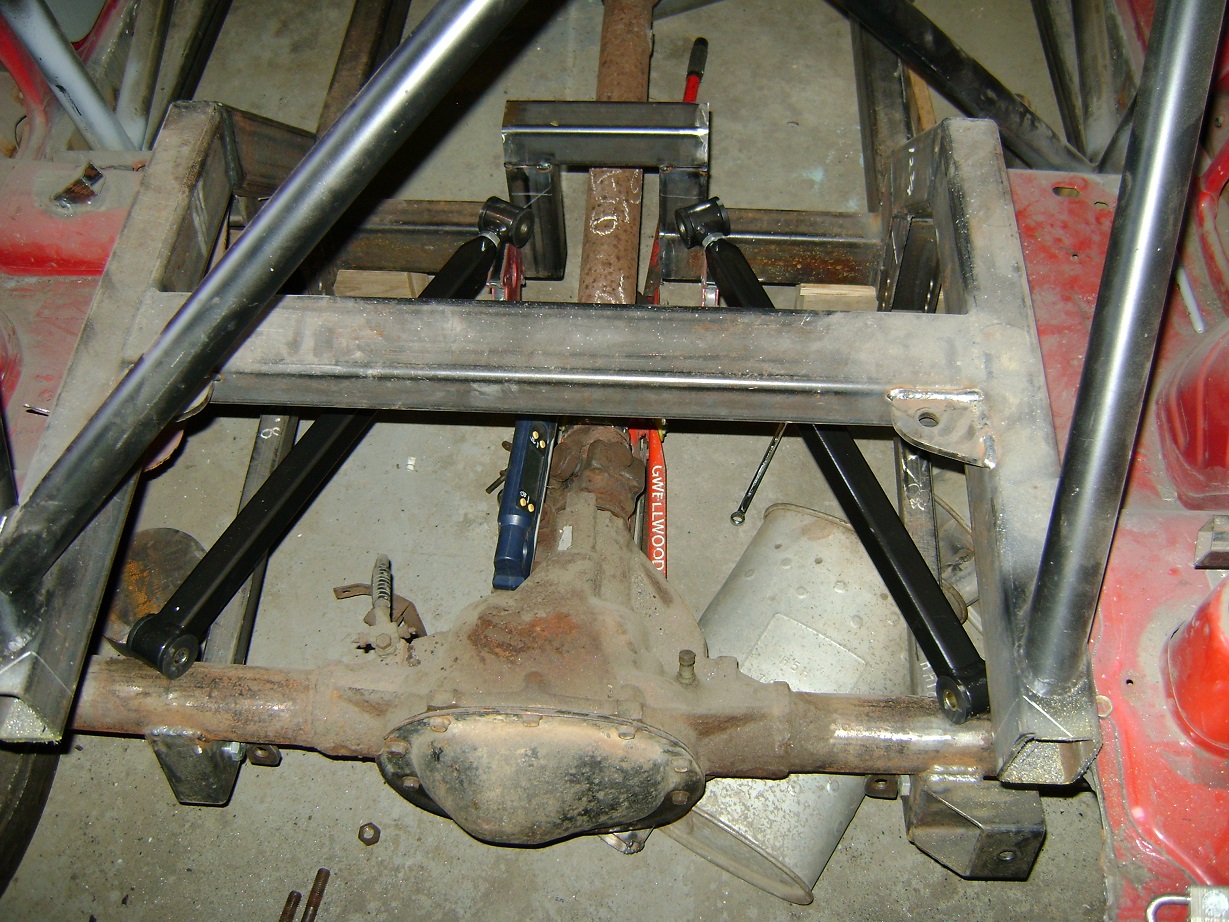
A former student and now fellow racer gave me some factory coil springs from an Integra that might just work perfect for rear springs. Hopefully they don’t get too stiff when I cut them down to the required height. The shock mounts you see in the cross member will not be used – I’ll be using the factory shock mounts.
I drew up the front mount for the upper trailing arm. Should be enough adjustment. 4th hole from the top is where I ~think~ it would work best for every day sanity, if there is such a thing with this car.
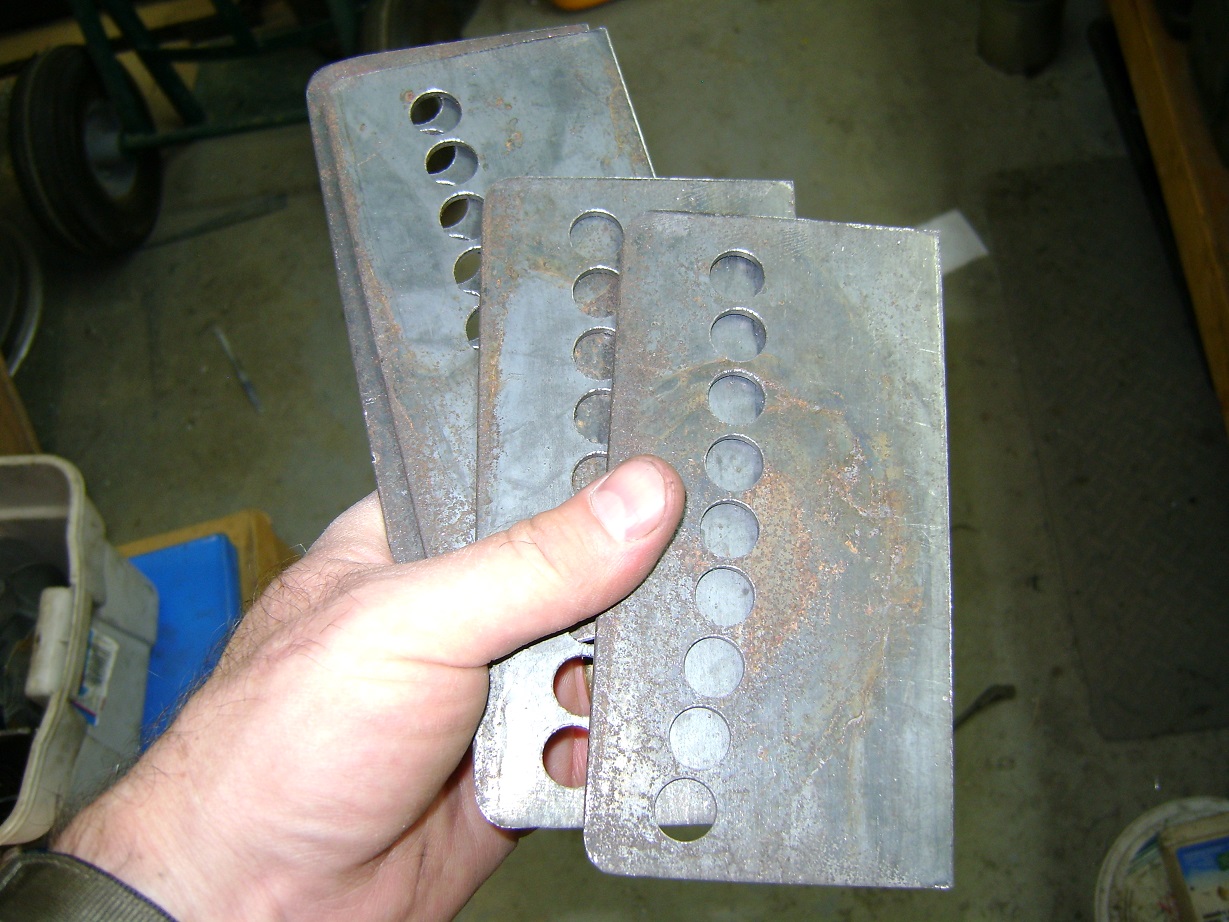
Template was used to centerpunch the holes.
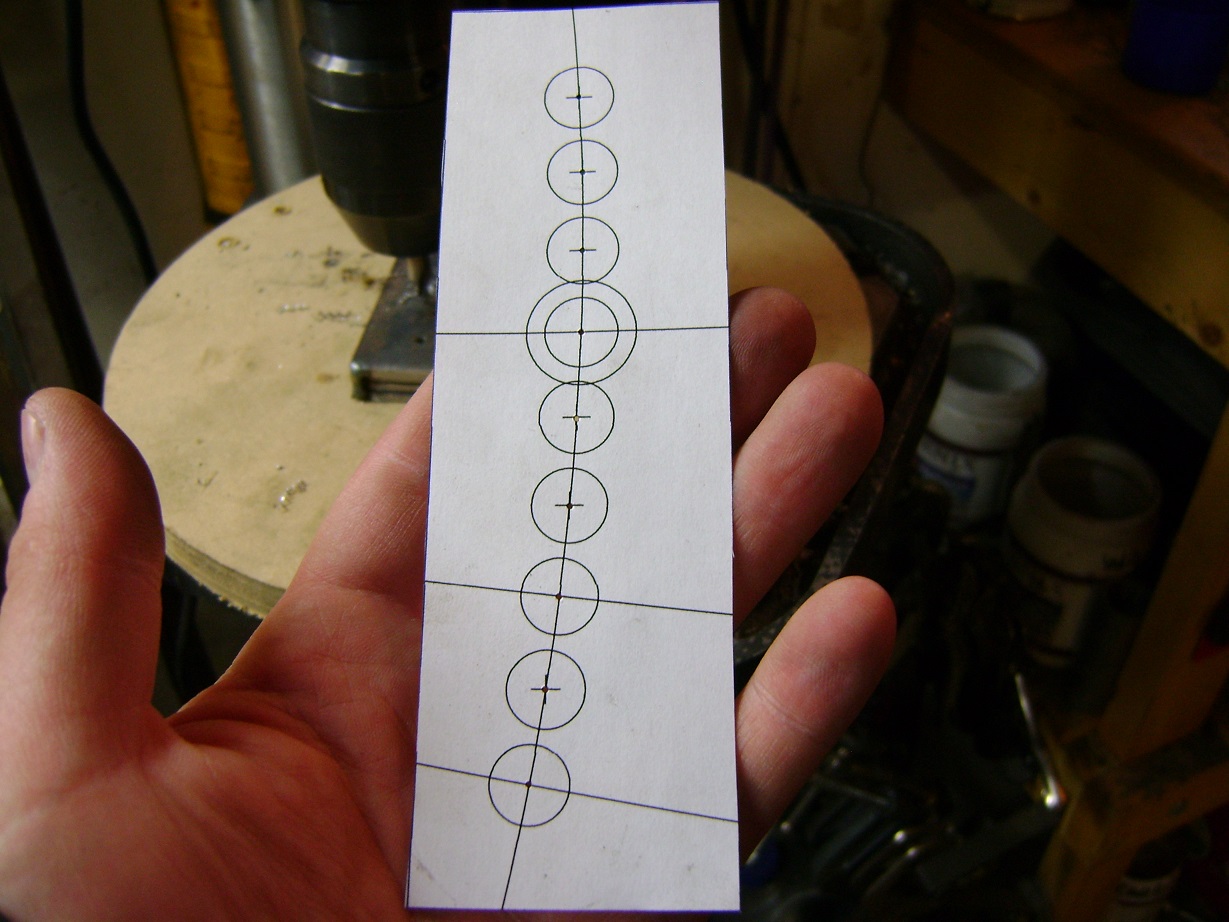
“Computer-Aided-Design” just means “Very Accurately Done Wrong.”
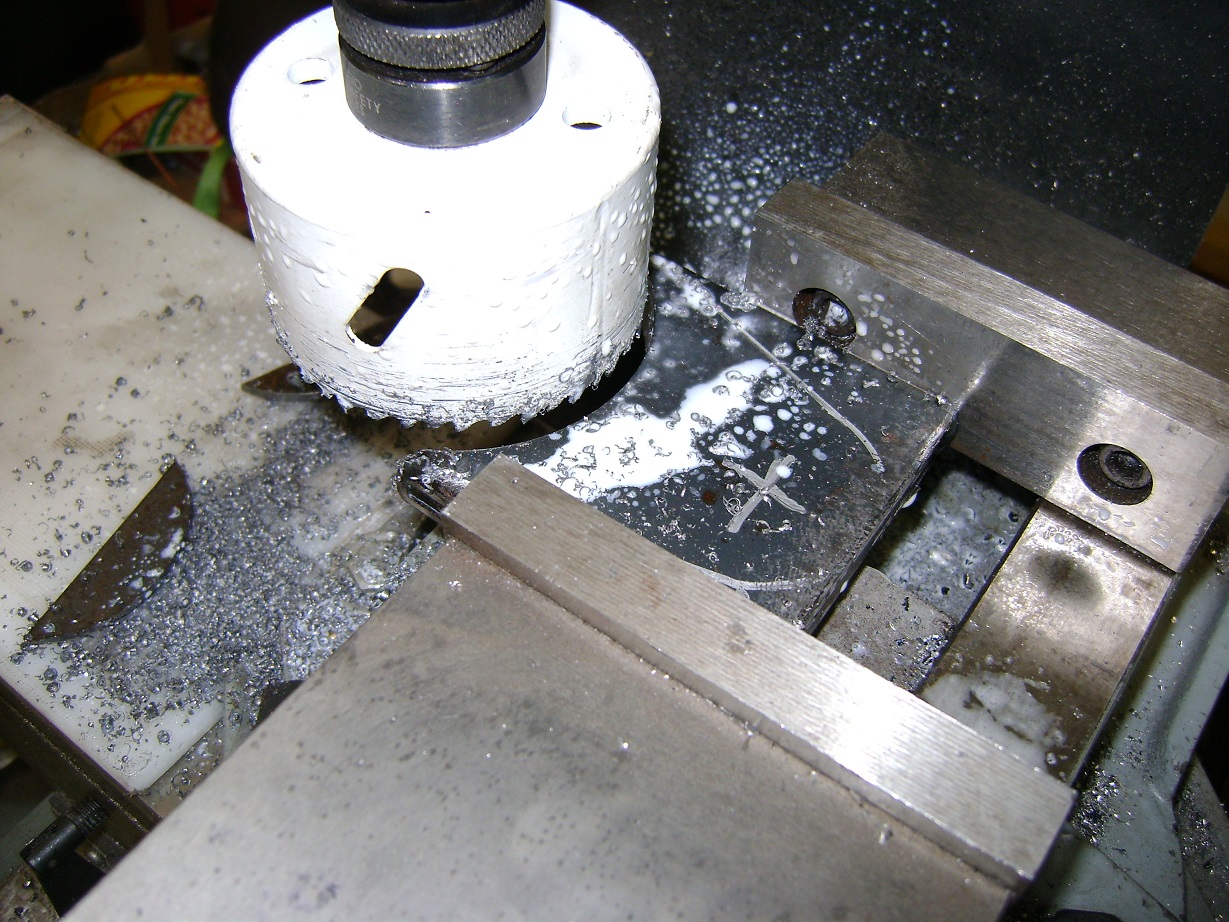
Tip for building a number of the same items – weld the plates together and drill the holes through all the plates. Use a lathe center bit to ensure the holes are drilled exactly where you want them. All subsequent drill sizes will follow the first hole you drill, so make it a good one.
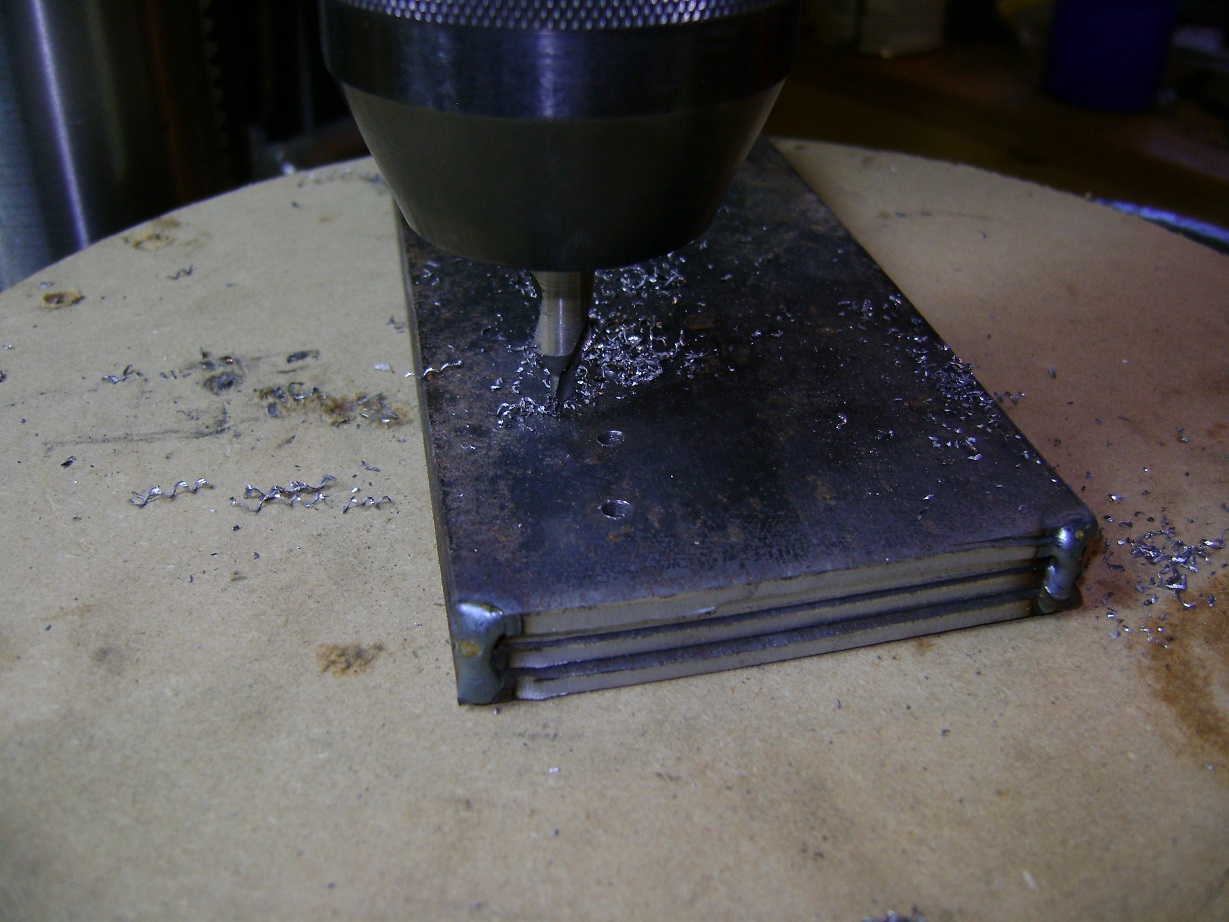
When you are done, grind the welds off, and smooth the edges.
Wanted to get more done today, but instead put a shift kit in a friend’s Ford C4. That was a fun job, I like those.
Kids will be away for a couple days, camping with the grandparents, so I hope to get the trailing arm mounts completed this week.
I started taking pictures of the upper axle brackets being made, but the next thing I knew they were done, and I neglected to take more pics. Here’s all I took:
Pinion was set at the same angle as the transmission less 1° for bushing flex in the four-link.
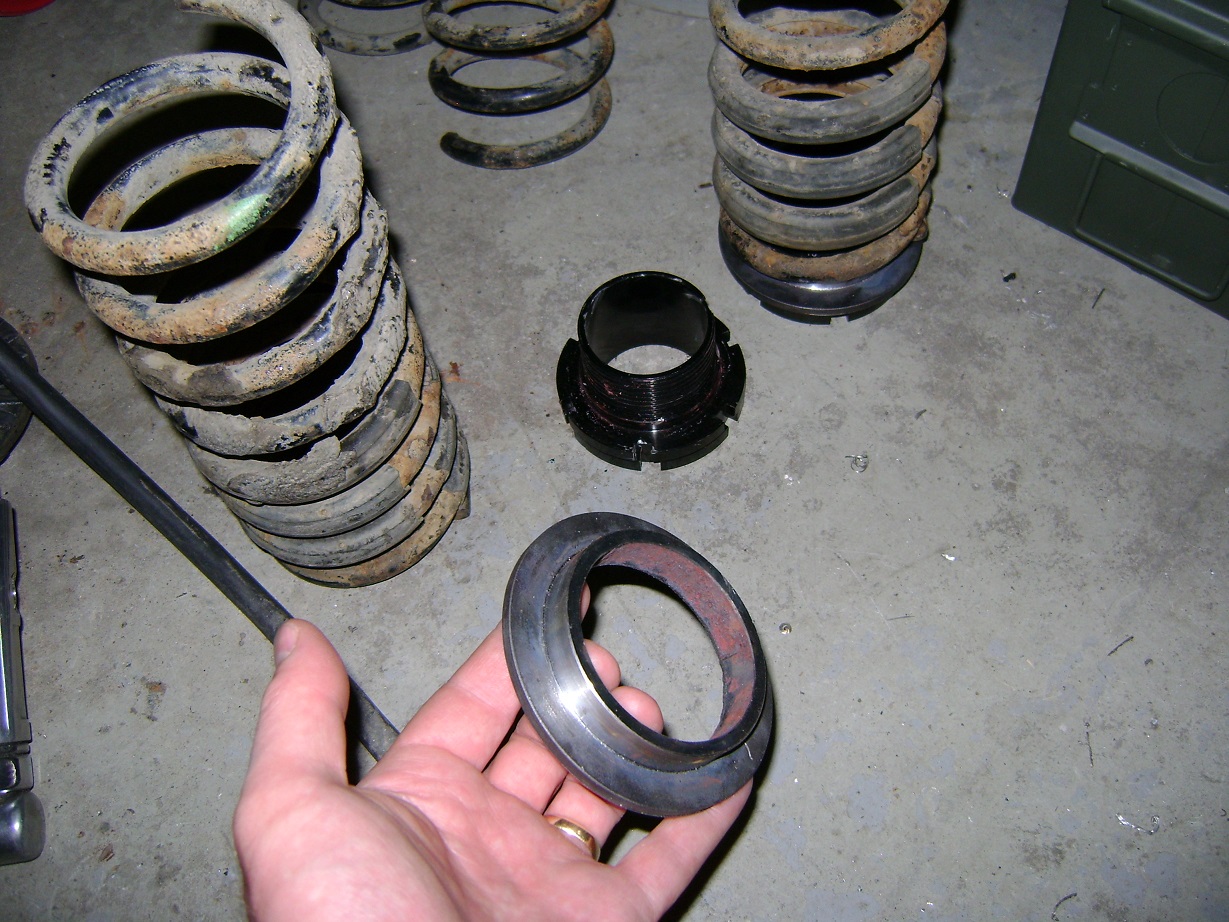
I started mucking with the Integra coil springs. I cut 5″ off the bottom and it sat pretty good, yet still seems soft enough. I need to adapt the coilover sleeves so I can fine tune the height when I’m done. Stupidly, I think I cut the wrong end off the Integra springs, so I will need to make an adapter to fit it to the adjusting sleeves. Had I cut the dead coils off instead, this wouldn’t even be a problem. Not sure what I was thinking. I’m sure it made sense at the time.
Nope, cutting the coils as I did, neither cost me, nor saved me time. It’s all good.
Figured out where the spring mounts needed to be, and made some mounts with some 2″ DOM tubing, and some 3/16″ plate hole-sawn as stops. I also shortened the coilover sleeve, since I didn’t have enough suspension travel to warrant full sleeves.
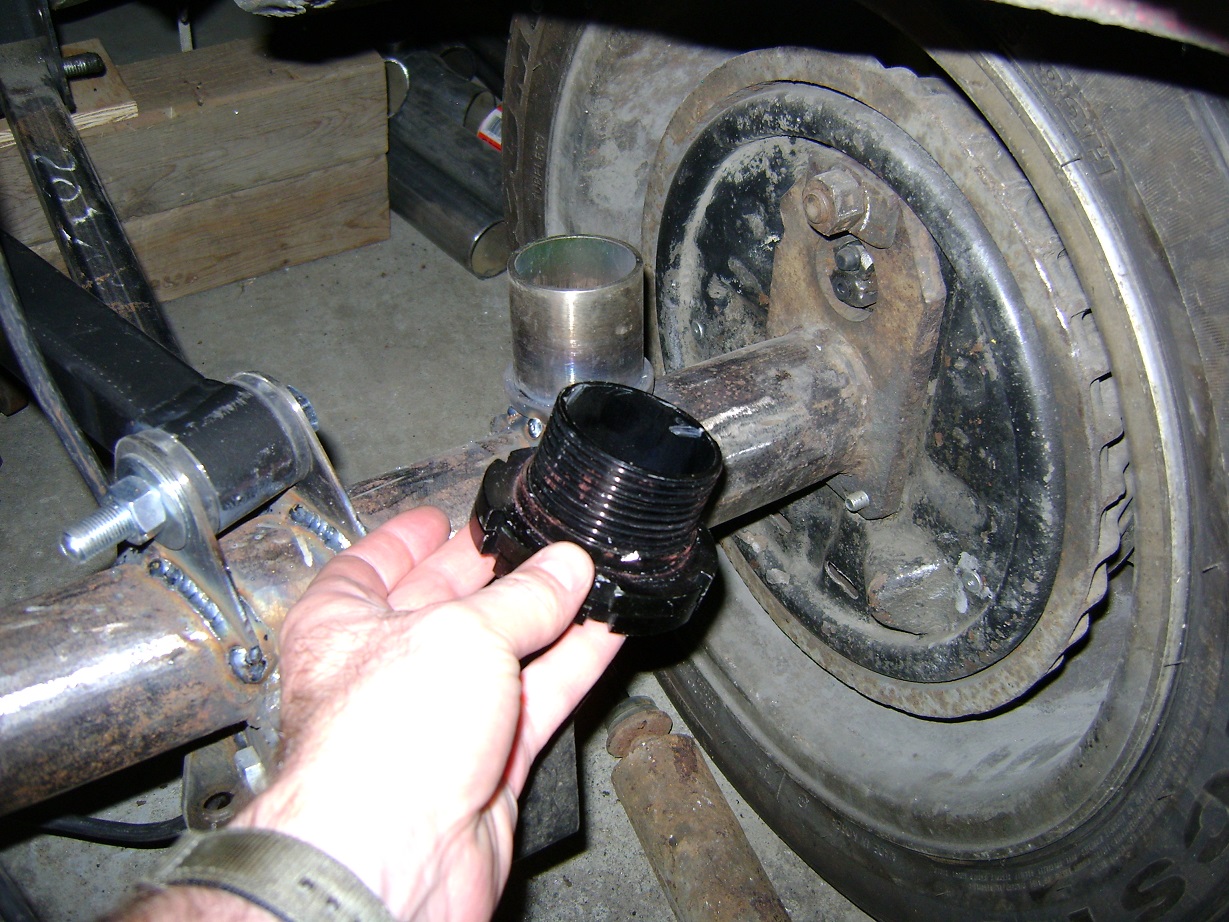
The cut Integra rear springs look like they might work great. I fabricated a spring spacer, since these springs are larger than the 2-1/2″ coilovers are designed for.
Fabricated some shock mounts for the axle. Shocks will be mounted using the stock Firefly mounts in the tub. A smarter man would have used these mounts for the lower trailing arms, but I was barking up a different tree at that time.

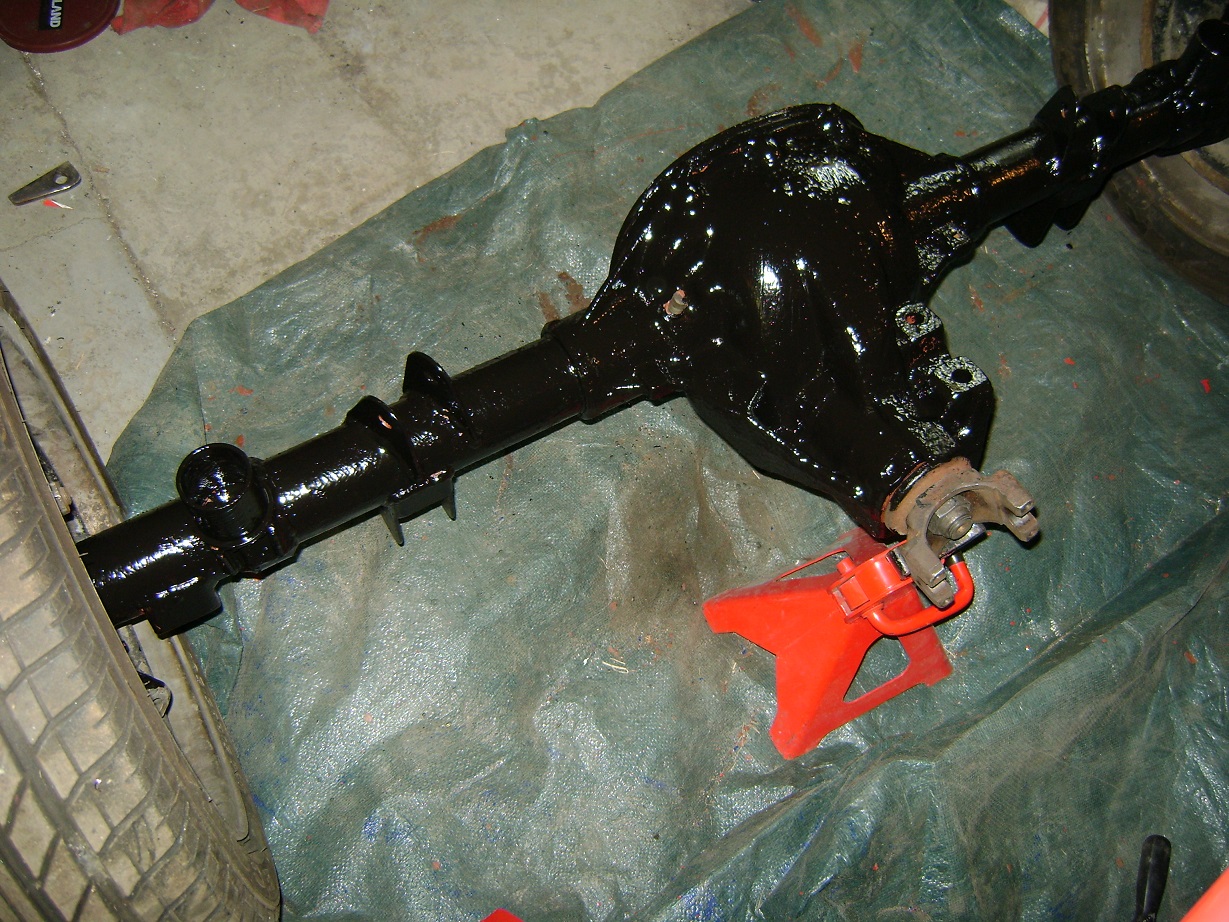
Pulled the axle out to finish welding the spring mounts, cut off the previously devised shock mounts (still shown), and will paint soon.
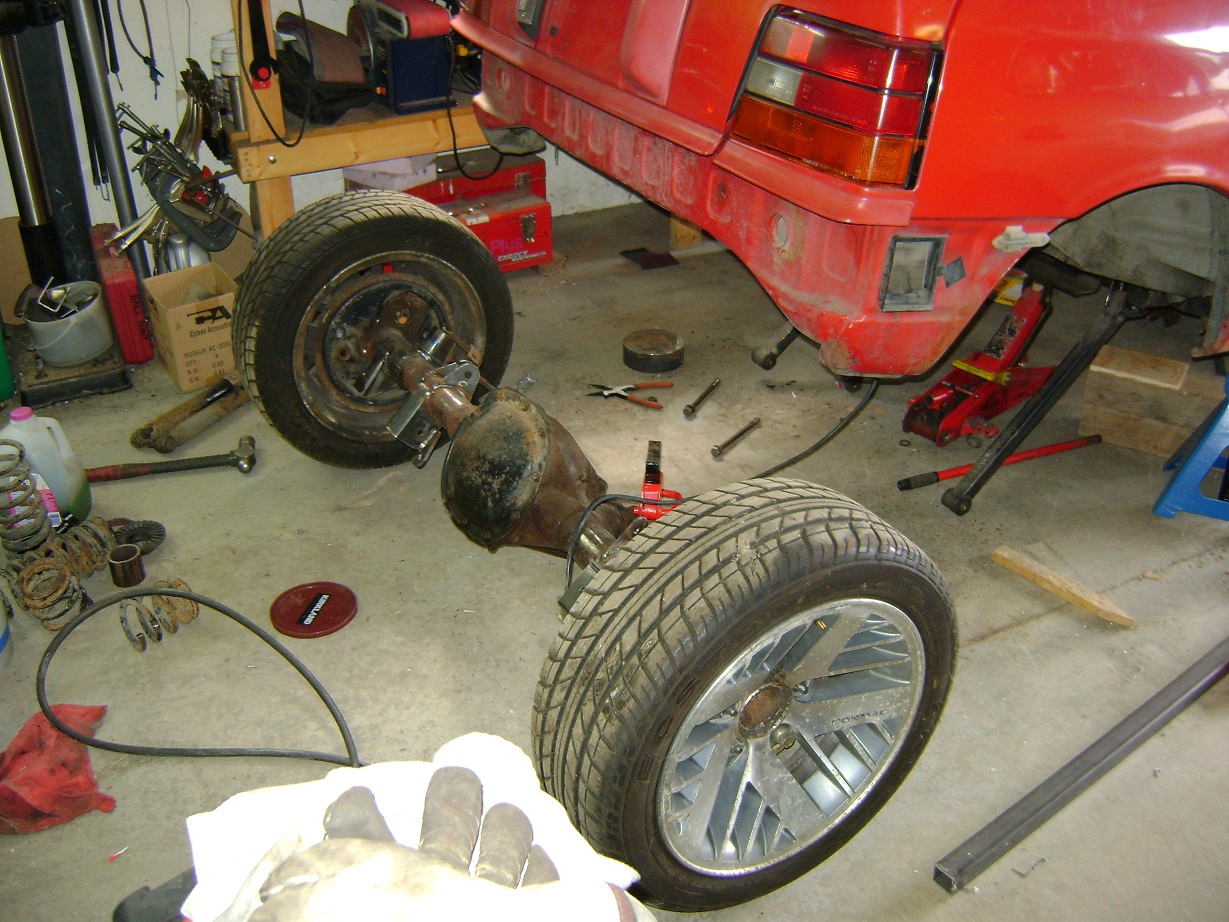
I pulled the axle out to primer and paint it:
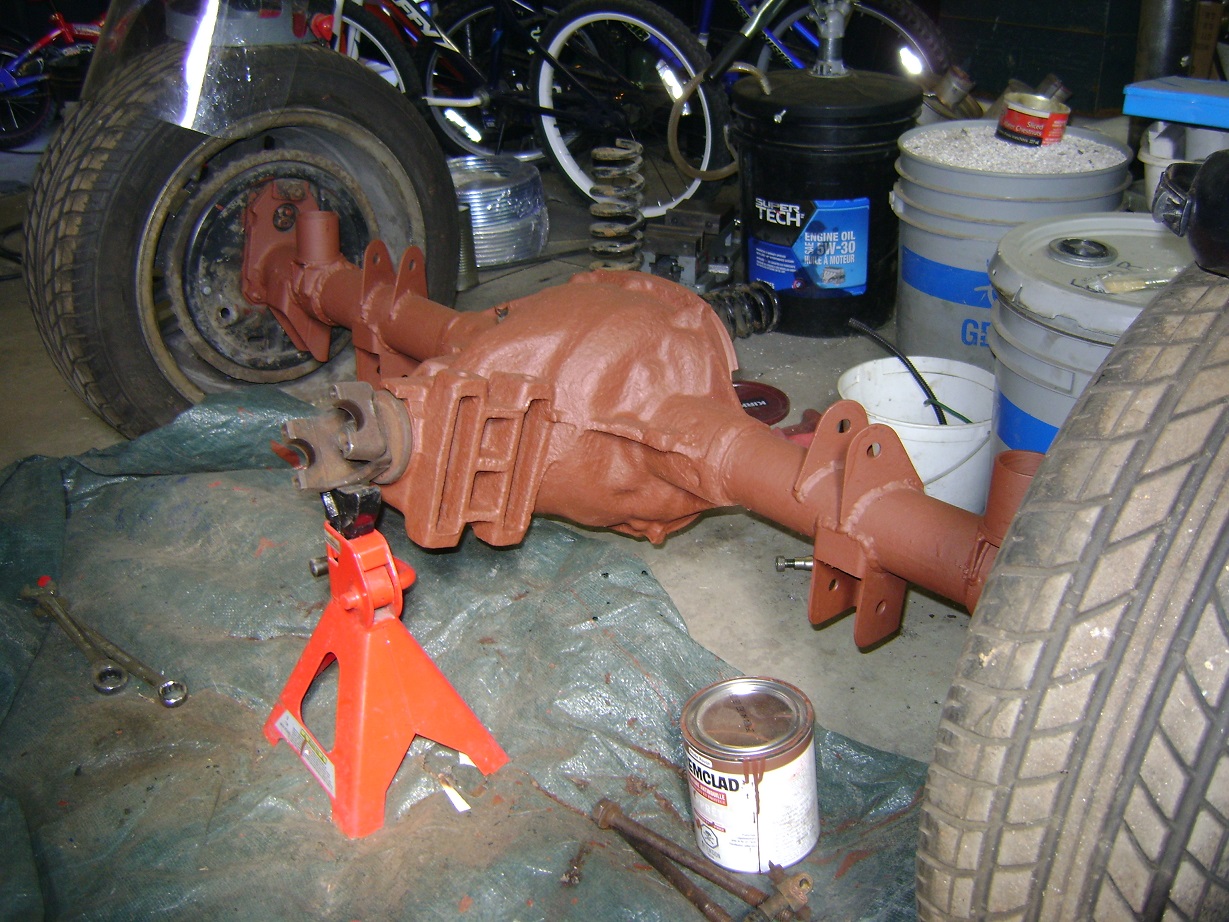
And intended to prime and paint just the mounts, so I could carry on with other things. But as I started priming, I noticed so many unfinished details that needed to be finished, so I had to calm my anxiousness to get things done, and instead, just get things done:
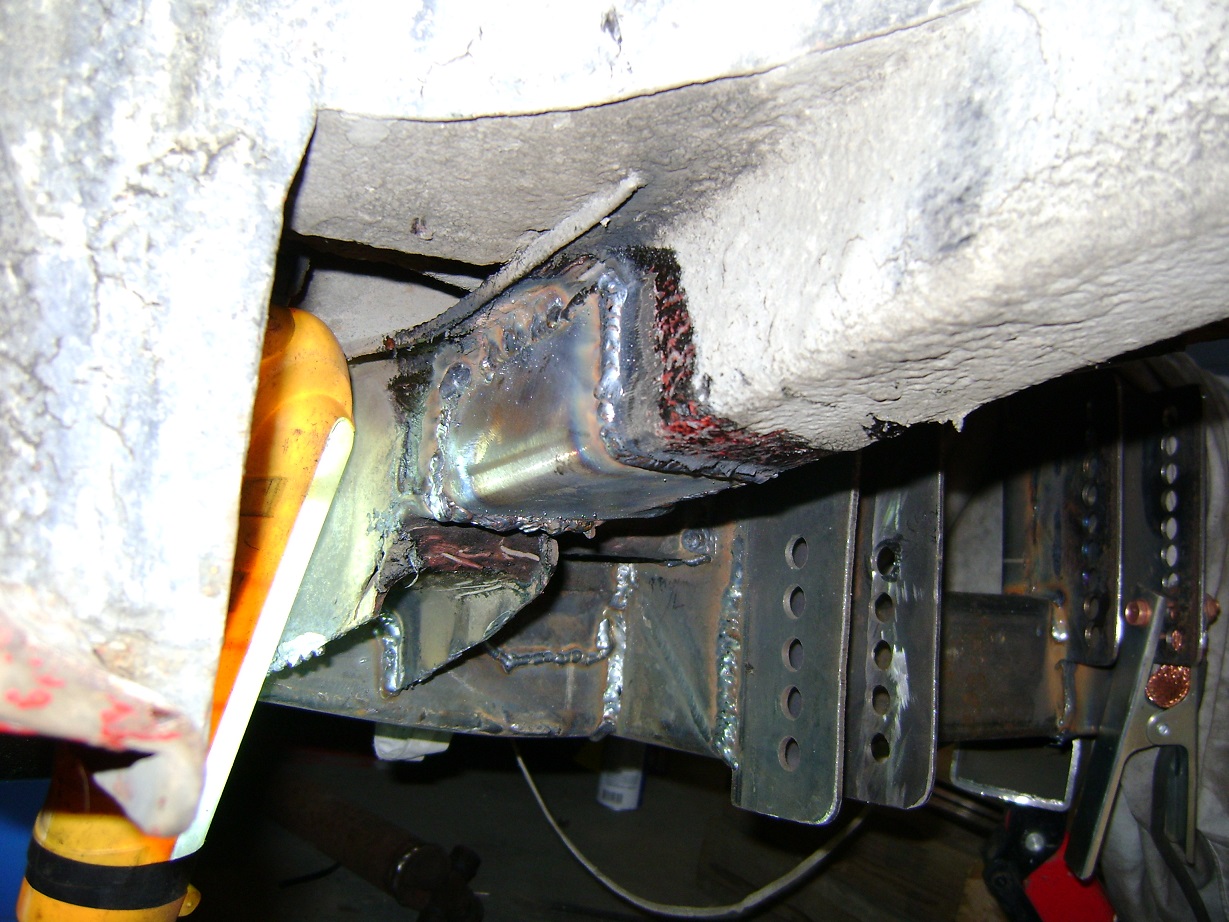
Noticed a nasty rust hole in the “framesque” section under the gas filler, so I had to cut that out and patch it:
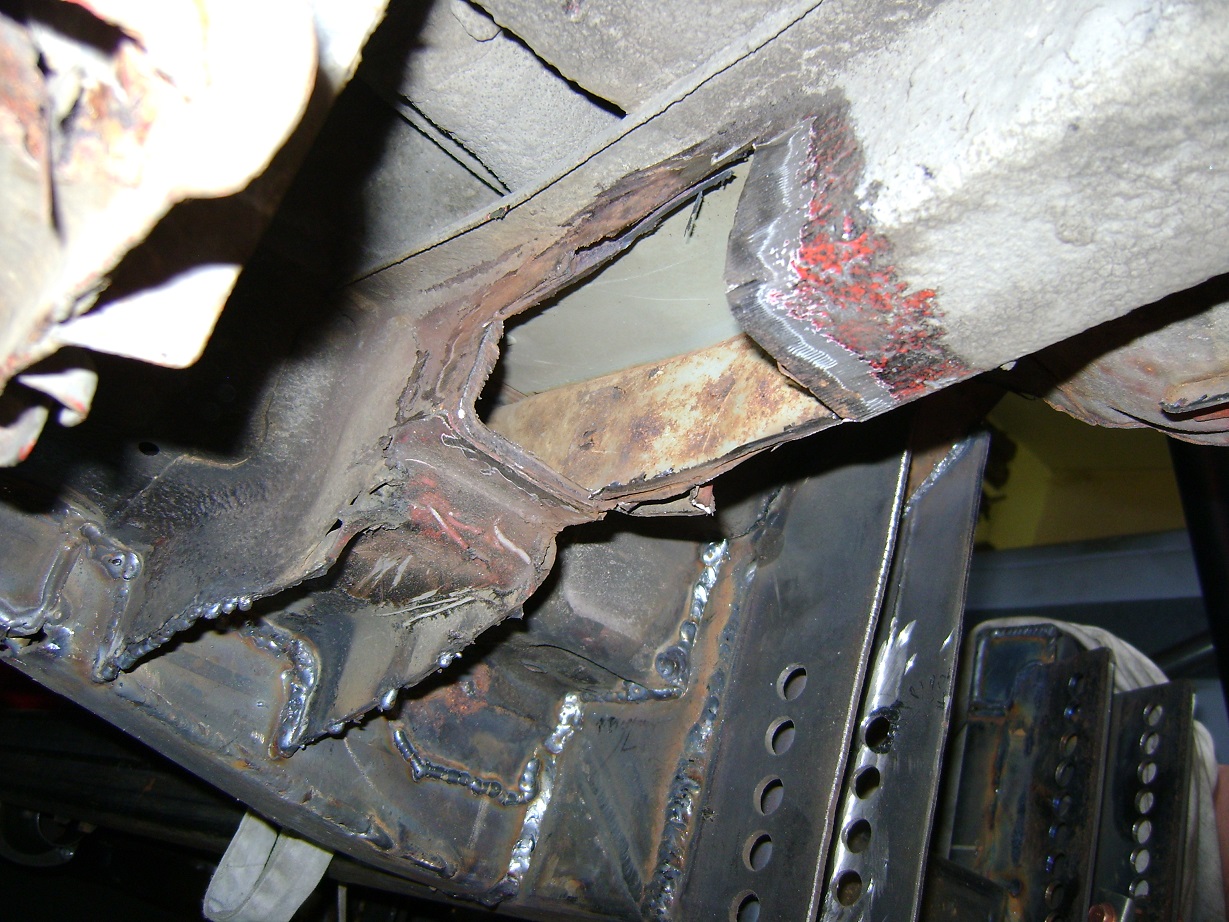
Don’t look at the welding too closely. I’m not having as much fun here today:
I did, however, splash some paint on the axle. I’m using “Zero-Rust”, which is cheaper by the gallon, but the gallon is getting old, and the pain is setting up pretty quick now. This was all brushed-on. I ain’t building no show-car here.
(January 2015)
Had my boys (7 and 9) help turn the car around so I can work on the driver’s side rocker panel. Nothing new to update, otherwise. Bought an Eastwood Equivalent bead roller on sale, which should help out with doing the floors later on.