
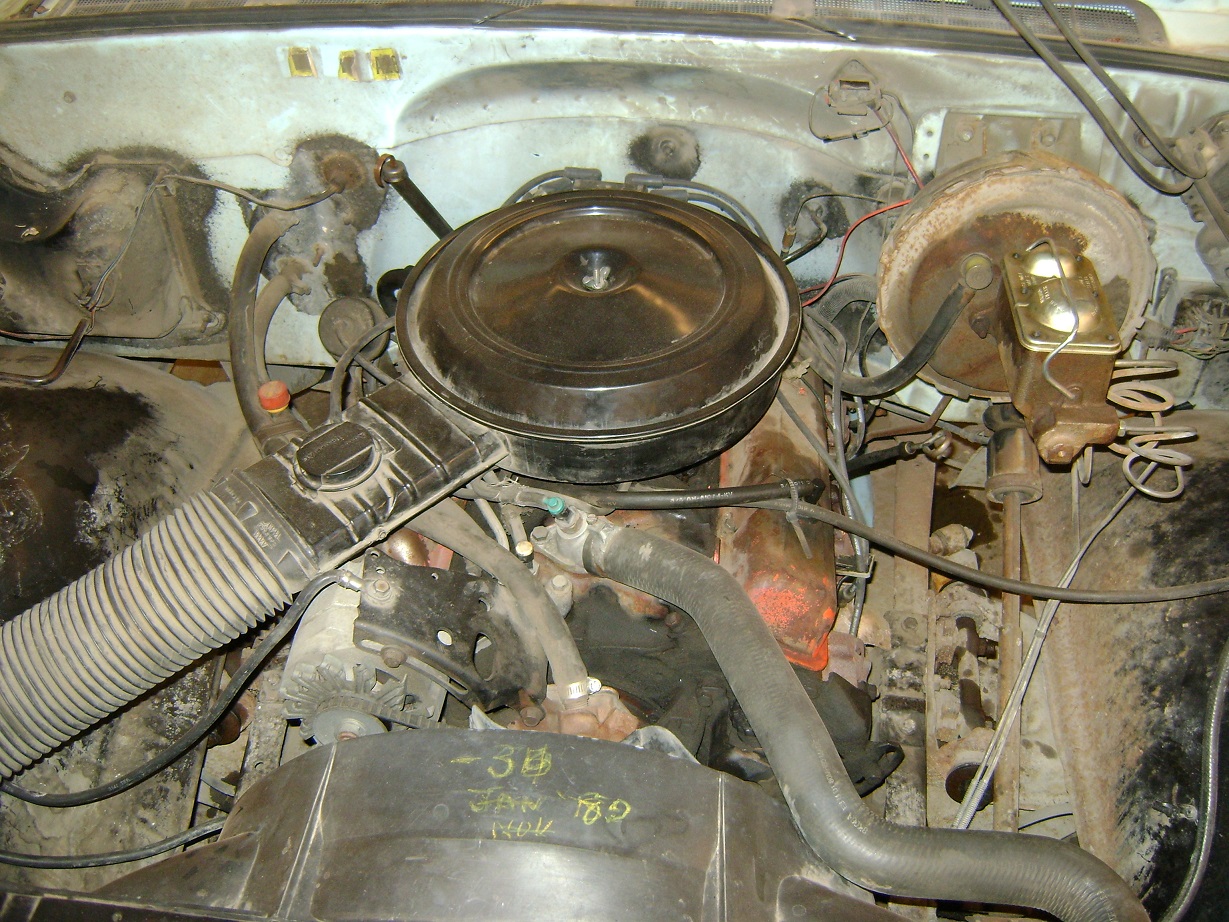
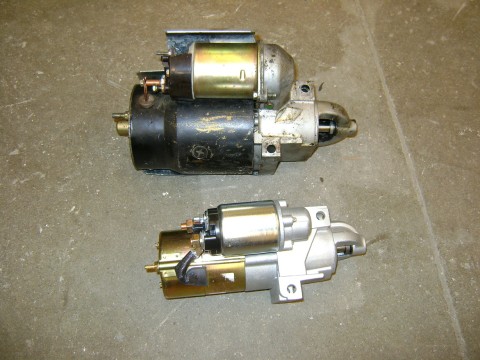
Old and busted.
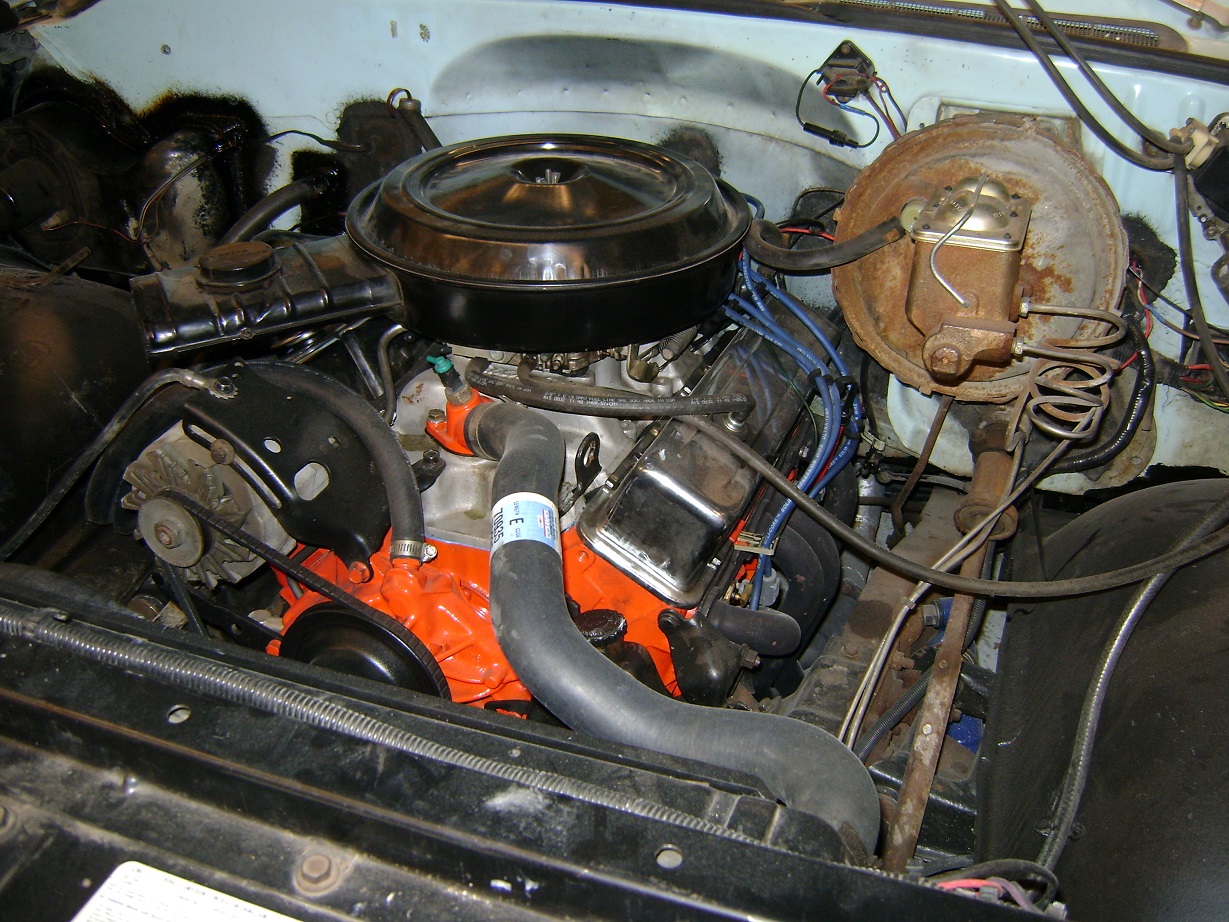
New hotness.
Step 1: Pull The Motor.
No magic here. I took pics so I could remember how everything was hooked up. Took me 2 hours to pull, which I guess isn’t bad since I’m rusty, old, and feeble.
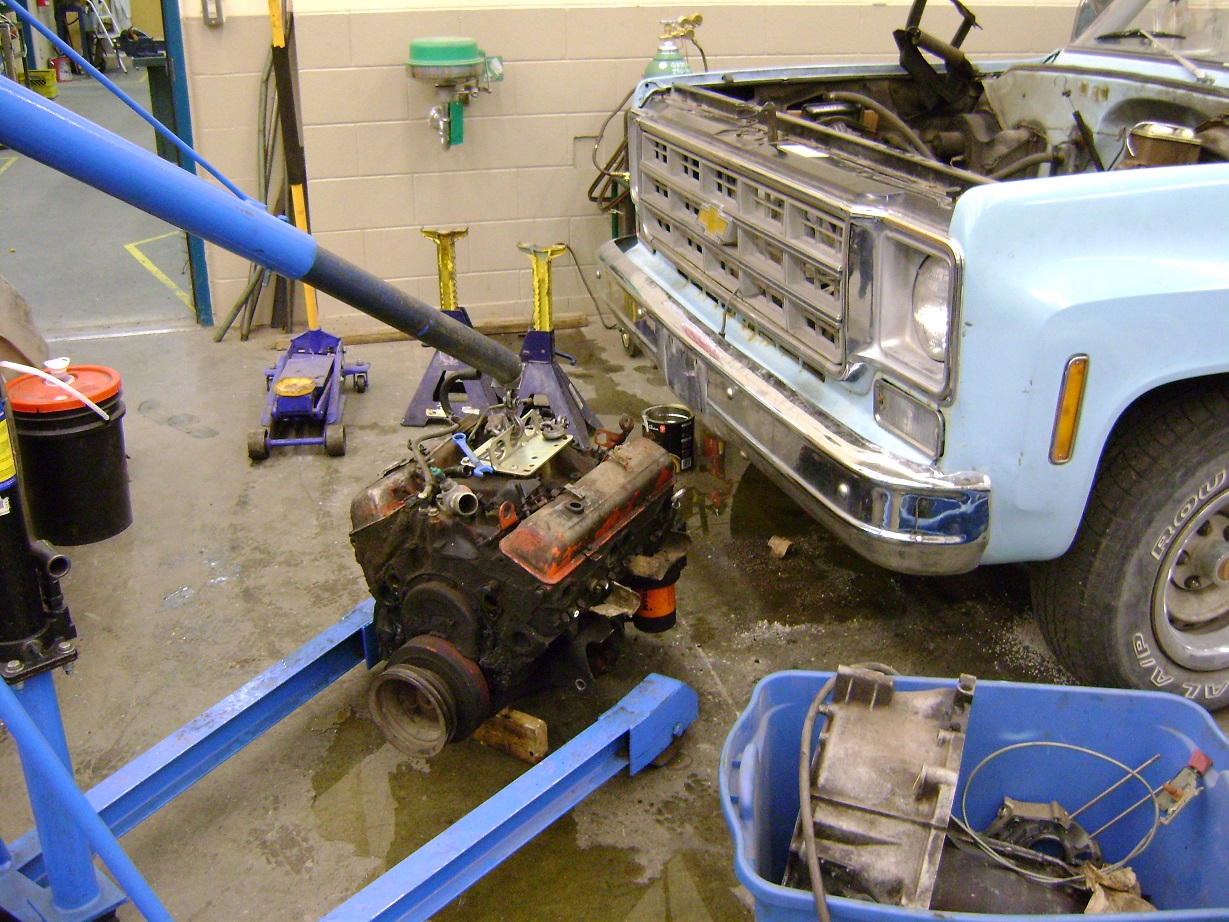
Pleased to find the engine is a 3970010 block (I was expecting it to be). Surprised to find how little effort it took to turn the engine over by hand to unbolt the torque convertor.
Step 2: Strip Down
The block turned out to be a 2-bolt main (disappointed sadness), with “882” heads (expected sadness), but that’s not an issue for this low-budget build.
The block had a bit of ring ridge, and the pistons needed some persuasion to remove. My intent was a cheap and easy re-ring (hence the title of this page), but I felt a bit uneasy about re-ringing the block.
Measured taper was 0.007″ which is still ~within~ the realms of re-ringable. The pistons are factory cast and dished pistons, showing some wear on the skirts, but no evidence of overheating.
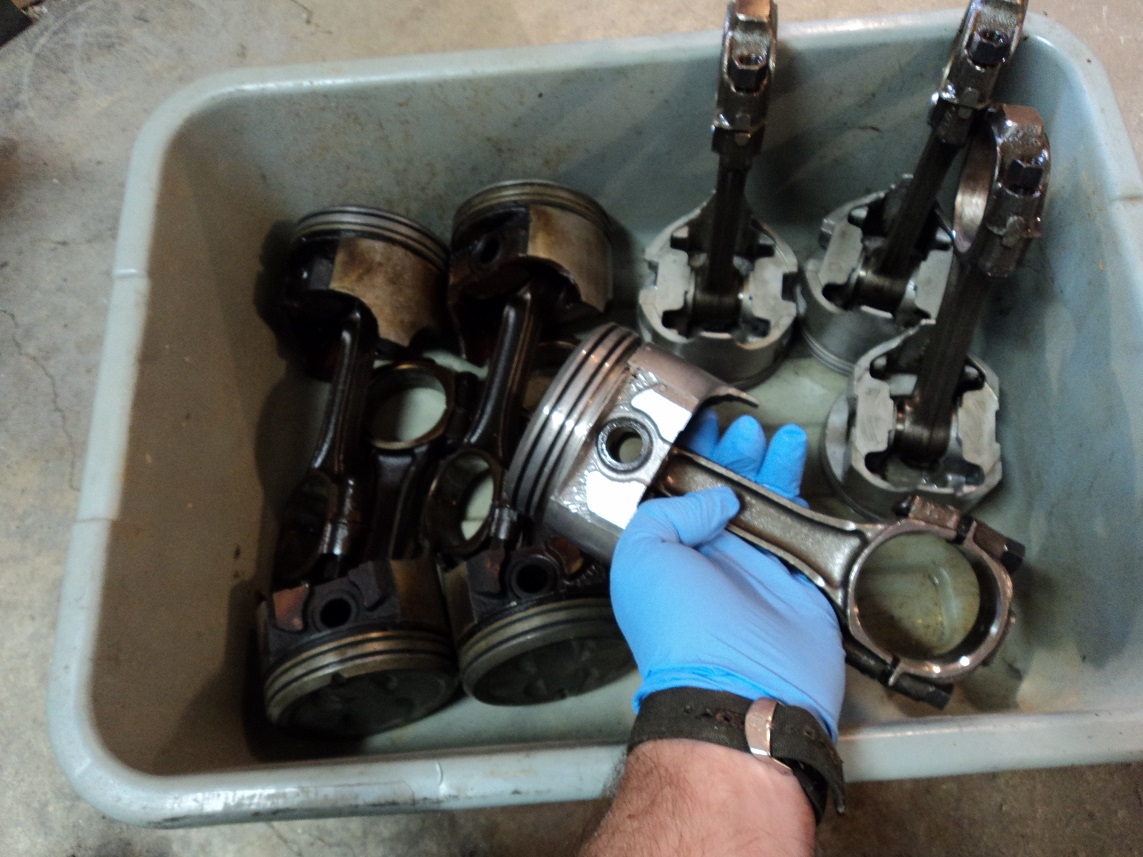
I got half-way through cleaning the pistons when I finally gave up and decided I would be happier long-term if I got the block bored out. I ordered Speed Pro Hypereutectic flat tops, .020″ oversize, and a set of Moly rings. Dropped the block and guts off at a local machine shop to be bored (with a torque plate), and balanced. With the heart of the engine being dependent on the quality of the cylinders, I felt that doing it right would be the best.
According to THIS SITE, flat tops with 305 heads (376450) and a typical aftermarket head gasket, I would get 9.9:1 compression, 10.9 with steel shim head gasket.
If this is too much, I could swap back to the factory 333882 heads and run a steel shim to get 9.1:1 compression.
Should Vortec heads fall into my lap, I could get 9.5:1 with composite or 10.3:1 with a steel shim.
I like the options I have with these pistons.
Note: I have since learned about “Squish” or “Quench,” the distance the piston is away from the cylinder head. Ideally you want this to be around 0.040″ – any more, and the engine will be more prone to detonation. As I understand it, optimum “squish” induces turbulence, which improves combustion, and reduces knock and ping. As of this writing, the engine is perfectly fine on 91 octane, and 36° total advance.
Parts List
Speed Pro Hypereutectic pistons (.020) H345DCP20
Speed Pro Premium Moly rings (.020) E-251K20
Melling oil pump M55
Clevite 77 rod and main bearings
Durabond CHP-8 cam bearings
Howard’s Cams #110961-08 (230/230@050; 470/470; 108LCA; 104ICL)
New harmonic balancer (old one was dry-rotting)
Step 3: Reassembly
I got the block, crank, rods, and pistons, back from the machine shop. It was a lot more than I expected – but I didn’t exactly ask for a quote when I dropped it off. I thought I held my composure really well as I paid the bill.
I love the assembly part.
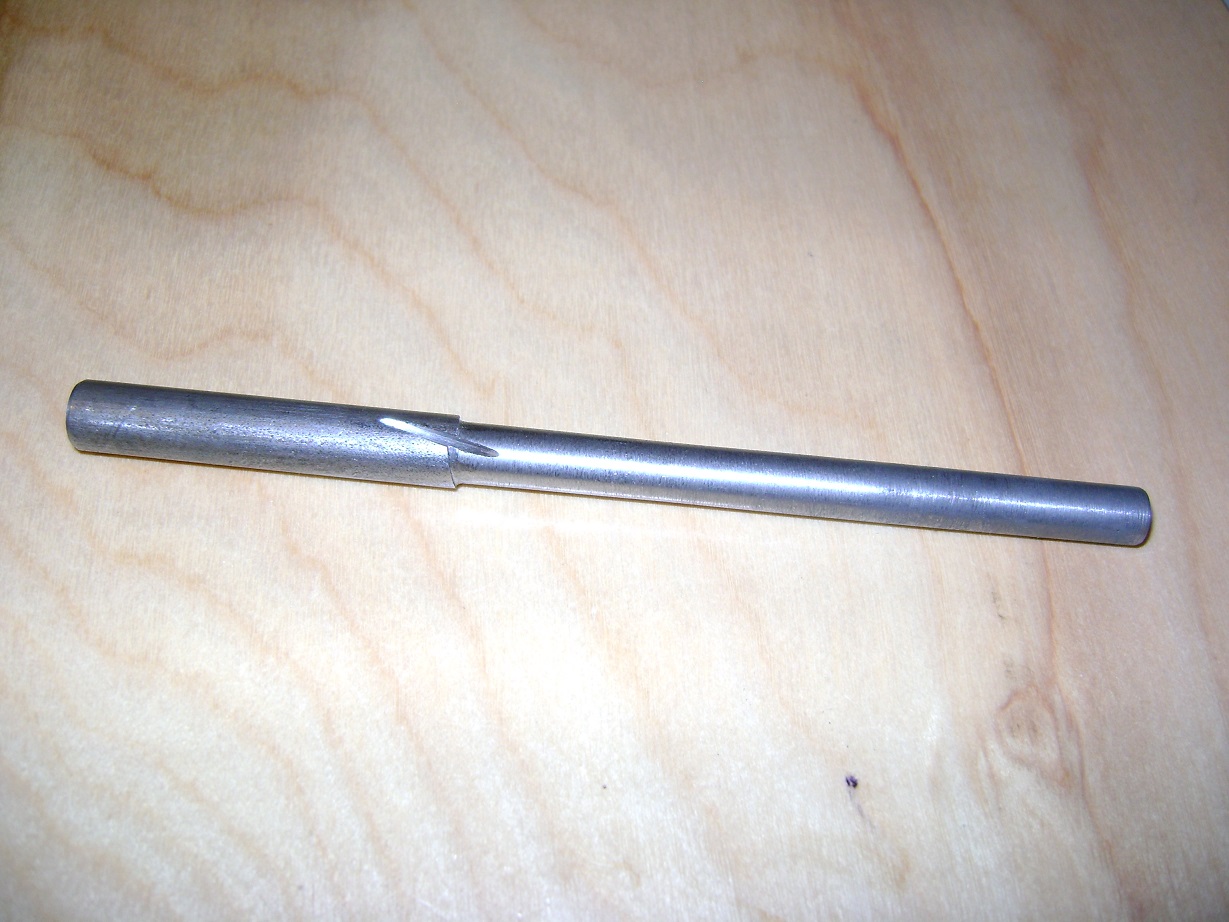
I fabricated my own cam bearing installation tool, as well as a camshaft installation tool.
I deburred the oil drain-back holes in the lifter valley. I smoothed and blended the rear main oil passageway. I clearanced the timing chain area to clear a billet timing chain set from Burr Fabrication. I removed sharp finger-cutting edges from the outside of the block, and thoroughly cleaned the freshly tanked block with Simple Green.
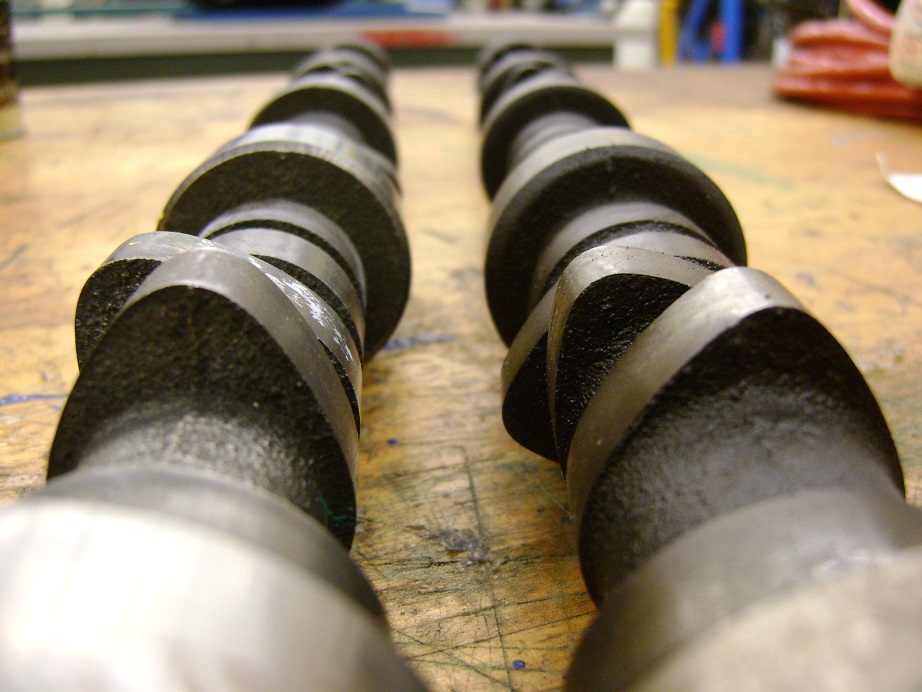
Here’s a comparison between the Howard’s Cams 110961-08 cam and the original 1977 350 camshaft. This engine had never been apart before, and even still had the original timing chain.
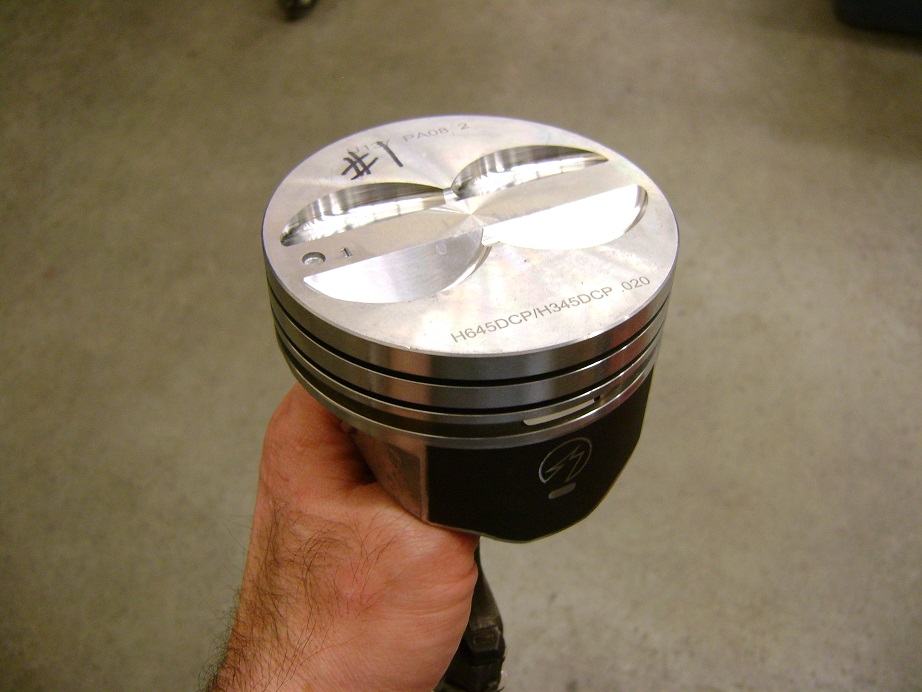
Speed Pro Hypereutectic pistons H345DCP20. Mmmmmmm. Shiny.
I also put together a couple videos on the assembly – teaching materials for my classes, so I’m not ripping off as much stuff from YouTube.
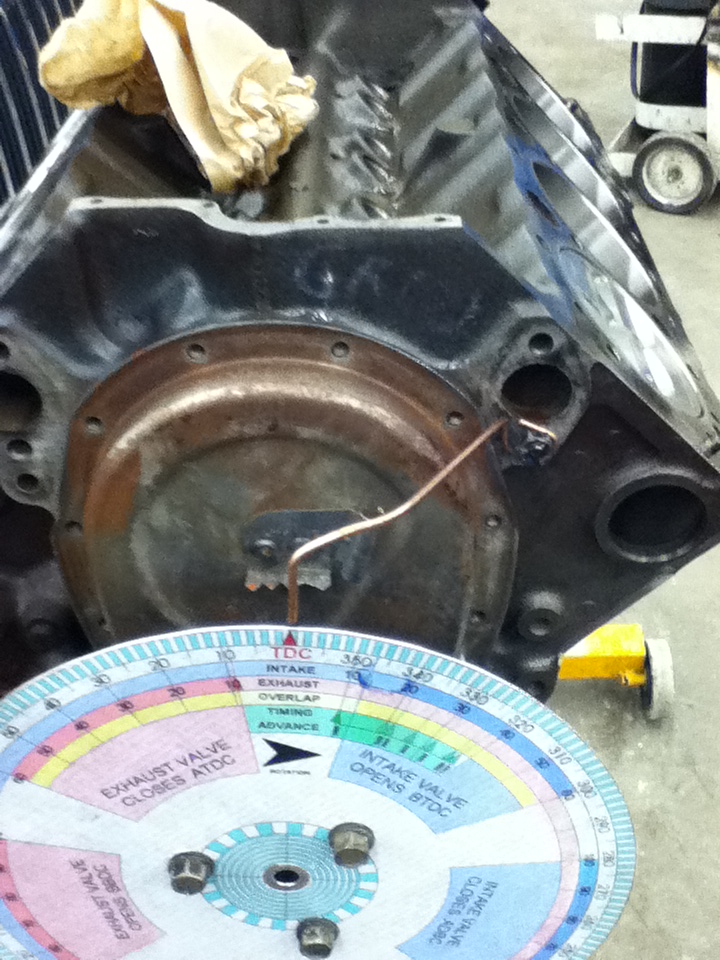
I degreed the cam and found it ground 6° retarded. The indexable timing chain set corrected the cam location. The new harmonic balancer was 1° retarded too.
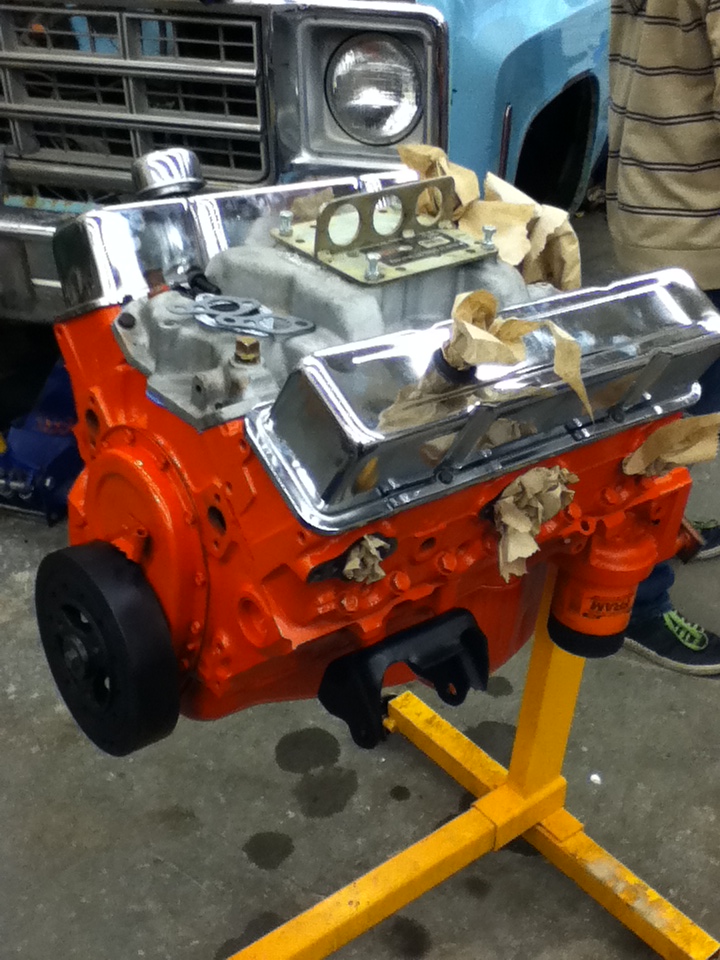
A used Edelbrock Performer was installed, as were used tall chrome valve covers. I replaced the motor and transmission mounts with polyurethane.
Step 4: Installation.
I picked up dual electric fans from a Ford Windstar van, since it is the same size as the rad core on the Chevy. Some wee trimming was needed to clear the inlet and outlet hoses, and I fabricated some sheet metal brackets to use the factory fan shroud mounting. I wired the two fans together, and ran them through a Pontiac Sunfire recall starter relay (LOTS of them in the wreckers). I trigger the fans via a Ford Escort fan switch (BWD:TFS13, turns on at 212°F, off at 192°F, you will need pigtail BWD:PT764. Best is yank the whole thing from the wreckers). The Escort fan switch threads right into the passenger side head.
It works grand, but draws more current than the alternator puts out.

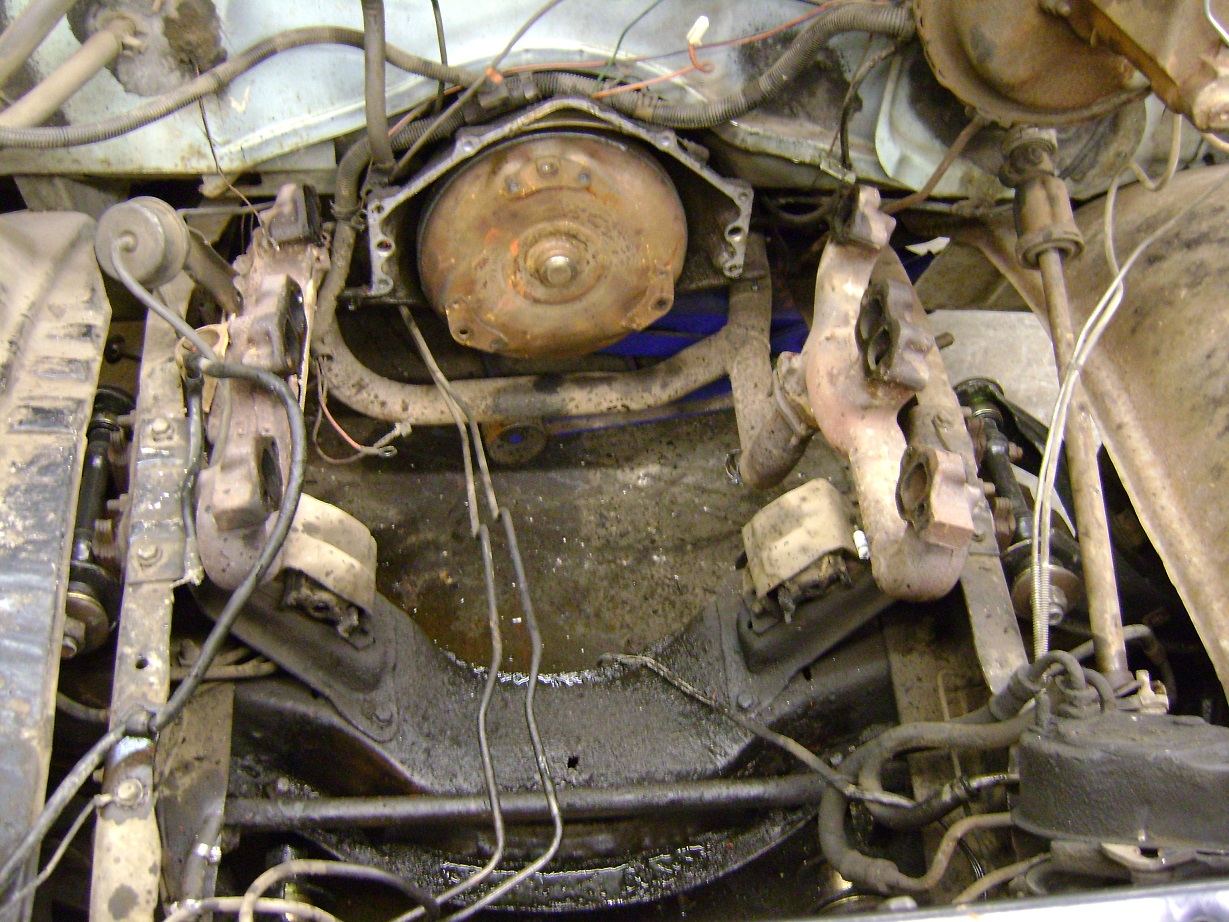
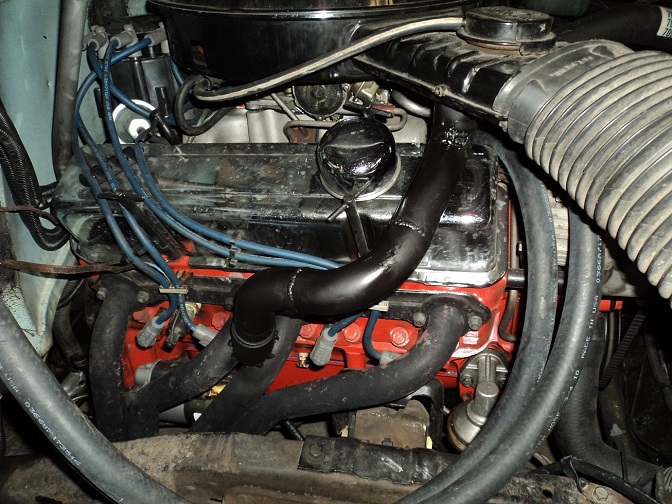
Headers were found on Castanet, de-rusted using electrolysis and sprayed with header paint.
Exhaust was built using about three 2-1/2″ mandrel U’s, four 2-1/4″ mandrel U’s, and a pair of Walker SoundFX (17905) mufflers. I want it relatively quiet, but also inexpensive (Mufflers were replaced one year later with a pair of Dynomax Super Turbo 17748. Not as inexpensive).
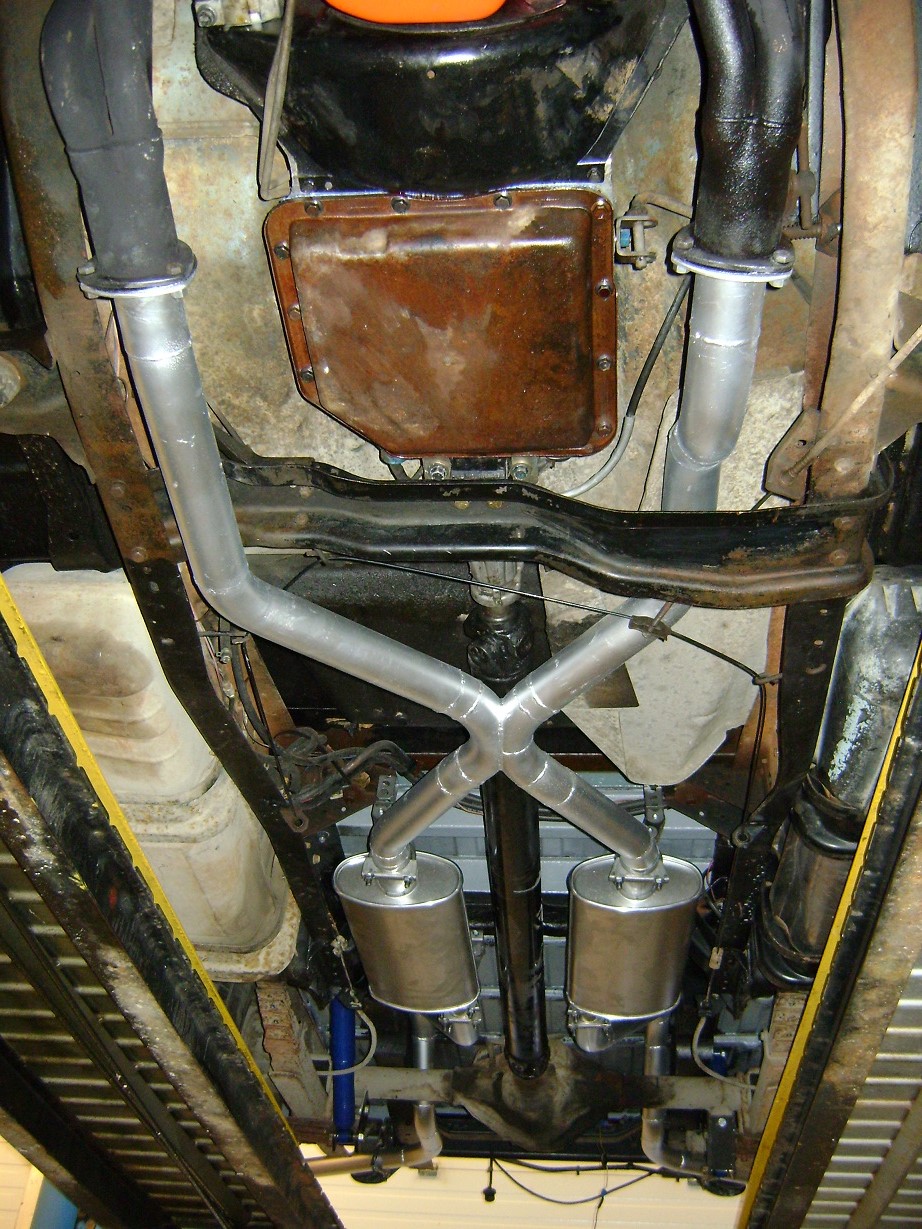
“X” pipe for cool sound and good flow. Tedious to build. All MIG’d and sprayed with header paint.

I wanted the tails to exit right behind the wheels, pointing down, but could not snake it through the frame and leafs nicely. Exiting before the rear wheels tends to discolour your wheels and be noisy in the cab.
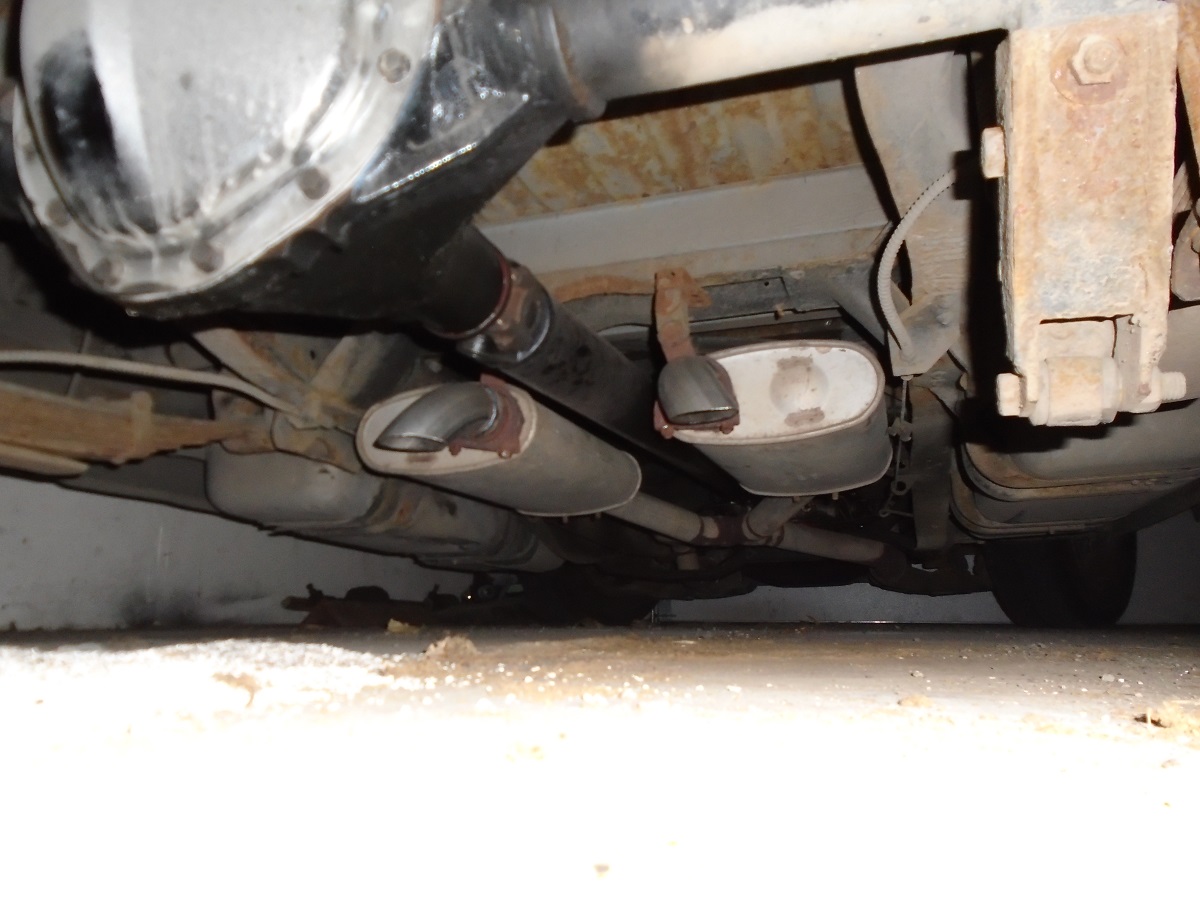
Addendum, 5 years later:
For some drunken reason, eventually the tailpipes started getting caught in the leafs when the truck was raised on a lift. No idea why it eventually started…. I got tired of fighting it, and lopped the tailpipes off, running some turn-downs angled slightly to the outside. Surprisingly, it really only drones just off idle, but nowhere on cruise at all.
The engine fired and ran with no problems at all. The cheap chrome valve covers and cork gaskets (cheap “Mr. Gasket” cork set) leaked, so I replaced the gaskets with thicker FelPro ones – I think they were VS12869R. Broke the cam in, and then took the boys with me to seat the rings.
A friend gave me a brand new “blueprinted” HEI distributor to use. It only provided 16° of mechanical advance. This meant running 20° initial timing, which wasn’t that bad since the cam is a bit snotty.
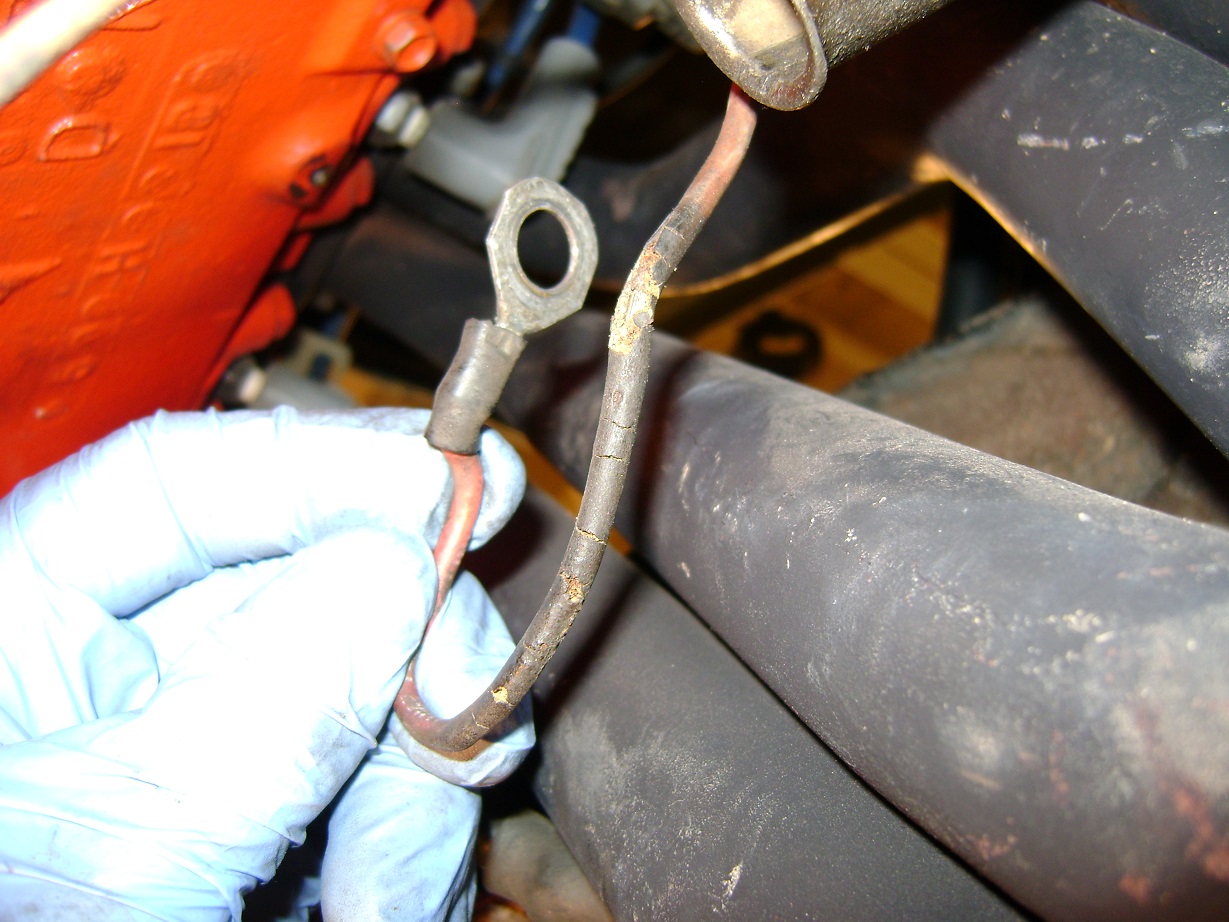
Step 5: Starter Heat-Soak Issues.
The headers and 35 year old wiring made the starter refuse to acknowledge me once everything was hot. I added a Ford-style solenoid to give full battery voltage to the Chevy solenoid. The Chevy still runs factory battery cable from the battery to the starter solenoid, I’m just bypassing tons of voltage drops through the key switch. It cranks AWESOME now. Yay Ford.
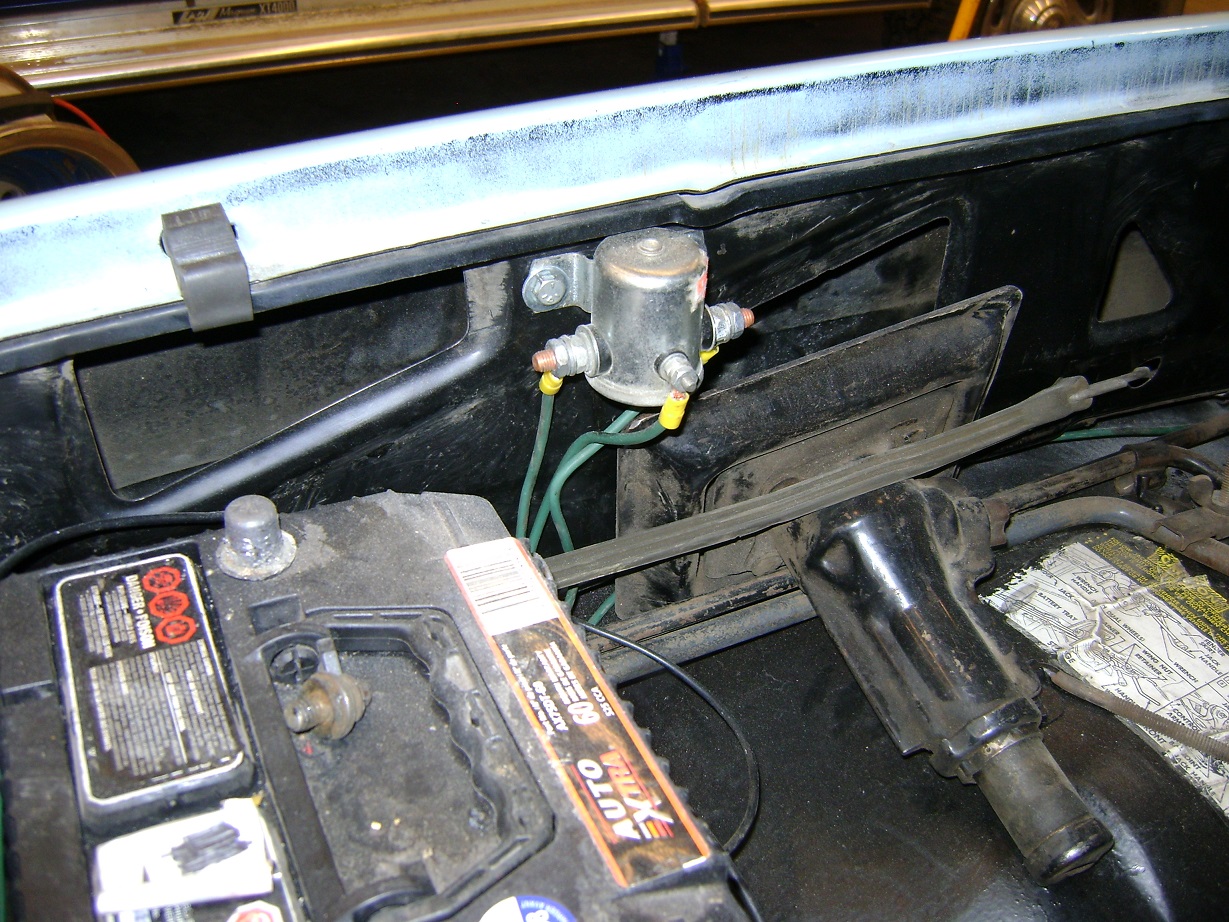
Ford-style starter solenoid to the rescue
Later, this solenoid upgrade wasn’t enough. I rebuilt the starter with new brushes, bushings, and a larger and longer solenoid (from a big-block Pontiac starter I had). I also fabricated a sheet metal heat shield to keep heat off the starter. But even that wasn’t enough.

I installed a gear-reduction starter for a ’98 C1500 5.7L. Bolts right in, but it needed some trimming of the Torque Converter splash shield to fit. As of this writing I have not used a heat shield on it. We’ll see how it goes. Cranks really nice now. Hopefully it will, hot, too.
Gee, headers cook ~everything~
The heater core puked. So that was replaced. $14. Gotta love Chevy cheap.
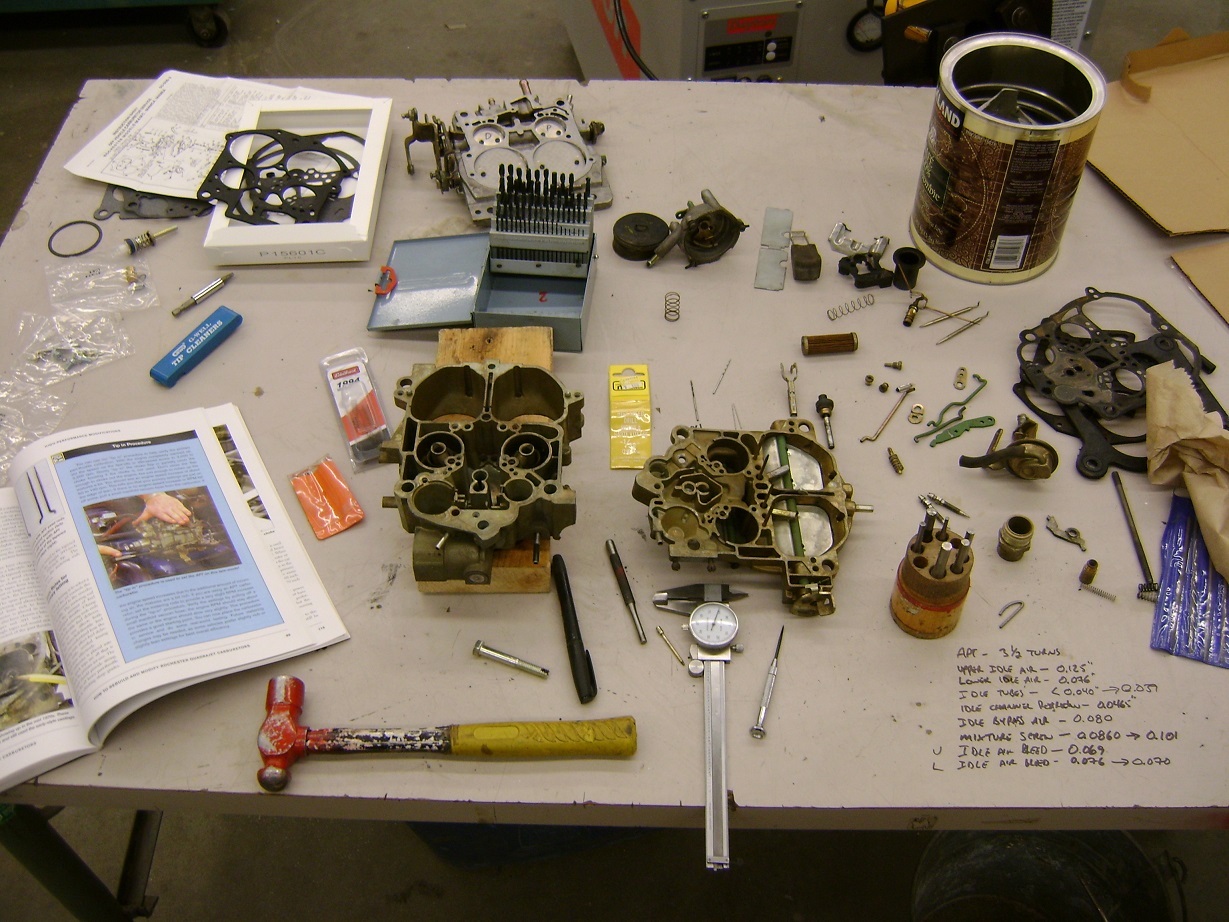
Step 6: Refresh the Rochester
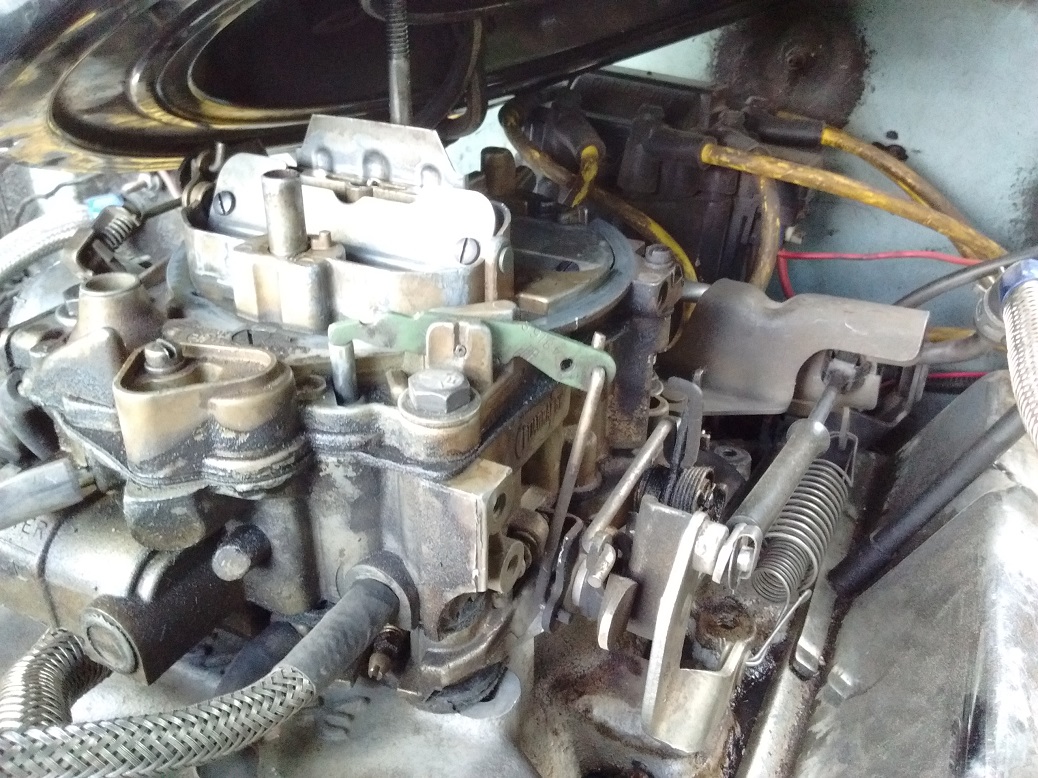
I bought Cliff Ruggles’ book on Rochesters, so I can tweak the carb to run with this engine. Mixed feelings about this, since EFI is SO easy to work with. And I have an extra MegaSquirt kicking around……. EFI might be next.
Once the engine was a confirmed “runner,” the carb was disassembled and rebuilt according to the low side of Recipe #3. I also fabricated a throttle shaft bushing reamer to re-bush the throttle shafts using some generic bushings from LordCo. Also bought Edelbrock 1994 Power Piston Springs – running 4inHg spring, since the truck idles at 8inHg in gear.
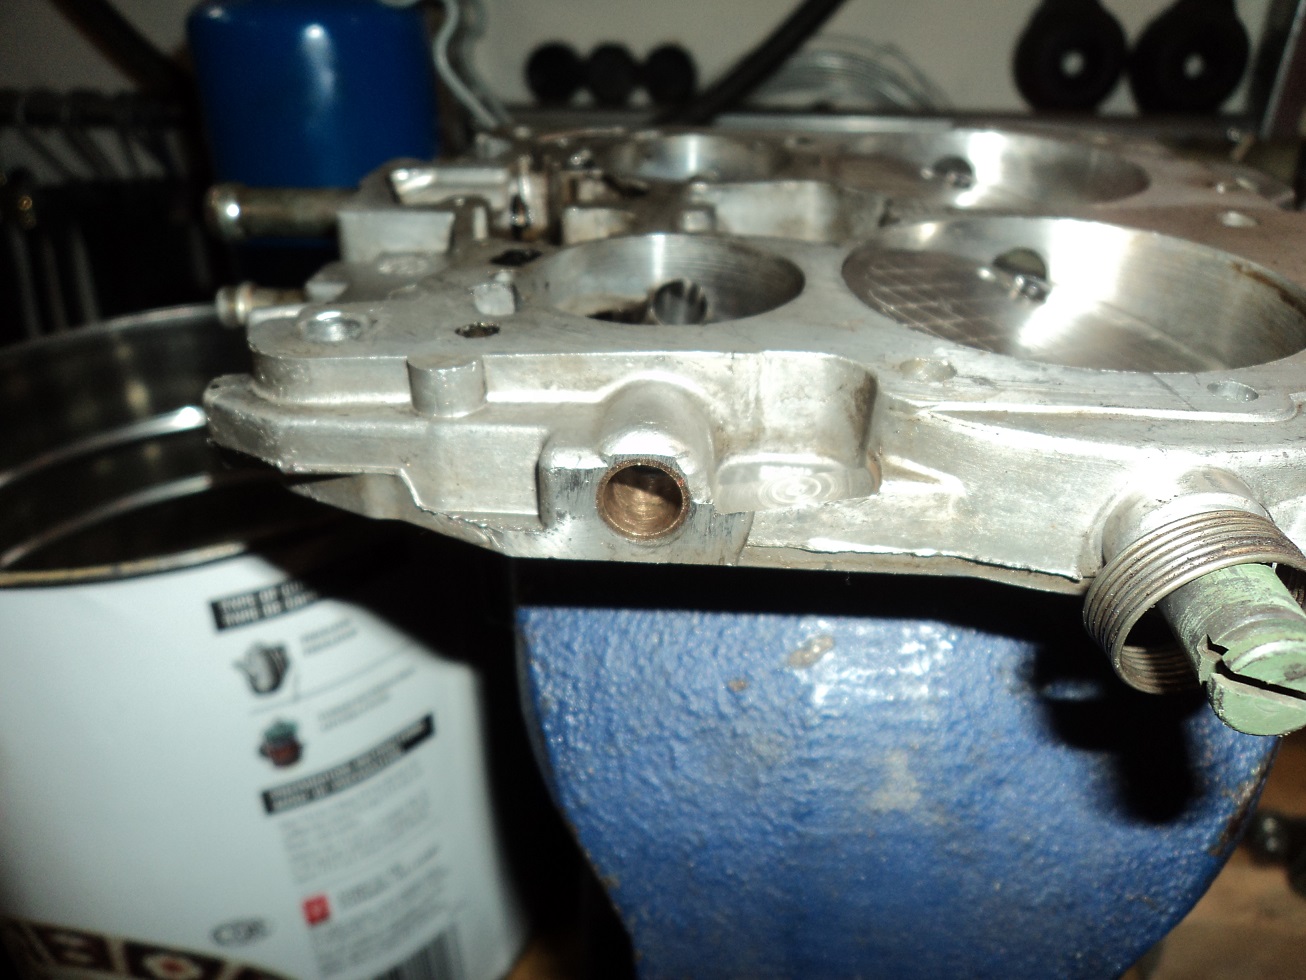
Heat Riser for Winter.
Made from an old header tube.
UPDATE: The float level was set back down to factory spec, unlike Ruggles’ book – I felt it was running a bit richer than I wanted. Apparently the Truck carbs are a bit generous in the jetting from the factory. I also had an off-idle stumble that felt rich. If the mixture screws were a bit rich, the stumble was BAD, but if the mixture screws were lean enough to reduce the stumble, the engine would run-on (diesel). When you tip-in the throttle, the engine would ~start~ to accelerate, but then fall – as if it was getting TOO MUCH fuel on the accelerator pump. So I switched to the furthest hole on the pump lever, and it drives great!
(Had to tweak the linkage a bit – note shiny scratches) it was binding on the linkage and not allowing the throttle to fully close).
Step 7: Spark Up the Ignition
I had an new-old-stock Mr. Gasket “Blueprint” distributor which seemed to give 16° advance at 3000rpm. This, with 18° base timing seemed to work well.
I fabricated a vacuum advance limiter so I didn’t end up with too much. Simple, made from the original pickup box, and attaches to the end screw of the vacuum can.
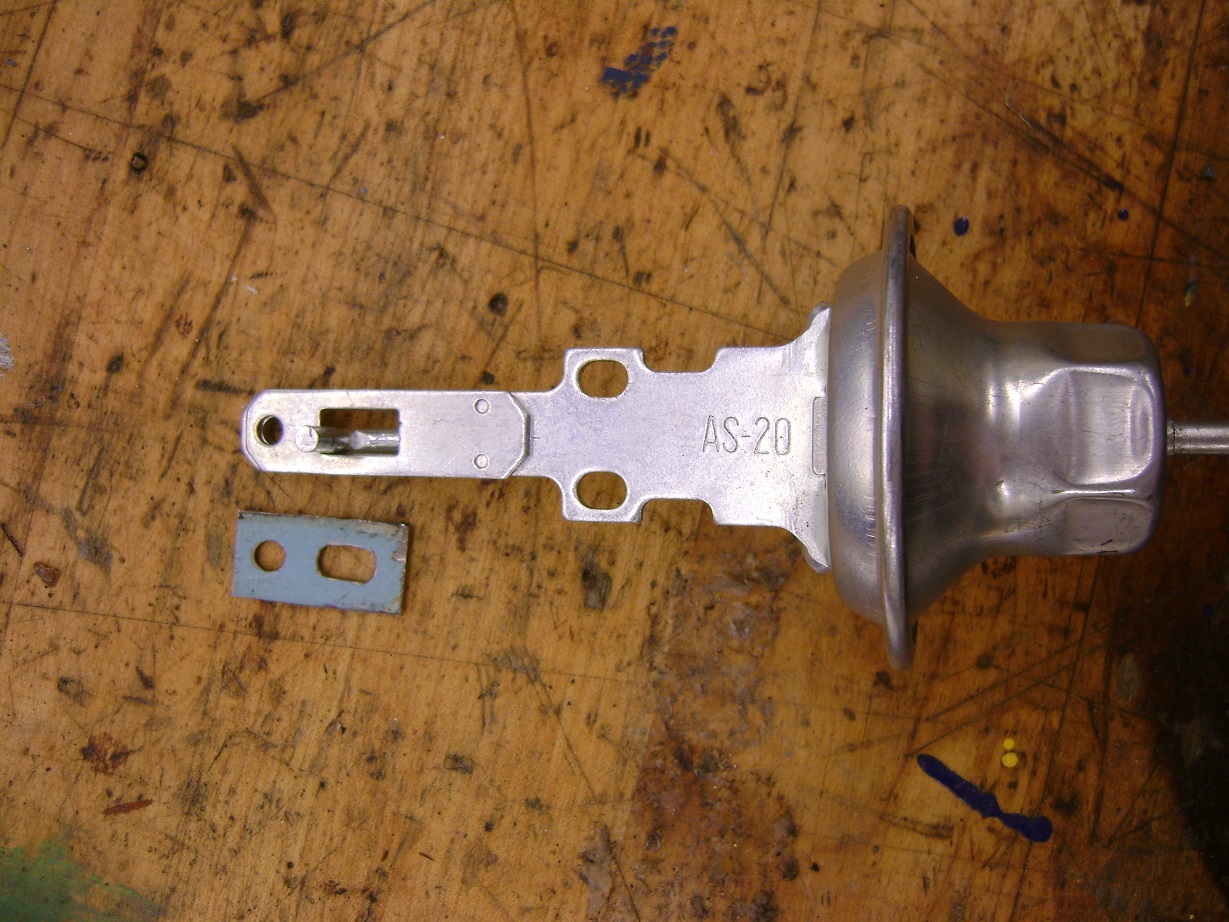
I have adjusted the can so I have a full 12° advance at idle (8inHg at 550rpm), hooked up to full manifold vacuum (with a 4inHg Power Piston spring in the carb). It was a bit shakey like this in gear, because when you lose the idle speed, you lose vacuum, which loses timing, which loses idle speed….. It didn’t like the stock torque converter.
UPDATE: Over time, the mechanical advance started slipping out of reality, causing detonation. The advance spring pins had come loose (TIG’d back in place), the vacuum advance can was adjusted too soft and became no longer adjustable, and I may have been drunk when I timed this engine originally, because the distributor was still advancing past 4500rpm. The distributor was fixed and re-curved with a Trans-A-Dapt kit, using only a light spring and a medium spring, and the advance weights had their advance restricted with roll pins pressed in convenient holes. The vacuum can was replaced with a VC1703 unit, which gets full 18° advance at 10″ vacuum.
I also added an MSD box I got in a Firebird I bought and cut up. I intended the box for a different project, but this one could use it more. Since it actually runs and all. No noticeable difference in operation.
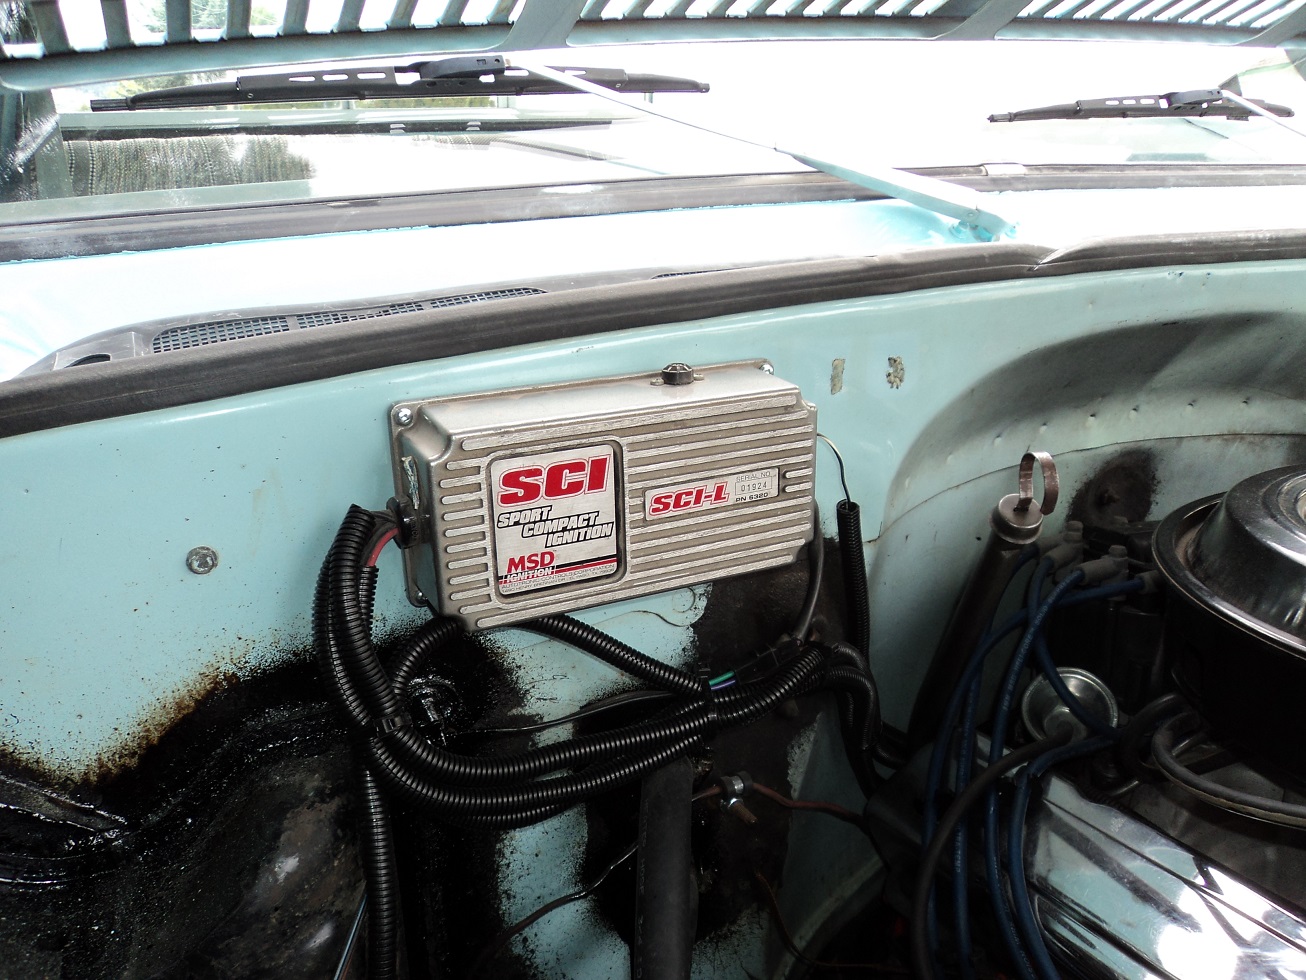
“Sport Compact Ignition” was free. Hoped it would give me some “Sport Compact Mileage,” but honestly made zero difference at all. I removed it after 2 years and went back to stock HEI.
Step 8: Braided Hoses
And couple years later the 80’s called… they wanted their hose covers back.
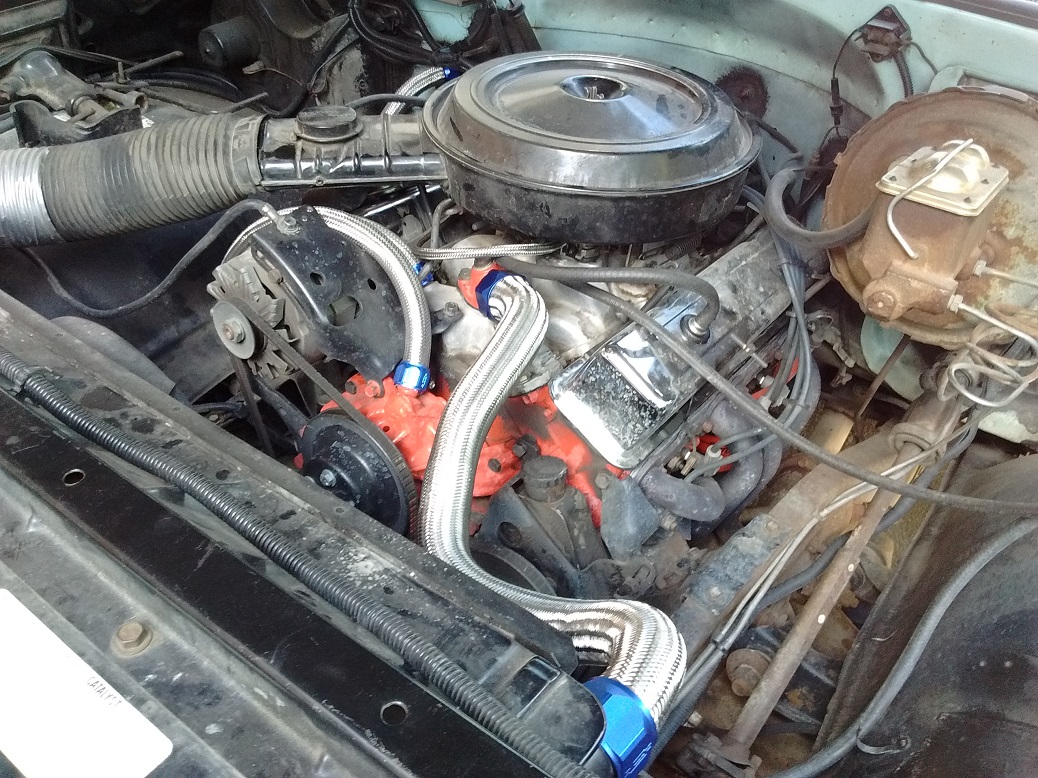
- Use silicone spray to get the hoses on. Soapy water is not easy.
- Use quality hose clamps. Cheap ones self-disassemble when they need to “expand” the hose clamp cover.
- Be aware that the hoses will now be HOT when the engine is running. Not as fun to touch.
Step 9: Blackstone Labs
I sent an oil sample for analysis, I thought I was seeing sparkles in the oil. This was their report:
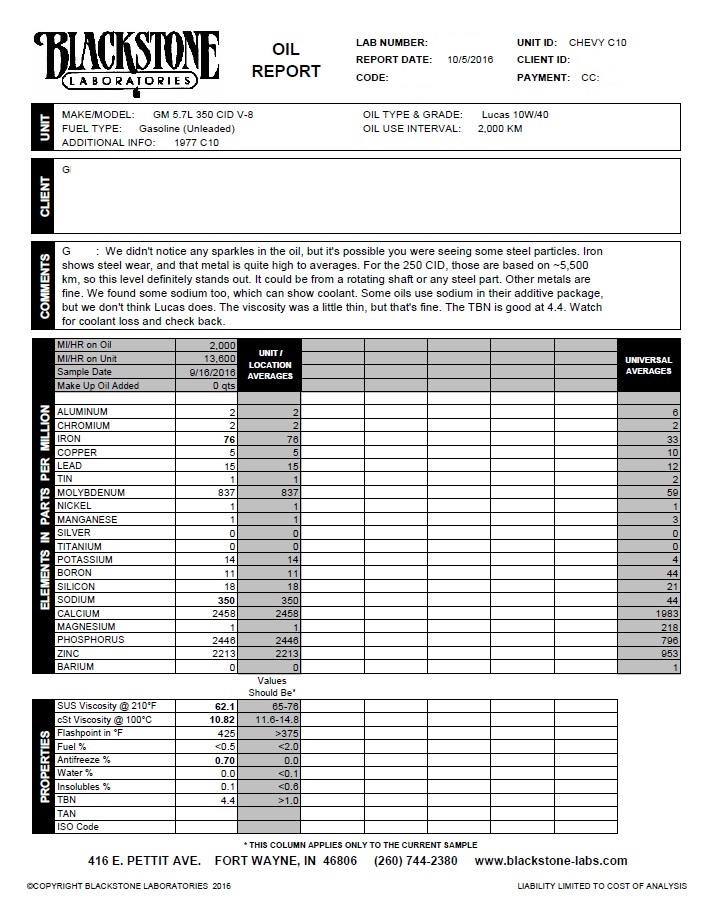
I’m suspecting the flat tappet cam won’t last forever.
(EDIT: flat tappet cam still going strong NINE YEARS LATER!)